
The Beginner’s Guide to Making Pottery with Clay
If you’re a beginner looking to start creating pottery, it can be daunting, simply because when you start out, there are so many references and so much jargon that it can be hard to understand. But I’ll tell you here how to start creating pottery with clay, why it matters, and some of the tools that you’ll want to get started.

Why pottery?
Pottery is a fun hobby for many people that’s been around for thousands of years. In fact, it’s something early civilization used to help create vessels that they used to transport goods.
If you’re wondering why you should try creating pottery, it can be due to the following:
- It’s fun
- It’s relaxing
- It lets you get your hands dirty
- It can be used to help relieve stress
In our world, handmade adventures and goods are something few people do these days. It’s more of a specialty action, rather than something you can learn.
Now, I don’t suggest doing this for money or anything, at least not initially. Instead, do it because it’s fun, and you want to learn how to do it.
What Clay to Use
Before you begin working with any pottery or equipment, it’s best to understand the different types of clay, and which one will be best for you.
The three different types are the following:
- Earthenware
- Stoneware
- Porcelain
Earthenware:
This type of clay has been in use since the early Neolithic age. They can be fired at low temperatures (600 °C), and hence do not require large kilns that consume a huge amount of electricity. These are porous in nature if unglazed; hence, you can’t store water in the containers made of this clay.
So, its usage was restricted for household purposes, initially. But on glazing these types of clays, a layer is formed by the finer particles, which act as a protective sheath, thereby rendering them non-porous.
25% Kaolin, 25% Ball Clay, 35% Quartz, and 15% Feldspar contribute to the general composition of earthenware. Fired earthenware bodies are generally white, buff, and red in color.
Earthenware is the lowest level of firing, which means that you don’t need to put it in the kiln for as long, and it’s much cheaper. However, it is more porous than other clay types, so you probably won’t be able to use it in the dishwasher or microwave, and the water could cause cracking if you use it with food-safe dishes unless it’s glazed.
Personally, I like starting out with earthenware, cause it’s so easy to use, and it doesn’t require as much.
Stoneware is the next, and some of the aspects of it include the following:
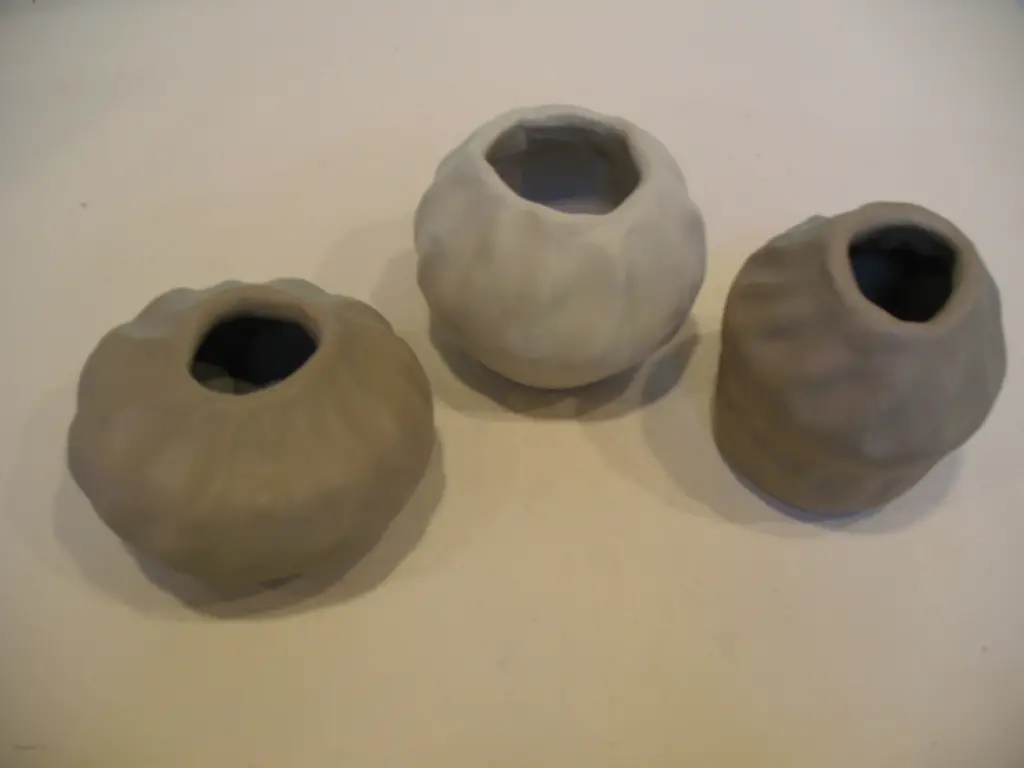
Stoneware was developed after earthenware but before porcelain. It is non-porous, regardless of being vitrified or not. It is generally fired at a higher temperature than the earthenware clays, ranging from 1100 °C to 1300 °C. It is denser, harder, and can hold liquids since it is non-porous.
Due to the presence of impurities in stoneware, they are grey or brown in color.
- There’s a wide temperature range, so good for everyone
- It comes in different colors
- You can use it with your tableware as long as it is fired
The one downside to this one, is that or those true beginners it may not be the best clay to work with, and if you’re not used to using glazes, it can be hard, but this is good to start with
Finally, you’ve got porcelain, which has the following properties:
Initially developed in China, porcelain is tougher, harder, and much more transparent than the other forms of clay after vitrification at a high temperature. It is generally fired at higher temperatures, ranging from 1200 °C to 1400 °C.
- It creates a wonderful cream color
- It is very fine and translucent
However, this is very expensive, and most of the smaller kilns that hobbyists use won’t get to this level, and while it’s pretty, it’s double the price of these other clays
Of course, if you are really starting out, you can get some modeling or polymer clay. These are good for real beginners, who don’t’ want something super in-depth or don’t’ want to use a kiln.
Some of the aspects of polymer clay include the following:
- They are very easy to use
- They have decent plasticity, so long as you put enough water on it
- It typically fires low, and can even be done in your oven
So, if you’re planning to make pottery, choose the clay you want to wisely.
To summarize, we provide you with a list of components of clay, their corresponding properties, and their disadvantages.
| Material | Properties | Disadvantages |
| Ball Clay, Bentonite | Plasticity, Dry Strength | High shrinkage |
| Fire Clay | Refractory | – |
| Kaolin/China Clay | White, Refractory | – |
| Stoneware | Refractory | – |
| Red Clay | Red/ Brown Color | Low firing, porous in nature |
| Bone Ash, Whiting, Feldspar | Flux | Causes warping |
| Magnetite, Iron Oxide | Buff/Brown Color, Speckle | Flux in reduction |
| Manganese Dioxide | Black Color | Produces toxic fumes |
Making the pottery
Now, making pottery has two different styles for you to choose from, and you can decide for yourself whether you want to make them one way, or another.
The ways to make it include the following:
- Slabs, which can be made into either cylinder shapes, or they’re slumped completely over a bowl or plate to make a bowl or plate shape, or you can even attach these slabs together, smooth out the corners, and make shapes
- Coiling, which uses certain coils to help you with p9outting the item all the way up, and it’s considered one of the good basic ways
- You can make a mold out of this, or cast one yourself, and add the clay to it to make a shape
- You can also pinch it, where you pinch the clay upwards, another good beginner means
- You can also learn on a pottery wheel, either electric or manually kicked
Personally, for those who are starting out, you may not want to buy a pottery wheel right away, which is totally fine. Choose the method that best fits your lifestyle and the one you want to use.
The Best Equipment for the job
When making pottery at a beginner level, there are a few things that you can use to make the job a little bit easier, and they are important to know.
The top products for you to consider in terms of equipment include the following:
- A kiln
- Carving tools
- Glaze if you plan to make it food-safe
- Paint or other decorations
- Stamps
If you’re beginning, but you don’t’ want to buy a kiln, get yourself some oven-safe clay, and get some paints that are quick to dry, and decorate pottery like that. If you’re looking to invest, however, a small kiln can usually fire basic earthenware pottery.
Choosing a kiln
If you plan on going the kiln route, you have a lot to choose from. There are two main types, and they are the following:
- A wood-burning kiln
- An electric one
However, you should choose based on personal desires, and choices as well.
A wood-burning kiln has the following benefits it:
- They tend to be cheaper
- They can fire pretty high
But they oftentimes need to be in a space that has adequate ventilation to do this, and these also pose the risk of potential fires and explosions more.
In contrast, electric kilns have the following:
- Can be used with either an outlet or an electrician plugging it in
- Doesn’t burn any materials
- Is a little easier to use
But these also tend to be on the pricier end, so remember that. Regardless though, choose a kiln that best fits your lifestyle and needs.
Personally, for beginner potters, you can get a cheap kiln online that’s electric, and it doesn’t’ have to take up a bunch of space.
When buying a kiln though, there are a few things that you should consider when choosing it, and they include the following:
- One that can fit your firing media
- One that has good elements that you don’t need to replace
- One that has a kiln sitter as needed
- One that has few cracks in the base or lids
If you’re buying it used, the condition is much more important, cause you’re going to want something that works for your property, and doesn’t require a bunch of it to be replaced.
If nothing else, buy something that hasn’t been scratched up too much, but also within reason. Get one that works well after years of use too, and you should make sure that you never have it near a heat source.
By now, you know that different clays require different firing temperatures, and hence, different kilns. Kilns can reach temperatures higher than 1000 °C. As a beginner, buying a kiln may be quite costly, but you can afford smaller kilns that can easily be stored in places like your garage, yard, etc. Large kilns require an electrician to connect themselves to the main power supply, unlike their smaller counterparts, which can be easily plugged into your household sockets.
Kilns must be placed at a location away from the vicinity of flammable substances like petrol, oil stores, cars, and gas cylinders. Children should be kept away from that particular place.
Kilns undergo wear and tear after each firing, and it is essential to check if all the parts and firebricks are in the proper condition or not. If they have developed major cracks in the base or lid, you should avoid using that kiln further.
Here, we are briefly providing about the notable changes observed in clay when putting in a kiln at different cone temperatures.
| Temperature (ºC) | Cone | Notable Points |
| 900 | 011 | Sintering begins. |
| 945 | 08 | Common Bisque temperature reached. |
| 1005 – 1145 | 06 – 3 | In this range, Earthenware vitrification occurs. |
| 1165 – 1210 | 4 – 7 | Mid-range vitrification. |
| 1225 – 1390 | 8 – 14 | High fire vitrification. |
The Potter’s Wheel
Pottery wheels are your next item to consider buying if you’re considering an option other than hand-building means.
Remember though, you have two types of pottery wheels, and they include the following:
- Manual ones
- Electric ones
Even a small electric pottery wheel would suffice a beginner in this field, and it would not also cost much. Kick wheels require a little more space, unlike the electric ones.
Modern high-powered pottery wheels such as the U.S. Art Supply 3/4-HP Table Top Pottery Wheel with LCD Wheel Speed Display possess several features, which make it more efficient and powerful. But these are mostly meant for professionals, not required by beginners as they won’t be throwing large pieces of clay into pots that require more torque.
Kick wheels are said to be more controllable, although many electric wheels are provided with gears to control the speed of rotation.
By default, the manual will be cheaper than the 3lectric one, and you don’t really need a huge one when starting out. Some people like to buy those huge ones, and it will only waste money
.
Ideally, for the beginner potter, get a small wheel. Usually, a manual one is pretty easy to work with.
The reason why you shouldn’t get anything too huge is due to the following:
- They can be hard for beginners to work with.
- They oftentimes are better to control if they’re manual
- They are simple to coordinate all parts of the body with
I know getting the fancy wheel is probably something you want to do, but it’s better if you try something easy to work with. Plus, it’s cheaper starting out too.
A modeling Stand
Now, if you’re looking to build your pottery, a modeling stand is a wonderful means to do it.
The purpose of a pottery modeling stand is the following:
- It allows for the piece to be made in a simple manner
- It can make the process much easier.
- You can slab everything on in one location to form it
Personally, if you’re struggling with making models, you should consider getting a stand, to make it easier.
Should you Learn Glazing?
Yes, the answer is simple. But you shouldn’t worry too much about it at the beginning.
That’s because of the following:
- You need to be able to fire this twice
- It can be hard to work with this
- You’ll want to take caution when mixing these
Glazing is good if you want to make them food safe. But, if you’re using this for a flowerpot, it really isn’t necessary, and it oftentimes may not be good if you’re just learning the process.
How Glazes Work:
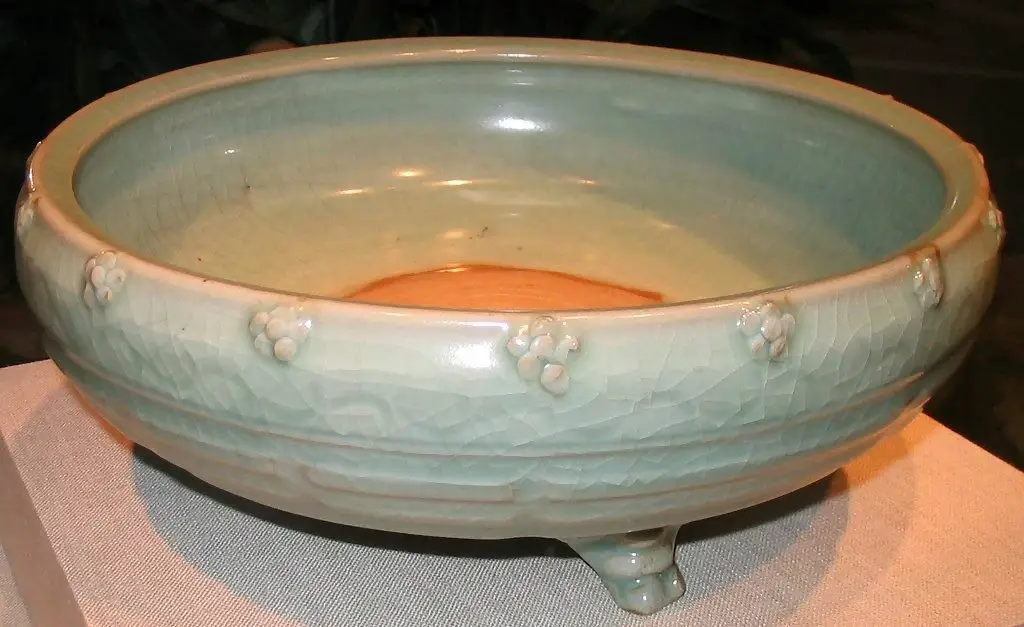
Glazing is a process in which the ceramic is coated with a vitreous substance that protects it from water. It provides strength and a tough surface. Glazing ceramic results in decoration, and adds color to the body, making it more appealing for a person to buy.
Once the clay is fired in the kiln at its corresponding temperature, glazing is done by spraying, dipping, etc. After that, it is placed in the kiln again. The most common techniques of glazing are salt glazing and ash glazing.
Investing in Tools
When you’re beginning, I do suggest getting some tools. Tools allow you to make the pieces in a way that’s easier for you.
- A wire to remove the piece, whether nylon or metal
- A sponge that’s wet to help remove water from the inside of narrow forms
- A piece of chamois leather to smooth the rims of pots
- A wooden rib to smooth the base of a piece of pottery
- Pin tools to help cut the top of wobbly pots, or to pop any air bubbles. Make sure to get a thin one
- A throwing stick to help clean the outside of pots, or make an undercut bevel, to help cut the pot from the wheel easier
- A trimming tool, to help with refining the shape whenever you have the clay firming up, which is essential for making pots that have foot rings to them
For the most part, those basic kits do wonders, and you’ll be able to get the most out of them that you can with just a few tools here and there.
The process of making pottery on a beginner level is the following:
- First, wedge out and prepare your clay, making sure there’s enough water in it
- Start to form the shapes of your clay through the process of pottery, whether it be on the wheel, slabs, coils, or the like
- At this point, work on smoothing everything out, and fix the top of it
- Always make sure that if there are bubbles or cracks, you handle those before they go into the kiln
- At this point, once the piece is finished, you’ll want to wait for it to dry, and that could take almost a week if you’re waiting for it to get bone-dry so that it can be used
- Once it’s dried out, you can fire it in the kiln, either a bisque fire or a glaze fire
- If it’s a bisque or single fire, once you finish, let it cool to room temperature, then take it out
- If you’re applying glazes and stains, apply it at this point
- If you plan on firing this again, do it the same way, following the instructions
- When it’s done, you should take it out, let it dry, and then check to make sure there wasn’t any misfiring done
- If you’re just using regular paint, you can paint it at the very end of it so create the design that you want to take shape
For a lot of people, it can take a little while to get this all in place, and if you’re wondering whether or not you should use a certain type of glaze or clay, the best thing to do is to read the instructions and make it work for yourself.
1-Experimentation:
The skill of pottery can be mastered quickly through experimentation. It means you must try out different combinations of clay to know what works the best for you. The clay must neither be too dry or too wet; else, it will become semi-liquid.
2-After Work, Always Clean-Up:
Working with clay is really messy, and you must clean up the workplace place before leaving it. You can use sponges to wipe down surfaces and collect and store unused clay. Washing and drying the tools are also important.
On drying, clay disintegrates into finer particles that mix with the air. These particles contain silicate compounds that may damage the lungs when you breathe. So, it is vital that you always clean up after your work is done.
3-Keep Short Goals:
It is the best way for beginners to retain their interest in the hobby. Make short goals like creating a simple piece on the wheel. Whenever you accomplish the task, always reward yourself. If you have made a piece good enough to be sold, try to sell it. Not only it allows you to earn some money, but it also gives you the motivation to continue your pottery work.
4-Find Out your Flaws and Work on Them:
Next, always reach out to people for their feedback. Show them what you made and ask if they like it. In this way, you will come to know about your flaws and can work on them accordingly. If you have already enrolled in a pottery class, you can consult your instructor about your artwork. He/she can point out what areas you lack the required skill and how you can improve it.
5-Reusing the Clay:
Have you messed up all in your first attempt? Don’t worry. You can always reuse the clay and try it once again. You only need to mold the required parts and then re-shape it. Now, all that you need to do is to wad up and start working again. So, you won’t need a large amount of clay as a beginner. Just start shaping it again!
6-Posture:
Throwing posture is often ignored by most beginner potters, and they end up having pain in their back, wrists, and legs. While using a pottery wheel, ensure that you’re working with your back straight and sitting at head level. You can raise the seat of the wheel and work or only stand against the wall and work. It is up to you to decide what suits you the most. According to your convenience, choose a throwing position that doesn’t cause you any pain and allows you to continue your work smoothly.
6-Practice, Practice, and Practice:
The more you practice, the better you learn the skill. It is not something new. You can practice at your home in a garage using a little clay and a small kiln. Once you get the hang of it, you will easily start making beautiful pottery pieces.
Remember honing the skill of ceramics and pottery is a tough nut to crack, but it is possible with perseverance and dedication. It may take you a long time before you make pieces that are good enough to be sold. So, have patience and try to improve each day. After you have progressed much, you can buy better equipment and may even start doing it professionally!
Pottery is fun!
As a beginner, you must keep in mind all the aforementioned steps before you start pottery as a hobby. Keep the patience to master it, and once you make your first piece, you are only going to get better.
Keep in mind that it is an expensive hobby, so do not blindly invest in it before even joining a class. Practice it, and once you learn the basics, you are going to create astonishing clay pots, plates, mugs, cups, and whatnot!
Pottery is a blast to try, and great for anyone who wants to get creative. It can take a bit of time to master, but it’s good to try it at a beginner level.
If you’re struggling with learning pottery past the basics, I do suggest taking a class to help with this. The classes will help you harness and hone the skills, making it possible to create the shapes that you love, without any problems.


