
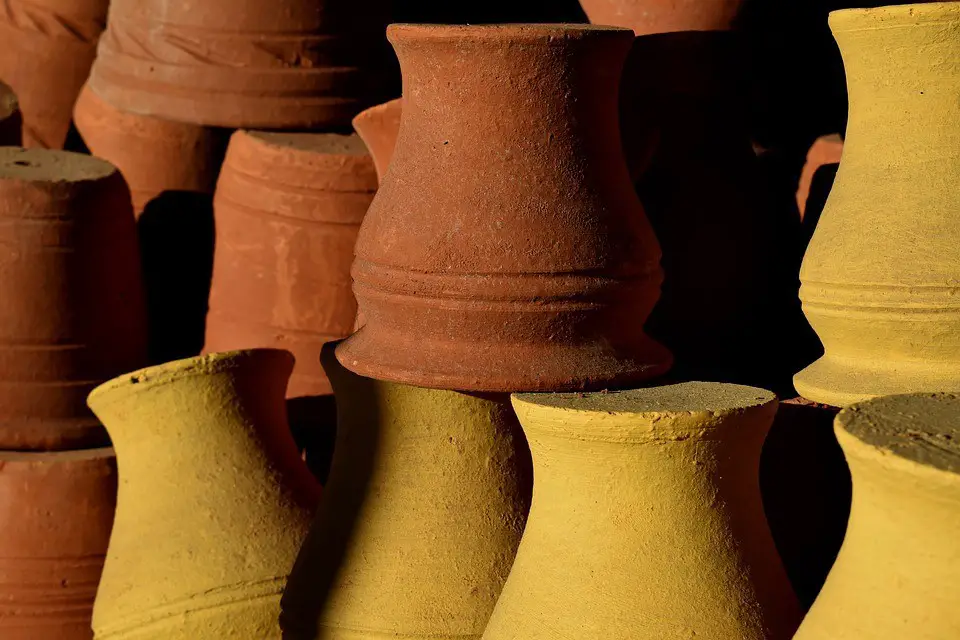
Pottery work is known as one of the most popular and traditional jobs in the world, it requires different tricks and techniques to be accomplished properly. Getting dough of clay and turning it into a beautiful piece of pottery is not a matter of joke. A long process with several steps needs to be followed with proper care and technique to bring out the exact shape that you want. From the very beginning starting with the selection of the right kind of clay, throwing it on the pottery wheel, drying, bisque firing, glazing to finishing it up with firing inside the kiln, each process is equally important and needs to be done correctly. Even a little mistake in one process might cost you the ruin of your entire effort.
As stated earlier every step is equally essential to success in pottery formation, drying is one of those most vital steps that you need to follow in the course of your pottery making. The entire process of pottery making depends upon the way you are drying your clay.
Why is the drying of clay necessary?
Now, let’s know in detail why drying clay is vital in the formation of aesthetically beautiful pottery work.
-
To strengthen the clay pot:
If your clay is not dried correctly, you won’t be able to work with it further. As the damp clay is fragile to touch and may break at any time just by the touch of your fingers, it is vital to dry your clay first and make the clay body stronger.
-
For locking the shape:
The shape that you have sketched in your mind will not be formed accurately, especially if you have not dried your clay correctly. The malleable and soft sticky texture of the clay is unable to take a sturdy and stable shape if it’s not dried accurately. So, to lock the exact form that you want your clay to look like, proper drying is immensely important.
-
To avoid an explosion inside the kiln:
Even a small amount of moisture present in the clay might cause an explosion when it’s being put under the excessive temperature of heat. The explosion causes instant breaking and cracking of the pottery, which is enough to ruin your entire effort.
Now the thing is that the process and duration of drying of every clay are not the same. The drying time and nature of drying differ from one clay to another, depending on the materials and substances present in it, presence of moisture in the clay, the water-absorbing capability of the clay, breathability of it, synthetic matters existing in the clay and many more things. So, understanding the drying nature of clay you are working with is of utmost importance. Also, a proper understanding of the clay nature and its drying process help in preventing future cracking and breaking of the clay body. Here is what happens if you don’t dry your clay correctly.
- Uneven drying promotes cracking in the clay body.
- Improper drying causes separation of the joints in the pottery body.
- Fastening the drying process doesn’t dry the clay adequately from the inside, which in turn leads to the ruining of the pottery piece.
So, these are the things that you must not want to happen to you while working. In this article, we are going to talk about all those essential matters that you should know if you are in search of a proper guide for pottery drying. If you are planning to start with your pottery work as a beginner or you have already attempted some failures in pottery drying, then the below-stated information will undoubtedly help you to ace the game of pottery making. Without straight jumping into the drying process, let’s start with the basics. Here, we go.
Factors that affect the clay drying process:
-
Type of the clay:
The drying performance of a pottery body depends on the type of clay that you have used for your pottery making. There are different types of clay available, and the character of each kind of clay is different from the other, and so is its drying time. Let’s have a look.
| Type of clay | Drying performance |
| Porcelain | The nature of porcelain tends to lose moisture or water content in it quite quickly. And, fast loss of water promotes the speedy drying process of the clay body. However, the problem with porcelain is that drying leads to shrinkage of the clay body. So, while working with porcelain, you need to be more careful while drying it to avoid cracking or breaking of the clay due to shrinkage issues. |
| Plastic clay | Due to having an excessive amount of plasticity in it, the plastic clays tend to shrink a lot while drying. Also, the plasticity present in it doesn’t allow the clay body to become dry quickly. Thus, you would have to let it dry for a long time to get an evenly dried clay surface. |
| Grogged clay | This kind of clay is quite potter-friendly as it is quite easy to work with grogged clay. The lesser amount of plasticity present in the clay is apt for speeding up the drying process. Also, extreme care is not needed, and the clay gets dried up pretty fast. Also, less shrinkage rate is ideal for preventing cracking in the clay body. |
-
Thickness:
The thickness of a clay body plays a crucial role in affecting the drying process. Excessive thickness leads to slowing down the drying time, while a thin layer of thickness of the ceramic body is quite friendly in speeding up the drying process. Also, the uneven thickness of the pottery body is the primary reason behind the uneven drying of the clay creating tension among the pot that results in warping or cracking of the clay. So, you have to be careful enough with the thickness of your ceramic ware. Try to give a uniform layer of thickness all over the pottery body to help it dry equally from every side.

-
Largeness:
How large your pottery body is, is also a key factor, which works hand-in-hand with the other elements in influencing the clay drying process. The smaller pottery pieces get dried up quickly, whereas the large enough projects take a lot of time and effort to get dried, or else it leads to unwanted fussiness in work. So, consider the largeness of your pottery and schedule the drying process accordingly to avoid breaking of your pot.
-
Moisture present in the clay:
The amount of moisture present in the clay also dominates the clay drying process. The drying time increases proportionately with the excess moisture content. The typical amount of moisture present in the clay makes it leather-hard within a short period. However, the clay containing excessive moisture takes much time to get dry as the evaporation of water happens slowly, which takes a lot of time to become bone dry.
-
The humidity of the weather:
The humidity present in the weather is another reason that affects the drying time of clay. Dry weather helps the moisture present in the clay to evaporate quickly. In contrast, hot and humid weather having excessive moisture slows down the process of clay drying rather than promoting a faster drying process. So, it is vital to avoid a moist or humid atmosphere for air-drying your ceramic ware evenly and quickly.
Clay drying processes to follow:
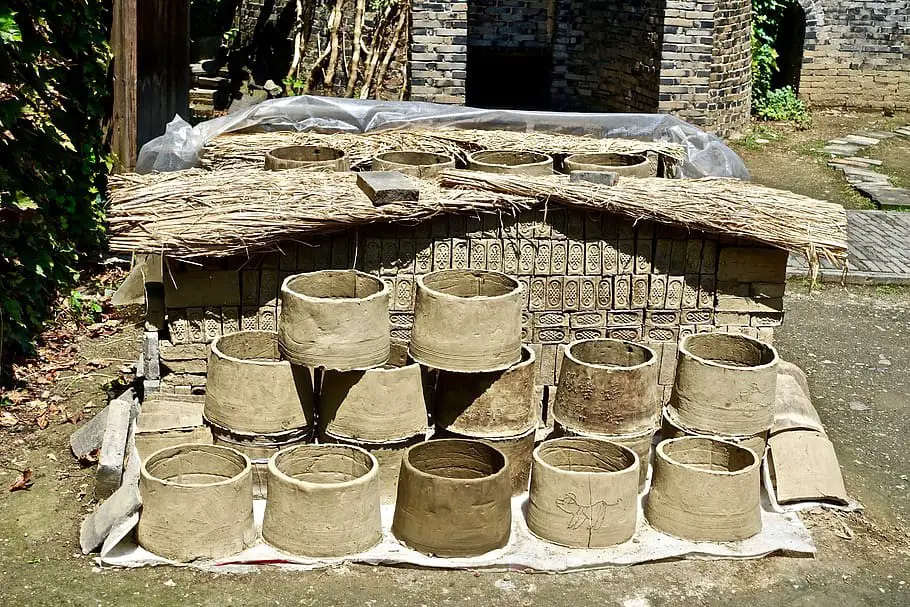
Now, let us talk about the most critical drying tips that one must follow to avoid breaking, cracking, or warping of the clay body due to improper drying of the clay. If you are a potter, then these tips are undoubtedly going to help you get success in creating something new and unique in pottery. The following are some of the easy and tricky tips that you can follow to dry your clay body evenly from every edge to promote the proper success of your pottery making.
-
Use plastic to dry your pottery:
You can do nothing about the drying nature of the clay. The substances and moisture content present in the clay control its drying time. Apart from this, the surrounding temperature, presence of moisture, and humidity in the air and atmosphere are responsible for influencing the drying process of the clay.
But these things are not in your control. All you can do to make your pot dry faster is to create the optimum conditions for your pottery. And there is no match of plastic in helping you to influence the drying process and time, that too with proper efficiency.
Covering the clay body with plastic is quite useful as it helps in the proper drying of the pot from all over the surface and also protects the model from uneven drying because of the difference in exposure. However, there are problems like the emission of moisture from the clay and the condensing of water droplets on the clay body. These factors might lead to some issues and hinder the process of pottery making. So, in such a case, you need to create a layer of paper towels in between the plastic surface and clay body to allow the paper towel to absorb the extra moisture.
Usually, the place of joints is thicker than the rest of the body. And we already know that unevenness of the thickness of the clay body is the reason behind its uneven drying. So, for the places that have different drying rates, you need to adjust the plastic covering to match the drying rate of the entire clay body and promote even drying throughout the pot.
-
Wrapping only the edges:
Edges of pottery are most likely to break or get cracked easily, because of its less thickness than the entire clay body. Just a little amount of pressure might lead to the breaking of the edges of your pot. Also, if this point of your pottery piece gets a minute crack, it will grow eventually and crack the entire clay body. So, it is crucial to protect the pottery edges while drying. Cover them up adequately to make the drying rate of the rims match the drying rate of the rest of your pottery piece to prevent uneven drying and further problems caused by it.
The thin edges of the pot need to be covered with plastic strips or paper pieces to slow down the process of drying and create compatibility among the drying rates. Also, the rims and joints of the handle or any other parts of the pot adjacent to the pottery body are quite fragile and vulnerable and need to be handled carefully to avoid warping or breaking. All you can do to save these places is by covering them while drying your clay. Just wrap up those places and let them become air-dry in an even way.
-
Using wired racks to dry the pottery:
Ceramic wares with long and plane surfaces are quite fragile and prone to cracking and breaking when it is improperly dried. Again, drying them usually by keeping them on a plane surface like a table or floor helps them to get dried from one side only, while the other surface remains damp as air cannot reach that side to make it dry.
Using a wired rack might be helpful as the supply of air on both sides promotes even drying of the ceramic wares. A proper supply of air is crucial for drying clay, as it helps in drying from both sides and hardens the clay body gradually from every corner. You can use top-notch quality wired racks like AmazonBasics 3-Shelf Adjustable Wire Rack for pottery drying.
While placing ceramic ware inside a wired rack, make sure to put it on a piece of cloth to prevent the clay from getting folded, bent, or disturbed while coming in contact with the surface of the rack. Also, be a bit extra careful while placing the ceramic ware inside the rack shelf as they remain in their most vulnerable form when they are not dry.
-
Drying the lids and jars together:
Pots made with a lid on top of it need to be dried together as a whole piece. When you are planning to dry the cover and the jar separately, it might cause a difference in drying rates, which will lead to warping and cracking of the pottery body. Also, separate drying of two parts might take a long time to get dried because of the uneven supply of air.
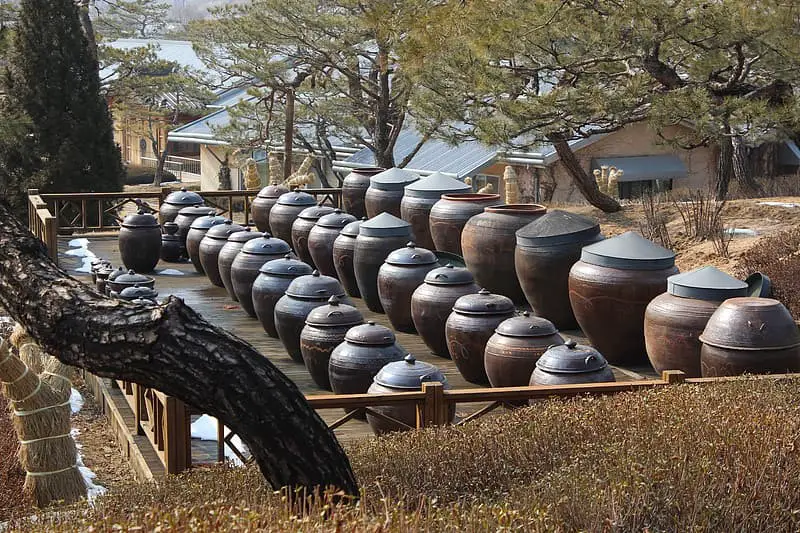
So, while drying, keep them together and cover the entire pottery work with a piece of plastic or paper to dry it equally. Also, a little change in the shape and size takes place post-drying, so keeping both the parts together will help them to get adjusted automatically according to their shape and size.
Make sure you do not place the wet clay body of a lid directly on the jar as it might cause them to get attached. It will be a messy affair to detach them and also might lead to the breaking of the pot. To avoid such a situation, you must place a paper towel or thin muslin cloth in between the edges of the jar and lid to prevent them from getting attached unnecessarily.
-
Using drywall to dry the clay body:
Placing a damp clay body on drywall helps in many ways. Also, it is suitable for fastening the drying process by increasing the usual drying rate, as in this procedure, the absorption of moisture occurs by passing through from one surface to another.
As we all know drywalls are made of plasters, and this substance is useful in absorbing moisture. So, choose the drywall that is free from moisture barrier for drying your pottery. Cover your pottery slabs with newspapers, and place them on the drywall. If you are working with several pieces of ceramic slabs, then cover each pottery slab individually with paper and place them above the other. Once they are leather-hard without the presence of a minimum amount of water in them, then you can remove them for further processing.
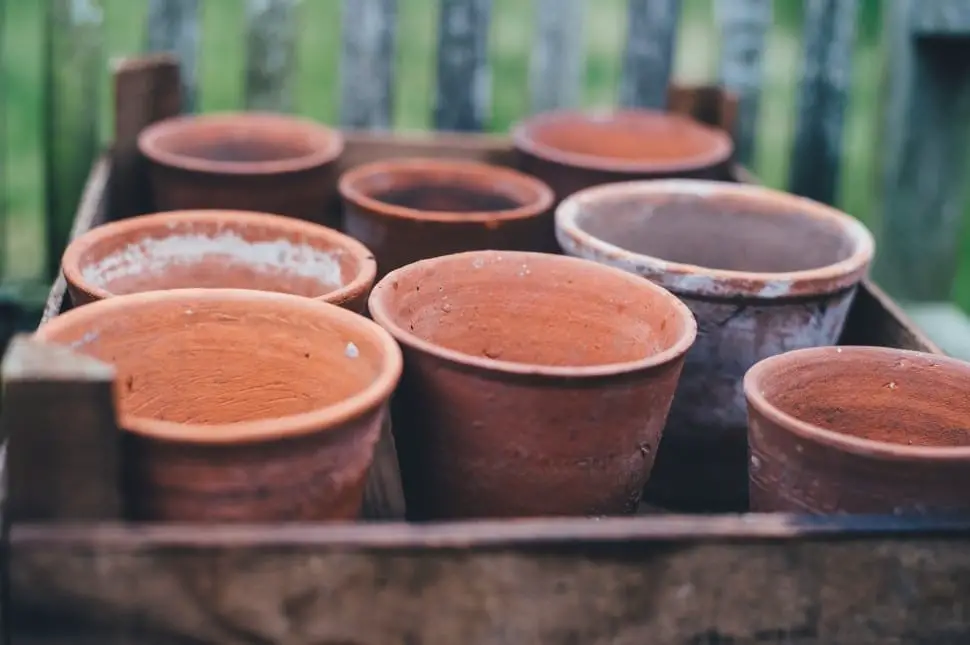
Drying of clay, based on the size of the pottery body:
Similar to other factors, the size of the pottery body you are working with also matters in the drying process. The drying time and rate both depend on the size of the clay body. Even a small difference in size can create a lot of tension in the clay, expanding it, thereby leading to warping or cracking of the pottery body.
-
Small clay body:
While working with a comparatively smaller project, you need to be careful enough as the small pieces are quite prone to get broken or lost. However, handling small pottery projects is quite easier than working with a large one.
Small pieces get dried up quickly at normal temperature and atmospheric conditions, as there are fewer places to cover. So, the drying process happens quite evenly. Also, it is quite easy to wrap those pieces up with paper and plastics to speed up the drying process, and the best part is that it doesn’t get much messed up. Once the pottery is stiff, replace the wraps and proceed with further processing.
-
Large clay body:
Working with a larger clay body is quite frustrating as the broad area of the pottery piece requires much time, and uneven drying happens quite easily in the case of larger pots. The bottom of the pottery body needs to get dried up fast to become stiff and strong enough to hold the weight of the entire body so that you can go on building the upper area of the pot.
Covering the upper area with a damp towel and leaving the bottom area to become stiff and air-dried is going to help you dry up the base area faster. Also, covering the upper area with a damp paper towel and the entire pottery body loosely with plastic works quite effectively by speeding up the drying process at the bottom. Such action helps in even drying of the bottom part of the ceramic body as well, with enough efficiency.
How much time does it take for clay to become dry?
The clay you are working with needs to go through different stages of drying. Every phase takes the allotted time to reach the consistency and texture of drying.
Let’s take a look at the time that is needed for each stage of the clay drying process.
| Drying stage | How to recognize the stage? | Drying time |
| Workable or plastic clay | Before forming the pottery shape with the clay that you have selected, it needs to have a perfect texture. If it’s a little bit sticky with much water containing in it and is pliable enough, then let it sit for some time. Keep it covered with a plastic bag in such a way that allows enough air to circulate and reach the clay to a workable consistency by evaporating the needless moisture content. When it reaches a dough-like consistency, you can consider it to be workable enough. | 15-30 minutes |
| Leather-hard clay | Once you have completed shaping your clay into the form of a pottery piece, you need to air-dry it properly to ensure it is manageable enough. Leather-dry is a state when the clay seems to be completely dry, but feels cold to touch, which means the moisture still exists in the clay body. | 2-3 days |
| Bone dry clay | After your clay is leather-hard, it means it is dry enough but not eligible to be placed inside the kiln as the moisture content present in the clay might lead to an explosion. You have to keep it for some more days, and you will see that the clay has turned pale and completely dry to touch without any coldness. It is the bone-dry stage. | 7-8 days |
Conclusion:
So, here we have tried to cover most of the essential points that you need to keep in mind while you are opting for drying your pottery or ceramic ware. The clay drying process is so intricate that it takes a lot of care and attention, and even a little mistake may lead to the failure of your efforts. Also, do not forcefully dry your pot using a hair dryer or heater, as it is not going to give you an even dryness. Instead, it will result in the cracking of the clay piece. Always rely upon the natural processes of drying to get the best results. We hope that the clay drying tips mentioned above will help you in achieving your goal.
Happy sculpting!


