
One of the basic points in pottery is throwing on the wheel. If you’re thinking about buying one, or even using one, this guide is for you. Here, you’ll learn everything that you need to know at a beginner level to help you throw on a pottery wheel, and what you can do with this to give the best results possible on this wheel.
What is a Pottery Wheel?
Before we get into the details of pottery wheels and how to use them, let’s discuss what they are. Pottery has a very rich history, dating back to 29,000 BC. That was a long time ago, and it’s quite shocking for many people.
However, the purpose of pottery was for more utilitarian reasons, such as:
- Creating cups for drinking
- Tools for eating
- Tools to cook
- Various ways to help the home
These were all made just from clay, and the practicality was what you were going for back then. However, it soon became quite interesting to many, since you could take a mere pile of clay, and from there, make something pretty awesome.
Now, the way that pottery was made before the wheel was just coiling and hand-building, which are still used today, but this helped out the process a whole lot more.
The wheel was invented around 1300 BC, and from there, it was used for a lot of things. It actually had a lot of great benefits to it, more than you could imagine, such as the following:
- It made ceramics way faster
- It took a lot of work off of the shoulders of the potter
- It allowed for more advances in pottery
- It allowed for pieces to be made that were more beautiful and functional than ever before
So now that you know a bit about the wheel, it’s time to discuss the ways to use the wheel, including what to get first, where you buy it, what type to invest in, and what the investment is, which is something that you should learn first before you even begin to get onto the wheel and use it yourself. We also will discuss how to use the wheel when it’s time, but for now, let’s talk about the beginning steps.
Choosing a Wheel
You’re probably going to ask yourself the following questions when choosing a wheel;
- What’s the best brand
- Where do I buy it?
- What’s the investment?
- How much will I need to save up
Now, when you look at these wheels, it might be a bit intimidating, since they do end up costing a lot. For ones that are super high quality, you’re looking to spend a couple of thousands of collars. But, if you want one for a home studio, you’re spending about 650 minimally. You should think about what you’re going to use it for, and obviously, the budget that you’re willing to put forward.
So, you’ve got two types of wheels:
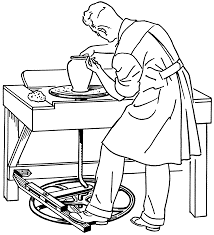
- The kick wheel
- The electric wheel
Electric pottery wheels are usually where you begin, and they are much better for the beginner in all of us, simply because of the following:
- Much easier to control
- Easier to center clay
- Much more compact
If you’re not in a permanent studio, you should get an electric one because they’re smaller and lighter, and you can use the backkick wheels to move them around. Many are available, such as small ones, to ones that have splash pans and other work surfaces in them. If you get one of these early on, you can keep it around for a while as well, and it can last you about 10 or more years.
What about kickwheels though? Well, these might not be good if you’re moving it around, and they may not be good for the beginner potter because of the following:
- They tend to be bulky
- They can be cumbersome
- Once it’s put in, you can’t move it
You need to put more care into where you put it, once it’s put in. They’re not just heavy, but they’re super impossible to move. Now, it doesn’t require electricity to use, but that doesn’t mean that it’s easy, but rather, you’ll be using your leg muscles to do all of this work. It’s wild because you’ll be kicking this to make it move.
However, it does have a few points to it such as it is relaxing, durable, and more trustworthy, but there are some downsides that should be considered, such as:
- It can cause knee issues from the obvious kicking
- It can cause arthritis issues as well
- You can aggravate areas of the body because of how repetitive and continuous this is for some people who use it
However, there are some benefits to this as well, such as the following:
- They are super durable since they’re impossible to move
- They don’t require a lot of maintenance, so they’ll last you a lifetime
- You can throw it comfortably regardless of how you kick in many different ways.
- They have motors attached to them, so you can kick it to the proper speed and help to maintain it.
Whatever you do choose, you should figure out the wheels that work for you, and it will definitely help. You should definitely go for something with a low horsepower as well, since if you do have one that’s too fast, well guess what, it will be too fast for you to move, and can often be quite hard for you to take care of. So, be smart with this, and make sure that you choose something that’s fitting for you.
Now that you know a bit about the types of wheels that you need, let’s take a bit of time to discuss how you throw, with the following sections below that tell you how to throw a pot in the most beginner of ways.
Starting to throw
When you’re working on throwing a pot, it can be quite relaxing, but also a bit frustrating. Most of the time, if you make stuff on the pottery wheel, you essentially follow the most basic of instructions. In essence, once you have the basics down, you’ll be able to do forms that are definitely more complex, and with bigger amounts of clay.
For the purpose of learning, once you’ve got a wheel and you’ve tested it out and learned a thing or two, you can start with this. However, it’s important that you start out small. Don’t go too crazy with the amount of clay that you’re going to be using, instead, you want to make sure that you’re able to actually make something effectively. When you start off too much, you’re going to get the following:
- Issues with throwing it period
- Issues with making forms
If you’re not versed in using your wheel, or your throwing, you definitely will want to make sure that you understand just how to use it, so that you’re able to definitely make sure that you’ve got a good feel for this, and you’re able to definitely make what you want.
You do need a few things, and they are as follows:
- Clay, about a pound or two
- A small sponge
- A wooden rib
- A bucket of water
- A bat
- A needle too
- Wire to cut the piece off when you’re done
If you have these, you’ll definitely be able, to begin with, this next part. Now, when you begin, you want to make sure that your wheel is set up similarly to a clock. You will definitely want to know where to put your hands in many cases because this is a huge part of it. It’s also good to understand how you use your pottery wheel whenever you’re doing this.
Steps to Throwing
Now that you have the stuff, let’s talk a little bit about how to throw a pot using your pottery wheel, in order to get familiar with it.
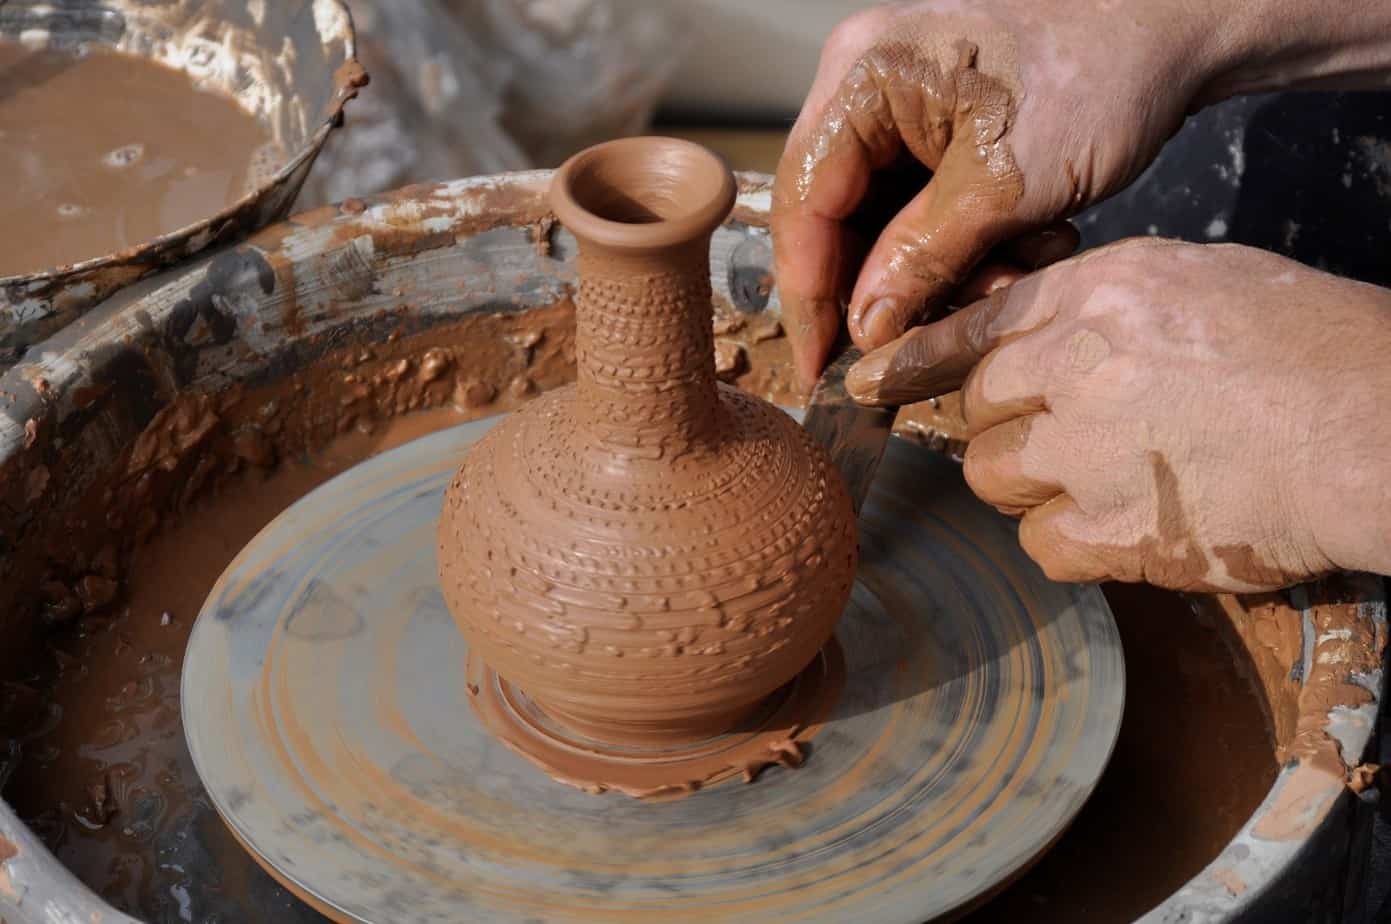
The first thing we shall talk about is the bat, which is attached to the head of your wheel, and it’s very helpful to use bats when you do this so that you can remove your piece without getting anything completely messed up or compromising the shape.
How you do this is as follows:
- Take off any chunks of the clay that are on the bat with the rib or a metal scraper. It is best to make sure that you don’t wash them since they can warp when they have water on them
- Put the bat on the wheel head with holes that fit over it
- Spin it and then slightly dampen the center with a sponge
Next, you attach the clay. You want to make sure that you take extra care to ensure that it’s fully attached, especially if you’re going to be doing this. To do it, you simply do the following:
- Put the rolled side wedges in the center where it’s damp
- Use pink to push the clay edges down. Rotate your wheel about a half of a turn push it down once again and continue until it’s pressed down
- From here, use the index finger to push clay onto the bat all around it
- Hold it there at 3 and then spin the wheel to seal it. don’t use water though, but instead, use your hands
From here, you begin to use the wheel at this point to continue throwing your clay, opening it, and centering it. You can read up more on it in other articles, but it’s definitely important that you make sure that you follow the directions and know how to throw the pottery effectively.
Speed Tips
When it comes to using your pottery wheel, it’s very important that you consider speed to be a deciding factor on this, and you should make sure to keep the speed of the spin consistent, especially when you’re centering this.
The best thing to do is to sit down with your wheel and try out the different speeds before you begin. You want to work at a speed that isn’t too fast, nor one that’s too slow. To do otherwise will cause the following:
- Issues with maintaining work
- Issues with keeping it consistent
These are two big things. Obviously, you don’t want to go too fast, because that won’t help with the actual result of this, but you also don’t want it to be too slow either, especially since you want to make sure that you’re able to have the wheel at a speed that you can trust. It’s definitely good to ensure that you’ve got a wheel that you can control.
Storage Tips
When you’re working with a wheel, it’s very important that you choose a good place to store this and to even use it. while you can move electric ones around, having it in a good area will allow for better and more reliable uses of pottery. When you’re looking to store this, it’s definitely important that you take the overall location of all of this into consideration. You should also think of the following:
- Ease of access from the wheel to the racks or kiln
- Ease of getting in and out of it
- Ease of moving your hands and feet around
- Ease of access to after, especially sponges
- Ease of being able to use this in different ways to help you get the most out of your pottery use
It’s best to make sure that it’s also in an area where you have electricity. If you don’t have electricity, you’re not going to be able to use your electric wheel. That’s what’s nice about them though since you can move this around and ensure that you’re getting the electricity that you need from them. It’s important that you take your time and ensure that you get yourself together, and from there, you too can create pottery that you know and love, and the kind that will make you proud.
Water Nearby
You need water, and that’s a huge part of throwing pottery. Water is what will keep the area slicked so that you’re not causing friction against the pottery itself. You need to make sure you have lots of water nearby.
Now, this can be done in a couple of different ways with a wheel, and they are as follows:
- A splash pan
- Having a bucket nearby
- Having something set up to the side to access
Now, having a splash pan is great, especially since it catches the water quite easily. But, there is a downside to it. sometimes, if they’re built into the wheel, it actually ends up costing more money. But, if you’re serious about using this, this can be quite a great addition.
For those who don’t have the splash pan put into them, you’ll need to buy your own version. It might seem like a bit of a nuisance though, since the surface might have a very small amount of space, and you may not be comfy.
You can also have it set up so that you turn to the side in order to et it, but there is a downside to that as well. The water that is there can actually be quite hard on your back, especially if you’re moving around back and forth, so do take that into consideration, and you’ll definitely want to keep that in mind.
You should also have room for your sponges as well. sponges are super important when you’re taking care of pottery since it does the following:
- It will take out excess water in the bottom
- It can help to thicken the bottom and keep the outer curves held
- It can help with throwing the cups that you make as well
Making sure that you have sponges near is quite important, and if you have a good means to set this up, then great. It’s also why it’s encouraged to get the wheels with a little bit of a work surface attached to them, so that you’re able to ensure that you’re able to get the right shape, and also not have too much water in there.
Save Your Clay on the Wheel
If you remove a piece of pottery, you might be inclined to just clean up the wheel and leave it at that. That’s great, but if you have wet clay that’s left from trimming when you’ve been creating pottery, and if you have wet clay that collects on the wheel, you should make sure to go save it. why is that? Well, you can use it again and again. You can reuse clay, it just takes a couple of steps, which are:
- Setting the clay that’s there onto a plaster slab
- Let it dry out a bit
- Use it again
So yes, collect the clay that’s on the wheel and make sure that it’s there since it can be reused once again to create a great sort of image that will help you as well. You can save the clay, and it will prevent waste.
You must clean off the wheel every time you’re done though. That’s because when you do finish p, any clay that’s left there does dry out. Granted, you can easily get the excess pieces that are big, but what about the small ones? This actually can form dust, and that is toxic to inhale in many cases. You must make sure that you’re able to get the clay pieces picked up since it definitely can cause issues if you don’t take care of it.
You should always make sure that your wheel is fully cleaned when done, and when preparing for a new piece as well, but it’s frustrating to have a bunch of new clay mixed with the old clay, and that can make it kind of gross. Just like anything that involves clay, sometimes it’s better if you fully clean it up, and make sure that you have a new and fresh surface, to begin with since it does end up making a difference with your pottery as well.
Learn the Basics
One thing that you’re going to want to do as well with a pottery wheel as a beginner, is to learn about it. That means the following:
- Learn of the pieces
- Learn how to use them
- Learn how to control speeds
- Learn what’s best for you
This takes some practice and experimenting to do since it is quite different from what you may be used to. For example, perhaps you’ve never worked with a wheel before and the speed is a bit too much. If that’s the case, you need to take your time and try to work with the wheel when you feel like you’re ready to. A pottery wheel does take some time to master, especially if you’re not used to it, but for many people, understanding the importance of the pottery wheel and manipulating it so that you’re able to get great results, is often quite nice, and it’s something that many people do tend to enjoy. It is worth your while to work with this, and you’ll be amazed at the difference that this will make.
This article discussed pottery, and how to use it, and you’ll have a lot of great benefits from this as well. You’ll not want to miss this, and if you’re ready to take your pottery wheel throwing to the next level, and truly learn how to master this element of pottery, you sure can with this great series of steps and this beginner’s guide to the pottery wheel. It can be scary, but if you work with it and get used to using it, you’ll be able to get a lot of great results from this and a whole lot of amazing benefits that work for you.


