Sometimes setting up your studio is the way to go when it comes to pottery. However, it is an investment, so you should make sure you desire to do this before investing money in it. If you’re at a studio a lot and want to extend to your own home, you totally can. You can even get the most minimal equipment, and you can use it for years. It’s not too expensive, and you only need a few things to begin. We’ll go over what you need though to set up the studio of your dreams.
Questions before you begin
Before you begin, you should first consider the following:
- Are you a hobbyist who just wants to work with the wheel, or do you want to build your own?
- Do you want to glaze and fire?
- Do you need a kiln?
If you’re answering yes to any of these questions, then you’ll want to consider seriousness. If you’re going to go, hobbyist, you just need the following:
- Wheel
- Shelf unit
- Worktable
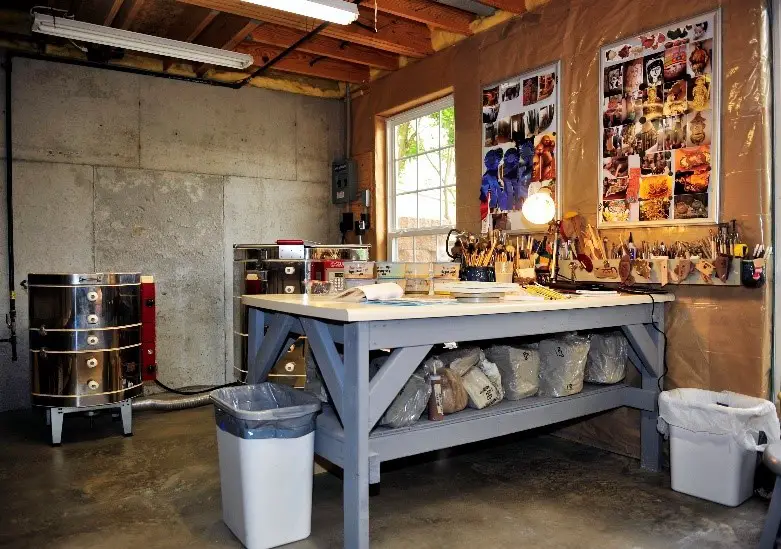
If you want to set up a studio, you should make sure that you have an ideal location. If you’re hand building, you can use the spare room in a home, or even a garage to make the studio.
You need enough space for a small table, a small electric kiln, and a shelf to put the stuff on.
If you want to wheel throw, you’ll need space for the wheel, a clay storage area, a work table, and some shelves. You’ll also need a sink on hand, a place to store tools, and a room that’s off to the side to glaze and fire the pottery as needed.
Depending on the type of home that you have and the space that you desire you should adjust this accordingly so that you can create a studio that fits your living space.
The Wheel
If you’re going to do wheel pottery, you need to make sure that you get the right kind. It honestly depends on a few factors when it comes to investing in pottery wheels, and they are the following:
- Skill level
- Budget
- If you’re going to do it as a career, or as a hobby
You can begin with a cheap and flimsy wheel, but if you’re serious and want to get a legit one, you want to get something that’s professional.
Brent wheels are the best for a professional wheel, but they start at about a little under a thousand and can go to 1700 dollars if you want a super professional wheel.
This is a good wheel though for any sort of skill level, and even if you’re considering it just as a hobby, a good wheel can make all the difference. You should get one that has a ¼ motor first if you’re starting, but if you can handle it better, you want to try out either a ½ or a 1 HP wheel, whatever works for you. The 1 HP is good for a lot of clay, up to about 100 pounds or so, which is a decent speed if you’re working with a ton of clay.
You can get other pottery wheels as well besides Brent, including
- Thomas Stuart/Skutt
- Shimpo Wheels
These are two other great ones, and you can get a lot of killer results from it. However, always keep in mind the horsepower that you need. To work with too much horsepower will cause you to lose control of the clay, and it isn’t something that you should try to take on too much of.
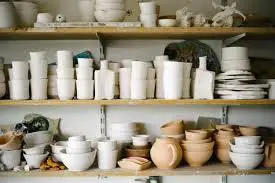
Storage Shelving
This is another key thing to have, because after all, you need a space to hold them before you fire them, or you begin to glaze them. You can start with a simple wooden shelf, or get something similar to these to help with it:
- A shelf that’s put into the wall
- One that has ware boards on pegs to store them
- One that you make yourself
You can choose to make your shelf if you do feel like this is for you, but if you’re not the handy type, you can simply get one from a local store. The biggest thing is to make sure that there is enough space to put the pottery on. It’s better to have too much space, than too little space, so make sure that you do have some sort of room nearby for this.
The Workspace
With this, you should be realistic about it. you can create a super small work table to help you get started, but sometimes, if you’re just beginning and using a tiny room, you might need something different.
The best types of workspaces that you can create on a budget are the following:
- A 4×8 foot sheet of plywood covered with canvas
- Plywood was cut to fit the needs and covered with a heavy sort of canvas
- A sheet of Formica to put on top if you glaze
With this, you can adjust the table to the desired size, but the canvas must be super tight on the plywood. If it’s not, it’ll bunch it up, and that will make it hard to work with the clay. Once you have it stretched tightly, you can staple it on the underside that’s there.
After a bit, the canvas will stretch out due to working on there, so you’ll need to restaple it, or even restretch if that does happen.
This type of surface is super cheap to make though, and it’s the best kind of surface that you can have for anything that you’re going to work with, short of glazing.
But, if you want to glaze on the same space, just throw some Formica on top of it, or dedicate a part of the workspace to glazing by putting some Formica on top of this. That’s because the glaze shouldn’t be mixed with the clay since it can end p creating problems later on. This is good for a small space that requires pieces to glaze, but ideally, if you can, create a different table to glaze your pottery. If you don’t have space though, don’t worry about that.
The room Qualities
With the room, you want to make sure it possesses the quality to help make sure that the pottery stays ideal.
- Damp
- Humid
- Encased
- Ideally dark
If you have this type of space, it’ll make storing your pottery so much easier. If you have a damp space for the pieces that are that need to be finished up, especially in terms of trimming and having handles attached to them, it can help you out a lot and make the job easier.
If you don’t have a space like this, get one of those old little refrigerators that you can store. Make sure it has shelves that are easy for you to apply pottery on. you should try to ideally get one that is encased as well.
If you don’t have space for whatever reason, get one of those shelves that’s wooden, and then throw a snuggle of plastic around it to help encase the area.
You can also get greenhouse shelving as well that has plastic at the bottom. You just want them to be encased and damp so that they don’t dry out before you’re finished up.
Kilns
Ahh, the kiln. This is where the magic happens when it comes to firing, and it’s something that, if you’re going to be serious about pottery and not just a hobbyist, you need a good one.
But, not all kilns are of equal quality. With the sudden surge of popularity when it comes to pottery, people want to set these up. However, because of how cheap these can get, sometimes people don’t get the best kind, and this can cause the following:
- Fires
- Explosions
- Pottery not fired correctly
- Reduction instead of oxidation
With this as well, many times the pottery hobbyists will get a super cheap one, use it for a bit, and then not touch it ever again, and they only take it out if they decide to sell.
If you’re looking to find a pottery kiln that works for you, the cheap ones might work if you’re like a super hobbyist and border on professional, but not if you’re trying to actually make good kilns. You should definitely try to invest in a good one, especially a larger one.
Two brands that you should stay away from are:
- Olympic
- Paragon models that are older
The Paragon models are good for small projects but don’t do large-scale with them since they’re not really that good for this type of thing.
You want a kiln that does the following when you’re looking for one:
- One that is sturdy and well-built
- Calibrated correctly
- Dependable
- Safe to use
Skutt kilns are usually the type that works well for some of the potters out there. They are expensive, but they are worth the money. You can find some people selling them for a cheap price, but if you do decide to get one, make sure that the kiln works well in terms of all of the elements, and that there isn’t any damage to the kiln as well.
You also have kiln options that you might not have thought about before. They are the following:
- Computer operated
- Manually operated
Now, if you’re interested in just pressing a button and not dealing with having to watch the pottery as it gets fired in different cycles, you go computerized. They’re reliable and they work well.
If you want to watch over the kiln and have a good idea of how much temperature is going on at this point, you can do the manual option.
Personally, for the beginning, you’ll probably want to go computerized, since this will control the firing cycles unless you want to learn how to use a “kiln setter” that shuts off the kiln once the temperature is touched. However, regardless of whatever one you choose, don’t just leave it unattended. If you do get the computerized one, you should stay in the room and work on other projects while keeping an eye on them.
With kilns as well, you should make sure that they’re placed in the proper area and away from walls and the like, which could end up causing fires and explosions. If you set this up correctly and do take on the proper safety tips as discussed before, you’ll be able to use your kiln in a very fitting manner and get the most out of it that you can. It’s important to practice good kiln safety since this is the most dangerous part of pottery.
The Tool Storage
Tool storage is a super important part when it comes to pottery. The last thing that you want is to have a killer studio set up, but then you don’t have a place to keep everything.
You should make sure the location is centralized, especially since it will help you find the things that you need.
You can try one of the following ways to store your pottery tools:
- A mobile cart that has a shelf on top
- A shelf that has horizontal bars to hold things
- A small little shelf that sits under the table
You can buy your own if that’s what you feel will work best, or you can make it yourself if you already have a built-in workspace. Ideally, though, this should be a separate storage area, and different from the workspace, since if you already have a limited workspace, the last thing that you need is more of it being taken up by a whole array of tools. With the cart too, you can trek it around the studio depending on what you’re doing, and you won’t be left without it.
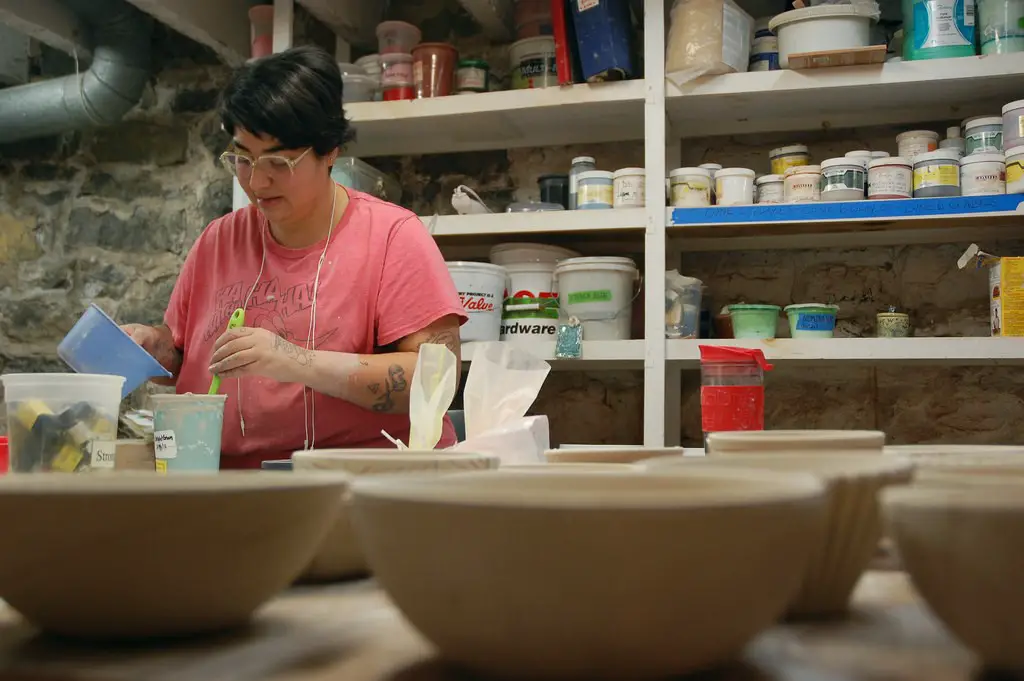
Where to Put the Glaze?
Glazes are important for pottery, especially if you’re going to fire it. If you’re going to buy pre-made or mix it with powder, that’s up to you, but you need space not just to glaze, but for glazing the pot as well.
There are a few ways to hold the glazes, and you can try the following:
- Little buckets with lids
- A built-in shelving space
- A small place that’s movable if you’re going to add any additions
With the bucket, you should put them on the table so that you can reach them. You don’t want to put them too low or too high. Setting it too low or on the floor is going to cause trouble for your back. Setting it too high is not going to work because you won’t be able to fully glaze the pottery that you have.
You should make sure that you have the table around two or so feet tall, but a little higher or lower depending on your size.
You also should have a work table that you have to house the pottery that you want to create, and it will help give you some space to work, but also a good place to keep everything nearby so that you’re not running back and forth trying to get the finished work to glaze.
How to Store Clay
You want to make sure that you have a good place to store the clay. You ideally should make sure that you have it nearby, such as under the table, or even on a shelf that’s a few inches off the floor so that you don’t get dust or any sort of residue on the clay itself.
With a studio, you want to make sure that you don’t sweep up any clay scraps that are there, since it will create dust that has silica in it, and that can cause lung damage. You should make sure that you get any water that’s on the floor off of it, and don’t leave clay sitting around to dry out. You should store the clay in the following type of place:
- One that’s relatively damp
- One that’s covered
- One that’s cool
You should make sure that you practice good hygiene in your studio.
Tools of the Trade
You also need tools to begin as well, and you definitely will have a better experience if you get some good ones. You should make sure that they’re quality tools in order to provide the best results for your studio.
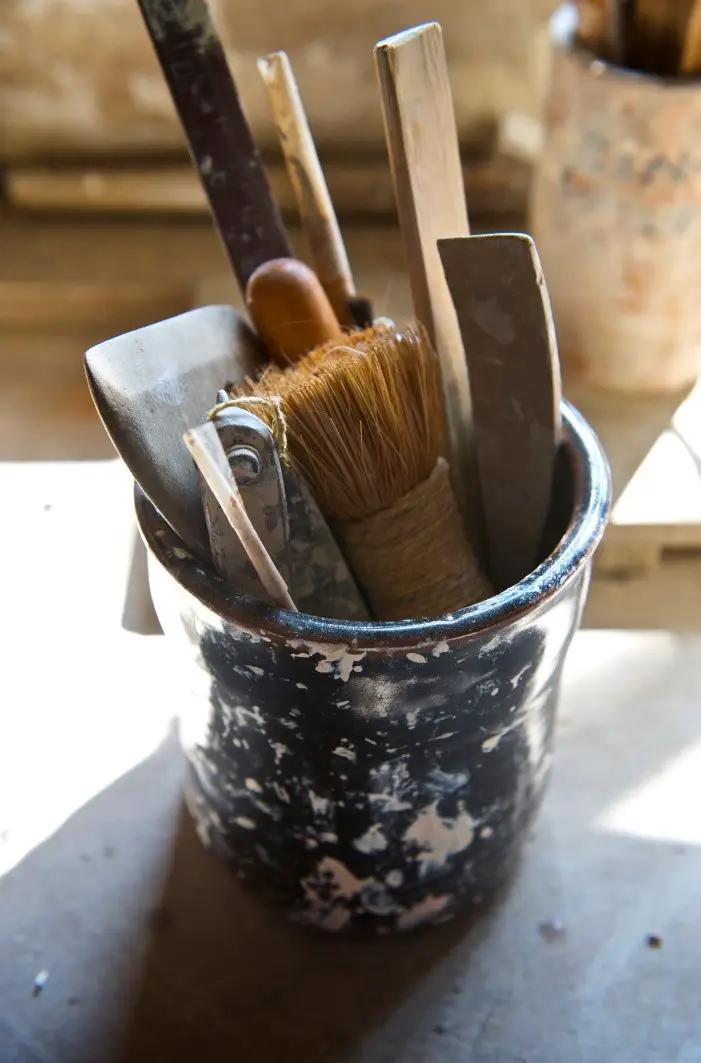
- Wire tool: used when you cut the clay. You should make sure it’s stretched tightly when you cut it and don’t cross it back over when you cut it. If you get a kinked wire, you should make sure that you fix it or toss it, since it can break the cable and then cut your hand and fingers
- Bowl rib: used to shape bowls
- Triangle rib: to help throw clay
- Needle tool: used to throw and score
- Rubber ribs: these are used to differentiate the level of hardness, and they are good to help with polishing pots and throwing them
- Wooden knife: used to throw clay
- Tools to clean up
- Glazing tongs: used to hold the pieces while you work to glaze it
- Sponge: used to pull water out of the clay
- Rimming tool: you can use this to trim the clay
- Ruler: used to help make work accurate to the measurement, used especially for lidded pieces
- Turntable: this is a great piece for glazing, and you can do virtually anything with it that you want to
- Paint Brushes: these are used to glaze the pottery. You should get one that fits the amount of detailing that you want on this
- Carving tools: you can use these to help you figure out how you want to carve, and you can try different ones as needed
- Large bowl rib: to use if you have large bowls to make
- Throwing stick: this is used to help shape things that won’t fit
- Calipers: These are used to make lids fit. You should make sure that you get one of these especially if you’re going to be creating pieces that are lidded quite frequently
This is all that you need to get started. You can choose the items as needed, and you can adjust to the way that you want them to achieve great success.
Ideally, if you can get help on this, do speak to the person running your pottery studio for extra tips. I don’t suggest investing in this unless you’re serious about wanting to do pottery since it is quite expensive for the kiln and wheel alone. But, if you’re interested in working on pottery in a more serious hobbyist fashion, or you just don’t want to drive to the studio every day, this works.
On another note, you can also have a small studio that doesn’t fire and then drive them to the studio if it’s close. This isn’t ideal, but it’s a good way to save space.
This article gave you everything that you need to know to set up your basic studio, and you can right now if you feel like this is what you want to do.
If You Enjoyed This Article Please Share and Pin. It is Greatly Appreciated. 🙂


