You’ve probably heard a lot of talk about pottery glazes. Well, what exactly are they? Why are they important? How can you apply them to your project in order to create the desired result? Well, you’re about to find out. Here, you’ll learn everything that you need to know about pottery glazes, and how applying them can make a huge difference in the state of your pottery art, and your overall art as well.
What are they?
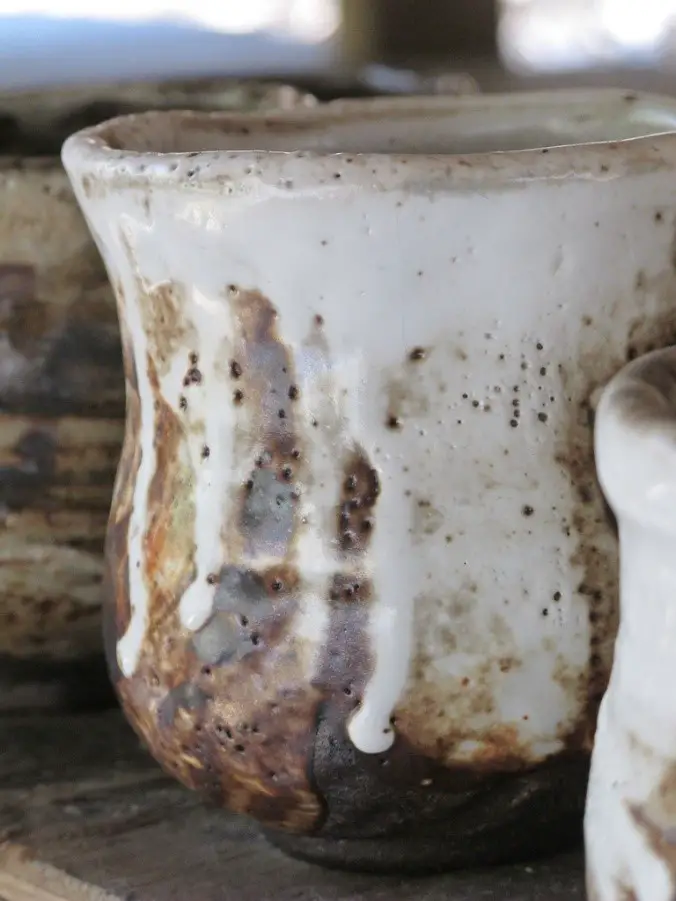
Glazes, in essence, are a coating that you put on top of a potter piece. This is almost like glass or even a transparent coating that you can put on top.
You can use these glazes to do the following:
-
Give a glass coating to the pottery
-
Waterproofing waterproof it
-
Smooth it out
-
Give color to the pottery piece
-
Add a design texture
Glazes are made of either ground or powdered ingredients, and they tend to not dissolve or anything. They don’t go bad with age, but the ingredients sometimes come out of suspension, so it’s important to make sure that you put it on right, and you make sure that you do put it on correctly. You should make sure that if you need to mix a pottery glaze you do so.
They’re not sticky in a sense, but they tend to adhere to the pottery before you fire by penetrating the clay, and the bonding does increase based on the interaction. Anything that’s on there that prevents the glaze from soaking can actually leave holes so it’s important that before you actually fire, you have the surface cleaned off.
Pottery glazes are used when you’re ready to take your pottery to the next level. They’re not really something that you have to do, but if you want to have some amazing pottery, they’re something worth putting on to make your pottery look even better than before.
Glazes are put on the surface of the object in the following ways:
-
Spraying it on
-
Dipping it
-
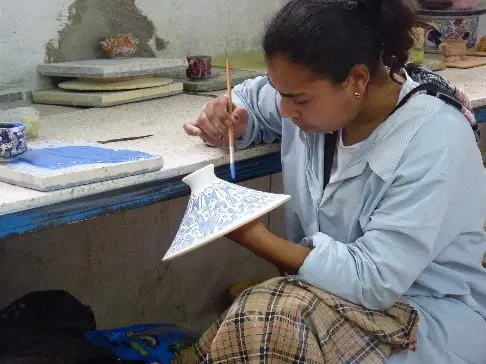
Brushing it on
They are great to use not only to help enhance the piece with some colors but to make it more durable. There are also different kinds of glazes that can be used to help give different results, based on the different firing temperatures. It protects the pottery from breakage, and can even help make it stain resistant too, which is pretty cool.
You might notice that when you touch it, it’s almost creamy at first, and you also might notice that the color is way different as well. That’s because minerals and inorganic compounds actually change their color when they’re fired up. What might be blue when coming out might be a different color when they’re fired, so it’s pretty cool.
They’re either made with natural or synthetic materials and when they oxidize, they change the texture, from what they had melted down previously.
They each have their own temperatures to fight, and their own temperatures to melt. The heat that the glaze is fired does determine what the overall ceramic glaze will be like later on.
There are a couple of little rules to remember with this, and they are as follows:
-
Glazes that fire low have vivid colors
-
Glazes that fire high often are delicate when it comes to colors
-
The more delicate the color, the more firing needed to get the result that you want
If you’re going to glaze, make sure that you have a space designated for this, since it will make the overall process way easier for you as well. But, remember it is messy, so do make sure you take the right steps to protect hair and clothing.
Types of Glazes
Almost all glazes begin as a powder, so you’ll need to mix them together, and a surface that can hold onto the buckets, so you don’t have to lift them. But, there are different types of glazes at this point. This section will go into the various different types of glazes you can try out.
The different types of glazes are as follows:
-
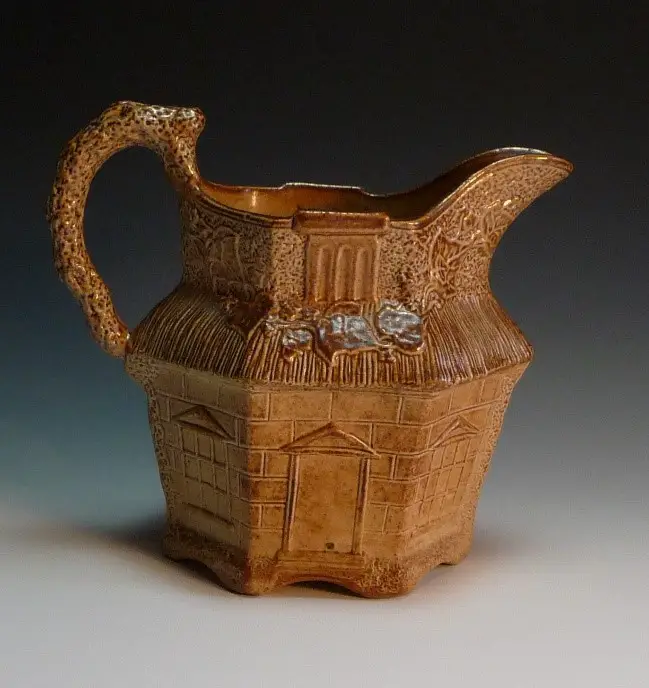
Transparent glazes: glazes that are transparent after they’re fired, allowing the surface color to be on there, but maybe slightly darker or even a transparent color on top of that.
-
Glossy Glazes: these are super smooth, and they reflect light. These are the bright ones that allow you to see your reflection in them after they’re done being fired.
-
Opaque glazes: these tend to have a solid color due to the particles or trapped bubbles that are within the glaze. It also contains minerals that can cause the opacity to shine through as well.
-
Flowing glaze: this is a glaze that melts when it’s fired and is runny and will bleed into glazes that are next to it, giving it a unique glaze once finished.
-
Stiff glaze: this is a glaze that won’t move once it’s fired, and if you already are looking for a “painted” glaze design, this is the best one for it.
-
Matte glaze: this is the opposite of gloss, and while they do have a nice charm to it in that it gives a rustic appeal to the object. It doesn’t shine and will absorb the light without reflection, so it might be one to consider.
These different types of glazes are all variations in nature, and it definitely is a great thing to have if you’re looking to master your pottery and make it even better.

How do you use them?
When looking to glaze pottery, there are different ways that you can do so. We’ll go over in this section how to glaze pottery, and when to use them.
The first is dipping. Dipping is done when the following needs to happen:
-
You want to get the inside of something.
-
You have small areas that are hard to get into.
This is often done in the same way dipping is done, which we’ll go over in a bit. To do this, you pour this into the pot, leave it in there for a few seconds, and from there pour it back into the bucket. Anything excess can be flicked off, and you want to keep the rim of the pot at a parallel angle to the floor, and you can also wipe off any excess to create a cool, decorative effect.
Then there is dipping, which in essence is probably the best way for those starting out. That’s because of the following:
-
It’s super-fast
-
You’ll be able to get large amounts of it
-
Allows for an even coat
It’s exactly what you do, and in essence, you put a piece of pottery into a glaze for a couple of seconds. You want to make sure that the bottoms have a wax resist on there if needed, and you want to make sure all of them are prepared well. You should also with this, make sure that the glaze is fittingly prepared by stirring it with a stick before you dip it. as a rule, the thinner the glaze, the longer the pot will need to stay in.
Brushing is another one that you can do as well. This is for glazes that are the following:
-
Are thicker
-
Require a number of coats
-
Don’t want to have something superfluid
-
Smooth marks that give a nice decoration
With this, you take a paintbrush and you put a certain number of coats of the glaze on. You should make sure that you read up on exactly how many coats you need for the color. Typically, if you want to make sure that you have rush marks, you’ll want to vary the thickness of these coats with each application. You should use synthetic stables as brushes for when you put this on.
Then there are sponges, which do help you with virtually anything related to pottery, whether you just want a textured application or one that creates a second layer. You can use different ones based on what you want to use them for, and from there, you can create beautiful pieces with the glaze, and it creates a sort of interesting pattern to them.
Then there is spraying it on. Then there is spraying the glazes on. This is another way to spray the glaze onto pottery, and it’s one way to help make sure that you get a good enough coat. There are spray guns, or airbrushes to put the glazes onto the pottery, and you should make sure that you take rightful care when you’re spraying the glazes onto the pottery.
Some of the rules are the following:
-
The nozzles have to be large enough to handle glazes without becoming plugged up
-
You will want to wear a respirator when you’re spraying these chemicals
-
You should do it in a separate area, ideally a booth with the right kind of ventilation.
By using the right safety precautions, you’ll be able to apply the glazes as needed and create some amazing designs.
How do you glaze pottery?
So, what are the steps needed to glaze pottery? Well, they are as follows:
-
First, choose the right kind of glaze for the pottery. You should make sure that you do choose one that works for you. Depending on the clay, the bisque might end up being white or red. If you have an object that you made yourself, you will want to fire it but keep it porous, since that will help with the way you’re supposed to glaze it.
-
next, get some disposable gloves so that you don’t get this all over your hands, and it can also prevent the oil from attaching to the pottery piece. Change them when they get dirty.
-
From there, buy glazes based on recommendations. You can go to the store, and get them either mixed or in a powdered form.
-
You will want to before you begin to realize that different glazes require firing at different temperatures, and don’t use glazes that require different firing temperatures since it can break the pottery.
-
You should also be aware of the ingredients in these since they often have a lot of toxins. Keep food or drink away, and make sure that you don’t keep anything that you ingest on hand during the process.
-
Next, you’ll want to get an overglaze, which gives a protective finish to the object. You should choose one that won’t hide the glaze under, and make sure that you get one that fires at the same temperature.
-
From here, you should prepare the surface by getting rid of any bumps that are there. You can sand them off until they’re smooth and make sure you wipe it with a sponge to get rid of any dust.
-
You should wipe down the surface before you start this when it’s dirty, especially since it will help to prevent particles and oils from trapping. You’ll want to keep it as clean as possible.
-
You should then put wax to the bottom of the object, and if you do have removable parts, where they meet. This is a way to prevent it from sticking to the bottom of things before you fire. You can use paraffin wax or a “wax resist” from a craft store.
-
You should at this point stir every glaze in a thorough manner, and make sure that you do have it at the right consistency. You will want to keep the particles from the suspension, by filling it with a cup of it and some water and then stirring, adding water as needed.
-
You should then use the brush, and then put the underglaze on first with the brush. You can go as detailed or as not as detailed as you want to.
-
You should then let it dry, scraping off any excess, and then let it dry before you put the next one on.
-
Finally, you can put on the overglaze, which is what goes on top, and from there, you should dip it into the overglaze for a couple of seconds, and then, let dry and then tip it again. You can brush it on too if you want.
You can at this point fire the pottery and see what kinds of glazes you get out of this, and the colors that are associated with this too. It’s kind of fun, although it might be a bit variant on the different types, it certainly does the job and then some when you do look at them.
Tips to help you
Now that you know how to glaze, there are a few things that you can use in order to help you keep everything clean when firing the pottery, and when you’re looking to glaze effectively, this is how you do it.
First, you want to make sure that everything is clean. You want to keep any pottery that you have completely clean, even in the following situations:
-
When Firing
-
When loading and unloading the pottery
-
When cleaning up anything
You want this to be clean because clean pottery is easy to handle. You should handle all pottery with some disposable gloves, and if you feel like something has been compromised, you should make sure that you bisque it again rather than just let it sit there.
When you’re trying to remove any rough spots with sanding, you’ll want to use silicon carbide paper, since this will help remove all of the rough spots. You will want to sand, and then wipe down with a sponge. You’ll want to use a sponge instead of ringing in order to help prevent the glaze from being messed up, and particles from being trapped. Ideally, you should have a lot of sponges on hand when glazing, about 4-6 of them ideally.
You’ll want to remove any sort of dust before you work on any glazing. This is because of the following:
-
It will trap the particles
-
It can compromise the pottery
-
It can be abrasive to your lungs
When you’re doing this, you want to remove all of the dust that’s there, such as dust from the bisquing, dust from the studio, and even dust from yourself or on the street. You can use an air compressor, but keep ventilation in mind, and make sure that you keep your space clean when using this.
If you need to get glaze dips off of the pottery texture, you should use a stiffer brush. It will help with getting rid of any of the dripping that happened, so you’ll have a nice, even piece. Softer brushers tend to smear them.
Use brushing when you can’t do the following:
-
Dip it easily
-
Pour it
-
Struggle with getting a matte texture
When you do brush it, you’ll want to watch the bisque while you brush it, especially since it tends to be shiny and wet when it goes on, but later on, I become way more matte since the water gets absorbed. If you put on a damp coat, you’re going to remove the initial layer before you put it on. You’ll also want to remember that the laws of gravity apply to the glazing, and you should make sure to keep the glaze from running if you don’t want it to and watch this in order to be mindful of it.
If you’re going to dip glazes, you want to have a container that fits it. if you use the wrong one, the following can happen:
-
It can oversaturate the piece with glaze
-
You might miss a few parts
-
It won’t go on evenly
These are common problems when you use an unfitting bowl, and the best thing to do is you should have a lot of different bowls. You should try to get shallow bowls for small pieces, and from there, bigger ones to handle the glazes that need to be put onto bigger pieces.
Finally, mix your glazes. Don’t be afraid to get them to be super mixed because they tend to thicken. Remember, the more improperly the glaze is mixed, the longer and more coats that you will need.
Some ways you can do it is with a stirrer, but if you’re working with a lot of glazes, or very thick glaze, you should use something such as an electric drill, and a jiffy mixer. If you have a dry glaze on the sides of this, you should sieve it, and then return it so that you’re not missing any. Mix it well will make your experience way better. You will be rolling this around to get complete coverage on said pieces, and you will want to make sure the surface is fully dried for when you glaze it.
These tips and so much more can be had when you start to do pottery glazing. Now that you know why you should do it, you can start to invest in pottery glazes to help you get the most that you can out of them. Pottery glazes will help make your work shine, and it’s a surefire way to get the colors and coats, along with the effects, that you not on the pieces that you know you want to create on them.
If You Enjoyed This Article Please Share and Pin it. It is Greatly Appreciated. 🙂


