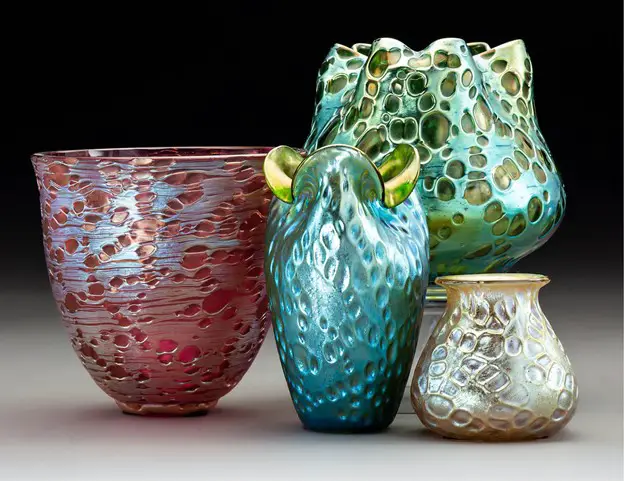
Glasses and ceramics are two sides of the same coin. This is because normal glaze generally includes silica which is the main contributor to the formation of glass. Adding glass beads to your pottery items can help create stunning results. After the pottery piece is glazed, light bouncing off this glass can look similar to an exquisite piece of jewelry.
The colors you hence achieve will be vibrant, bold, & eye-catching. Any pottery item that you produce using glass would surely be a showstopper.
How can you use glass with pottery?
The best thing about adding glass to pottery is the fact that you don’t need anything special to create this unique effect. You just simply have to make use of a cheap glass & then put it into the ceramics kiln. Depending on the type of glass being used, the temperature can be changed to achieve the desired effect.
The prime difference between glass kilns & ceramic kilns can be narrowed down to the fact that glass kilns tend to fire in a top-down manner. This is typically done to get even heat for the flat glassware items.
On the other hand, ceramic kilns tend to fire the item from around its sides to heat it in an even manner. During the firing process, you need to keep in mind that glass, when heated, tends to expand & cool when contracts. This is why you need to ensure that your pottery work gets enough space to expand and contract without cracking during this process.
If you are a newbie to the pottery world, make sure you incorporate glass into your artwork with a simple yet elegant design. Something as simple as a bowl would provide you with a wider base and allow the glass a chance to pool in as well as melt without cracking.
Make sure you don’t use a lot of glass at work. With glass pottery, a little is more & you wouldn’t want to risk changing states as it could lead to the cracking of the ceramics.
Glass Types to Use with Pottery Designs
As it is with clay, glass tends to change its state by varying temperatures. The state can also vary depending on the ingredients it is made up of. The standard silica-based soda lime is a commonly available glass variant that tends to melt around 1500 degrees Celsius. On the other hand, pure silica might require fluxes to melt, especially when the temperature is lower.
When firing glass, it is best to start slow, especially if the glass ingredients and origin are unknown. A good way to process glass and ceramics together is to make use of glass beads, given the fact that the colors here are strong. Plus, they are an ideal size with a soft and round shape.
Most glasses are made up of lime, sand, & soda. Also, you can find different variants of glasses in the market, such as tempered, stained, tinted, bulletproof, etc.
Make sure you avoid using broken glasses as they require a higher melting temperature, and they’re sure are safety issues associated with their use. You can experiment with a range of glass variants such as sea glass, broken bottles, mosaic glass, recycled glass, or anything that you can find. An important lesson to learn is that regardless of how similar two glass pieces look, the origin of the glass could be different. In case these are fired, they might show similar or varying colors. For example, one might remain green while the other would turn white.
Plus, also keep in mind that the sea glass tends to be expensive and might not be accessible for newbie potters. Red glass doesn’t always turn red post-firing & might become black or brown when mixed with glaze or different glass colors. You might better your chances of getting a vibrant red if only you use it alone & keep the thickness high.
Here is how you can determine the glass compounds by looking at the color itself:
| Colors | Glass Compounds |
| Amethyst, Deep Amber, Decolorizer | Manganese Oxide |
| Ruby Red | Gold Chloride |
| Brown | Iron Oxide Greens |
| Deep Blue | Cobalt Oxide |
| Brown/Amber | Carbon Oxides |
| White | Antimony Oxides |
| Black | Cobalt, Iron, Manganese Mix |
| Reds | Selenium Compounds |
| Brown/Amber | Sulfur Compounds |
| White | Tin Compounds |
| Red, Light Blue | Copper Compounds |
| Glowy Yellow Green | Uranium Oxides |
| Yellow | Antimony with Lead |
Firing Temperature & Other Potential Problems with Glass for Pottery
The prime issue that surfaces with glass for ceramic ware is that it can only be used for decorative purposes. These pieces could be a major problem if any of them break off and get into your body somehow. Additionally, it could also lead to cuts and bruises. Even after being fired, glass pottery isn’t safe for food purposes as the surfaces carry tiny cracks that tend to collect dust or food bits.
Glass is best when fired in the electric kiln using Cone 6, giving you access to 2223oF temperature. However, make sure the pottery item is first bisque for the best results. Firing it at a particularly low temperature might not melt the glass sufficiently.
Things to Remember When Using Glass for Pottery
When firing glass for pottery purposes, here are some things that you need to remember:
-
Glass-constructed pottery might not be safe for food & must be used as décor only.
-
To achieve the best results for most glass pottery, use the Cone 6 for firing purposes.
Make sure you test & document the glass source using different glazes to verify the results before you place the actual pot.
Best ways to apply glass to your ceramic work
Depending on the effect you desire, the glass-embedded ceramic work process can differ. You can apply the glass atop the glaze to achieve a marvelous effect. Next, the glaze can slowly be scraped off for the glass to be placed on its bisque.
When fusing glass with ceramics, make sure you consider opting for a good-quality kiln. You can opt for options such as the Love Charm Professional Microwave Kiln for Glass Fusing. This kiln is perfect for fusing or melting glass for DIY techniques.
There are three different techniques that you can try when fusing glass with ceramics.
1. Tack Fuse:
Tack-fusing kiln-forming technique is where 2 disparate glass pieces are heated right until they get hot enough and stick together. However, the temperature must not be hotter than this to avoid letting go of their real characteristics.
2. Medium Fuse:
With the medium fuse technique, the temperature is higher than with the tack fuse method. Here the edges are way softer, and the surface achieves a natural shine. Plus, the embellishments could be more prominent. It is ideal for thicker glass pieces.
3. Full Fuse:
This technique uses the highest possible temperature to help separate glass pieces merge smoothly into a single body. This leads to the development of a completely new glass variant with the properties of the parent glasses.
This table can help you better with glass firing using these fuse techniques:
Tack Fuse Technique
| Segment | Temperature (oF) | Ramp (oF/Hour) | Holding Minutes |
| 1 | 1050 | 250 | 30 |
| 2 | 1250 | 250 | 20 |
| 3 | 1350 | 300 | 10 |
| 4 | 950 (COE-96) 900 (COE-90) | 9999 (Full) | 60 |
| 5 | 800 | 200 | 10 |
| 6 | 100 | 300 | 0 |
Medium Fuse Technique
| Segment | Temperature (oF) | Ramp (oF/Hour) | Holding Minutes |
| 1 | 1050 | 250 | 30 |
| 2 | 1250 | 250 | 0 |
| 3 | 1400 | 300 | 5 |
| 4 | 950 (COE-96) 900 (COE-90) | 9999 (Full) | 60 |
| 5 | 800 | 200 | 10 |
| 6 | 100 | 300 | 0 |
Full Fuse Technique
| Segment | Temperature (oF) | Ramp (oF) | Holding Minutes |
| 1 | 1050 | 250 | 30 |
| 2 | 1250 | 250 | 20 |
| 3 | 1460 | 300 | 10 |
| 4 | 950 (COE-96) 900 (COE-90) | 9999(Full) | 60 |
| 5 | 800 | 200 | 10 |
| 6 | 100 | 300 | 9 |
What is the right amount of glass to be used for your pottery?
The thermal expansion or material coefficient rate for glass and clay is vividly different. Glass tends to crackle depending on the glass type, clay, & total amount used. Try the combination on a test tile and check whether you desire the same result with your glass pottery.
Also, keep in mind that your clay might shrink down more than glass in certain cases. This eventually creates a lot of stress and cracking on the pot and the glass, along with the following potential problems.
-
If you happen to use a lot of glass, its crackled surface will fail to settle & you can also see some cracks that might be higher as compared to other parts of the pottery. This eventually leads to sharp edges causing potential injury.
-
Using a lot of glass on handbuilt items like trays could lead to breaks in the project. You can see this problem with trays that looked perfectly fine before firing but start to crack or break post the firing process.
Glass and Glaze Interaction: What Happens?
Imagine that the glass is a glaze. This is why every glaze and glass combination would affect the outcome. For example, the red glass tends to become red after post single glazing session. However, it might turn black or brown with a 2nd glaze coating. The colors that deck the glass could be consistent for almost every glaze variant and range between yellow & light blue.
Bisque Firing: Pottery with Glass
An important step in glass pottery-making is to bisque your piece the right way. In most cases, pottery pieces are fired twice, with the first firing process being a bisque one. This helps turn the pottery from a soluble clay state to a hard ceramic one that doesn’t dissolve in water.
Most professional potters bisque fire the glass to a temperature that ranges between Cone-04 and Cone-06. When firing a clay pottery item that requires the glass to melt into it, the potters generally bisque their items to a Cone-6 temperature.
This is when the clay completes all the shrinking starting the very first fire. You won’t have to deal with difficulties that are similar to firing glass pottery items twice.
Decorating the Pottery
Once the pottery has been bisque fired, all that is needed to do is to decorate the item depending on the look you desire. You must be wondering whether you need to place the marble directly onto your bisque pottery for better results, or would a glaze be needed first.
Well, to answer this, you need to consider a lot of choices. While some potters get great results only after glazing the ceramics, others put the marble directly. The entire process depends on the way the pottery item is being fired and the component of the glass.
There is an argument that glaze comes formulated to melt & eventually stick to the ceramics offering better results. In case you are in doubt, it is always better to bisque the ceramic first.
How do you cool your glass pottery?
It is always advised that you leave the kiln away in a cold and darkroom for cooling. It might surely be tempting to take a peek inside your kiln as it is cooling down. However, it is recommended that one shouldn’t touch the pottery before it is completely cooled.
Doing so might cause heat damage or even destroy your pottery due to sudden thermal changes. Issues such as thermal shock can cause your pottery item to crack. Remembering this process is especially important in case you plan on melting the marbles within the pottery.
As explained earlier, clay and glass both have varying thermal expansion coefficients. This suggests that it might expand and shrink at varying rates due to sudden temperature changes. Moreover, if you plan to open your kiln way too soon, it can cause the clay to shrink suddenly.
If this happens on a massive scale, it could cause alarming pressure on the clay and glass, which could cause it to break off, leaving sharp edges throughout your kiln.
Conclusion
Once you are done cooling your glass pottery in the way mentioned above, you will land with a piece that is exceptionally beautiful and perfect to the core. You can use this to beautify your living space and add some uniqueness to your home décor. So, keep experimenting!


