The beauty of pottery lies in its multitude of techniques and styles that unleashes a wide variety and opportunities to shape your dream and imagination. Whether it is the variation in style or incorporation of cultural specialties, the vast industry of pottery always tends to get richer.
One of the fantastic methods of pottery building is coiling. Coil pottery comes with its distinctive feature, which is rich in style and looks amazingly different from any other kind of pottery. If the world of pottery making seems tempting enough for you, then coil pottery is worth the try.
So, do you want to indulge in a learning ride about all the essential tips and hacks on how to build coil pottery? Then you have landed in the right place. But before moving on to the tips, let’s have some basic idea about what exactly coil pottery is.
What is coil pottery?
Coil pottery follows the construction where the pottery is built by joining or staking the pottery coil one on another. Coiling is a particular method of creating pottery. It has been quite famous for ages and has been used to build vessels, pots, and other shapes and items.
Potters use pliable clay to form coils out of it by rolling it into long pliable cylindrical shapes. Then the coils are placed above one another to build a shape.
While building, the coils are pressed together to form a strong joint and, at the same time, a beautiful texture.
The coiling technique was quite prevalent in countries like Africa, China, Greece, and New Mexico, in the ancient era. Potters used to apply this coiling technique to build a very thick and tall structure of the vessels. The method enables the walls of the pottery to be better controlled and less prone to collapse.
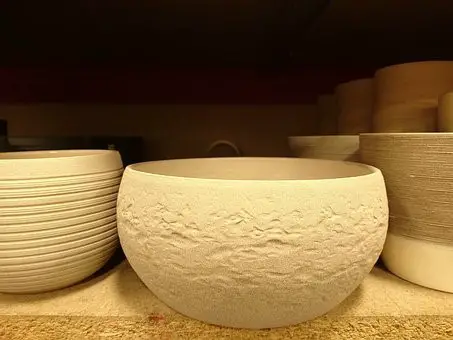
The coil pottery method is restricted to the use of fresh and soft clay. Or else it is going to be difficult to form the structure. The specialty of coil pottery is leaving the joining points without smoothening to create a unique aesthetic value.
How to build up the perfect coil?
In case you are a beginner, then you need to go a bit deeper before leaping to make coil pottery. Most beginners tend to focus on making regular round coils. But it is not always the solution to build the right shape for your pottery.
So, let’s have an insight into the types of coils that you can make.
| Types of coil | Specialty |
| Round coil | Round coils are the basic shape of a coil. It comes cylindrical. To be more precise, it looks like a round stick. |
| Flat coil | Flat coils are the flattened form of a round coil. These are more effective when you need to build the pottery wall faster. |
| Triangle coil | Triangle coils are round coils that are pinched to make a triangle shape. The shape is considered relatively strong, which is quite helpful to create the perfect shape. |
Guide on how to roll a clay coil:
Before you start making coil pottery, you need to know the perfect technique to build up the proper coils. Here are the tips that you need to follow to achieve the ideal results from the very beginning. Let’s have a look.
- Pick the clay that you are going to use: There is nothing wrong or right about the type of clay that you should use for making a coil. It completely depends on your choice and comfort. Still, there are some words that you should keep in mind before choosing one.
- Grog clay: A clay that comes with rog can be considered the stronger one. Grog is a type of granular that makes the clay strong and grit. Clay, along with the grog, is going to retain the perfect shape and get the necessary strength to bear with weight. On the other hand, the un-grogged clay is much more elastic, which adds flexibility to it. So choose wisely what you need.
- Porcelain: porcelain clay tends to get dry faster. It takes much time to build a coil and then stack it to make pottery. So when you are going to start building the shape, your porcelain might become dry at that time. It is better to avoid porcelain for bigger coil pottery projects.
Pick a clay that is soft and moist for building the perfect coils. If the clay is too dry or gritty, you are going to have hard times while coiling. Also, it tends to crack faster if the clay is too dry.
If you are trying to make a small bowl or a cup, then a ball of clay is going to be enough for making the coils. For larger coils, you need to opt for larger quantities.
-
Squeeze the ball to make a sausage shape:
Start with patting the ball of clay properly. After patting, you need to squeeze the clay to build the shape of a sausage. You can taper the needs, as it becomes easy to deal with the problem of getting the hollow ends. If there are hollow ends, the air gets trapped inside the clay, which is very likely going to cause an explosion when you are going to fire it. Then, after making the tapered shape, roll the clay properly using your palms until it becomes round.
-
Twist the clay sausage:
Once you are done with rolling the clay sausage, make sure that your clay is not getting flattened. If it gets flattened, keep it on the working table with the narrow side of the piece you are working on. Press the coil gently to give it a square shape. Size each side of the coil properly and start rolling it again.
If you want to avoid this problem smartly from the very beginning, you can twist the clay sausage. Start with turning one end of the coil, and follow it by turning the other end in the opposite direction. Twisting is going to help you retain the perfect shape.
-
Make the length of your coil:
Now you need to give your coil the desired length that you think will be suitable for your pottery project. Keep rolling using your palms until you are getting the right length. One vital thing that you need to keep in mind is, as the length is going to get longer, the clay roll is going to get thicker. To have a fair idea about what thickness you need for your project, take the clay quantity based on that.
What is the proper thickness for a coil?
While building the pottery, you need to have a piece of good knowledge about the thickness required to make the perfect shape of the coil pot. The thickness of the coil decides the strength your pottery wall is going to get. Also, it is vital to make processing easy and joining effective.

Here is a guide on how the ideal thickness should be for the coils:
| Type | Thickness needed |
| Smaller pots | ⅜ to 1 inch of diameter of the coils are going to build the perfect shape for smaller pots. |
| Larger pots | For larger pots, the thickness should be ¾ to 1.5 inches in diameter. |
Tips that you should apply:
Here are the useful tips that you need to keep in mind if you want to get the desired result with coil pottery building:
-
Avoid air trapping in the clay:
While rolling the clay, it is recommended not to make a hollow at the end of the clay sausage. A hollow is going to promote air trapping inside the clay. It is going to destroy the pottery due to an explosion when the air comes in contact with fire. You can pinch the corners to make a tapered shape.
-
Avoid your clay from cracking:
While rolling a coil, your clay might tend to become a bit dry even if it is moist and fresh enough. Before starting to work, it is important to rehydrate your clay if it is too dry. Wrap up your clay in a damp towel or a piece of paper. Place the wrapped clay inside a plastic bag and leave it overnight. Also, you need to ensure that you are not working on an absorbent surface. Before working, dampen the body slightly.
-
Prevent your clay from sticking on the surface:
While working with a damp surface, you are finding that your clay is sticking on the surface; you need to shift the clay to a dry surface. In case your clay is too moist, work with an absorbent surface to allow the clay body to absorb the extra moisture. However, you can also cover the surface with a canvas to avoid such problems.
-
Make the proper use of your hands:
While shaping a coil, you need to use your hand properly. Most of the potters use the whole space of their hands to roll a coil. In the beginning, you need to use your fingertips and then pass them up to your wrist while rolling. Using your whole hand thus gives the clay better shape and proper firmness in texture. Using the small portion of your hand, therefore, keeps the clay unworked from one side.
To roll the clay properly, move your hands backward and forward. Sometimes you may need to move your hands outward. While moving your hands outward, maintain a slight diagonal angle to avoid the ridges in your coil.
-
Keep note of the pressure you are applying:
To get the best shape, it is essential to maintain even pressure while working. In case the clay you are working with is too soft, there is no need to opt for too much pressure for rolling the coil. Make sure that you are stretching the clay outwards, despite squashing it downwards. Lightly put a little firm pressure. Achieve an even thickness everywhere on the coil.
-
Cover your coils appropriately:
While working with making the coils out of a pottery ball, try to make a few coils at one time. Clay coils tend to dry out faster. For this, you need to cover them properly before storing them. Cover them in a plastic bag before you opt to use it. Seal the plastic bag properly to retain moisture and prevent the air from entering.
How to build up a coil pot?
Now you know what coil pottery is. It is time to learn how to ace your skills in pottery making. Here we are going to talk about how you can make coil pottery step-by-step.
Things you need to know before opting for making coil pottery:
So, here are a few things that you need to consider before creating coil pottery.
- You can leave the coils visible, or you can smoothen them as per your requirement.
- Join the coils properly to avoid any cracking or breaking during construction.
- Make sure the clay is soft and fresh.
- Use the proper process of joining.
- Consider using proper tools to join and score the clay coils.
A quick insight into what tools you are going to need:
Now that you have known the basics of coil pottery, you should be well-acquainted with the tools needed for performing this art properly.
So, below are some of the major tools that you need to have by your side while making coil pottery.
| Tools that you are going to need | Why do you need them? |
| Rolling pin | To flatten the clay |
| Slab roller | To roll the slab for making the base |
| Extruder | For preparing the coil |
| Knife | To cut the clay |
| Scrapper | To blend the clay coils |
| Rib or wooden tool | For blending, smudging, and smoothening the clay coils |
| Wooden paddle | To shape the clay |
Now let’s jump on to the process that you need to follow if you are looking for a complete guide on how to prepare a coil pottery step by step.
The coil and base making:
When you go to work with the coil pottery, you need to prepare the coil properly at the very beginning. Here you are going to see how you can prepare the coil for your project step by step:
-
Take a fresh piece of clay:
Start with choosing a fresh piece of clay. Knead it properly to get a pliable texture. Form a dough out of the clay. Make sure that you are not using too much moisture in the clay. Or else it will become runny. Use Bastex 5 lbs Low Fire Pottery Clay to get the best pliability and proper texture.
-
Flatten the clay dough:
Once you have the soft clay dough, flatten it properly to about ¼” of thickness. You can use a rolling pin or a slab roller to flatten the clay. Make sure that you are doing it on a smooth surface and that your clay is not getting stuck to the surface area.
-
Cut the slab base:
Once you are done flattening the clay, the next step should be the cutting of the slab base. You can cut the slab base up to your desired dimension. It is recommended to cut it with ¼” of thickness.
-
Prepare coils:
After you are done with cutting the slab base, you need to prepare the coils. You can either prepare the coils by using your hands or use an extruder to give them the coil shape. It is going to look like a soft clay stick. Clay coils tend to dry out soon. Make sure that you are covering it properly with plastics while storing it to retain the moisture in it.
Start building the wall of the pottery:
As soon as you have completed preparing the clay coils for your pottery, now it is time to move further. You need to build the wall for the pottery project that you are working on. Here is how you can do it:
-
Scoring and slipping:
Here, you need to start working with the slab base and coil to stick them together. Score the slab base properly and slip it well to make sure that the coil sticks appropriately. Apply the first layer of the coil to the bottom. Push the coil firmly onto the slab base to make it stick properly.
-
Cut the coil:
After sticking the coil to the slab base, opt for one round of the first layer. Then cut the coil to make sure it fits perfectly with the parameters of the slab base.
-
Blend the joints:
As you are done with applying the first layer of the coil and cutting it, you need to blend it properly to ensure a strong and reliable joint. On the inside of the slab, pinch the coil firmly to make it stick to the base efficiently.
-
Merge the coils:
After joining the coil properly to the base, you need to merge the joints of the coil layers if you want to get a smooth surface. You can use your fingers to smooth the coil. Or you can use a scraper or a rib tool to do the job with ease and perfection without getting your hands dirty.
-
Apply the next layer of coil:
Once you are done with making the first layer smooth and well-textured, you need to move on to add another layer of the coil. On the rim of the smoothed coil, add another layer of the second coil. This time there is no need for scoring or using slips. Just place the coil the way you did before.
-
Smudge the layer:
As you have applied the second layer, you need to make sure that you are smudging it correctly with the previous layer to create a solid joint. You can either do it by pinching the coil or using a rib or scraper to help you.
-
Start with another layer:
As you have applied and smoothened the second layer properly, it is time to work with the next layers. Just the way you did previously, go on adding layers and joining them properly by blending the clay through pinching or using a rib or scraper.
Join the coils at a different place. If you want to widen the pot, start working with larger and lengthier coils to increase the radius of the pottery and go on creating layer after layer until you feel that you are done.
Preparing the rim:
As you are finished building the wall for your pottery, you need to continue with giving it the finishing touch by adding the rim to it. Here is how you can create the rim:
-
Add coiling:
At the outer area where you are going to construct the rim, you need to place the coil accordingly. Take a large coil that covers the width of the pot. Place the coil neatly in the rim area.
-
Settle the rim:
as you have finished placing the coil to make the rim, now you need to join it efficiently. At this point, you need to be highly attentive, as any carelessness can ruin the aesthetics of your pot. Firmly pinch the coil of the rim with the wall to create a very strong joining. You can add your desired texture or designs to make your pottery look more attractive. The finished pot should be free from any mistakes, smooth, and we’ll-textured.
Drying the pottery:
As you have successfully built the entire structure, now it is time to dry it properly. Before drying, you can use a wooden paddle to shape the pot and add more strength to the coils. Then allow the pottery for slow drying. Cover the pottery piece loosely with any plastic and leave it for several days. As soon as it is bone dry, remove the wrap and prepare it for bisque firing.
Decorating Your Coil Pottery Art
You can take your coil pottery game up a notch by applying unique decorating techniques. There are several methods you can experiment with which include:
- Slip Decoration:
For the unversed, slip is a mixture made of clay and water which can be used for pottery decoration. This particular technique is just as effective for coil pottery decoration as well. Moreover, you can add your favorite oxide or pigment to create a beautiful tint on your artwork. You can apply the slip on your coil pottery work with the help of sponges, brushes, and even fingers to create some intricate designs. Alternatively, you can also experiment with slip trailing to create fine lines.
- Try Sgraffito:
This technique is implemented in combination with a layer of slip. The way it works is you first apply a layer of colored slip on your coil pottery artwork. The next step is to scratch or carve through the layer of colored slip. Doing so will reveal the clay layer beneath. The process will allow you to create intricate images and designs. You can use needles, carving tools, or even a toothpick to carve out your design.
- Inlay Technique:
The inlay technique involves filling incised, carved lines, or patterns with contrasting colored underglaze or slip. This technique can be used to add some visual interest and depth to the coil pottery surface.
- Use Textures Or Stamps:
To ensure your coil pottery work doesn’t look too plain or boring, you can use stamps or pre-made textures available online. You can also create your custom stamps by carving a wood block or even with a piece of potato. Personalized or custom stamps allow you to create artwork that is specific to your style while giving you creative liberty.
- Mishima Technique:
In the Mishima technique, you carve the designs onto the coil pottery’s surface. These carved lines are then filled with colored underglaze or slip. Once you are done filling the carved clay, the excess can be wiped off with the help of a sponge or tissue.
- Majolica Technique:
The Majolica technique involves the application of brightly colored glazes on a pale or white-colored clay body. So, if you have crafted your coil pottery with pale or white-colored clay, this technique will add some beauty to your artwork as it is popular for its intricate designs and vibrancy.
- Underglaze Painting:
Underglazes are ceramic paints that work best when applied to bisque ware or greenware pottery. You can easily paint intricate illustrations or designs on the coil pottery. Once the firing process has been completed, you can apply a clear glaze to enhance the colors and protect it as well.
- Layered Glazes:
If you love to play around with glazes, you can experiment with the layering technique. However, ensure that you don’t overlayer or use colors that interact with each other creating a muddy appearance. Using the right colors layered on top of each other, you can get beautiful textures and color variations. You can experiment with various glaze combinations to discover what works for you.
- Use Decals Or Transfers:
While normal decals or transfers aren’t safe for kiln-firing, there are ones designed especially to resist high firing temperatures. Ceramic transfers or decals can be added onto the coil pottery work before kiln firing and topped with a clear glaze to protect it.
Conclusion:
This article is all about how you can build pottery along with a coil. While creating the coil pottery, make sure you are using premium quality clay to get the best results. Coil pottery is one of the easiest ways to build pottery, as there is no need to struggle with the shaping and wedging of a wheel.
On the other hand, it provides much strength to the pottery wall. If you are thinking of trying out a large project with fewer mistakes, try this out with your touch of uniqueness. We hope these tips and guides are going to help you in many ways.
Happy sculpting!


