Coil pottery is a widely used technique for creating beautiful clay pots and bowls. This method is known to produce strong and beautiful clay works; hence, it is used by amateur and professional craftsmen. Various types of clay coiling techniques can be used. Each of the methods is equally efficient and comes with a commendable effect. Are you aware of all the clay coiling techniques? If not, let this article be your savior! Keep reading it to learn about the different types of clay coiling techniques with complete precision.
What are the Best Clay Coiling Techniques?
Here’s a list of techniques used for clay coiling:
1. Simple coiling
Simple coiling is one of the most convenient coil pottery techniques to build your clay work. In this technique, you must consecutively put clay coil rings on each other to give your desired shape. Depending on your requirements, you can increase the layering as much as you want. The procedure for this technique is simple.
First, prepare a simple base for the clay work. Next, knead the clay as required and form small portions. Once the portions are derived, roll them up, forming clay coils. You can slip and score your clay surfaces using modeling tools to increase the adhesion. Finally, finish by placing each coil on the other and gently blending the clay ends with your thumb.
2. Patterned Coiling
After simple coiling, patterned coiling is a prevalent clay coiling technique used by artisans worldwide to form mind-blowing clay creatures. In this type of clay coiling technique, beautiful and intricate designs are created on the outer surface of the clay pots, along with simple clay coils.
For this technique, first, you must form the pot’s base. Form a strong base using at least 6 clay coils to prevent it from breaking off. After that, take the rest of the kneaded clay and start forming small designs that you will need to blend in at the outer surface of the pot on top of the previously placed clay coils. Use the slip and score procedure to ensure none of the designs break off. You can also use your thumb to blend the designs.
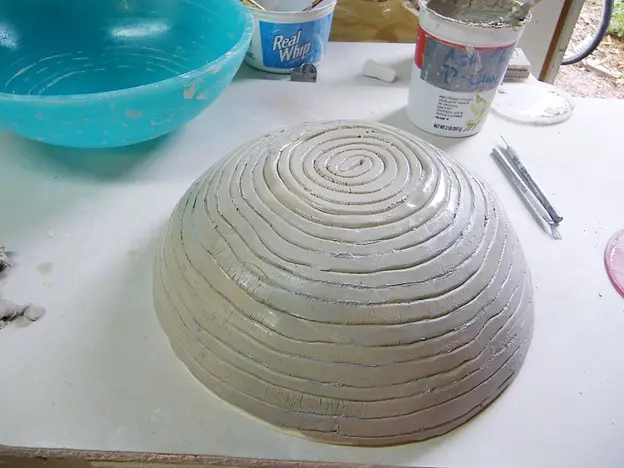
3. Coil Bowl Designing
It is another widely used clay coiling technique used to make clay bowls. The design in this method can be done either by clay molds or directly by hand. However, this technique can even be implemented to give any pottery work an appealing shape.
Use a bowl of any size and mold the clay on it accordingly. Place clay coils on the clay mold or bowl according to your preference. You can create designs such as dots, swirls, coils, etc. Place them one by one, starting from the base, and once the design is complete, put another layer of clay on the bowl, covering the designs from the outside. Blend out the clay evenly using pottery tools and then wrap a saran wrap firmly around it. Once everything has dried up, remove the saran wrap and paint your bowl as you wish!
4. Smooth Coil Pottery
Smooth coil pottery is a beautiful clay coiling technique that can make attractive clay creations. Being incredibly easy to build, if you want to try out any of the clay coiling techniques, you can readily resort to trying it out.
For this technique, first, take an adequate portion of well-kneaded clay. Carve out a slab of clay and transform it into the base of the clay pot. Next, take clay coils and place them consecutively. However, here lies the twist. Unlike other techniques, you must smooth out all the coils in this procedure using a rubber rib. Follow this method until you have achieved the desired shape for your clay pot. For finishing touches, you can make designs for the neck of the pot.
Conclusion
Which one of the clay coiling techniques you liked the most? If you are willing to create clay creations, use any of the clay coiling techniques mentioned above to impart them with an irresistibly appealing outlook. However, use the perfect clay modeling tool kits for the best results. You can try out the Blisstime Pottery Carving Tool Kit, one of the best clay modeling tool kits you can ever buy!


