You know how to throw pottery based on another post, but what about other types of creation? Throwing is just one of the many types, and for some beginners, it might be easier to work with other means. This post will discuss how to create clay forms in other ways, and the steps that you need in order to create this. You’ll know how to do this immediately, and it’ll make your pottery creation all the better.
Slab Pots
Slab pots are another type of pot that you can try out. This forms slabs in the following ways:
-
Rolling out the clay
-
Stretching it
-
Cutting it
-
Pressing it
And from here, you’ll join this together in order to create various sculptures that work for your pottery endeavors.
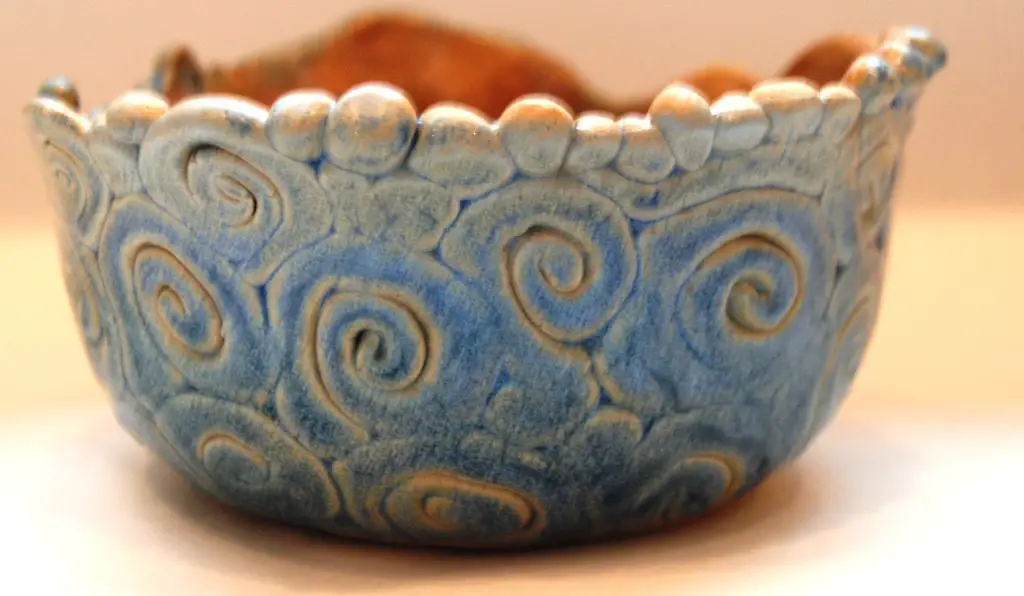
Slab building is often done when you want to make something intricate that you normally can’t do with a potter’s wheel or if it’s hard to do with any other means. It’s a way to make pottery that was used a lot by pre-Columbian potters in Mesoamerica, and these did play a part in the eventual evolution of other vessels.
Typically, it’s a means these days to create different pieces that are both soft and stiff, commingling these two things together in order to create a beautiful piece.
So how can you make slabs, to begin with, this? well, there are a few ways to do it. You can do it either by:
- Rolling it out
- Using an extruder
- Hand tossing it
You essentially want to create some slabs and make sure that they’re uniform in terms of thickness in a quick manner.
When you toss the clay, you’re essentially doing it at an angle, and you can create a slab that’s nowhere near as even in terms of thickness. This is something that potters like to do when they want to give something a more handmade feel t the creation at hand.
To construct these slabs, you want to make sure that the slabs are still damp, so make sure that they’re rolled out and do have some dampness to them. From there, you can use it with different molds, including:
-
Slump Molds
-
Drape molds
-
Incorporated into other pieces after they’re hard
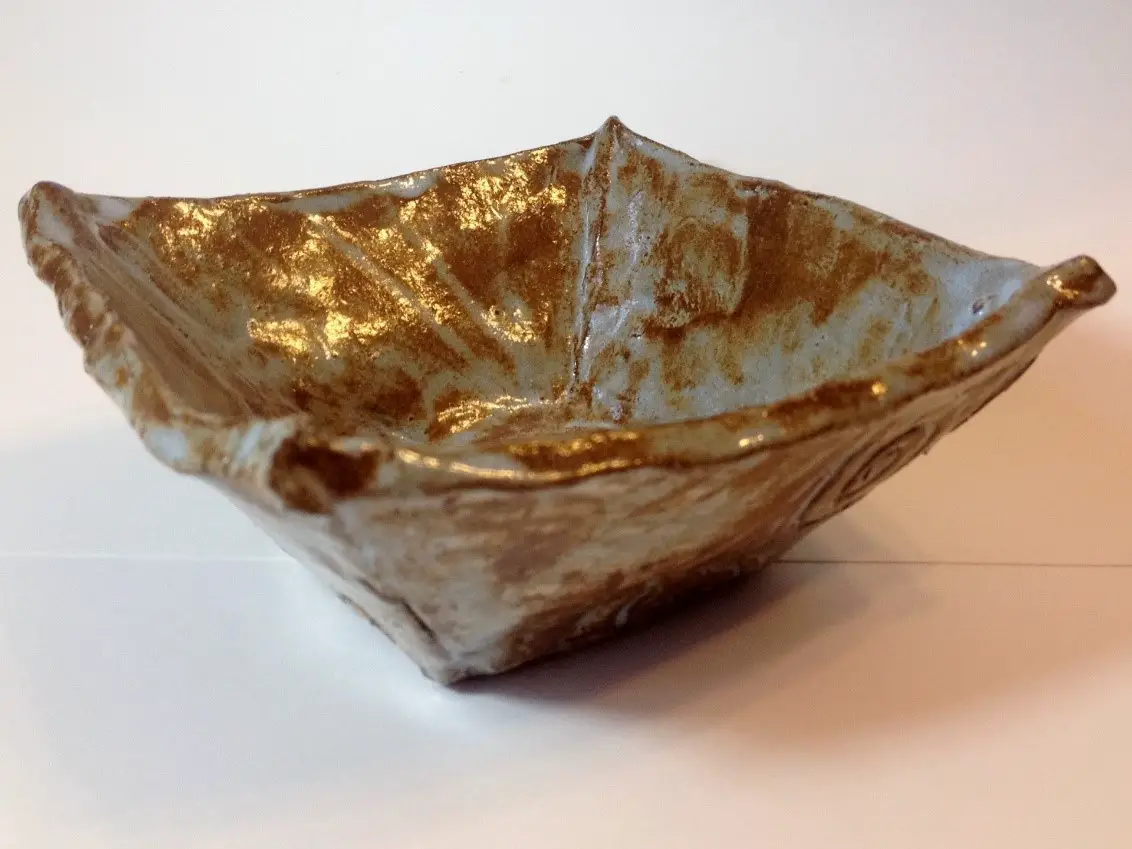
You essentially can create what you want to create, but you might realize that you have a leathery texture to it. but, with these, if you do decide to use a mold, you can work with the textures, firing effects, and decorations instead.
You can also use the drop technique, where you put the slab over a mold of your choice, and from there you can put the frame on a supporting board, and then put it n the floor. It will create a huge impact, a bang, and from there, you can shape this into a certain texture without having to touch this.
Now, with a stiff slab, you’re working towards the architectural forms instead. You essentially roll it out, and then let it sit before it’s cut and jointed.
You can merge these with different components, including:
-
Hard leather clay components
-
Stiffened slump molds
-
Thrown components
-
Pinched components
If you want to use a soft slab for example in the opening of a slab pot, you can use that to create the lid for a pot. You can use this as well for creating various textures at the bottom of pots to create “feet” of sorts.
In essence, this form of pottery is much more creative than just throwing something on a wheel, and you can basically try what you want before you fire the pottery.
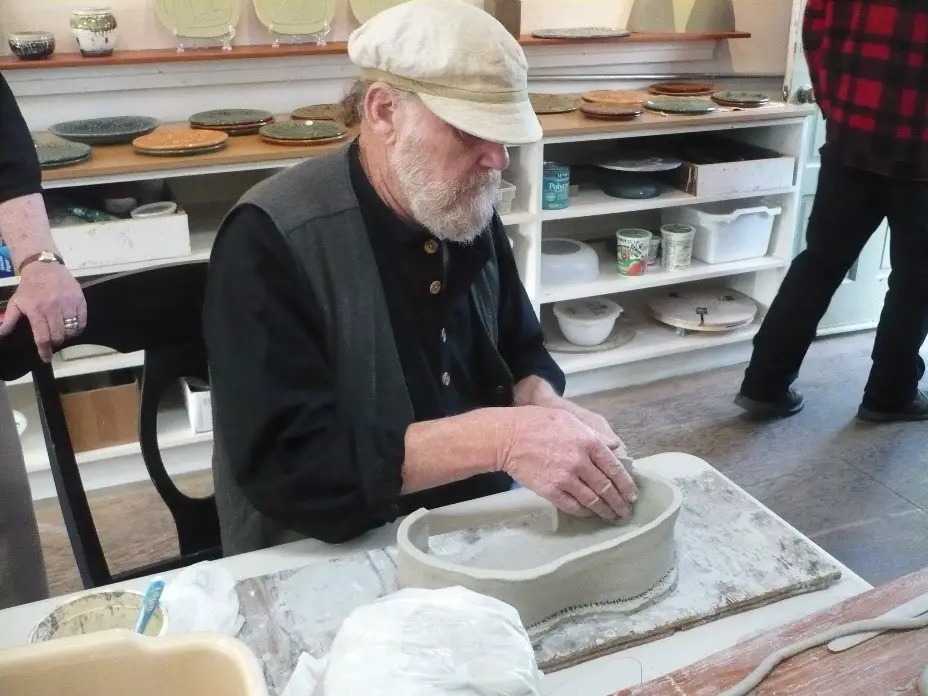
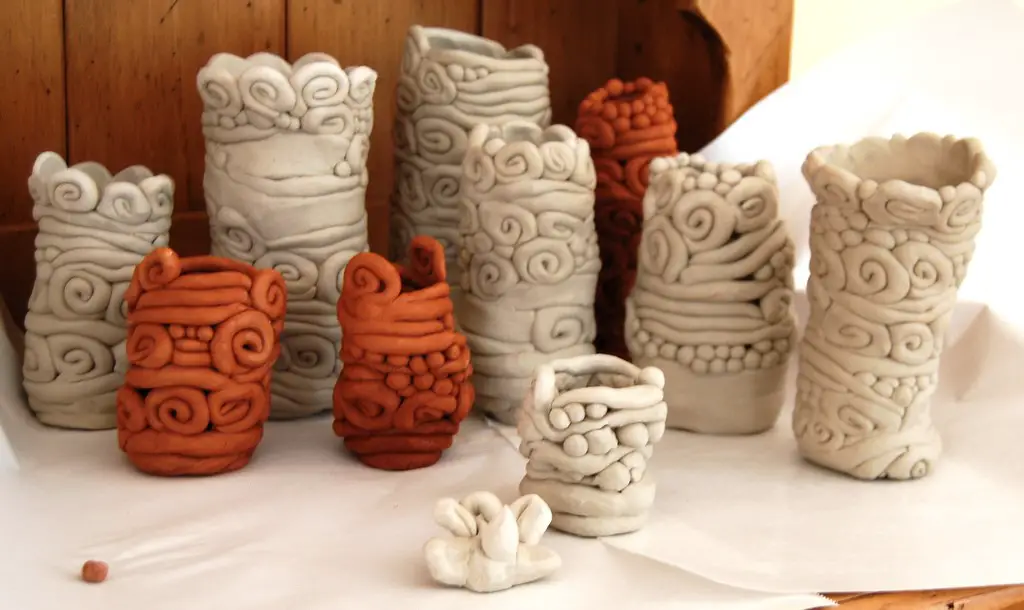
Coil Pots
Coil pots are another type of pottery. These involve coils, and they’re made in the following ways:
-
By being rolled
-
Cut out
-
Extruded
-
Formed together
From here, you put these on top of one another to create walls on pot designs with this type of pottery, I might not be used necessarily to hold liquids, but it does make a very pretty piece.
Before you begin with this, you’ll need to make sure that the clay is aptly matched to the form that you’re using. The walls will be thick, so you need something that’s strong, and allows for expansion.
You want to look for clay with the following before you begin this:
-
Has sand in it
-
Has grog in it
-
Has a shrinkage rate of about 8% or lower
-
Soft inconsistency
-
It’s wedged before you begin with this.
Now the first thing that you want to do is to flatten the clay to a thickness of about ¼ of an inch. You should use either a slab roller or a rolling pin at this point.
From here, you also want to consider dimensions as well. You will probably want a bottom that’s larger than the diameter of the pot itself so that you can trim it down later on. It’s better to go too big than too small.
Once that’s done, you should make sure that you have it on a surface that doesn’t stick, and you can use a disc of clay that’s bisque to hold it there. Now for the coils, you want to make sure that you prepare them by hand.
There are a few things that you should know before you start with this:
- Make sure they’re wet
- Keep the coils that are finished in plastic to prevent drying out
- You can do this either by hand or with an extruder
Now, the next part of this is the coiling, which is actually quite fun and almost addictive once you begin with this.
You will be able to make these into coils or patties.
You should try to work on a surface that allows you to work a bit faster and easier because it can be tedious. Some great surfaces for this are:
-
A kick wheel
-
A turntable
-
A banding wheel
You essentially are taking the coil and beginning on the top part of the floor of the pot. Don’t begin with the sides of the pot, since it actually will make it much weaker if you do begin with it, and is susceptible to breakage.
You want to take the coil that you’ve first rolled, and from there, stick it, and put it around. You’ll realize when you finish this up that it’s probably way too big for the pot itself, and you’ve got excess. That’s not a problem, and you can simply just trim off the extra slab and you can from here take the outer part of the slab and from there weld it directly into the coil itself. You should feel this surface before you continue to ensure that you have a binding that’s strong enough for the pot.
When you finish cutting the coils, you can pinch them onto the inside of the pot. You will see little thumb or handprint marks on the bottom there. If you pinch this into the slab, you’ll be able to hold it firmly together.
If you want to really ensure that it’s all together, you can push it on the outside as well.
From there, you simply stack the coils on top of one another in a similar fashion. You will want to make sure that it is welded together on the wall. That’s because it will help to create a super-strong joint. You’ll want to move the thumb on the inner surface downwards, with the fingers on the outgoing up.
If the clay is stiffened, you should score it, blush on the slip, and then put the row down and from there, weld it.
You’ll notice that once it’s all welded, it’ll expand a lot. The coils should always be made thicker than what the wall will be at the end of it. You should keep the smaller pots to about 1-inch diameter, with the later ones around 1.5 inches.
So how do you make the outside wall smooth? Well, you can grab the rib. A rib is pretty easy to use, and you just have to do the following:
-
Put on the coil
-
Pinch it
-
Smooth it
You should make sure when you do this that one hand is on the clay and supporting it so that you’re able to keep it even.
From here, you just keep adding layers. You should put up to three at once before you smooth it. When cutting the coil, make sure that the cut is different from where the location of the joint is, since it’ll end up messing up the strength of the joints on the pot.
Here are a few things to also keep in mind when you’re using coils:
-
If you go outwards, make the coils shorter
-
Always only go up to three before you smooth it out
-
You can vary the smoothness if you want to if that’s what you feel like would look cool
-
If you’re going to take a break, cover your work
-
If you’re going to continue working on a piece, you should put some paper towels against the top row before you cover this, but if you want the bottom to become slightly stiff, leave a gap. You should tuck the plastic if you don’t want this.
Now, if you’re near the end of this with the rim, you want to essentially choose one of two ways to finish it off. They are:
- Smooth
- Not smooth
You should check if the rim can hold the weight of the pot before you do this. If you’re working with a big pot, you should let it sit for a bit to set. From there, you should make sure that the next coil is from there slip and scored to the pot that you have created.
You can create a design that best befits the pot at this point, and if you’re worried about the wall not being strong enough, use a paddle and lightly tap it. From there, you want to loosely cover the pot in order to dry it before you begin to bisque this.
Now, if you’re considering moving the wall in an inward fashion, the coils will need to go to the inner surface at the top row. You should make sure that the top of the coil is inward, and the inner side is downward.

You should make sure that the rim isn’t too thin, and if it is, put another coil on there and weld it.
You can essentially take your time and work with this, and you can also use the paddle to further shape it too before you glaze and fire. You can choose what you want to do with this, and take your time with adjusting the creation as see fit to your liking.
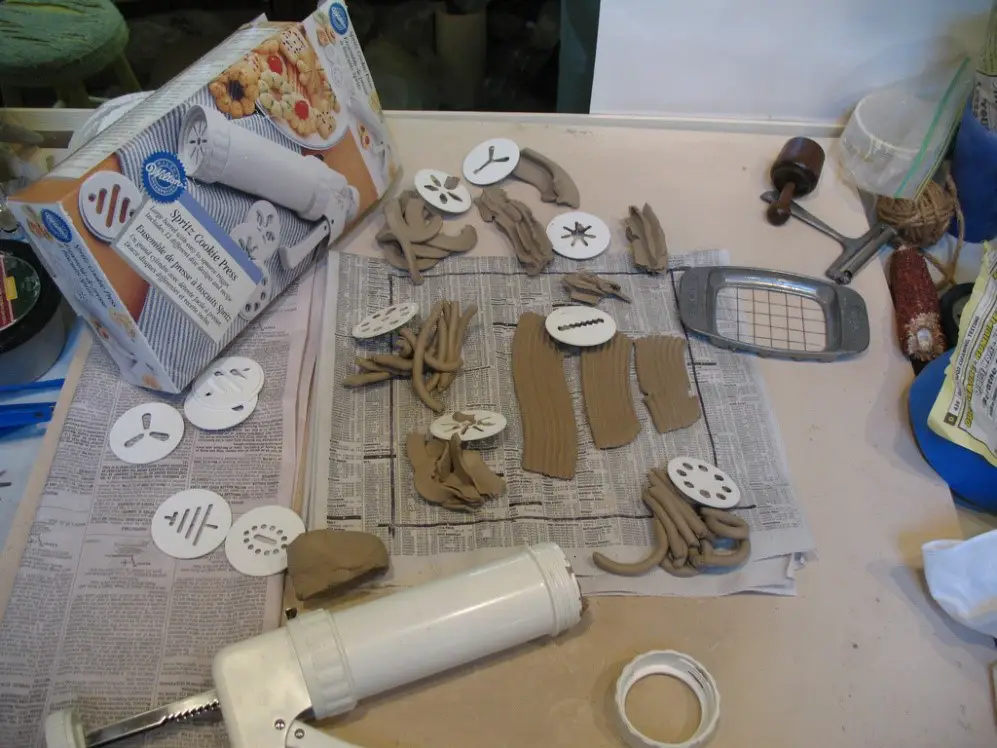
Extruding Pots
Finally, we have extrusion, which is a means that can be used in essence to help create these types of forms if you want this.
You can use extrusion in the form of coils as mentioned before, or you can use it with other various forms in order to do the following:
-
Create a top to the pot
-
Create appendages to the pot
-
Create handles for the pot
With this, you’re using something called an extruder, which makes using the clay to create different forms much more rewarding. An extruder is a great tool, and something worth investing in, and this section will talk about a few tips to help you create extrusions for your pots.
Now, before you begin to do this, you want to make sure that the extruder is put together, and you have the clay prepared.
When you use the clay through this, there are two things you want to keep in mind:
-
That it’s moist
-
That it’s wedged correctly
The results can vary greatly depending on the characteristics of these clays. Some are better suited than others. The general rule is that if it works well on the pottery wheel, it’ll work in the extruder. You don’t want it to be too stiff, especially since you’ll be the one having to push the clay through the die.
Now, extruding can be messy, so it definitely does involve preparing correctly. Plus, if you need to change the die on the extruder to work on something else, you’ll want to reduce the time that you need to use when scraping this. It’s definitely quite important to make sure that you know how to clean this thing.
So what’s the best way to use the extruder: well, you do the following:
-
Wrap your clay in plastic, making sure it’s moist.
-
Cut a hole into this right in the middle
-
Put it through the extruder barrel
You can use the thin plastic for covering pots, and from there you’ll be able to put the clay through the extruder, and once you finish that, you can take the clay out.
If you’re done with using this, you basically just have to do the following:
-
Take the die out from the bottom end
-
Press the rest o the clay out of the bottom
-
It’ll come out, still wrapped, and from there you can unwrap it, and then from there you can throw it into the most area to use it again
It’s a way to make sure that you also don’t contaminate clay as well, and you don’t have to worry about clay showing up.
Now, once you finish with the extrusion and the clay, you can from there, take the pieces that you have and trim them to your own personal liking. You should keep in mind what you need, and from there, you want to take the bowl, pot, or whatever you’re making, and from there, firmly press this into the sides of the pottery that you’re working with.
If you’re going to extrude the clay and you have a working piece, cover it so that the piece doesn’t dry out. You want the cay to be the most when you work with this, or else it won’t stick to the sides very well. You should make sure that everything is nice and moist, and from there, press the extrusion piece to the sides of the clay. You want to edge this, and make sure that it is firmly together. You will want to press in, but not hard enough that it destroys the sides, and from there trim off any excess that you need. You can definitely from there, work on the other side and create the handle.
Now, if you’re struggling with the extruder, you’ll want to practice. This is a new sort of tool, and it requires a lot of practice to begin with this.
If you’re doing this alone, you should make sure that you use your chest to press this, and you should press the handle with this so that you can use your hands to guide the clay when you extrude this.
If you’re trying to use a square extruder, you’ll want to use a little bit of pressure on the sides, and you’ll form here, lightly flatting the wall for extrusion. You should put the other boards on each hand, and from there, straighten up the extrusion from the other sides by squeezing this. You essentially want to work on flatting this until everything is clear.
So with extrusions, can you combine them with slabs as well? the answer is yes. Lots of times, potters like to combine the two of them in order to create the following:
-
Coiled pots
-
Coiled casserole dishes
-
Coiled vases and pottery
With extruders, the best thing to do is to play around with all of them. They do take a bit of time to master all of the dies, since you can do everything from creating coils to squares, to even having hollows created with them. You should work to try out all of these different ways, and from there, you can create the pottery of your choice quickly, and without fail.
This post discussed a few of the different ways to create pottery that you will enjoy. The best thing to do is to work with it and try to discover which different ways work for you. You never know, and you might end up finding a great piece to work with, and something that can completely change the way that you build your pottery.
If You Enjoyed This Article Please Share and Pin it. It is Greatly Appreciated. 🙂


