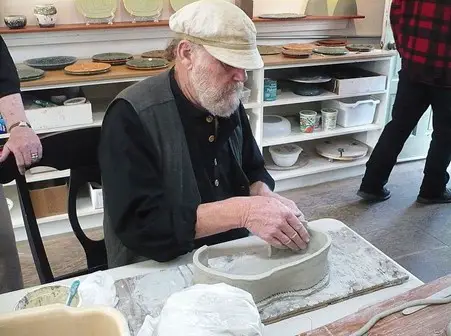
Nothing can be more fun than pottery building, as it comes with various techniques that are enticing to unleash. When we think about pottery building, the first image of the technique that comes to our mind is pottery’s wheel building technique. But the reality is, there is no limit to methods for pottery building despite wheel throwing.
Slab pottery building is one of those fantastic pottery building techniques, which is quite popular among potters due to its ease of building and creating unique shapes. If you are a beginner in the world of pottery building, then starting with the slab pottery technique will be an easier one for you.
Here we will discuss the basics of the slab pottery building, which you can follow to finish off with a master-piece. So, let’s start with it, without buzzing around anymore.
What is the slab building technique in pottery?
The slab pottery technique refers to the one where you need to start with smooth slabs of clay to form the various pottery shapes through molding. The slab technique includes the rolling out of the clay to achieve an even thickness all over. Then the process proceeds by cutting the shapes, and folding of the clay slab. The technique also includes bending and manipulating the clay to join the two slabs to get the finely finished end project.
The hand-building technique of the pottery uses the slabs of clay instead of the potter’s wheel. Compared to the wheel-building technique, hand-building pottery processing is way easier for a beginner. The uniqueness of the process lies in the creator’s hand artistry with the clay to build the various marvelous shapes.
The history of the slab building technique dates back to the Mesoamerican Pre-Columbian age. Though the slab building technique was not that popular in the old dates, the new age slab building is much more modernized and is in extensive practice among the potters.
The basics of slab building:
Slabs are the base for hand-building pottery. Before starting with the slab pottery building technique, you need to know what a slab is in pottery. What slab is the right one for your project? And how can you make it?
Slabs are made using a variety of processes. The very well-known process for slab building is the method of rolling out the slab through hands using a rolling pin or any rolling equipment.
You can also efficiently process the slabs out of clay using your hand, by tossing it, or with the help of extruders. However, the rolling process using a slab roller is the most convenient one as it provides the clay slab with an even and uniform thickness from everywhere the clay.
Also, you can easily toss the clay against the hard surface from an angle. However, the result is not going to give you a uniform thickness from everywhere. But you can use this technique easily if you want to create a handmade feel with your slabs.
| Slab Construction Type | How is It Made? |
| Soft-slab construction | Soft slab construction uses fresh and slightly damp clay to roll out to prepare the structure. The end structure gets a leathery feel. The soft slabs go better with the slump molds or draping over the hump molds to create various forms. It is useful for creating a more surfaced texture with detailed design, decorations, and firing effects. |
| Stiff slab construction | The stiff slab construction includes rolling out of the clay, and the theme is slowly dried to acquire the leather-hard stage. It offers the best use in architectural and geometric construction. The slab is cut and joined with another slab to create various pottery forms. It is easier to work with the stiff slab clays while joining it with another soft clay as it is less messy. |
How to start with the basics of pottery building with clay slab?
Once you are done gathering the proper knowledge about the clay slabs, you need to proceed with how you can build pottery shapes out of them. Here are the basics of how you can create pottery out of the clay slab step by step. Let’s have a look at how you can build full pottery from a clay slab:
Step 1: Crafting the Foundation Slab:
Developing a solid clay slab is the first step in your slab pottery-making journey. Firstly, take several clay scraps and leave them to dry for about 3 – 4 days. After drying them up, put the remnants of clays into a water-filled jar. Once dissolved, it will form a quick slurry consistency. This way gives much more robustness and boosts efficacy to the joints of your slab by replacing water with slurry clay.
Next, compact the slab and mold the clay into a single, consistent, and well-textured ball. You will want to use an even and flat surface to flatten the ball, and you can use either your palm or a rolling pin. It is aimed at ensuring the uniformity of the layer in slabs. Once done, gently peel the slab away from the surface without haste. You can later lift it with care and place it in the kiln to turn it into your unique creation.
Step 2: Forming the Base for Slab Pottery:
In phase two, you need to create the bottom part of your slab. Use a potter’s needle here to cut the pottery slabs and shape them according to the design you had in mind. For example, if you are targeting the creation of a tiny pot, begin with a square base with a two-inch length by width.
After trimming, smoothen the sides of the cut clay by simply striking it on the table or fat surface area you’re working at. Taking appropriate advantage of the potter’s needle, use it in scoring the top layer of the slab by creating shallow grooves (approximately ¼″ wide and ⅙″ deep) starting from both sides. This detailed scoring helps bond subsequent layers and strengthens the complete workpiece.
By adhering to these detailed steps, you lay the groundwork for a successful venture into slab pottery, where precision and creativity converge to bring your artistic vision to life.
Step 3: Constructing the Slab’s Sides:
Precision is crucial during this significant part of slab production. Start by fixing your clay slab on solid ground and maintain precision as you use a scale and potter’s wheel to turn them into faultless, pristine, straight lines. The process involves identifying areas where trimming should be done to achieve even widths throughout the slab. It would be best to start by cutting off the top section, which will eventually become the outer part of the pot you are making.
Adopting a detailed strategy again, perform the process on the second slab, considering it should be the same size as the first. Begin the process by notching the lower border of the clay slab, making it more robust for consecutive operations. Scoring is making rough marks for joining two clay slabs together before pottery construction. The technique is for enhancing the adhesion of clays to have a strong bond while making potteries.
Score the inside edges of the same slab. Then, take your brush and apply slip to one or both of the scored surfaces after scoring. Slip is a liquid mixture of clay and water that varies in consistency, usually from creamy to watery. The slips act as a glue that keeps the clay parts together. Place a side of an upright slab to the score and brush with the slurry slab so that their connection is stable. Additional measures may be introduced to avoid slumping if it is desired.
Then, make a thin coil and put it inside the corner where your side slab is rooted. Use the blunt side of a wooded instrument to compress and affix the two sides of the slab subsection together. Trim the excess material to refine the structure and the remaining edges into straight lines using a potter’s needle. Individuals can use the S & E TEACHER’S EDITION Double-Sided Pottery & Clay Sculpting Tools for seamless trimming. Accurately mark and cut the slab to ensure a proper fit within the clay interior surface, adjusting it as needed.
Step 4: Affixing the Remaining Sides:
Moving on to the next part, the procedure for securing the other two surfaces has to be carefully done. Start at the bottom edge of one side using a slurry comprising the two aggregates mentioned above. Place it carefully to fit appropriately into a pocket created by the first two slabs.
Provide support for this joint by adding another strategically positioned coil for a strong bond. Select an adequate length of clay to cover the whole area with only a single application. Use the end of a round wooden tool to press the coil into the slab and reinforce it on both sides. Finally, score the last side slab as you did the previous ones for the final slab, and then secure it in the proper place.
The above is the brief outline of making a solid pot from the slabs; this will have structurally correct walls.
Step 5: Perfecting Your Slab Pot:
This step is to be taken with a basis on what kind of resilience and a final touch can be imparted onto the slab pot. Start with strengthening the structural quality of the pot to avoid cracks or breaks. Mix the outer joints on both sides, utilizing a woodcutter to diligently and accurately incise them. One end of the pottery should be anchored to the working surface while the bottom edge is tapped on firm support for a good joint.
Using a potter’s needle, further define the upper slope of your pottery and trim off any unnecessary scrap clay. Ensure the pot is stable by holding it firmly while pressing at appropriate points. Use more slurry paste on top if it does, and smooth out those areas with your finger. Ensure you completely weld, grind, and smooth out all the joints for structural and an excellent final touch.
Step 6: Drying the Slab Pottery:
Wait to fire the pot until it is entirely devoid of any moisture. Once that is ensured, place the pottery in a warm place or one akin to room temperature and allow it to dry out over one or two weeks, periodically touching it to check its warmth. If it is still cool and wet, continue drying until it is scorched.
Dry it slowly and carefully so as not to develop unsightly cracks due to rapid dehydration. For slower and more controlled drying, you may cover the pottery using plastic film, which creates precise drying conditions— followed by beginning the bisque firing process once the pottery gains its final dry stage. The post-bisque firing establishes a platform that allows you to personalize it using differentiated glazing, giving your creation a distinct mark of its characteristic style.
Tools that you are going to need for making slab pottery:
As compared to any other type of pottery, the number of equipment you need to use here is minimal. You are only going to need two or three tools to give your pottery the right shape.
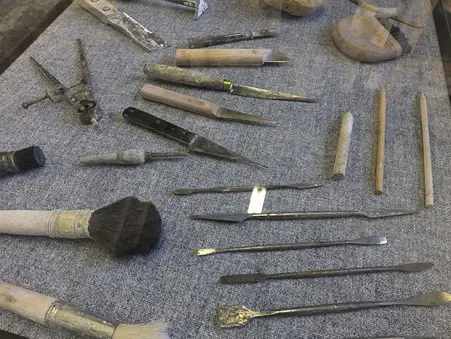
Let’s have a quick look at the tools required for slab pottery:
| Tools | Functions |
| Rolling pin or a slab roller | To achieve the flattened slab with even thickness |
| Potter’s needle | To cut a score on the slab |
| Wooden tool | To blend the joints of the sides |
| Brush | To apply the slurry mixture |
| Scoring tool | To achieve the flattened slab with an even thickness |
Conclusion:
Creating slab pottery is much easier than any other technique of pottery building. All you need to have is a good quality of clay and lots of enthusiasm to give your creativity the shape of reality. Start with building slab pottery to unleash the beautiful ways of pottery building. We hope this article will help you if you are thinking of starting with trying your hands in slab pottery building.


