
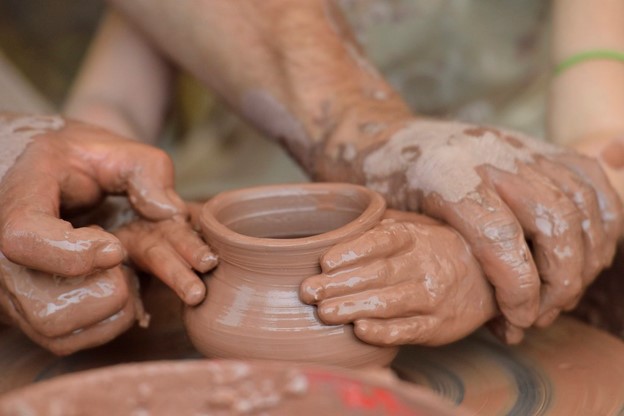
Pottery, as simple as it might look, might not be everyone’s cup of tea. However, with regular practice and the right information by your side, you can learn your way into the world of art. Now, being the best at the art requires you to invest time, patience, and some capital. However, things won’t work your way if you do not select your ingredients the right way. The same rule applies to clay as well.
You don’t necessarily have to stick to every rule but define a guideline that fits your bill while bringing you pottery items that are just as you like.
So, before you hit your pottery wheels, here are some beginner-level pottery mistakes that you need to avoid when using clay. You can learn from these mistakes and rank yourself among the top talented artists in the world of pottery.
Pottery Clay Mistakes: Here is What Might Go Wrong!
1. Failing to Wedge the Clay
One thing most professional potters agree with is the need to wedge the clay properly. Although a tiring task, clay wedging is an unavoidable part of the pottery-making process. Most beginner-level potters haven’t ever done this before.
Most potters simply take the required clay dough, pat it into a ball shape, & then throw the same on their pottery wheel. If you think you can avoid wedging the clay to save some time, it could prove to be counterintuitive. Failing to properly wedge your clay makes it difficult to mold properly. Not only that, you might not even be able to center it properly as you throw.
Clay centering could be a big battle and you might also have to deal with the air pockets. Air pockets tend to throw off your clay from the center making your crafting experience all the more troublesome. In case the clay has a massive air pocket, it would never center given the fact that air tends to be lighter as compared to clay. The best way to move about it is to wedge your clay correctly.
2. Check for Moisture
Before you initiate the clay throwing process, you need to ensure that it has good moisture content. It must not be loaded with hard spots while maintaining a smooth texture throughout. This sure can turn out to be a particularly tedious process. However, it sure is vital to ensure that your pottery piece turns out to be perfect. However, in the long run, this can shorten your pottery construction process.
There would be almost zero glitches when you follow these tips perfectly. Clay that is way too moisture-laden can splatter around during the throwing process. The right balance of moisture is important for crafting an amazing vase, bowl, or anything of your choice.
3. Select the Right Clay
Now that you have wedged your clay and checked the moisture content of the same, it must feel smooth on your hands as you throw it on the wheel. It must in no way feel like rough sandpaper against the hands. This means you are using clay that isn’t right for your pottery piece. Several clay variants can be used to throw. On the other hand, there are clay variants available for hand-building techniques.
Even though you can practically use any clay variant with the pottery wheel, it could be difficult to center or shape them all. Keep in mind, when throwing your clay, you need to feel a smooth texture that glides well as you move your hand around while shaping.
If you feel the shaping process is making you exert a lot of effort, it most likely isn’t the right clay for you.
Clay Type: What Should You Use?
In case you are a starter in the pottery world, it would be best to search for smooth and strong clay that has little or no grog/sand. Clay that has these properties will take a bit longer to properly center. This might not be a bad deal given the fact that it gives you enough time to create the walls of the clay project.
However, clay that is way too soft can collapse faster and won’t create the right base. In case you plan to build by hand, you can make use of more sand or grog in the process. In case you need a suggestion in terms of the best clay, go with the Amaco Moist High-Fire Stoneware Clay. This clay is best for creating durable dishes, planters, sculptures, and so much more. Created from non-toxic and safe materials, this clay is ideal for both hand molding as well as wheel throwing.
Refrain from using clay that houses too much sand or grog during throwing. Although a higher amount of sand or grog would mean that the clay stays up for longer, it would also feel very coarse like sandpaper while hurting your hands.
Here are some clay variants that you need to know about before you pick one for your next project.
Clay Type | Firing Temperature | Ease of Use |
| Kaolin | Close to 3272oF | Difficult |
| Earthenware | 1745 to 2012oF | Easy |
| Stoneware | Mid-Fire (2150 to 2260oF) High-Fire (2200 to 2336oF) | Medium Difficulty |
| Fire Clay | 2696oF | Easy |
| Ball Clay | 2336oF | Difficult due to Shrinkage Issues |
4. Use the Right Amount of Water on your Clay
Keeping the right balance of water in your clay is very crucial when it comes to crafting an amazing piece of pottery. However, this is something most beginner potters go wrong with. In case you are working with clay that is too hard and dry, you cannot center it or mold it as required on the wheel. Even if you do, it is highly likely to crack as you progress in the process.
Alternatively, clay that packs in a lot of water can easily be centered. However, it is just as easy to collapse when you try to pull up the wall. Fortunately, you can easily correct these water issues when working with clay. Ensure that the clay isn’t too soft or too dry.
To introduce more water to your clay, make sure you use a spray bottle. This will help you add in the exact amount of water instead of pouring it all in one go. On the other hand, if you see that your clay has a lot of water, make sure you choose a wedging surface that absorbs excess water from the clay which could either be plaster surface or wood.
If this doesn’t work, you can easily flatten your wet clay and lay the same on wood, drying board, or even plaster. This method might take some time. However, patience always pays. Keep in mind that this process might not work with an overly mushy, soggy, or oversaturated piece of clay.
5. Do Not Press Your Clay Too Hard
When centering your clay, you might feel that the soft clay might need to be pushed hard to give it a shape. However, this might not be something you should try. The issue is when exerting a lot of pressure on the side using the anchor hand; you might throw your clay off-center and even wear out yourself.
Throwing clay shouldn’t be a strenuous task and shouldn’t take off a lot of your energy. Truth be told, you need not put in a whole lot of energy and strength when crafting anything you want. Ensuring the right amount of pressure is necessary. Let your upper body take charge of the situation and ensure that things progress naturally without the need to exert a lot of pressure.
When pulling the wall of your pottery piece, ensure that your fingers aren’t pressing too hard. If you happen to do so, the mold can become uneven way too fast. Your clay can become too thin or wonky on the bottom, top, or even in the middle.
6. Do Not Open Your Clay Too Soon
With pottery, there is no scope for rushing things. This fact is all the more true when you try and open up your clay piece. Most beginner potters tend to have a habit of pushing into the clay way too quickly. This is a major mistake and could be hard to fix.
Pushing the finger into your clay’s center too fast can plunge a hole into the piece which might make the bottom very flimsy and you would have to start over. On the other hand, when you open your clay slowly, the rotation of the wheel works in your favor. This helps create a perfect shape on the inside with balanced clay distribution for your piece’s wall.
Here are certain tips that you must follow in order to be successful with your project:
- Dip the fingers into a pail or bowl of water
- Position the thumbs right onto the clay’s center
- Now, push down slowly on your clay piece & start opening up
- Place the anchor hand towards the clay’s side & push all the way down leaving an inch or two while you continue to open
- Refrain from applying a lot of force
- In case the fingers seem dried up, dip them again in water and keep going
- Continue doing this till you seem to be close to the clay’s bottom
- Always keep the needle tool to measure if you are close to the bottom, do not go too far down
Opening up the clay surely takes a bit of practice. However, once you are done with it, the final work will be exceptional. Keep in mind that professional potters do not mold the clay using force. They allow gravity and rotation to get the job done with a bit of hand and finger movement. Alternatively, you also need to keep in mind the mushroom effect that can create slips for air to get trapped in.
7. Prevent the Cracks as the Clay Dries
You have just crafted a wonderful pottery piece. You take the artwork off the wheel & then set it away to dry. After it has been dried or bisque-fired, you might happen to see a crack or more. If this happens, your heart will probably sink. These cracks might occur anywhere like the rim of the piece, the bottom, or even in the handle joints.
However, these cracks are very tough to fix. So much so, that you might have to create a piece right from the start. However, you can do things to prevent such cracks from happening at all.
Compress the Clay
When making pottery pieces, the first thing you need to do is compress the rim and bottom throughout, even when firing the piece. Whenever you rush this process or neglect the same, you would see an S-shaped crack.
Slow Drying
With clay, the best method for drying is to go slow. Make sure you place the piece on your ware board or drying board to evenly dry it out. For the very first day, you need to cover it with plastic to prevent the formation of cracks.
Wax Resist
In case you see most of the cracks forming in the area where you attach the handles or similar projections onto your piece, the best way to go about it is to brush on the wax resist in the area. This ensures that your clay doesn’t dry out way too fast and prevents any crack formation in the joints.
Doing this ensures that there is minimal chance of cracking and you won’t have to redo your project again from scratch.
Conclusion
Practice and patience are important when you plan to become a renowned potter. Maybe the first time around you might get things right. However, beginner’s luck might not come in handy every time. Following these basic rules and working it on with your experience will ensure that you get the right piece finally with the perfect texture. Remember, pottery can never be learned overnight. You need to give it time to ensure perfection.


