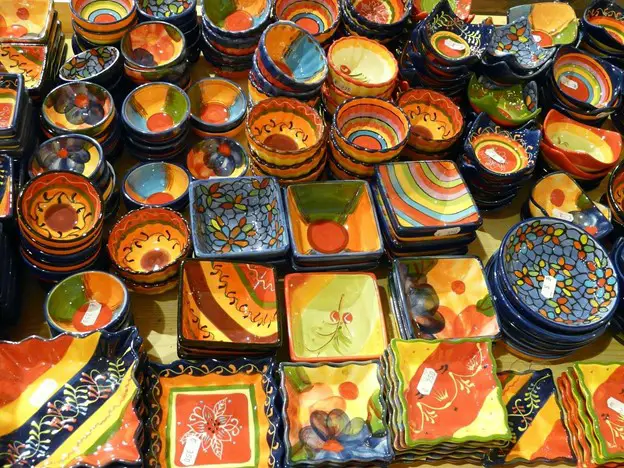
You have shaped up your clay, and now it’s ready to be painted. But what if you do not know how to paint it right? If you think you can do so with traditional paints or painting techniques, then you, my friend, are very wrong. When potters need colorful effects added to their pottery pieces, the need is for unique methods and colors to paint the materials.
Generally, potters tend to colorize their work with the use of important ceramic materials like slips, underglazes, or oxide stains. Post firing, this fuses onto the ceramic clay body and doesn’t flake off as a regular paint would.
However, when not created for being used functionally, like maybe being used as a display art, potters might make do with traditional painting materials. However, it is better to stick with glazes and similar variants to avoid the color coming off way too soon.
So, essentially, the “Number-1 Mistake” you can do when painting the pottery items is using the regular color methods. Pottery is an art for a reason, and every art form comes with its special set of techniques that you cannot escape but learn.
The methods used for painting clay or ceramic art include:
- Slips
- Glazes
- Underglazes
- Oxide Stains
- Fingernail Polish or Acrylic Paint
So, let us check out all these painting techniques before you commit your very first pottery painting mistake.
1-Underglazes:
Underglaze is a special technique that helps you achieve a coloring effect that is similar to watercolor on your pottery pieces. To achieve this effect, the underglaze needs to be thin enough & must have enough colorant within it to take out any fading issues.
If you want to achieve the best effects, you can go for the Sax True Flow Set of Underglaze Assorted Colors. This coloring and glazing liquid has an opaque and concentrated texture that can readily be used on greenware, clay, or bisque.
To achieve an acrylic-like effect, you could go with a liquid underglaze or work with the help of a heavier painting style that adds a lot of underglaze onto the surface of the clay. When using the liquid underglazes, you need to cover the clay in layers. This is due to the consistency that doesn’t come through in terms of colors until you add in at least 3-4 layers.
Keep in mind that dark colors would bleed through the overlying layers, although they might not be visible before firing.
2-Slips:
Another way to color your pottery work is to make use of slip. This slip is a liquefied clay particle suspension made in combination with water which is used for coloring clay pottery before firing. For the purpose of coloring, you can either use white slips to achieve a clear effect or make use of colored slips that are tinted with the use of oxides.
Slips are commonly used and provide the best results with greenware. When it comes to coloring with slips, there are several advantages to it which include:
- Painting with slips makes it easy to completely clean off the mistakes and start fresh
- Slip painting is suited to match the shrinkage in clay that happens after firing. This means you won’t have to worry about the heavier applications that pop off during the firing or drying process.
- Given the fact that slip paintings tend to get bisque with the pottery, you can also add additional underglaze colors in order to strengthen its overall visual impact. It can help further define your pottery’s look with brighter and vivid colors.
3-Oxide Stains:
The oxide stains serve as a wonderful option for painting the flower lines and also for implementing broad chunks of colors to the pottery item. With oxide stains, you do get an option to use the commercially manufactured stains that often make use of fritted materials that make it safer to use as well as chemically stable.
Alternatively, you can simply use the earth oxides in combination with water to create good color coverage. However, you will have to determine what colors go with which type of clay to get better output. Keep in mind that certain oxides tend to be fickle in nature and might change their color dramatically if there are any other elements present in the glazing liquid with coloring properties. A good example of this is chrome oxide which is mostly green in color post glazing and firing. However, in case there is even a slight amount of tin present in your glaze, it might turn pink post-firing.
4-Glazes:
The glaze is a classic painting item and has been used for coloring ceramics for years. This is termed a glaze-on-glaze painting technique. It is mostly seen in the traditional majolica techniques. However, one issue with glazing is the fact that it is highly likely to liquefy and flow while it melts during the process of firing. This could lead to the designs sagging, and it might become indistinct around the edges. Not just that, it might so happen that the underlying glaze might completely disappear.
5-Fingernail Polish or Acrylic Paint:
If you aren’t creating a pottery piece for functional usage, you aren’t limited when it comes to painting your piece. As a pottery artist, you can make use of traditional painting techniques with no worries about the paint coming off after being used every now and then.
However, when painting with the regular coloring options, make sure you keep it in a place that is away from water or an outdoor area. This can lead to water or moisture exposure that would eventually cause peeling or flaking off colors from the finished piece.
Two types of non-ceramic materials are used for painting these variants of pottery items. The most popularly used painting item is acrylic paint. However, you can also make use of fingernail polish that creates an equally effective result. Unlike other techniques used for painting, both of these materials come with the added advantage of non-water solubility post drying.
Apart from being rendered unusable in terms of functionality, making use of fingernail polish or acrylic paint comes with another drawback. It can visually compromise or flatten the surface of the clay they tend to cover. Moreover, it could be particularly tough to integrate all these materials visually, even with the ceramic or clay craft.
Mistakes You Might Make in the Pottery Painting Process
There are several mistakes you can be guilty of making when you partake in the pottery painting process. Some of them are explained below:
-
Using Lead-Based Glazes:
If you plan to make use of your pottery for the purpose of eating or drinking, the key is to make use of lead-free painting glazes and not the ones that pack in the harmful lead. The market is loaded with a range of color & effect-specific glazes that is free of lead and satisfies your coloring needs.
These glazes contain the least amount of elements, such as lead making your pottery art safe for drinking and eating purposes. Most potters make use of this particular glaze variant when crafting things such as dinner wares.
-
Fritter Lead Earthenware Glaze:
This particular variant of glaze consists of a large amount of red or white lead that could be toxic when used for the coloring of dinnerware. The use case of this type of coloring glaze is mostly for the decoration & coating of flower vases.
On the other hand, some companies might use the lead bi-silicate-based frit that serves as a combo of different materials that are melted together. This makes it insoluble & resistant to any type of acid attack. This renders the red or white lead anoxic.
-
Mid-Fire Glazes or Stoneware:
This type of glazes tends to be particularly constant under reducing as well as dissolving conditions. Using these glazes, a variety of properties and colors can be obtained for the stippled bodies. Most of these glazes can be intermixed while allowing the potters to indulge in techniques such as double-dipping, pouring, mottling, or double painting, where you coat one glaze type over another.
-
Raku Glazes:
This particular glazing or coloring style is predominant in the Raku firing method. This Japanese pottery technique was mostly used in Japan’s tea ceremonies. However, today this method has reached far and wide. This type of coloring technique requires the potters to fire at a very low temperature. After the piece is taken out of the firing kiln, it is then cooled in the open air, where the actual color surfaces as it cools down.
Raku Glazes & Colors
Glaze Number |
Color |
| 850 | Raku Clear |
| 851 | Raku White |
| 852 | Torquoise |
| 853 | Cobalt Blue |
| 854 | Celadon |
| 855 | Emerald |
| 856 | Muddy Waters |
| 860 | Flash |
| 861 | Metallic Flash |
| 862 | Galaxy |
| 863 | Nebula |
| 864 | Sunspot |
| 865 | Mars |
| 866 | Deep Space |
| 868 | Gator Skin |
| 870 | Starry Night |
| 871 | Raku Yellow |
| 872 | Raku Orange |
| 873 | Raku Red |
| 874 | Metallic Lime |
| 875 | Algae Bloom |
| 877 | Kodiak |
| 878 | Cosmic Copper |
| 879 | Dune |
Painting Pottery: What Not To Do With Glazes?
Now that we have established the basics, you need to keep in mind the fact that there are multiple mistakes that would only surface after you have fired the piece, and then, there is no going back. So, here are some things that you would need to avoid.
1-Do Not Use Glazes with Higher Expansion Ratio than Your Clay Body:
Also known as crazing, this is a common coloring mistake you can do when painting pottery for the very first time. However, truth be told, it is fairly easy to clarify as well. If you have ever come across a pottery piece that has cracks all over it post-firing, it means that your glaze has a higher expansion ratio as compared to the clay body.
If you want to detect the same before the firing process, is to simply breathe on your piece & fog the glazed surface. You can correct this by reducing these differences in coefficient. Alternatively, you can also add a readily available expansion material like that of silica to your existing glaze. This helps reduce the overall expansion difference.
The vice-versa, known as shivering, is also true. If you happen to use a glaze with a lower expansion ratio, there will also be cracking issues seen. Ultimately, it is a mismatch mistake that requires silica reduction in order to avoid lower expansion issues.
2-Use of Excessive Amount of Powdery Glaze:
This particular issue is known as crawling and usually happens with most beginners and sometimes with experienced potters as well. Crawling generally occurs when your coloring glaze has a heavy buildup in certain corners & has zero flow in others. This is all due to the high surface pressure that occurs due to the glaze melting process.
Most of the time, crawling occurs due to the adhesion problem that happens because of bad glaze application. Also, when the glaze is very powdery, it might fail to attach itself to the clay surface, making crawling unavoidable.
Crawling is mostly common with powdery or matt glazes as compared to liquid glazes. Crawling is also a possibility when one coloring glaze is put on another. This is especially true when the base glaze dries out before you apply the 2nd glaze. In simple words, you can avoid this by putting on your underglaze on top of another before the base one dies out.
3-Excessive Use of Glaze:
The excessive use of glaze can result in an issue known as blisters. These blisters tend to look the same as little craters. These craters are mostly 0.5cm or smaller in diameter. Apart from excessive use of glaze, insufficient drying of the glazes piece might cause a chunk of blisters occurring on the surface. Also, if the air is trapped within your pottery piece, you can see blisters post-firing.
The fluxes that might cause this issue are boric acid, potassium carbonate, borax, magnesium sulfate, or sodium carbonate. Replacing these items could be the key to getting rid of craters.
Other Issues That Occur During Glaze Painting
Apart from the prime issues mentioned above, you might also experience pin-holing that occurs when you haven’t mixed your glaze properly or when the firing temperature isn’t controlled properly. Another issue is settling out which surfaces due to improper glaze mixing or when using a glaze that is infected with bacteria.
Pottery Problems & Reasons
Pottery Painting Problems |
Reasons |
| Shivering | Using a coloring glaze with lower expansion as compared to the clay body |
| Crazing | Using a coloring glaze with higher expansion as compared to the clay body |
| Crawling | Drying out of underglaze before the application of overglaze or using additional powdery glaze |
| Pin-Holing | Making use of glaze that isn’t mixed well or a firing process that is badly controlled |
| Blisters | Occurs due to excessive glaze application or incomplete preparation of clay |
| Settling-Out | Occurs due to improper glaze mixing or using bacteria-infected coloring glaze |
Conclusion
As a pottery enthusiast, remember coloring is an art that requires practice and only corrects with time. You need to understand that each process in pottery crafting, be it throwing, shaping, or firing has an impact on how well your paint turns out in the end.


