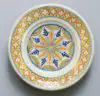
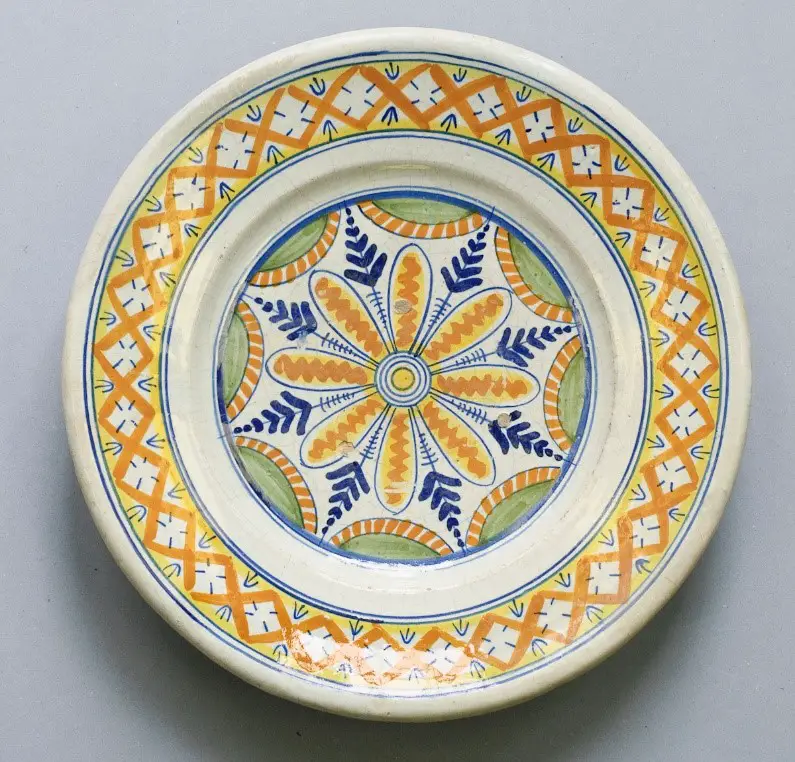
You may have seen this intricate design on various plates and the like with flowers, other decorative elements, and the like. You may have noticed that most of these tend to have a white background. Well, this type of pottery is very popular when working with earthenware clay bodies, and it’s called majolica pottery. But, what’s so special about this? What does majolica pottery entail? How do you do it? Well, you’re about to find out. This post will discuss majolica pottery in its entirety, various ways to truly give you the results that you want to get, and the different means to really make it so that you’re able to create the pottery that you want.
History of Majolica
Majolica is quite a rich pottery in terms of history. It’s typically associated with three different areas, and they are:
- Spain
- Italy
- Mexico
Typically, this is a very popular one still to this day, and it was widely created in America and in Europe during the second half of the 1800s, but it’s actually been around during the Renaissance.
This is actually a sign of wealth. During the Renaissance, this actually signified affluence, and great taste as well. Typically, these were used for the following celebrations:
- Weddings
- Engagements
- Births
- Anything major that changed a person’s life
- Any time you wanted to signify wealth
The early process of this is actually quite different. In the early making of these types of pottery, you would use either tin or lead enamel on a piece of earthenware that’s fired, and then, it would create an opaque, porous surface, and then a design was created on there again.
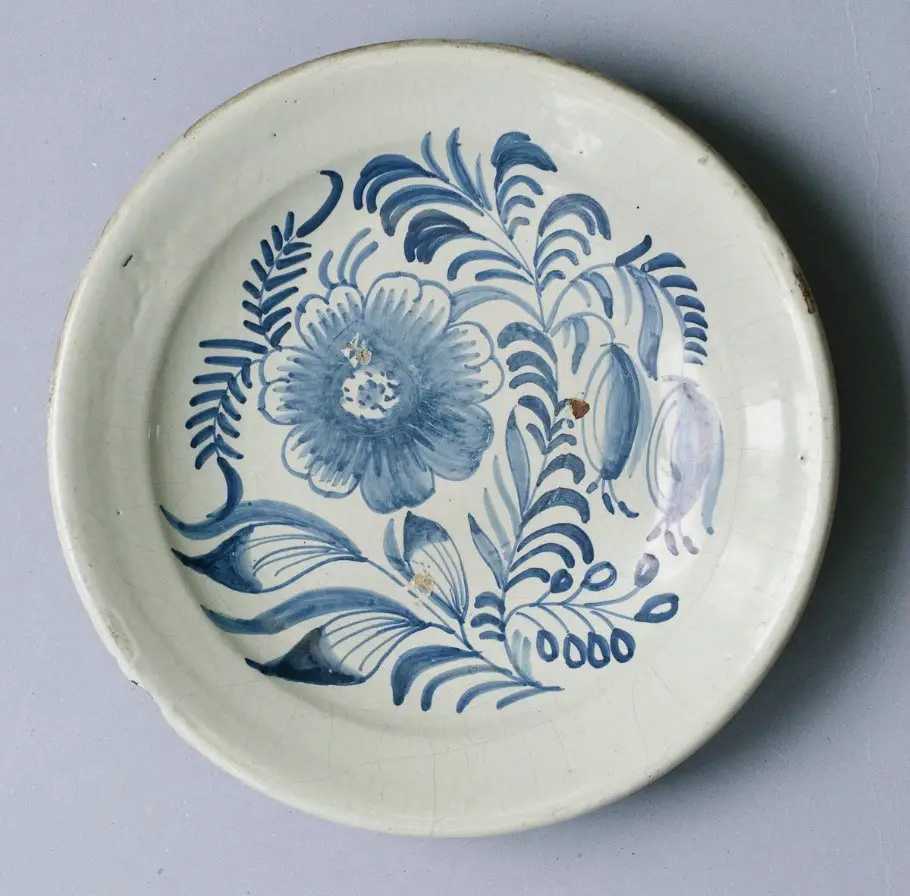
Typically, you saw flora and fauna on these, and then, you’d put a coating on top of this and then it would be fired once again. In the Renaissance, lots of times this type of firing was quite different, and the same went for glazes. We’ll discuss how you can do this later on.
Now, most of the time, the items that were made from this were quite funny. Nowadays, it’s commonly seen in various plates and such, but it actually can be used to decorate and make the following:
- Teapots, smoking paraphernalia including match holders and ashtrays
- Tobacco Jars
- Butter Pats
- Mugs
- Dinnerware
- Platters
- Oyster plates
- Cuspidors
- Figurals
You actually saw this a lot in the various dessert sets that are out there, and it definitely does make quite a nice design for it.
Typically, the reason why they used tin-lead glazes was that of the fact that it was mostly what was available. But, Majolica potters were the ones who originated all of this.
How it Was Exported
Typically, the wares when they first began had a muster overglaze that was actually put into place when the Moors invaded the Spanish peninsula during the 700s. This was what was typically in a lot of pieces during this point, and that’s how a lot of potters on the island themselves managed to make these. However, it referred to different elements during the 15th century, and they were:
- The lusterware itself
- The tin-lead glaze ware that was produced on the island or reminded it of it
Majolica was also something that was used in the Middle East, spanning as far as Iran and other areas that were popular during that time.
Renaissance ware
Now, we said that it was popular in the Renaissance times, but it was originally dated all the way back to the 14th century and popularized during the mid-15th, typically by the Spanish. This is because it was created on the Spanish island called Majorca, and from there, it soon traveled to Italy and was a key part of the Renaissance.
The way it was typically exported to Italy was in the form of two different wares, and they were:
- Faience
- Delftware
These were offshoots that were typically given to Italy, and they were very similar to the tin-glazed type that was actually seen in Majolica. The faience wares were made in Faenza and the Delft wares were produced in the town of Delft. These had a different sort of look when you compared these to the visuals that were seen in the Mediterranean version.
The key visual differences were the following:
The Majolica counterparts weren’t made with these same features, so they were a little bit darker, and that was the key, defining the feature that typically is used with this
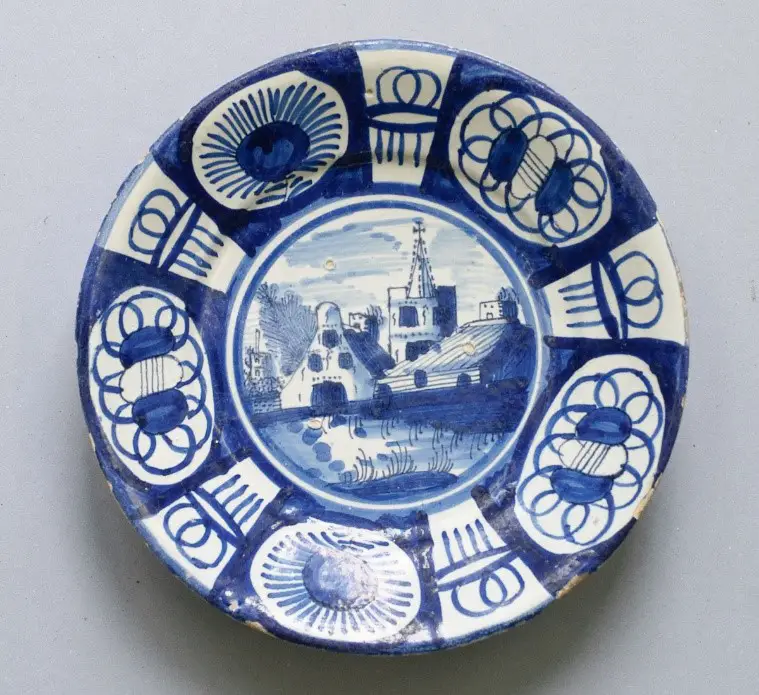
There was also another name for these as well, and this came about when it was soon created in the Netherlands during the 16th century, and that was istoriato wares, which means that they were painted with stories, and that’s because often, these were painted with a bunch of characters that were seen to incorporate a story, giving it a different visual flare.
From there, it soon made its way to Europe and the Americas, and it debuted at the Philadelphia Centennial Exhibition in 1876.
Created from a Mold
Now, when it came to the Americas, the way that it was made was changed. It typically was made from a mold, and this was because of the following:
- More intricate patterns could be made
- Which made them more desirable
- It was easier to create raised decorations with this
However, due to it being made from a mold, it fell away from popular pottery fashion during the 1900s, at least in the first half of the century, but, it made a comeback in the 1960s, and because of this, it actually created some more interesting designs. It also caused various reproductions.
There are still many that make this, and it’s still a very popular form of pottery, and it actually can be of interest to some collectors, since they still find them, but most want older.
For Majolica, it actually can be quite expensive, for it being minimally 35 dollars a plate, to thousands for a set. You can look around in antique malls and such to figure out what you can find, and if there are any originals.
The Conditions
Typically, the reason why this is so expensive because of different factors, and they are:
- Condition
- Quality
- Uniqueness
- Maker
- Size, pattern
For many, this is usually what determines these factors. Lots of times, these are also used marks, but you might be able to find ones that are unmarked. If you’re someone who wants to make and sell your own, sometimes putting some numbers on there can make all the difference.
It also is a very fragile piece, and that’s because of:
- The porous nature
- The way the sides are made so they chip easily
That means, that if you’re going to be getting this, you should definitely make sure that you handle this carefully so that you’re not hurting the state of the piece.
When Making majolica
Today, with majolica, it’s made slightly differently. They don’t use the traditional recipes that were used, and that’s because it contains lead in those glazes. The original had the lead in there, and that is highly toxic. Instead, potters use a couple of different kinds, and they are:
- Commercially produced fruits in the glaze recipes
- Commercial white glazes
- Commercially produced stains and glazes
Typically, they try to avoid a lot of the lead-based materials, and that’s because, if they are being used for actual foodstuffs, it can cause poisoning and the like. Raw oxides are occasionally used as well, and it may be something to consider, but not at all required.
Because of the new improvements in ceramic material productions that have been happening over the years, you can still recreate this same style and colors on a lot of mid-range wares nowadays. To do it on a mid-range ware does come with some benefits, and they are:
- They’re more suitable for use
- They’re stronger
- They’re of better quality and tend to last longer
Majolica is definitely a type of pottery to try out, and there are a lot of cool things you can do with this. you’ll be able to create some awesome wares with this if you so desire as well.
The benefits
There are actually a lot of benefits to working with Majolica, and it’s not just that it looks petty. That’s because of the following:
- It’s not as expensive in terms of a glazing technique compared to others, since it’s bisque fired at cone 3 and then you can glaze fire at cone 4, so you theoretically can decorate in one firing
- You fire at a lower temperature, so it’ll be brighter
- It is a great way to show off brushwork if you’re the type that’s skilled with this
- If you like to work with a blank canvas and create amazing designs with some stains, this is the way to go
- The colored glaze looks precise on this type of pottery
- The pieces tend to be vicious, which means that the glaze won’t move when firing, preserving the work
Majolica is a great way to create some amazing pieces, and you’ll definitely want to try this if you’re thinking about working with this. you’ll be able to create some amazing pieces, and you’ll want to make sure that you get the most out of this that you can.
How do you do this
So how do you do this? Well, there are some exact steps that you can take, and listed below are the steps necessary to create the best and most rewarding piece of pottery that you can.
- First, you want the piece to be leather hard or bone dry, and it needs to be earthenware
- Before you bisque fire, put a thin layer of red terra sigillata at the bottom, and any places you don’t want to glaze. If you want to have exposed clay, this will give a nice shine to it
- You’ll then want to glaze the pot with some matte majolica glaze, or a glaze that works. You should make sure that the consistency is thicker than normal. Some can use tongs to glaze, while the larger ones need to be dipped and poured
- Make sure that the glaze doesn’t overlap too much, since this can cause thickness issues, and it could create a pinhole if too thick
- Wipe the foot of the pot to make it clean
- If making lidded, glaze the underside of this so that it doesn’t stick
- Once dries, smooth out the air bubbles and the pinholes and trips by rubbing and dusting off the material
- Once cured, it’s time to decorate! Use a pencil that shows you where you’re going to stain, so that you have a good idea of how you want to do this
- In essence, the decorating is up to you, with it being minimal to the point of a few dots, or even an elaborate and overall pattern creating the piece. You can erase the mistakes with a finger.
- Majolica begins with the foreground using the stained paste and then works toward the background so that everything is painted white
- You can use different motifs, including flowers, nature, or whatever you want.
- You should make sure with this, that the stain paste is of the thinned glaze consistency, for if it’s too much, it’ll drip, and if it’s too thick, the brush won’t glide easily
- You should then start with your foreground first, and you can use a brush to create various lines with thickness
- Decorate it as much as you want, layering it as needed to help create a beautiful, blended image
- To outline the shape, you can also put a black stain on this as well, since it will help create more dramatic and interesting lines
- Once you finish the foreground, you want to move towards the background. Now, instead of keeping the middle ground and background one color, you can try to use different elements, including a wax resist. If you use a wax resist on the middle ground, you’ll then be able to apply the background to the pot, and there you have it, the wax will stop the stain from being absorbed
- From there, you want to make sure that any new overglaze put on will be behind this, and if you want to add more color, you can
- Once you’ve painted it all and have the wax resist on, you can choose an overall hue, and you can brush it to create a nice range of color
- You can also add an atomizer filled with a stain paste that’s rutile to give a surface that’s mildly textured, similar to pottery kilns. Once applied to the background, you can use a damp sponge to wipe over the decoration to get rid of any sort of glaze
- Once everything is covered, you can then put additional decoration onto this if you want.
- You should, even when the wax has been dried up, let it cure for about 24 hours before you touch it. If it’s still damp, it might stick to the fingers rather than the pottery, so it’ll take the decoration off. however, a sponge works since there aren’t oils on there
- Now, once you finish it, you can fire to cone 05, doing it slowly, and do it for no less than 12 hours since it’ll allow for the glaze to be evened, and allow for the gasses that are in the clay to slow down and burn, and this will make it free from the pinholes as well
- This is very stable, and once you finish off, you’ll be able to take it out and admire the decoration.
If you want to, you can also make your glazes and stains. For stains, you can make stain pastes, and they’re made with either frits, or Gerstley borate, which typically are glass former and fluxes, which allow for the stain pastes to begin to melt into the base majolica glaze, and they’re often layered on top of that to give it a finish that’s nice, and glossy. It’s also low-fire, and you can use commercial stains or oxides for you to do this. however, you should test the recipes before you use them so that you know they will work, and obviously, if you’re using dried material, you should wear a mask or a respirator so that the silica doesn’t get in there.
Tips and Tricks
Here are a few tips and tricks that you can keep in mind when you’re working with majolica. With this, if you follow it correctly, you’ll be able to create some great and pretty pieces that are similar to historical artwork.
- The base matters. Make sure that you always have a good base to start with, and don’t once fire these. If you have a bisque-fired piece, it’ll work better
- You should make sure to avoid high firing with this type of pottery, but it won’t completely ruin the whole thing
- If you want to have a really smooth surface for this, use a small piece to sand this down so that you have a smoother surface that you can work with
- Add the majolica glaze in an even and tick manner, since if you’re keeping with the traditional method and using a form of earthenware, you don’t want this to sow, especially if you’re using a colored earthenware
- If you’re using a piece of earthenware that’s already white, you don’t have to make sure of this as much, but it’s still good to be thick and even
- You should use this in round pieces as best and as much as you can. These are the ideal pieces to create this with since they are better and have a thinner consistency
- This type of pottery glaze doesn’t hold well on shaper angles and corners, so try to avoid those types of pieces
- You can use a traditional decoration if you feel like doing this, but if you feel like you’re in over your head, that’s fine too
- If you’re having trouble with creating a piece, you should use a soft pencil to create the design on the bisque-fired piece
- From there, you can add colorful glazes to the white background
- Using the wax will make your life a whole lot easier, so make sure that you put the wax resist on your piece once you’ve finished a decorative element
- For best results, make sure that you let the piece cure. This may not be something you have to do, but it makes it look way better.
- If you’re going to be using a majolica glaze material, you should try to use terra sigillata
- However, if you plan on using this, you should make sure that you low-fire all of this, and make sure that the surface is watertight in order to help create this type of image
With this type of pottery, the way to do it does follow a certain formula, but it’s not something you have to do and follow through to a T. Instead, you should make sure that you’re using this as best as you possibly can, and make sure that you’re getting the most from this that you can achieve as well. For many people, this makes a huge difference, and if you’re considering this form of pottery, this is the way to go.
Majolica is a cool type of pottery to learn about, and it’s one that you can try out in order to get some cool results. If you’re a potter who wants to try a historical form of pottery, this is the way to go, it’s a fun pottery technique that will make a huge difference, and it’s a pottery technique that you can try out and one that will make a huge impact in your pottery endeavors.


