When you’re looking to create some elegant designs in clay, sometimes you need to think about the brushing that you use. What are some good ones? What will look good? Well, you’re about to find out. It’s something that will take your pottery to the next level, and this post will discuss ten different ways to brush your piece and to make it so that it looks nice. We’ll go over the steps to do each, and why they matter.
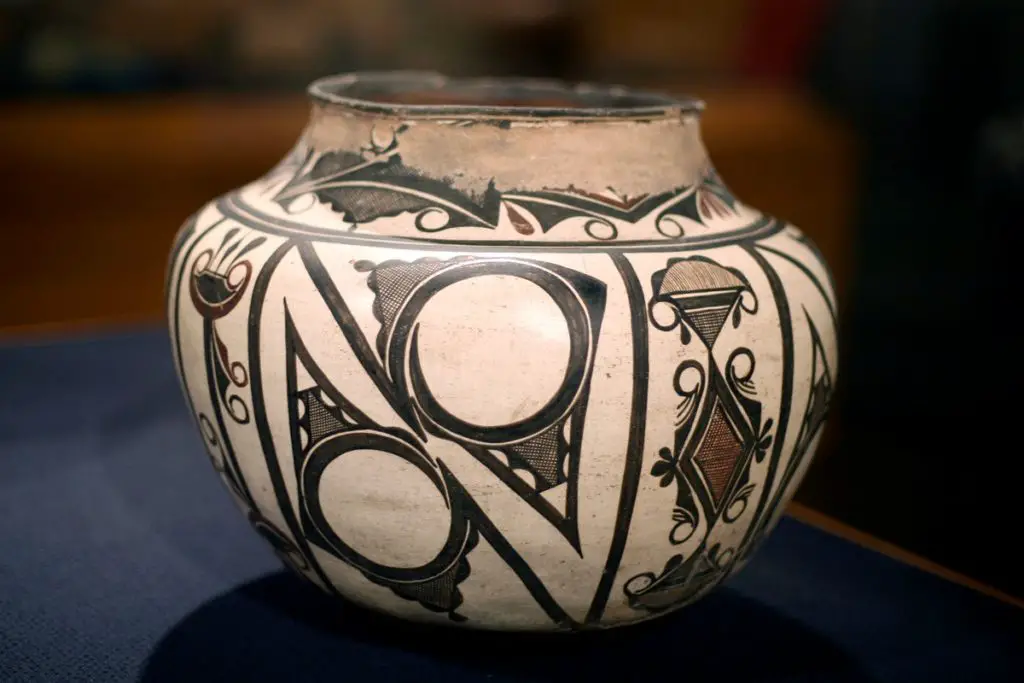
Anasazi
This is a very old brushing technique, and the name means ancient ones. It was a brushing technique that was done between 200-1300 AD or so, and you typically find these in most of the southwestern portion of the US, and it’s quite interesting to try.
The process is the following:
- You begin with hand-building the clay via a coiling technique, including rough clay and the grog that’s in the earth
- From there, you use a slip to paint on the ware and then you burnish it, which is polishing until it’s smoothed out
- This will, in turn, give shapes and lines, and you can use paint that’s made from the bee plant and brushes from leaves from the yucca tree to decorate it
- If you don’t want to get that specific and detailed, you can always vouch for a black underglaze to make the patterns as well
This is a very old technique, but it’s still used to this day, and if you’re looking to create a more traditional piece of ware, you can always try this, and you can explore these ancient pottery techniques if you feel like you can get something from this.
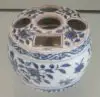
Brushwork After You Bisque
We talked about bisque firing in a previous post, and we did talk a bit about the different things you could do with your bisque once you’re done with it before you fire. These include:
- Using an underglaze
- Using a glaze period
- Brushwork
- Painting various elements in period
Well, one of the things that you can do is use fine brushwork, and from there, you can then fire it once more. Many famous potters use this, and you can create some great illustrations from this as well. If you’re someone who is pretty familiar with bisques, and knows how to make them but feels like you could take a design and throw it on there, well, you’re in luck.
You can do this with virtually anything, but, small pieces that you can use, such as a coaster, or maybe a small side plate or a brooch, should utilize this technique.
To do this, you simply begin with the following:
- First, you need to create the pottery piece
- From there, you bisque fire these
- Then, take a fine brush of choice, and with the underglazes that you have, brush what you want to put on there
- Let these dry, and then, once you have the right amount of glaze that you want for this, especially in terms of detailing and the like, you put on a transparent underglaze to solidify the design
- You then put this on high firing, and from there, you get a shiny and brilliant finish
With this, the possibilities are virtually endless, and you’d be amazed at what this can do for you, and all of the different and all of the different elements of this. You’ll be able to do so much with these, including painting the finish that you want and creating the shapes that you desire.
Before the Bisque
We just discussed doing this after the bisque, but did you know that you could do this before the bisque as well? For some people, this one tends to be a bit hard, because sometimes, you need to watch out for the elements of the shape being compromised, the elements of possibly creating something that doesn’t look even and nice and the like. If you’re looking to change the way your pottery looks though, you can try this.
To do so, you should be familiar with the elements of bisqueing, and also can work with pottery in the greenware stage before you begin to try this. To do this, you have to begin with the following:
- Wait until the piece is leather hard, but don’t put it through the bisque just yet
- Mark out where you want the glaze to go with a pencil
- Take your glaze, and then put this on, making sure that you stay within the pencil lines
- From there, you can put it into the bisque firing
- You then add in a transparent glaze on the bisque that you’ve fired and then fire this ware again to completely solidify the action, making it so that you’re able to create the beautiful piece that you want to make before you’re able to put it into the bisque
If you like to bisque fire your stuff, you should try this one, because it’s new, it’s unfamiliar, and it’s something that you’ll be able to make a difference with. If you’re looking for a new and innovative way to work with glazes, definitely try this, since it’s something that can ultimately end up looking good and something that tends to be quite pretty whenever you work with this.
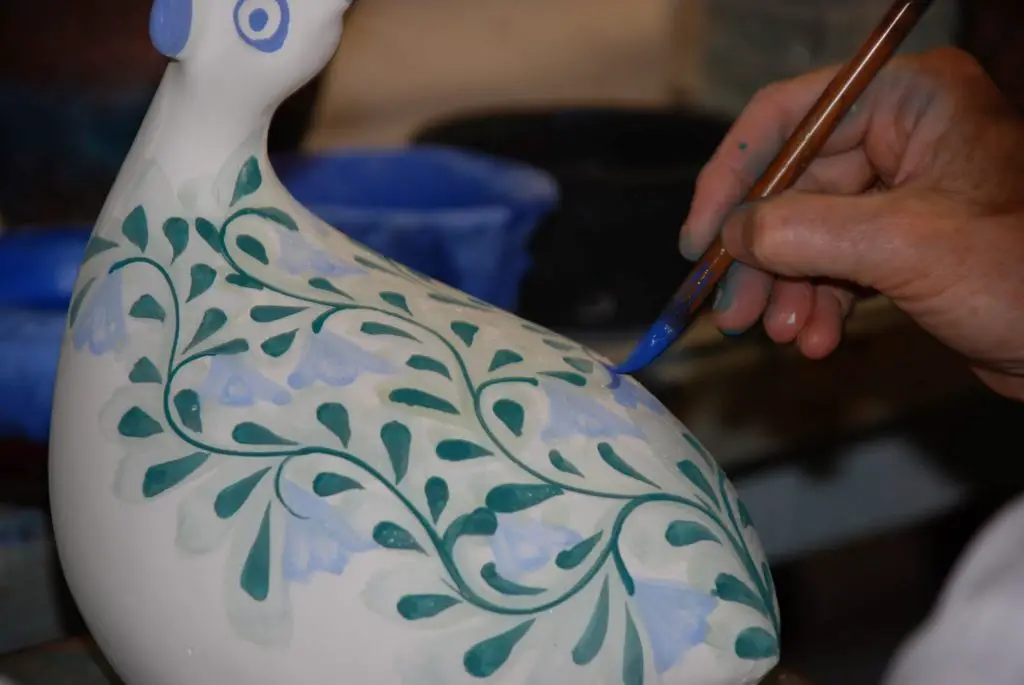
Personalized Brushwork
One way you can take your brushwork to the next level is by personalizing it. You can, in essence, give this to someone as a form of personalization, and if you have someone that you love, this is one of the best ways to do it.
You can use this for many different things, including:
- Pet bowls
- Bowls
- Plates
- Glasses and mugs
And so much more. If you’re someone who has a furry friend who might like that or just wants to give something nice and personalized, this is the way to go.
Now, what you first want to do is the following:
- Shape the bowl, plate, or the like, into whatever you want to make
- Bisque fire them
- Hand paint the artwork, name, or whatever onto the ware, using different types of underglazes along with a paintbrush that’s fine
- Make sure that the brushstrokes are visible, and when you’re done, you can use a transparent glaze before you fire once again
This is a fun and very interesting way to create something personalized. For those who want to make stuff for friends, family, and the like, this is the way to do it. The best part is that you can make virtually anything from this, and you’ll be able to create a great sort of thing. For many people, this is one of the best ways to also get familiar with underglazes as well, since ultimately, it often means that you’ll be able to utilize them in different ways, and from there, you’ll be able to easily and without any problems, make sure that you’re able to have the personalization that you want.
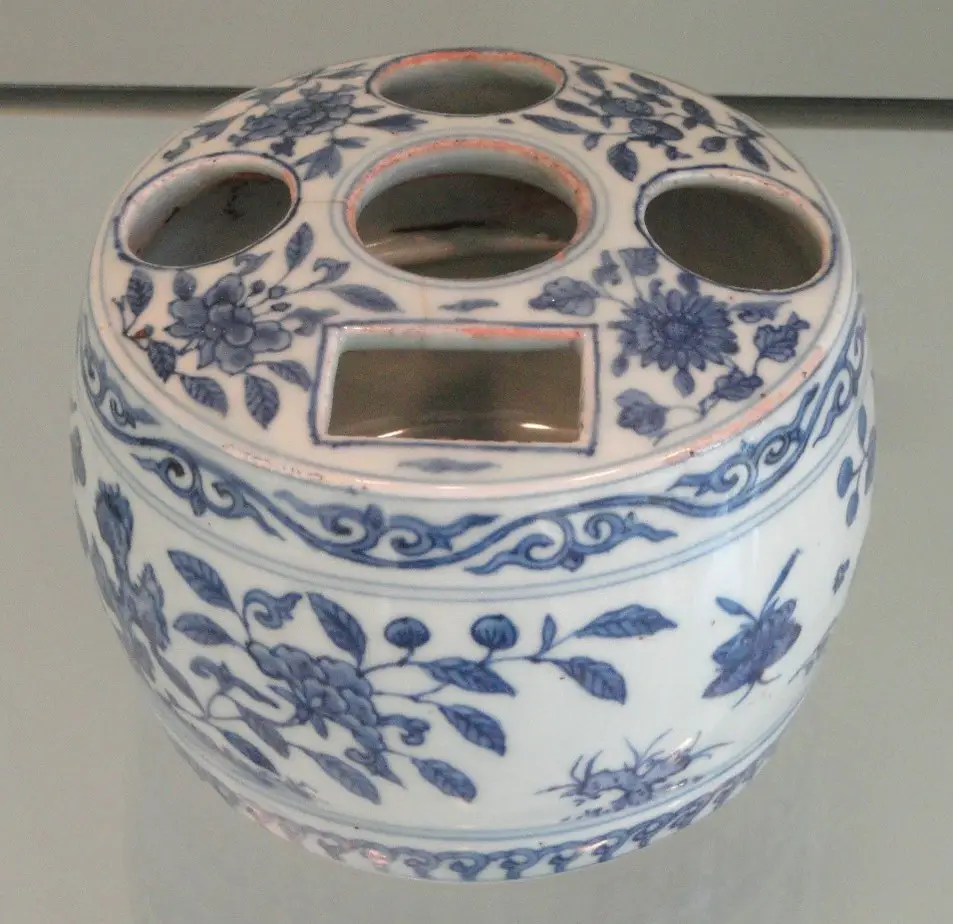
Full Painted Underglaze
Another cool way to do any sort of decorating is through actual hand painting the underglaze. This is a great option because you can paint some cool, intricate designs on this one. But, you should keep an even color scheme. Don’t change it up because of this.
You should make sure that you do this when it’s bisque before you begin because it will hold the pottery glazes much better. You should also keep one color for all of this, so do different variations of this, and that’s because you will want to make sure it looks nice and even. Underglazes, however, fire in a similar color to what you put in the pot.
With this, you want to brush, and if you see brush strokes, don’t try to wipe them away or anything. That’s the point of this, and if you use brushstrokes, you can create a painted effect, which gives you a nice little pattern to add to. Typically, if you paint this with underglaze, and then you use a transparent glaze before you fire, it will create a beautiful, intricate design.
As a word of caution, however, you should make sure that you’re able to put multiple layers of this onto there. You should use different types of brushes as well, along with multiple coats, and from there, you can put three underglaze coats onto there, and then two glaze coats that you have, and from there, you’ll be able to fire it, and create a beautiful piece that works for you. experiment with this since it can ultimately work in your favor.
Brushing while on the Wheel
Did you know that you could brush on the wheel? It’s more than just creating the pottery that you want, rather, you can glaze your stuff here too. There are some benefits to this as well, and they include:
- An even consistency
- A full-coverage
- A nice texture to it
- You can also mark your pieces with this
You can with this make some cool designs while it sits on the wheel as well. how do you do this? well, first you must do the following:
- Create the piece, don’t try to do this before you bisque, it won’t turn out well
- Bisque fire this
- Put it on the wheel and then center it. You should try to use a plate or a bowl
- You can then decant some of the glazes into the pot itself and choose your brush of choice
- You should try to use some brushes that can have soft and dense bristles, such as a Hake brush
- Put the brush onto there, and then set your wheel at a gentle speed
- After each turn, move the brush away in a slow fashion from the rim and then move it toward the center
- Make sure that with this, you set this at a gentle speed so that you’re able to cover everything without too many problems
- If you don’t want to keep dipping the brush, you can get a syringe with the glaze, keep it close to the pottery or brush, and then put it on there as the wheel continues to spin
When you’re done, you can sit there and let this dry, put on the overglaze that’s transparent to seal this, and then fire it up again, and you can create fun, intricate shapes with this design.
Detailing
One great way to utilize brushwork in pottery is detailing. Details make or break a piece of pottery in many cases. That’s because of the following:
- Details add life to the piece
- Details are small things that while others may not see, You will see it
- Details can give that personality to the piece too, making it your own in a sea of the same thing
A tiny brush and some glaze can make detailing on small pieces of pottery quite amazing. It’s best if you use this for small details or even small pieces of pottery, and they don’t have to be super complicated either. To do this, you can simply try the following:
- Build your pottery how you want, whether you want to hand build it, use the wheel, or whatever
- Bisque fire these
- From there, you can use an underglaze of choice, and from there, add in the small details, make the design, or whatever. If you want to monogram a plate, you can even do this as well.
- Dip the entire thing in a white glaze
- Make sure that you separate the glazes that you need first before you do this
- Finish up by making sure that you have a transparent glaze on top to seal this, and from there, you can fire at will
Sometimes, the detailing that you do with this makes or breaks a piece of pottery, and if you’re wondering whether or not to include the details in there the answer is yes, include those details, put all of this together, and make the piece your own in the way that you want to make this piece work.
Splatter technique
Something quite different, but a very valid form of using brushing, is to splatter them. You might think that this isn’t the way to do it, but here’s the thing, these small details can change the way a piece of pottery looks, and it can make your ware stand out.
This is a popular technique, and all you need is the glaze yourself, and a brush to do this activity. From there, you simply do the following:
- Get your piece ready to try this out, first by building it, and then doing a bisque firing
- From there, get the first glaze coat onto there that you want to be the background color of choice
- At this point, you want to take the other color that you want to use, such as maybe you have an oxide that works, and from there, you flick it with the paintbrush onto the plate
- You then let this whole thing dry, and then you fire this
- From there, you’ll take this out, and let it dry, and there you have it
If you’ve ever done splatter ware before, or you’ve been interested in this type of work, then this is the way to go. If you’ve ever been curious about this, then definitely try it out. It’s a way that can make a world of a difference with your pottery, and it’s a creative way to take your pottery to the next level and give it that extra little force that you want to give it, and that extra touch that you want to put forward onto the piece itself.
But where to begin?
You may be sitting here, reading about all of these cool different ways to do it, and you may wonder where to begin. Perhaps you’re someone who doesn’t want to make a full piece yet but instead wants to test out brushwork. Or maybe, just maybe you’re someone that has an idea but wants to try it out before it’s conveyed onto the actual piece, or you want to try a glaze out on a type of clay that you’re using. These are all perfectly valid reasons to be hesitant on this, but there is a way to test out the decorating before you do this because it’s often hard to get rid of mistakes in many cases if you make one. That is to make some test tiles.
To do this, you simply do the following:
- Build some small tiles, usually through hand and slabs that you’ve put together
- From there, you want to bisque fire these, similar to how you would the actual piece
- You can from there, try out different brushwork, patterns, colors, and shapes that you want to put on with this
- From there, if you like how they’ve turned out, fire them up, and you then have some coasters and such that you can put around your place. You should, if they turn out right, set them up with a transparent glaze so that they’re waterproofed before you fire them.
- If they look bad, just toss them or see if you can use them as a mosaic piece or something. It may not be perfect, but it’s a good way to test it, and you’ll be able to work on making pieces that you like.
Stencils
Finally, we have stencils. Stencils are great because of the following:
- They’re easy to apply
- They can hold a certain shape on them
- They make it easier to have straight lines
- They’re perfect for those of us who aren’t good at actually putting designs on a piece of pottery
To begin, you want to make sure that you have a piece that’s already been bisqued if you haven’t done so already. You should then either hand paint or dip it into a glaze if you want to, and from there, when it’s fully dried, you grab the stencil that you plan to use, along with the brush, and then add on the underglaze.
From there, you obviously let this dry, and then put a transparent glaze over this, and then let it dry before you fire this again. As always, whenever you’re using underglazes, you throw an overglaze over the top of this, and this, in turn, will protect the ware, give it waterproofing in many cases, and help keep it nice and shiny.
Many people who are getting into pottery, want to create intricate and amazing brushwork with this, and you can use different sorts of strokes and the like to create some wonderful and amazing pieces that you desire from this. Of course, it’s up to you what you want to do with it at the end of the day, but if you’re looking to take your pieces to a new, decorative level, try these. The cool thing about this is that they’re pretty simple to do, but you should know the following before you begin:
- How to make a pottery piece, whether hand-built or on the wheel
- How to bisque fire and use a kiln
- All about underglazes and overglazes, or at least what they are


