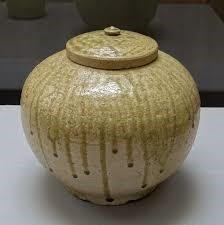
Ash glaze, also known as wood ash or organic vegetation glaze, is made from the ashes of trees, vegetation, fruits, and vegetables. It has been used for over 2,000 years, and historical evidence indicates its popularity in several Asian cultures. Its popularity then and now is due to its simplicity, ease of procurement, and final results. Continue reading to learn how to make ash glaze and some easy recipes you can try independently.
How to Make Ash Glaze?
Ash glaze sure sounds intriguing. The good thing is you can easily make it at your home studio without much hassle. If you are interested in making your ash glaze, then follow these steps-
1. Collect Raw Materials
To make a batch of ash glaze, you generally require a large volume of raw material. Ash glazes can be made with wood, plants, fallen leaves, fruits, and vegetables. For an environmentally friendly glaze, collect fallen leaves, twigs, fruits, and vegetables from a forest during the winter. Before you burn the raw materials to make the ash, it is essential to dry them after harvesting thoroughly.
2. Burning the Raw Materials
Once the raw materials have thoroughly dried, it is time to burn them. It is best to burn them on a cement slab for little contamination. We also advise burning the raw materials on a dry and windless day. Set the dried materials on fire. Periodically, use a rake to burn the unburnt materials. Once it has cooled, collect the ash in a container.
3. Sieve Through the Ash
Move the ash indoors into a ventilated room to sieve through it. Make sure that there is no fan in the way. Scoop a small portion of ash and place it in the sieve. Place the sieve on top of another clean yet empty container. Sieve through the ash one scoop until only a fine powder remains. We highly recommend wearing a Dewalt Dual Mode Safety Goggle and a face mask to avoid inhaling the ash.
4. Wash the Ash
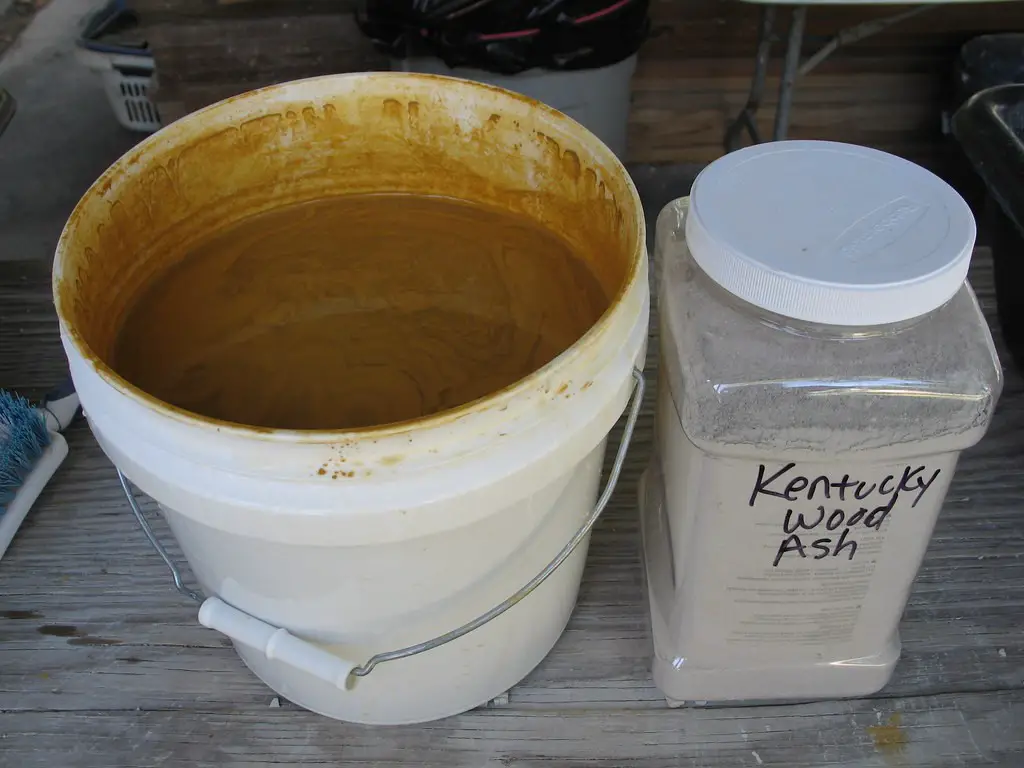
Washing the ash is one of the most critical steps in making the glaze. To clean the glaze, carefully pour the ash into a bucket. Fill the bucket a quarter of the way up. Give the ash and the water a thorough stir. It helps remove the soluble salts present in the ash. Let the ash settle for a few minutes. Remove anything that floats to the surface before leaving the ash to settle overnight.
In the morning, you’ll notice that the water on top has developed a yellowish color and has a soap-like feel. Using a mug, carefully remove the water. Fill the bucket with water again and let the ash soak for a week. Repeat the process until the water on top is clear and it doesn’t have a soapy texture.
5. Dry the Ash
Now, dry the ash by removing the water. Then, dry the remaining ash in plaster drying bowls. Once the ash has completed drying, sieve through it once again. Your ash is ready to be turned into glaze.
6. Mixing the Glaze
Mix ash with ceramic ingredients like clay, silica, and feldspar to create a glaze slurry to make the glaze. Add as much or as little ash to the slurry, depending upon the desired effects. You can follow the recipes below to see how ash reacts to different materials to create various glazed surfaces with potentially beautiful colorations.
7. Applying the Glaze
Apply the ash glaze to bisque-fired pottery using a brush, dip, or glaze spray. Experiment with the number of layers and application methods to achieve the desired appearance.
8. Firing the Glazed Pot
Set the bisque temperature to 1200℃-1300℃ for the glaze. Since the firing temperature significantly impacts the final product, it allows experimentation. Many people tend to fire ash glazes in reduction kilns, whereas other potters prefer oxidation kilns.
Safety Precautions to be Taken While Making the Glaze
While making the ash glaze, you should cover your hands and forearm with a glove. You must also wear a respirator mask and protective eye gear while handling loose ash. It is because loose ash can irritate the eyes and cause respiratory diseases. Also, it would be best to dispose of the remaining ash responsibly. Ash is alkaline. Dumping it directly into a water body or on a field can hurt the plants and aquatic life. To dispose of the ash, wrap it in aluminum foil and throw it in the garbage.
3 Best Ash Glaze Recipes
Now, it is time to explore the best ash glaze recipes one can try. It would help to move slowly through these recipes as you master the techniques. The following ash glaze recipes are perfect for understanding the versatility of ash glazes-
1. Basic Ash Glaze
This simple yet versatile wood ash glaze recipe is a stepping stone into the glaze world. To make this glaze, combine equal parts whiting, Custer feldspar, OM 4 Ball Clay, and silica in a mixing bowl. You can experiment with the proportions of the ingredients for different glaze textures and stability.
| Ingredients | Percentage |
| Whiting | 25 |
| Custer Feldspar | 25 |
| OM 4 Ball Clay | 25 |
| Silica | 25 |
2. Cowan Amber Glaze
Cowan amber glaze is perfect for a complex ash glaze with warm undertones and exciting textures. Each ingredient in the list contributes to the glaze’s color, melt, texture, and visual appeal.
| Ingredients | Percentage |
| Gerstley Borate | 2.55 |
| Talc | 3.88 |
| Whiting | 18.06 |
| Custer Feldspar | 44.90 |
| Cedar Heights Redart Clay | 11.33 |
| OM 4 Ball Clay | 6.22 |
| Silica | 13.06 |
3. Amber 1 Glaze
It is another popular wood ash glaze recipe with beautiful amber undertones. Lithium carbonate in this recipe results in a glaze that adds depth and character to the pottery pieces by introducing unique color variations.
| Ingredients | Percentage |
| Whiting | 24.3 |
| Lithium Carbonate | 7.5 |
| Custer Feldspar | 24.3 |
| EPK Kaolin | 6.5 |
| OM 4 Ball Clay | 18.7 |
| Silica | 18.7 |
Conclusion
If you are in an experimenting mood, then wood ash glazes are perfect for you. Ash glazes allow potters to create unique pottery pieces with organic aesthetics and distinctive surface qualities. Made by combining wood ash and ceramic materials, these glazes offer potters a range of flexibility with their recipes. You, too, can explore the creative possibilities of ash glazes with the recipes and tips mentioned above.


