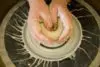
For many people, knowing how to center the pottery is a huge part of it. It can be quite hard for many people, but here, you’ll learn how to properly center pottery so that it’s thrown correctly. By the end of this, you’ll be a pottery centering master, and you’ll be able to work hard at centering the clay so that it can help you throw even better.
Wedge Successfully
The first thing you have to do is wedge the clay. What does that do? Well, it can help you have a better time when it is centered, and when done right, it’ll help make a much better cut.
The first thing that you do is make a high area towards the center of the bottom so that air can leave when you put the clay on the wheel head or the bat. You want to make sure that the sides are kept pretty straight and vertical when you do this, so it makes centering all the easier.
You also want to create a high point that will get the clay to move up.
You want to know how to properly wedge clay because of the following:
- It’ll create a much better surface for the clay to work on
- It’ll make centering easier
- You can move air bubbles out
- You can create better mounds that work better.
With wedging, it’s a good rule of thumb that if you’re going to make something vertical, you want to have a mound of vertical clay. If you’re going to have something lower to the ground, you’ll want to create an open form, which in turn will make it wider as well.
Hitting the clay
Hitting the clay is your next step because it is pretty important and plays a huge part in centering. This is due to the following:
- It’ll get the air out of the clay even more that’s in the wheel area
- It will keep the clay stabilized when you’re centering
- If you remove the air, it’ll facilitate the centering
Now, how you do this is simple. The first thing you do is put the clay around your hands with the smallest finger that you have changing the direction of where you hit the base. You want to keep your nose right over the center of the wheel area since it’ll stabilize the body.
You can practice before you do this moving the mounds up and down to feel all of this.
Moving your hands up and down before you begin is quite important because it allows you to get a feel for the following:
- Clay weight, whether it be quite small, or quite large, and it’ll help with the amount of force that you need.
- How aligned the clay is if you’re going vertical
- Where the center point of the wheel is
When you’re hitting, you want to keep your elbows towards the outside, because if you have them next to the body, it can angle everything. You should, as you move your hands down, continue with this to go from the very bottom to the top and reach every single area.
After each hit, you should make sure that the mound is repositioned each time. That way, it will help to ensure that you have everything perfectly centered before you begin.
Repositioning the clay
Sometimes, if you have a throw that you want to fix, you might need to reposition the clay. This will in turn help to keep the clay as close to the center and will keep the mound straight. If you notice that the mound is not at the center, or it is the angle, and it’s got too much suction, you will want to reposition instead of wedging.
Why is that? well, that’s because of the following:
- It takes less time
- It’s easier
- You can fix where it’s located if you do need to change this
Ideally, you should look at where it is. If it’s angled, you should touch the highest point where it’s not centered, and then do it on the opposite side near the top of where it is, and from there, move it to the center to straighten this. You should rotate so that the point that is mostly off-center is as close to the body as possible. Push down and hold the clay, and then move this as center as you can. It can be a bit complicated, but repositioning the clay is most definitely possible, and something that should be considered if you’re looking to fix it.
It’s important that before you continue with centering you do this, because it does play a huge part in the future of where your pottery will be angled, and you’ll be amazed at the difference that this makes as well.
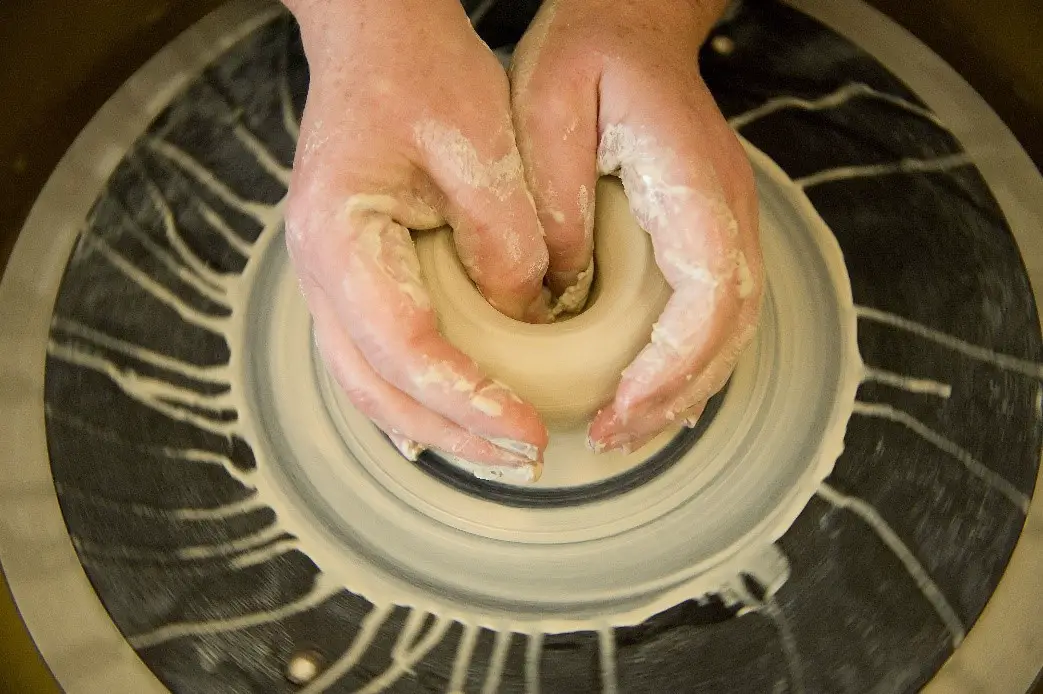
Slap Centering
This is the first centering technique that you want to use. Slap centering is essentially centering your clay with your hands still dried with slaps to minimize further centering.
Now, when you do this, make sure that you consider the following:
- Don’t be too forceful and work the clay too much—it could cause cracks
- You should make sure that with each slap, you have straight sides and a curve with a subtle point
- Center this and make sure to look for the high points off-center
- You should slap and release slowly when doing this. don’t go too fast
- When you touch this, release your hands immediately
- For from the top and then move in so that you don’t torque the mound and ruin the structure
- You should not have the hands horizontally contact the clay, but instead small vertical slaps
- Ideally, with this, you should try to slap in almost an oblique manner not directly horizontal
Sealing the Mound and Centering Your Top
Now, sealing the mound is a very important step before you go on with full centering. This is because it prevents the water from breaking down any of the suction that’s there. It’s essentially used for stabilization.
To do this, you should start with the following:
- Roll your index finger near the inside of the mound near the bottom of it, and then curve it downwards to create a buttress at the very bottom of it
- Move your hand in a spiral from the very edge of this to the top and center of the mound, and then back down to where your edge is, and this, in turn, will create a high point for where your mound is.
You should at this point see that the top of this is centered by the second step, and it does create a better high point if you need it when you’re centering the clay.
Now, at this point, you will want to lubricate the clay a bit more. We talked a lot about dry slapping earlier, but by this point, you will want to make sure that the clay is lubricated. The more lubrication, the less friction that you have, but don’t overdo it and douse this because that can pull the clay off-center.
If you don’t lubricate enough, it can break the clay down, and it can cause structural issues. So too much water or too little water can create structural damage, and even result in torquing, which is often quite a problem for many people.
The best way to lubricate is to create a slip from where the clay is by using a wet sponge that is loosely held, or even your hand if you’re able to control the pressure. You should move either the sponge or your hand quickly along the surface before it breaks down. If you notice that the lubrication is lessening, you should always replace it.
You should always have either fingers or a sponge on hand to replace the lubrication while you center, because this is a huge part of it, and it definitely can make a huge difference in the clay.
Wedging while Centering
This is another technique that will be used when you’re trying to center the clay. Essentially, you’ll be doing the following:
- Moving the clay down
- Moving the clay along the head of the wheel
- Moving the clay up the center area where the mound is
- Mixing the clay so that it’s compressed and aligned
You want to make sure that the clay is homogenous in the way that it feels. If you work it too much, or lubricate the pot too much, especially on the top third of the mound can cause structural problems on the top third of the piece you’re making. This causes walls to thin out, and rims to break down easily.
If you are underworking the bottom third of your pottery, this is also a huge problem, because if you do this, it can often make it very hard to move, plus it can cause a bit of top-heaviness on the base, and it can cause issues with the walls thickness and even the floor of where the pot is. You should watch the angle you approach this to direct the clay toward your center and get rid of any high points that you don’t need as you continue to push the clay against the wheel. Take your time, especially since you want to make sure that you do this since it can affect steps later on.
If you do the correct amount of wedging and centering, it can help prevent the following from happening:
- Coning
- Strength issues
- Redoing the pottery
The strength of your pottery depends on the mound being wedged correctly, so keep that in mind. The more you work with this, the better it will end up being for you.
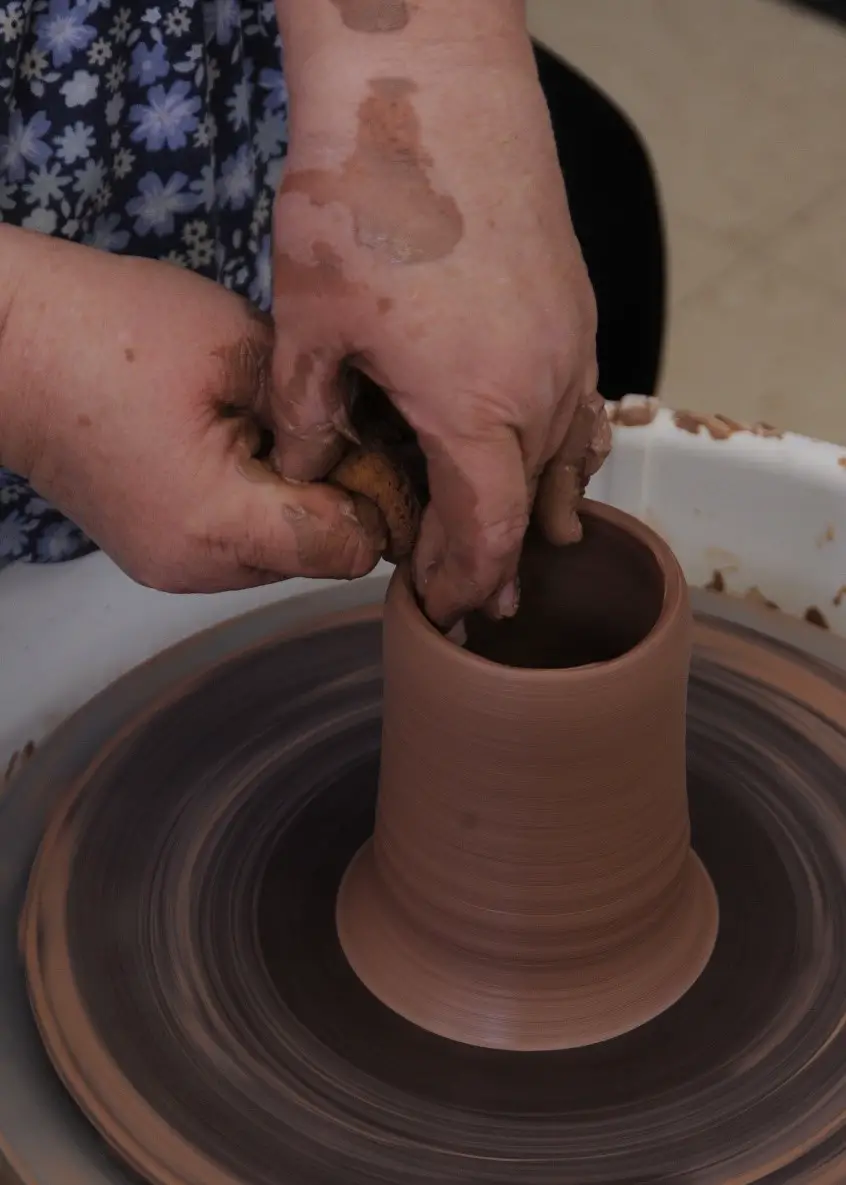
Final Centering
This is the last centering that you will need to do. This, in turn, will prepare you for the opening. You want to do this because of the following:
- It will compress the clay enough
- It’ll align the particles easily
- It’ll help create a better shape and form
- It’ll help make opening much easier
Now to do this, you first want to take your sponge in your right hand and lubricate it before you move the left
Take the top third and then center this by with a hand that is cupped take the left pad and then move the direction near the outer edge to about 7:00 or so.
You should then raise your shoulder, push your elbow in, and then move your bones towards the center, with the body weight that you have, center the top third or so of the clay, releasing the pressure once it’s at about nine or so.
With this, you want to keep your right thumb area perpendicular facing to your fingers, and from there push it towards the center of this mound so that you’re controlling the high points of this efficiently.
For the middle area, you should have the thumb and the outside areas of the left hand take care of the middle. You should move your elbow down and keep the arms parallel with the head of the wheel. You want to keep your water nearby, and from there, you begin at seven once more, keep the pads of the fingers away from where the clay is, and keep your fingers flexible so you can feel where the clay moves, and then put pressure on both of the pads of the left hand and keep it moving off the high points. You should move your body the opposite way of what it’s spinning so that the high points are gone, and then release it at about nine or so.
Finally, for the bottom, you should have both the right and the left hands work together. You should leave your left hand to center the bottom third or so, but, you should be watching the buttress that is forming. You want to watch for it to get larger, and once you do, you should reduce the pressure on your hand itself, use a sponge to protect your fingers, and from there at the top, you should throw down with your movements diagonal with the body toward about 3-5:30 or so.
At the head of the wheel, you should move your palm towards the ceiling so that the clay that’s under the edge of the mound creates a sort of undercut, and then move the clay directly across the head of the wheel and then up the core center of where the mound is.
This, in turn, will create a high point on the side of the mound that’s a little less than about ½ an inch above where the wheel head is located.
You should, with the wrist area of the left hand, move to the high point to dispel, and from there, center the bottom ¼ of the clay mount itself without abrading.
You should have the right-hand move to change where the direction of the mound near the top to hold its center, and from there, you should have the left hand move the high point that’s at the bottom of this mound. You should dispel the rest of the high points and from there, you’ll completely center the clay.
This does take a bit of time to master, but once you work at it, you’ll be able to master it.
What about Ergonomics?
Probably the biggest thing that you should be watching out for is the placement and use of the hands. This is a big thing, because lots of times, people do this wrong, and this breeds the following:
- Wrist injuries
- Arthritis
- Carpal tunnel
- Lowered efficiency
If you don’t put your hands in the correct position, this can play a major part in it.
When you’re centering, your right hand should work to center the top area of the mound itself, and it should be working to lubricate the left hand as it continues, and it should control where the buttress is, and also move the clay a little bit. You should work to train your hand so that it does this, especially since it can help to prevent injuries.
Two things to remember are the following:
- Keep the hand cupped
- Pull or push with the body and the arm
By doing this, you’ll be able to keep the clay moving.
Now with your left hand, you want to make sure it focuses on controlling the high points and centering the mound of the clay.
You should first look at the left hand, focusing on the palm, and note where the muscle pad is at the bottom of where the thumb is, and the smaller pad that’s right over the bone of your wrist. You should see that when you do cup your hand, these two pads are perpendicular to the end of your arm and are high-point controllers, and will direct where the force goes.
You should make sure that these are cupped, and that they aren’t straight. If you keep it straight, it’ll cause the following:
- No power so more work
- Your pads contact where the clay is creating friction
You should make sure that your hands are cupped the entire time, which in turn will help with the overall efficiency of the clay
If you keep your fingertips cupped, it’ll communicate where the clay should move, and you’ll be able to see where the off-center points are, and anything that you need to fix.
You should always have your thumb extended, especially since it’ll help with the following:
- It keeps the muscles strong
- You can control the high points way better as well.
Another area that you should be focusing on is the movement against the spin. This is a critical thing, especially since it can affect where and how efficiently the centering will be. You should make sure that the following happens:
- You keep your left hand away from your body
- You keep it between 7-9
- You have the right-hand move toward the body
- You keep it between 1-3
With this, you’ll be able to ensure that you do have the right ergonomics associated with this, especially since it can affect the overall health of your wrist, and your efficiency as well.
Angles
One final area to discuss when centering is the angle at which you’re about to approach this. You need to look at how you move the clay. It’s important to make sure you’re aware of this, especially since the position of this can affect the approach.
Some things to consider are the following:
- Tucked elbows control the movement of the clay
- The posture and position of the body affect the angle of the approach
- Watch out for natural body movements
- Have the potter chair at the right level to the wheel so that you don’t have to use bodyweight transfer
- Watch where the height of the splash pan is, especially since it can cause issues with the left arm and the elbow not moving enough to move it up
- Watch your fingers when you’re throwing to make sure you know where you want them to go
- Make sure that you’re not hunched over either. This will not only give you back issues, but it will also cause issues with the overall wheel power
With this, you’ve learned how you can control the wheel and your overall power when it comes to this. Use this information wisely and know how to center the clay efficiently. You’ll be amazed at the difference that this makes if you use this information, and you can also center the clay so that when you do open it up and throw pottery, it’s easier for you, and can net you some great results as well. do this, and it’ll make all the difference.


