So you’re about to throw on a wheel, and you’re excited about this, but then the second that you do, you end up having some major problems with centering clay. It’s frustrating, and it’s something that many potters have issues with when they’re beginning on the wheel. In this post, we will discuss the top problems with centering clay and throwing clay, and how to rectify them relatively easily.
Why you need to know this
Centering is very important because it allows you to create a beautiful piece easily. If you don’t center well, it will cause problems, and the sad part about this is, that you’ll probably never be able to achieve anything on the wheel until you know how to do this. For example, it helps with the following:
- Creating a base for your piece
- Allowing you to create just about anything on the wheel
- Allows for proper throwing of the clay
If you know how to center the clay, you’ll be able to be successful. What it takes though, is lots of practice. You should know how to practice this and do so if you haven’t already. If you’re worried about doing it wrong, then you’ll end up having problems. You should go in with the idea that this will work and that you’re able to create the perfect items that you want.
Make Sure you’re prepared
One of the key issues with centering clay is that you’re not ready for this. However, you can get this ready by doing a few things before you begin. Here are some beginning tips for you to keep in mind as you learn how to center the clay.
- Always have something with shorter sleeves on to help you keep your hands out in the open
- If you’re just starting, make sure that you prepare your clay in a fit manner, and you can do so by making sure that the air bubbles are gone, and you get rid of any uneven textures that might be there
- You should make sure that you do this to prevent coning up, which is something that more experienced throwers use, but you’ll want to make sure that you have prepared clay before you begin
- Make sure you prepare a lot of different balls of clay, especially if you’re going to be practicing. Get about two pounds of it to begin. It’s not too big, but also not too small, and it makes it a lot easier
- If you’re doing a lot of these, put them in a plastic bowl so that you can keep them all together and not dry out. Throw some plastic on top of them to help with this
If you have these beginning actions in, you’ll be able to do a whole lot with this.
Clay Breaking
Probably your biggest problem is when you’re trying to use clay, and then it gets broken. This is commonly a problem when you’re trying to build walls, especially for new potters. The solution to this is pretty simple, and it involves the following:
- Maintain steady pressure completely up
- Keep your clay in a cone shape without the knob at the very top of it, since that tends to twist off
- Keep the hands in a downward tilt, not an upward one
This is probably your first issue, and here is how to fix it easily.
Uneven pressure on the cone
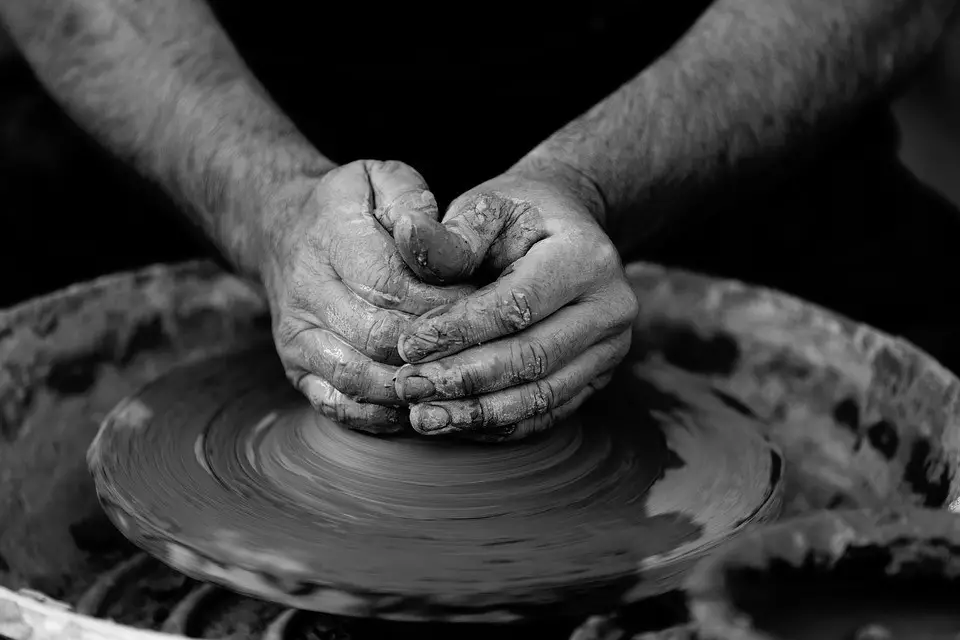
If you notice that when you make your cone shape, you’ve got one hand pressing over the other, it can create an annoying situation. There is a simple way to rectify this as well though, and it’s the following:
- Look at the posture and make sure that you steady yourself
- Ensure that the back of your neck, upper arms, shoulders, palms, and wrist are ridged
- Make sure that you’ve got both of your hands moving with equal pressure. This can be hard if you’ve never done it
- You should also make sure you brace your arms near the body and legs so that you’re using the full body and not just the hands
The Spiral
This is another super common issue that happens when you’re throwing, especially for beginners. This is a spiral shape, which commonly happens if you move faster than what the wheel can take. It’s pretty easy to fix though, and you should simply do the following:
- Adjust this as needed and ensure that you allow for more rotations of the wheel before you move your hands up
- Take your time and make sure that one circle is completed before you move upwards
- You should make sure that the centering is done faster than the wheel speeds, and not too uncontrolled. You’ll have to learn how to move in a slow, yet controlled manner
- You should make sure you apply this to spirals on cylinder walls and work with the wheel to adjust as needed and create the control that you want
Centering Leaves a hollow Center
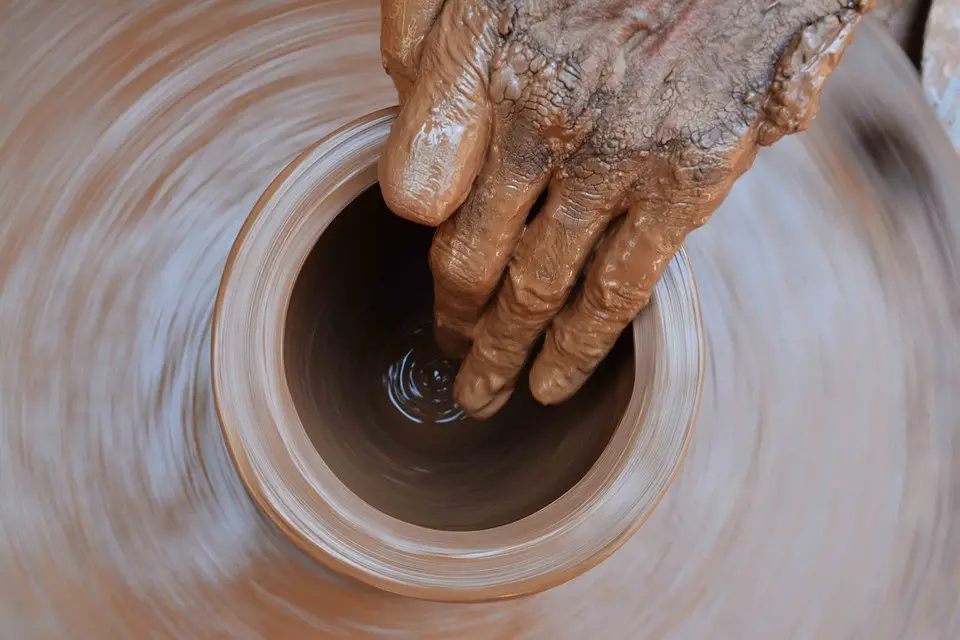
This is usually when you’re trying to center this, and it doesn’t create the cone shape that you want. It can be quite frustrating, and it’s something that you should keep in mind when you’re trying to get better at this. Luckily though, there are a lot of different things that you can use to ensure that you have the best result from this. When you’re trying to center, do the following:
- Make sure you’ve got your hands super deep into the clay, and make sure that the clay rises completely as a whole in the middle as the clay rises
- Continue to follow the clay with your hands, moving further and further up as you rise
- Make sure you’re moving this in an even manner so that you’re able to maintain the “cone” shape with this as well
The mound is Off Center
This is another very common issue with centering clay. You’re working so hard, and then, you realize that the mound is off-center. You can’t let this happen because if you do, then the bowl or piece you’re throwing will be off-center, and it creates balancing issues and the like. Luckily, there are a few things that you can do to fix this, and they are as follows:
- Make sure that you have your palms leaning directly into the clay with a pressure that’s steady
- Always make sure that you have it at the position of 8 o’clock for the best results
- Center the bottom first and then cone up
- Never try to do the bottom centering at the end, because it will end up making everything uneven
- If you do this, the clay that’s uncentered will disappear once the cone starts to get smaller and smaller
Doing this effectively will help with this, and it will let you achieve the best results that you can from this.
Collapsing Walls
You may have had this happen before. You’re putting the walls up, and then bam, they end up collapsing. It’s frustrating and annoying, but did you know there is an easy way to rectify it? That’s right, you can do it with a few simple steps, and it will make it easier to fix this.
- Use less water when you throw for starters
- Move your hands up to the bottom and then the top.
- Don’t press down
- If you’re moving your hands, try not to take too long when centering and throwing
- The more pulls done, the softer your clay will be, so try to get about 3-4 pulls out of this
The Top lip is Uneven
This usually happens near the end when you’re trying to create the lip. It can be frustrating, but luckily there are a few things that you can do.
- To cut this evenly, move it to the 4 o’clock position and hold it with the fingers on your left hand
- Push the needle into the clay wall to the inside fingers
- Hold this for a few revolutions and then lift it off the ring of clay
A nonexistent Bottom
This is when you center, you look down at the wheel, and then you realize you’ve got a wall, but not a bottom. There are a few things that you can do to fix a bottom that isn’t there when you’re centering clay, and that is the following:
- Don’t stop the wheel, but stop the opening to the bottom on the side that’s thick
- Take that, and push down on it with a needle to check the thickness of this
- If you notice that it’s too thick, you can push it down further
- If it’s too much to do, you should stop the wheel, fill it with a pancake of clay, and then try to re-throw it
The clay creates a mushroom that goes off-center
This is a situation where when you’re pushing the cone down, it creates a clay mushroom of sorts, goes off-center, and then traps the water under the clay. This then makes the clay rip off when you’re coning or pulling, and it’s annoying to have happened. It’s a typical problem, but there are a few things that you can do to fix it.
- First, push the clay from the side and lean the clay over
- This will cause the clay to move back to the center as the downward pressure is exerted on there
- Keep this smooth and continuous to get the best results possible from this
Air bubbles
This happens sometimes on the wheel, where you’re centering, and then you see a small bubble of air located in the wall. There are a couple of things that you can do in an ode to fix this quickly, and they are as follows:
- Stop the wheel completely
- Take your needle and poke the bubble there
- You’ll see a void, so fill that with some clay
- Re-throw the wall and make sure that it’s not there
- You can prevent this by making sure the clay is wedged, and you cone the clay a few times
One Lip is higher than the Other
This happens occasionally as well, where you’ve got one lip on the piece that’s higher than the other, with a wall thicker on one side than the other because the hands moved in a diagonal or one hand is in front of the other. It’s pretty easy to fix, and it simply involves doing a few things. They are as follows:
- Take the fingertips and make sure that they move in a line that’s straight together
- Also, make sure that the clay is centered, and that you open it up in the center.
The walls are uneven
This is when you have walls that are thick, bulging, or in general, get cut off. It’s quite annoying, and you want to make sure that it’s put together quickly. This happens more during the throwing step. To fix this, do the following:
- Throw these with the outside fingers lower than the inside to help make sure that the fingers that are touching keep the walls together
- Make sure that the inside fingers support the wall, and from there push out the clay with the outside fingers to create a thinner cylinder you can gather the clay that’s there to throw up
- Keep the throwing near the middle to help compensate for this
The S Crack
This is something that you don’t necessarily discover when you’re on the wheel, but it happens when you’re going to bisque fire this. You’ve spent this time throwing, only to discover that there is a giant crack in the wall. Of course, you can’t fix this, unless it’s in the leather hard stage. You may be able to rectify this. The best way to learn from this mistake is really to just keep a few things in mind once you try again.
To help fix this next time, you do the following:
- Compress your clay better when you throw it
- Drop the clay ball down harder when you start this on the bat
- Push down on this to help open up the ball completely
- Make sure that you open on the thick side, and compress this by throwing the bottom
- Never leave water in the bottom, and ensure even drying of the pots
- Make sure that if you’re having this issue you dry this upside down or have the top covered to prevent this from happening.
The cylinder creates a triangle at the bottom
This usually happens when you’re throwing it, but it is a centering issue. You may see this when you look at the walls, where they’re very thick, and they end up leaving clay in the shape of a triangle at the bottom. This creates issues when you fire it, so you must fix this. To rectify this issue, you need to do the following:
- Always make sure that you create a flat-bottom
- After you open this up, put your fingers into the hole and then pull them slowly across so that you create a bottom
- From there, you can then pull the clay
Uneven Shapes
This is something that also happens when you’re throwing, but centering does play a huge issue. This often doesn’t match, and the problem with it, you’re going to end up creating an uneven bowl if you’re not careful.
To fix this, you should do the following:
- Always throw the cylinder first
- Make sure that you get the height that you want
- Always make sure that you have it together, and you make sure that the inside determines the outside of this
- If they don’t match and it’s too thick, you’re going to create this problem
Water Issues
You want to make sure that you don’t leave the water at the bottom of the pot. However, sometimes it’s hard to get rid of that. There are a couple of things that you can do to fix this
- Take a Rag and gently pat the bottom and sides
- Take a sponge and evenly clean this off
However, you need to make sure that the sponge is of high quality, such as the Mudtools MudSponge Cleanup & Shaping Tool. This pack of 3 sponge pieces will help you tackle the mess and extra water.
The problem with the clay being in the Center
Let’s say that you’re trying to center this, but it keeps getting off-center. The biggest thing that you can do here, is make sure that you’re batting the clay correctly. You should also make sure that it’s sitting in the correct area before you start to open up the walls.
Another big thing is to make sure that it sits down hard at the bottom of the wheel. You don’t want it so hard that you can’t take it off the wheel, but you don’t want this loose either. That’s where the bats come in, and if you have it lightly pushed down on there, you’ll be able to prevent the wheel from having issues, and you’ll be able to keep the pieces on there.
If you notice that it’s struggling to come off, take some water and gently move it onto the bottom to help pull it off. Or you can take a small, flat piece and just get that under there, and pull it off of the area.
Choosing clay
A final thing that you need to make sure that you do, is making sure that you choose the correct clay. This is usually one of the key centering mistakes, and it’s a mistake when you’re throwing too. That’s because, if you don’t have this, you’re going to be able to throw well.
The best things to do when you’re choosing the clay are the following:
- It’s got good plasticity
- You can create a smooth surface here and can work with it easily
- You should make sure that you try out variety, but pick the softer one, to begin with for you to use
- However, don’t go too soft, because it’ll struggle to hold the shape that you want from it, and the wall will have issues with being pulled off
- You can use the softer clay to master the centering and the throwing, because lots of times, you don’t want to make it too hard
- If you make this too hard, you’re going to need to apply more strength to the center of this, and it makes it much harder to create shapes
- If you have trouble with creating shapes, lots of times it can affect the evenness of this, and that’s why many do encourage you to start with the easier clay to work with
Now, it might also happen that you could confuse clay with ceramic, and there is a huge difference between the two. Both these materials require specific throwing techniques that need to be kept in mind. So, here is a comparison table to help you select the right material for pottery throwing.
| Ceramic | Clay | |
| Definition | Ceramic material is made up of an inorganic and non-metallic component that is designed to harden at higher temperatures | Clay is a natural material extracted from soil and consists of the clay minerals |
| Kiln Operation | Ideal for clay handling in a high-fire kiln | Perfect for clay handling in a low-fire kiln |
| Composition | Made up of metal oxides like silica oxide, zirconium oxide, & silica carbide | Made up of crystalline silica and aluminum silicates |
| Cost | Expensive | Cheap |
Clay must not be too hard
There are multiple reasons for the clay to be hard. In case you have created your clay mix a long time back and allowed it to sit out without being used, it will surely get hard. You must keep your clay balls covered with a towel that is damp but not wet. Alternatively, you can place them in a zip-lock plastic bag.
Your clay might also dry up when it is stored for too long. To avoid this, you can slice the clay into different sections while spraying water on the same. When using this clay, wedge it well enough. This will moisten the clay.
Improperly Wedged Clay
Most beginners do not want to wedge their pottery clay. This is something unavoidable. This is somewhat understandable given the fact that beginners have no experience wedging. The key is to learn the right way to wedge from a professional pottery artist.
Improper wedging can lead to problem-centering with harder spots in the clay. Your clay ball won’t be consistent due to wedging issues. Trying to cut corners and save time might result in a non-consistent pottery experience while throwing.
Proper Elbow Placement
When you start the process of centering, it is important to watch the way you place your arms. If you look at your arms, you might observe that they are hovering up as opposed to being stable. The key is to anchor the hand to your adjacent leg or something similarly stable. Make sure your wrists are in a bent condition for proper centering.
Slow Moving Wheel
You will also have issues centering the clay when your wheel is rotating very slowly. At a slow speed, the clay will move around more and go off-center easily. When your wheel is sped up, you can find better clay-centering control. The key is to speed up your wheel to a medium-high or high speed.
After you have centered the clay, you can slow down the wheel to create your pottery piece successfully. The best way to control the speed of your pottery wheel is by making use of an electric pottery wheel. One such amazing option you can try is the Mophorn Pottery Wheel.
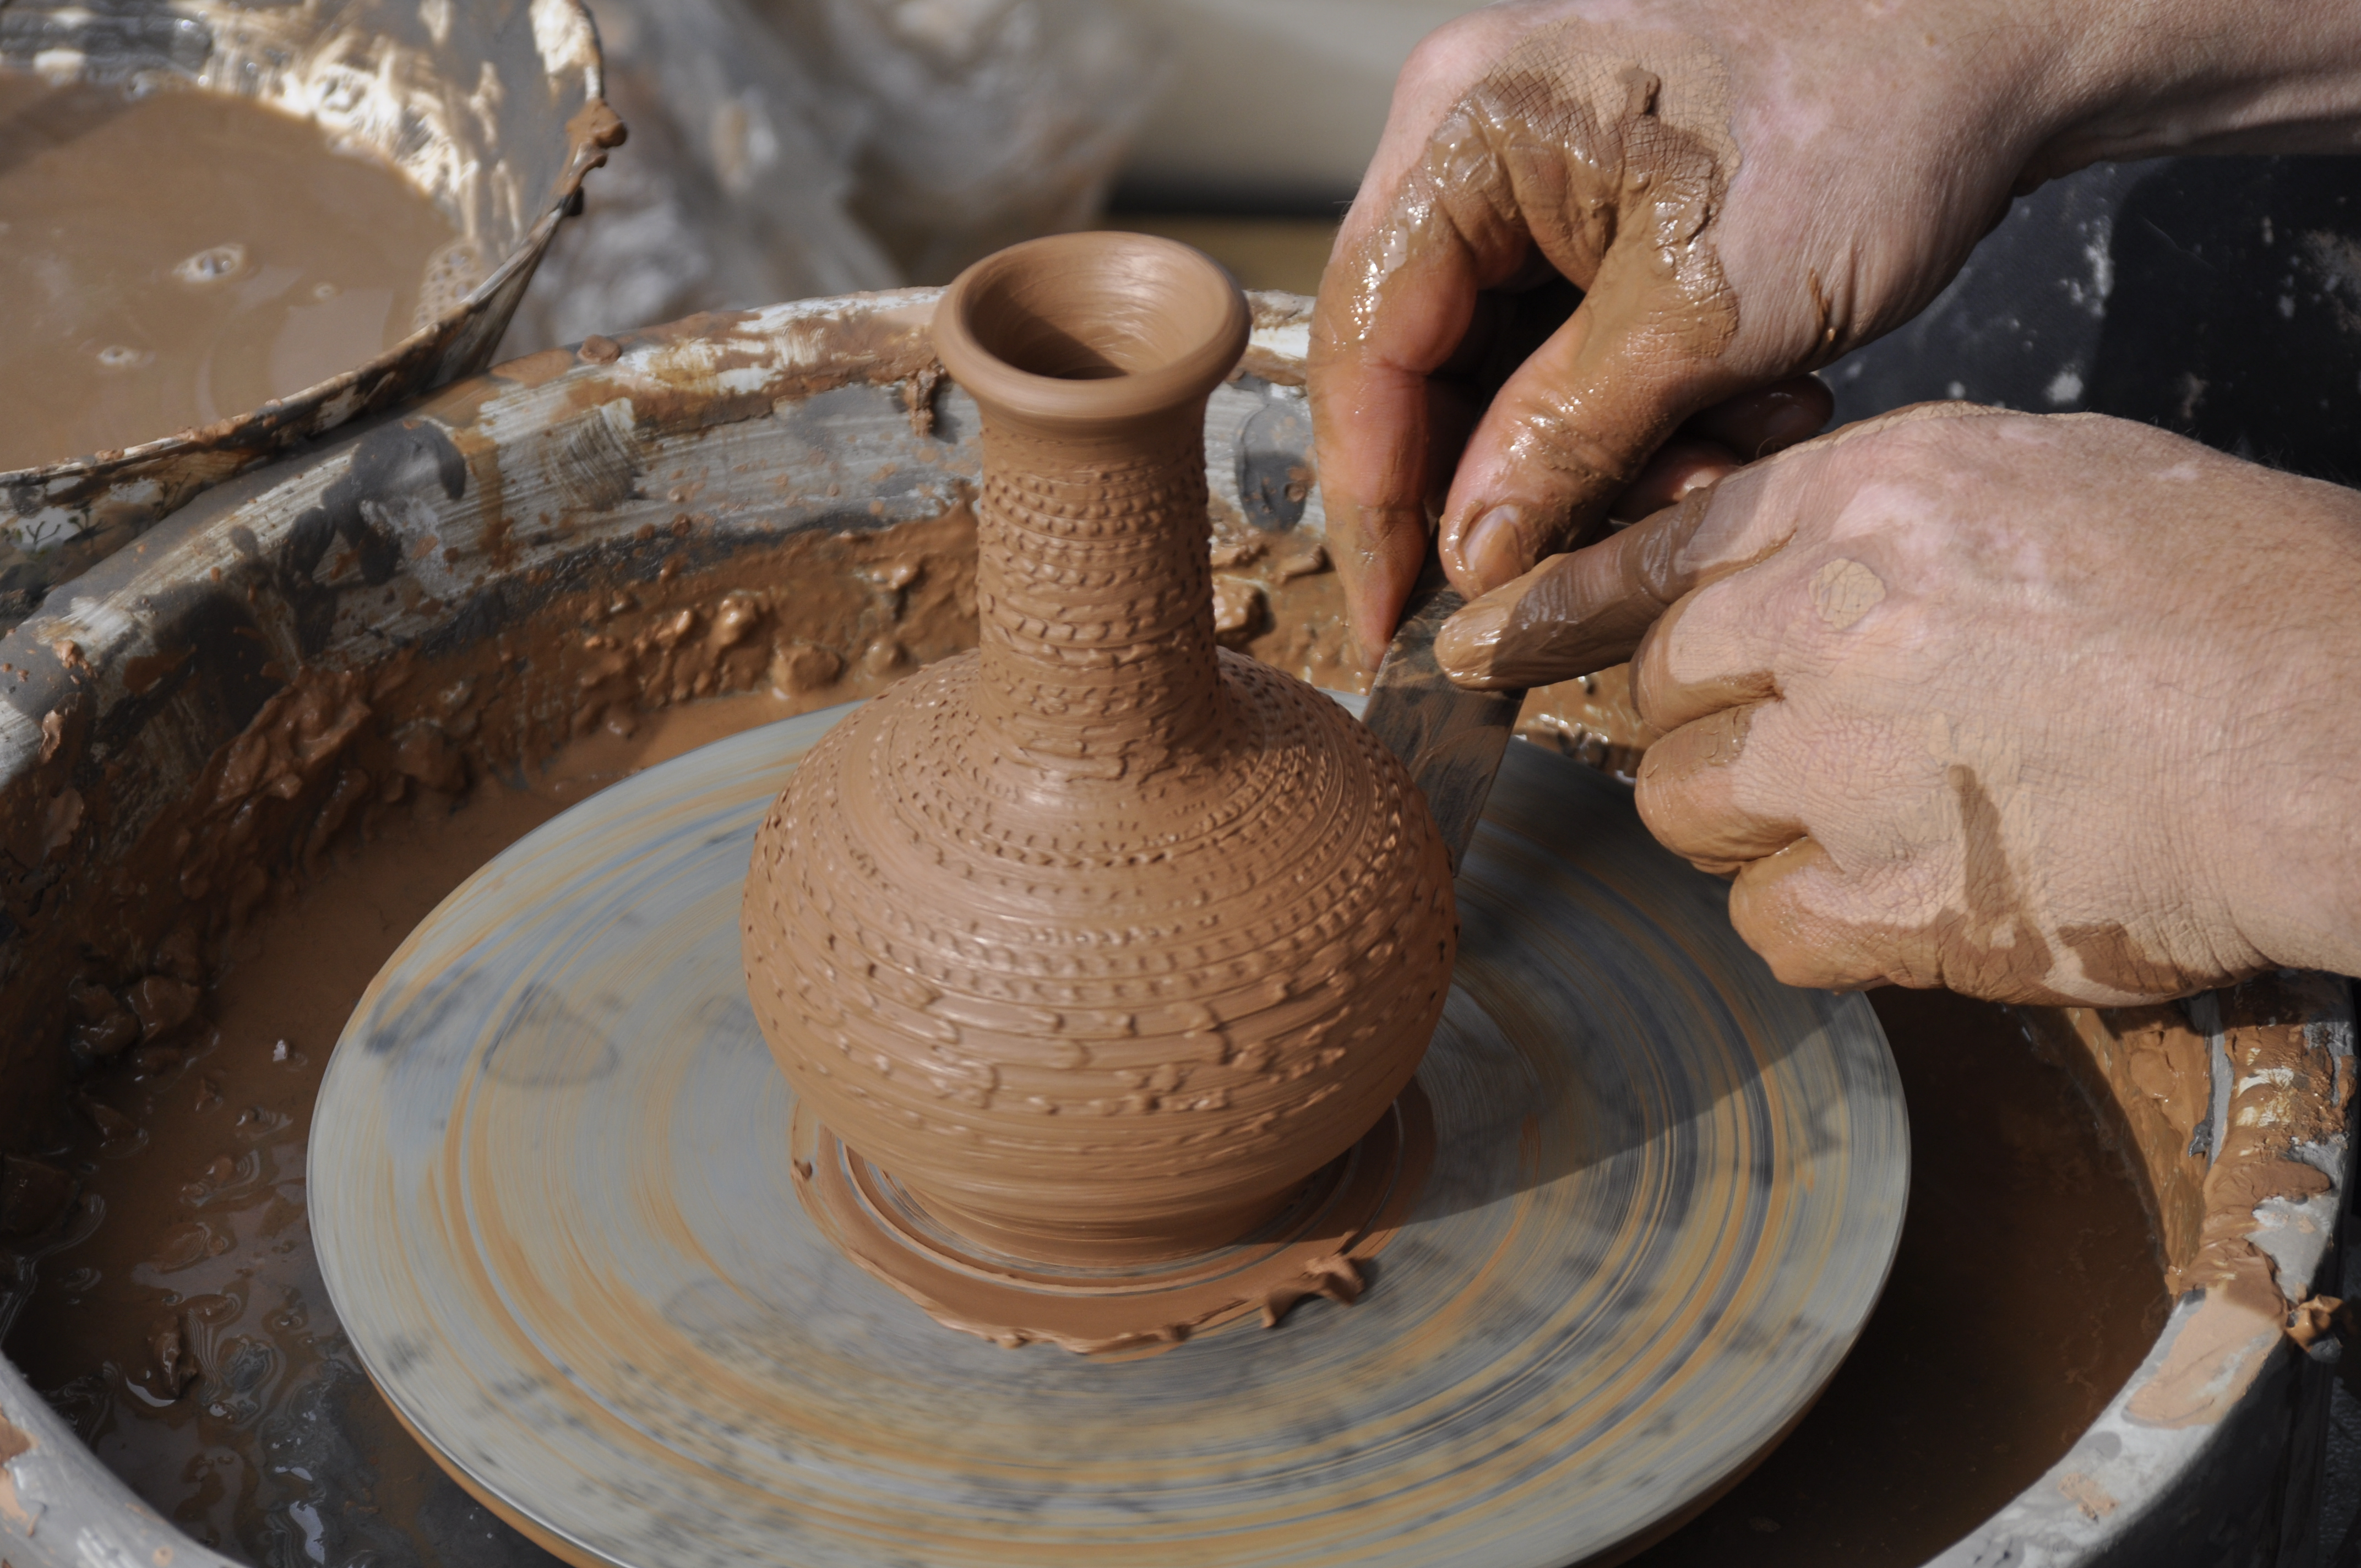
Use Modeling Tools to Cross-check
This is a trick used by most professional potters. Here is how you implement it to find out whether your clay has centered properly.
- Make use of the pointy side of the modeling tool & place the same gently against the clay
- Steadily hold the modeling tool using both hands and slowly turn the wheel on which you have placed the clay
- If you see the line forming into one whole circle, then you have centered it in the right way. In case it does end up as one single line, you need to work on it again.
When using a modeling tool, make sure you have the right set to accomplish the task. You can check out this amazing tool known as the Swpeet Modeling Clay Sculpting Tool Kit.
Throwing along centering are two big issues, and if you notice that you have problems centering clay and throwing, it’s time for you to learn how to do it better. These are the top issues, and they often involve learning and practicing at the end of the day. Even the best throwers need to take some time and learn how to effectively use the right types of clay for a successful throw.
So if you’re down about whether or not you’re going to throw something correctly, you should first and foremost learn about the major problems in centering and throwing clay when you’re working with this. By making sure that you get it, and making sure that you understand how to effectively do this, you’ll be able to create the clay centering that you want to make, and you’ll be able to throw the claymore simply, allowing you to achieve great results from these tips as well.


