Do you like to watch and try out a DIY Air Dry Clay artwork? Wish you could store your air-dry clay for a long period without the issue of drying out? This is one complaint artists come up with now and then. Air-dry clay is undoubtedly one of the most versatile and fun products for artistic usage. However, the air-dry clay drying out before being used could be a devastating sight.
But what can we do about it? How can the unwanted drying of air-dry clay be prevented? Well, if you are seeking the answers to these questions, you’re at the right place. Here we will tell you the ways that can help you prevent the precious air-dry clay from drying out abruptly while in storage.
Before we know the tips to keep the clay from drying, we need to get deep into the composition to understand how it dries out so quickly.
Difference between air dry clay and Polymer Clay
If you have plans to get into crafting, you will come across two common variants of artistic clay, including:
- Polymer Clay
- Air Dry Clay
The polymer clay is easy to mold and use for any professional or hobby-based artwork. However, the use of the polymer clay might require baking once the shaping process has been completed. The shape doesn’t set in permanently unless the clay is baked at a certain temperature. On the other hand, air dry clay dries out on its own in a matter of one to two days after being used in the project.
Let us take a look at both the clay types in this comparison chart below:
Type | Air Dry Clay | Polymer Clay |
| Features | Air Hardening, Non-Toxic | Pliable, Soft, Convenient Shaping |
| Material | Water-Based | PVC |
| Dry Time | 24 Hours | Oven Baking Required |
| After Drying | Solid | Not Solid |
| Shelf Life (When Unopened) | 1-Year | No Deadline |
Storage Techniques for Air Dry Clay to Prevent Drying
The best way to prevent the airdry clay from drying out is to keep it inside containers that are tightly sealed. The simplest way to do so is by using the heavy-duty bags that come with a zip lock. Regardless of the container being used by you to store your air-dry clay, your focus needs to be keeping the moisture level intact. If you are an artist or hobbyist with multiple colors to take care of, you need to try multiple small bags. If you are wondering which zip lock bag would be your best bet, you can try the Hefty Slider Freezer Bags to keep your clay in.
Make sure you store all of them separately to avoid overcrowding. After you are done placing clay within the zip locks, keep all of them in a tall container with a tight lid. Make sure you choose a transparent container as well as a transparent zip lock. In case you are puzzled as to which container should be used, you can try the Bayco Glass Food Storage Container. It will help you see through in case your air-dry clay has started to dry out.
What is the best temperature to store air dry clay?
Apart from storing your air-dry clay in sealed or tight containers, you need to store it at a temperature that won’t dry it out. Keeping the air-dry clay within the bounds of normal room temperature as per your location can help prevent any unwanted drying.
Remember that a temperature too high or too low can disturb the molecular integrity of the compound. It means your air-dry clay can melt in a hot environment, or freeze hard in a cold one. So, the right way to store your air-dry clay is in a place that is cool and dark away from direct sunlight.
What to do in case the air-dry clay starts drying in storage?
Even the best storage techniques might leave a chance for your air-dry clay to dry out with time. Maybe you failed to close the lid tight enough or left it out for too long. There could be multiple reasons for your air-dry clay to dry out in storage. To catch the drying before it completely takes over the clay, make sure you check it every other week. That is why, earlier in this blog, it was suggested that you keep it inside a see-through container.
If you catch the clay that has just started to dry out, you can reverse the process easily. Just spray it with water and store it back again. Apart from spritzing it with water, you can also wrap it in a wet paper towel and seal the same within the container. Remove the towel after some days as the clay will have absorbed enough moisture.
But what if it’s homemade clay?

How can you store the homemade clay?
Regardless of whether your air-dry clay is homemade or bought from the store, the storage process to avoid drying is the same for both. However, in the case of store-bought clay, you need to remove it from the original packaging and wrap the same in your zip-lock pouch. Keep in mind that this process should be done while removing the excess air from the bag.
Reasons for drying of air-dry clay
Now, there are multiple reasons for your air-dry clay to dry out. Some of the common ones have been listed below:
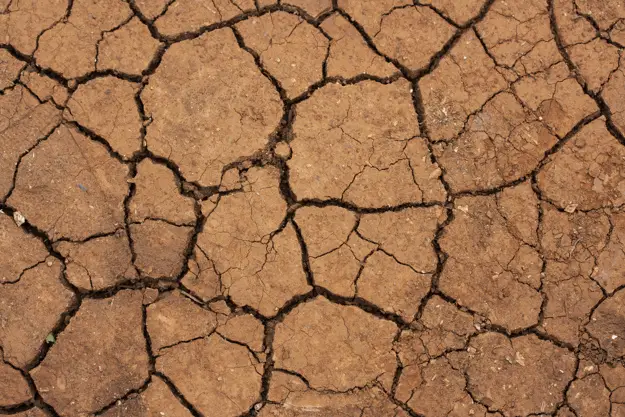
- Evaporation of moisture due to high temperature
- Thin rolls are more prone to cracking
- Oversaturation of water
- Two pieces that haven’t merged properly
How to test if your air-dry clay has started to dry out?
There is a chance that your air-dry clay has started to dry out inside the storage box. But the drying isn’t visible. You might not want to risk taking it out and exposing it to the outside air for further drying. So, what can you do in such a situation? How can you test if the drying process has started?
The key is to opt for a nail test. In this test, you do not have to take the clay out from the zip lock. Just press your nail on the clay while it’s still inside. If your nail goes in smoothly, forming a good dent, you can relax. Your air-dry clay is perfectly safe.
However, if you feel like the nail isn’t going in as fast as it should, maybe the drying process has started. In this case, take the clay out and opt for the reversal process explained in this blog.
Conclusion
Instead of panicking or throwing out your air-dry clay, you can opt for these DIY techniques and restore the clay to its original form and use it as much as you like. Remember to keep the clay moist, but do not overload it with water as it could cause further cracking as the water evaporates. Now that you know the techniques to keep your clay safe from a complete dry-out, it’s time to get started on your artwork!


