Air-dry clay is famous among clay enthusiasts because of its versatility and easy drying process. It is an accessible medium of air-dry clay that allows anyone to unleash their inner artist. But in all, air-dry clay presents an irritating challenge: cracking. Those unpleasant fissures can be an eyesore even to the most beautiful creations. But you don’t need to worry!
This comprehensive guide equips you with the knowledge and techniques to prevent cracking your piece of art and keep it intact. Read on.
Understanding the Air-Dry Clay
Before we delve into how you can prevent cracking, let us briefly understand what air-dry clay is all about. Unlike kiln-fired clay, air-dry clay hardens when exposed to air over time. It gives this clay a unique characteristic and convenience in use. Depending on the climate you experience, air-dry clay reacts to it. Moreover, the thickness, consistency, and size are some factors that determine the dry time of the clay.
What Makes the Air-Dry Clay Unique?
If you are wondering why this clay is so popular, here are some of the characteristics that explain what makes air-dry clay unique:
- Drying Time: Air-dry clay eliminates the need for a kiln, drying and hardening at room temperature over time. The drying period is less than that of other clays, making it a unique type of clay.
- Shrinkage: Air-dry clay usually shrinks as it dries up. Considering the shrinkage rate, craft your project accordingly so it does not appear smaller when you give it the final touch.
- Texture and Finish: The texture of air-dry clay can be fine, smooth, and even gritty. It depends on the brand and the composition you use. Besides, it depends from artist to artist to decide what finishing touch they must give.
- Color Options: The best thing about air-dry clay is they are available in various options. It gives the artist the privilege to choose the colors and patterns of their choice.
In short, air-dry clay is highly versatile compared to other clays. However, to prevent cracking, you will have to take some steps. Precautionary measures do not always work, and for such situations, there are remedies we have mentioned below.
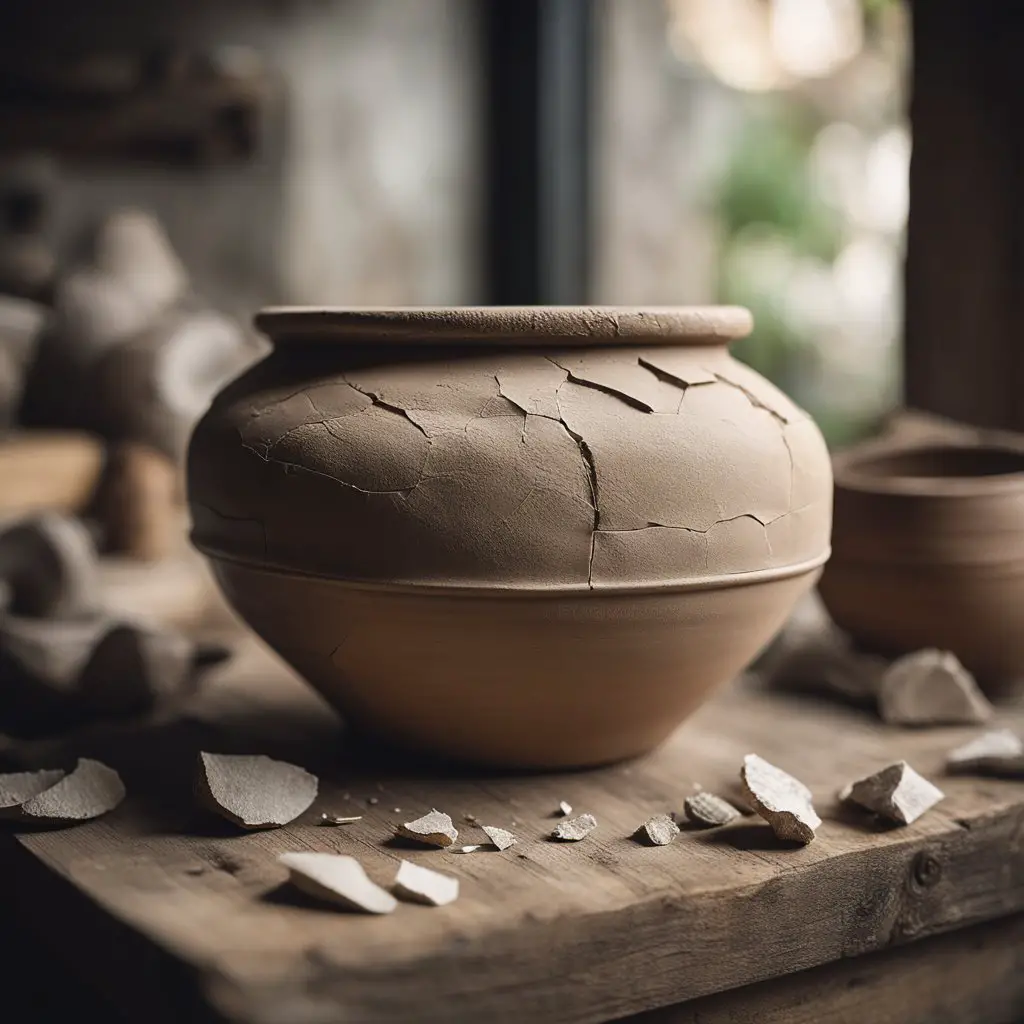
Why Air-Dry Clay Cracks?
If you have used air-dry clay, you know that air exposure assists the clay to hasten its drying process. But did you notice that it has started to develop cracks?
Air-dry clay is prone to cracking for several reasons. Uneven drying, where the outer layers dry faster than the inner layers, creates internal stresses, which lead to cracks. Thick sections of clay retain moisture longer, causing uneven shrinkage and cracking. Insufficient conditioning, marked by the presence of air pockets, results in weak points and ultimately results in visible cracks. Lack of support for large structures and rapid drying conditions, such as exposure to high temperatures, can also induce cracking.
Besides, Sharp edges and uneven transitions, low humidity, improper joining techniques, overworking the clay, and leaving the project uncovered during breaks further contribute to the formation of cracks. These factors are essential for preventing and addressing cracking issues in air-dry clay projects, enabling artists to create more resilient and visually appealing pieces.
How Do You Prevent Cracking in Air-Dry Clay?
We know it’s irritating when the project you poured your heart and soul into gradually starts to develop cracks. However, if you are looking for ways to prevent them, we have you covered. Here are some practical solutions to help you avoid cracking in air-dry clay. These are:
1. Knead the Clay
This process is also called conditioning the clay. Before you start your project, it is essential to note that when you take the air-dry clay out of the packet, you are first supposed to knead it. It helps the clay blend properly, enabling you to maintain consistency throughout. So, for that reason, we suggest you knead the clay with your knuckles for at least a couple of minutes before you start crafting.
2. Opt for a Waxy Surface
If you have ever touched the air-dry clay, you know its nature is highly adhesive and moist. So, it will stick when you keep it on the bare surface, and removing it will become extremely tough. However, if you place the clay on a waxy surface, it will not stick to the surface, thus minimizing the amount of stress you put on it. If you do not get wax paper, you can use alternatives like silicone or vinyl placemats to place the clay.
3. Do Not Roll the Clay Too Thin
If the clay is rolled too thin, the crafted piece of work will develop cracks over time. The general rule for rolling the air day clay is around a ¼-inch to avoid this. This formula works for speedy drying and minimal cracking of the project. So, make sure you do not overdo it while thinning the clay.
4. Add Just Enough Water to the Clay
Adding the optimum amount of water is essential for air-dry clay. It is important to note that adding a lot of water will make the clay watery, and thus, it will be difficult for you to maintain consistency while working on the project. Depending on the amount of clay, keep pouring a small amount of water until you feel that the mixture is perfect to start using. So make sure you do not over-pour water.
5. Craft Solid Joints
When crafting structures from air-dry clay, the seams and the joints play an important role. It is essential to develop robust connections as it is linked to various parts of the projects. If the joints are vulnerable and unsteady, the rest of the structure will likely develop cracks over time. So, to strengthen the joints, utilize the glue called ‘slip.’ Next, keep the scraps of the air-dried clay drenched in water so that they melt, creating a wet slush. Finally, use it as a gluing agent and brush it onto the connecting surfaces.
6. Provide Enough Support for Large Structure
If you are working on crafting a large structure, provide enough support as the air-dry clay dries. It is one of the crucial factors as it prevents the parts from coming down because of gravity and prevents cracks. So, ensure the structure has enough support from all sides to get the perfect results after the project dries up.
7. Allow the Clay to Dry Properly
When it comes to air-dry clay, it needs air exposure to dry properly. Rotate the structure every once in a while to ensure that there are no uneven dry patches on the surface. The clay should usually dry in 24-48 hours, depending on the climatic conditions of your region. Notably, the clay dries the best when the weather is dry.
8. Store the Clay Properly
It may so happen that your project might take days to be completed. So, it becomes crucial to store the clay properly to maintain its original state until the work is completed. We recommend keeping it inside a sealed vessel and away from direct exposure to sunlight. It will help you to preserve the clay properly and continue the crafting work effectively the next day.
9. Fix the Cracks as Quickly as Possible
If you notice cracks developing while crafting, repair them as quickly as possible to prevent them from further development. Depending on the size of the crack, you can fix them. For instance, if it is a small crack, you can patch it up with air-dry clay until it is fixed. However, you must use epoxy putty if it is an enormous crack.
Drying Time and Conditions for Air-Dry Clay
Giving your project enough time to dry up to get the best results is essential. When we talk about air-dry clay, it requires time depending on several factors, and one such factor is the current climate condition of the place where you stay. The following table guides on drying times and conditions, helping users understand how to optimize the drying environment for their air-dry clay projects.
| Drying Condition | Expected Timeframe | Its Roleplay |
| Room Temperature | Around 24-48 hours | Room temperature is an ideal condition for the project to dry. It also prevents rapid drying. |
| Controlled Humidity | 72 hours or more | This type of condition helps to maintain even moisture as the sculpture dries. It takes more time but is suitable for drying. |
| Drying Grid or Rack | Varied time | This drying condition promotes air flow that assists in drying air-dry structures. |
| Plastic Covering | During breaks | Covering the clay prevents premature drying when taking breaks from the project. |
So, before starting a project, consider this table and plan your crafting accordingly. Remember, the expected timeframe is rough and may vary under certain circumstances.
Remedies for Filing Cracks in Air-Dry Clay Projects
Did you notice crack development even after taking all the precautions? Do not worry; we have also mentioned the remedies for such crack development. These are some of the renowned techniques that will help you fix the cracks effectively.
1. Fill and Blend
It is one of the most effective techniques for fixing the cracks. In this method, you have to prepare the mixture of air-dry clay as per the size of the crack. Remember, the clay should match the structure’s color so that it blends with it well. Fill the clay on the cracks with a tool or your fingers. Smoothen it to make it look even on the structure.
2. Implement Rehydration Method
This technique is suitable for small cracks on the surface level. Gently mist the area where the crack is with water using a spray. Allow the water to be absorbed by the clay for a few minutes. Then, rub the cracked area with your fingers to smooth out the clay and close the crack. Make sure you do not over-saturate the clay.
3. Try the Score and Slip Repair
This method is effective for larger cracks or gaps. In this, you use a scoring tool to create minor scratches along the edges of the crack. Apply a thin layer of slip (a mixture of air-dry clay and water) to the area. Fill the fresh clay into the scored and slipped area, ensuring it sticks well. Smooth and blend the new clay with the existing surface.
4. Do Patching with Paper Clay
If the crack is deep or extends through the entire thickness of the clay, consider using paper clay. Paper clay is a mixture of air-dry clay and paper fibers, creating a lightweight and durable material. Patch the crack with paper clay, blending it smoothly with the surrounding surface. It is also an effective method to fix and hide huge cracks.
5. Apply a Surface Coating
If the cracks are minor and the overall structure is decent, consider applying a thin surface coating over the entire work. It can be a mixture of water and air-dry clay or a thin layer of gesso. Smooth the coating over the surface using some tools and pay extra attention to the cracked areas. This method is beneficial when the cracks are narrow.
6. Sand and Refinish the Sculpture for a Finishing Touch
After the repaired area has dried completely, use fine-grit sandpaper to smooth the surface. Sanding helps blend the repaired section with the rest of the project. Once sanded, you can finish the entire piece with a sealant, varnish, or paint for a consistent appearance.
Check out VERONES’ Grit Wet Dry Sandpaper to give the perfect finishing touch to your project and enhance its overall beauty.
Final Words
Cracks are widespread and an inevitable part of any air-dry clay project. But they can be prevented if you take the necessary steps. So, before you start a project, make sure you choose the right type of clay and keep the composition of the air-dry clay as per the requirements of your project. Besides, if cracks develop even after taking all the precautions, several techniques are available. So you do not need to worry about the cracks anymore. Happy crafting!


