Beginner artists love working with air-dry clay, mainly because it doesn’t involve working with the potter’s wheel. The best thing about this clay is that it dries out with time due to air exposure and doesn’t require firing for permanency. However, a few reasons could bring about cracks in the sculpture.
So, how can you avoid getting into this mess and prevent cracking in the air-dry clay? Before learning about it, let’s see what air-dry clay is.
Understanding Air-Dry Clay
While it is known to be the easiest clay to work with and is recommended for beginners, understanding the properties of air-dry clay is the first step to preventing cracks that may develop on your sculpture.
Advantages Of Air-Dry Clay
It is the best medium for a beginner pottery enthusiast because the number of factors at play is relatively few compared to any other clay type. In addition, the air-dry clay is easy to mold, can take any form, and is easy to revive. All it needs is a spritz of water, and the clay will be malleable again.
No extra equipment is required besides the clay since it hardens by itself after 24-48 hours of sculpting.
Disadvantages Of Using Air-Dry Clay
It may be difficult to mold the clay in time before it begins to harden. However, it is a reversible process that can easily be undone using some water. Besides, it is also highly fragile when used to make smaller, delicate objects with intricate details and may not provide results as expected.
The biggest disadvantage of using this clay is that it is prone to cracking. While it takes about a day or two to harden, your clay may break due to excessive shrinkage of the clay.
Air-Dry Clay: Does It Crack Easily?
Most air-dry clay brands offer naturally acquired clay made from white earth that hardens as it dries. Air-dry clay doesn’t require baking for the curing process and typically shrinks very little. Not just that, cleaning up your work table after crafting is more effortless than working with ordinary clay or polymer clay.
The best way to resolve cracks in your air-dry clay is to fix them as soon as you notice them. It helps you treat them on time and prevent them from becoming deeper. If there are a few little cracks on the clay surface, you need not wait until the clay is dry. Resolve this issue by making a slip of some air-dry clay. Add water to the clay to achieve a consistent mixture that can be applied to any crack so it is adequately sealed.
Some reasons for your air-dry clay to crack as it dries up:
- Moisture Evaporation:
Air-dry clay has a lot of water to help with malleability. So, if you keep it out of the packaging for a long time and expose it to the air, the moisture starts evaporating within a couple of hours. However, at times, due to high heat, the water begins to evaporate very fast, which could create small cracks. So, the key is to let it dry at its own pace. The slower the drying process with air-dry clay, the better it is.
- Improper Storage:
If you start working with air-dry clay that has already started drying, it could lead to cracking issues due to faulty moldability. The key is to check if your air-dry clay feels too hard to mold or create shapes with. If it feels too dry, add some water to the clay. It will help add to the flexibility and prevent cracking issues. Also, you must ensure that the air-dry clay is safely stored in an air-tight container.
- Clay Rolled Out Too Thin:
Your air-dry clay could also start cracking during the drying process if the clay is rolled out too thin. Thinner clay pieces dry up faster and are prone to easy cracking. Rolling your clay pieces to 1/4th of an inch in thickness is the key. Ensure that the clay’s thickness is consistent to help prevent any cracking issues.
- Excessive Water Used While Molding:
If you have used too much water while trying to layer clay on top of another existing layer and mold it into one sculpture, your clay may not have the stability to hold itself up. While it may help keep different parts together initially, the excess water is bound to evaporate from the clay during drying. As a result, it leaves your sculpture in pieces and may even cause cracking due to the lack of water molecules to bond clay particles together.
- Excess Heat Used to Speed Up Hardening:
Since pottery can be such a long, tedious process, some people may speed the hardening using tools like hair dryers or putting their work in an oven. It may help you harden it faster, but you will also disrupt the natural flow of events. The structural integrity is bound to be threatened soon, and there will also be cracks on the surface of the pottery. Using these devices will also affect the stability and durability of your clay in the long run. So, let the clay dry independently instead of trying out any tricks.
- Using an Armature:
An armature is an outline of the sculpture made using durable and rust-resistant materials like wires, aluminum foil, polystyrene, etc., that help retain the shape of the sculpture while balancing the weight of the clay. It is used to make sculptures with various small parts that require lots of clay.
Since these materials do not have enough water that evaporates at the rate that air-dry clay shrinks, it can cause cracks.
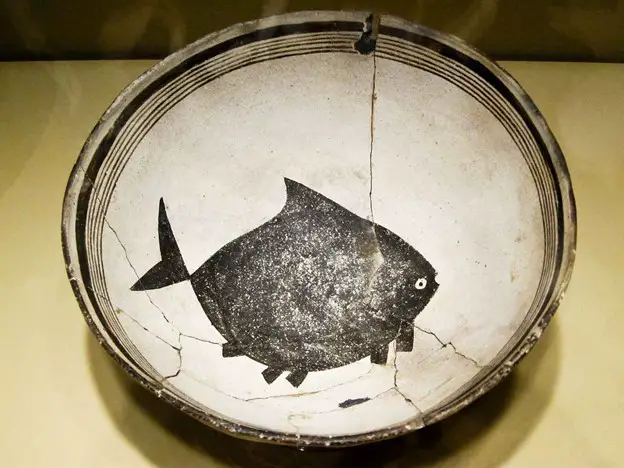
Can Cracks on Air-Dry Clay Be Covered?
It is a must to know that air-drying clay cracks naturally and may be experienced by seasoned professionals and beginners.
So, if your clay begins to crack, these are some ways to salvage it when noticed immediately.
- Small Cracks: If you notice small cracks appearing, it is the best time to repair the piece without letting it show. Use a slip, which is a simple mixture of water, glue, and clay, to fill the cracks. Ensure that it is applied precisely only into the cracks and not on a flat surface that is crack-free, as it will be noticeable and affect the overall look of your sculpture.
- Big Cracks: Cracks easily visible on dried clay can be fixed using clay. Take some clay of the same kind as the clay used to mold the pot. Since clay shrinks after drying, it is advised to use more than required to fill the crack sufficiently. Once put, smooth down the clay to make it seem like a part of the original sculpture. To make it more realistic, you can smoothen the surface using sandpaper or a rough surface to eliminate the excess without affecting the rest of the clay.
Factors to Remember to Avoid Air-Dry Clay Cracking During the Sculpting Process
Instead of dealing with the symptoms of the problem, it is best to deal with the cause and make effective changes that can eliminate the root cause.
Thus, taking the following preventive measures while molding and sculpting can reduce the chances of your clay cracking.
1. Dealing with Air-Dry Clay Pre and Post-Molding:
Ensuring proper maintenance by maintaining the clay in its original condition as packaged by the manufacturer is the first step to minimizing cracks in clay.
2. Considering Proper Storage:
Air-dry clay begins to harden immediately after being removed from its packaging, which goes unnoticed. While working on the project, keep the unused clay under a damp cloth. This way, it can retain moisture and be ready for use when you need it.
When you’re done using the clay and need to store it away, remove at least most of the air from the storage container. For this purpose, zip-lock bags or air-tight containers with lids are ideal.
How Do You Deal with Air-Dry Clay While Molding?
If you optimize the sculpting process by using the tips stated below, you can considerably reduce the chances of cracking.
1. Keep Your Surfaces Clean and Dry:
Clean surfaces, especially at your workplace, are essential to take up any activity. When dealing with air-dry clay, keep your surfaces dry and clean from debris, dirt, etc. There must not be any dampness, stickiness, or cluttered belongings on the surface either. Moreover, you shall not hoard excess tools while working on an air-dry clay. A sculpting knife shall do the trick just fine, along with the expertise of your fingers.
It is also better to place a layer of protective sheets, paper, mat, or newspapers on the desk you are working on to prevent any clay from sticking.
2. Keep a Spray Bottle Handy:
The clay shall always stay wet in moderation so you can mold it to the desired shape. However, avoiding using hands or measuring cups is essential since they can cause excess water content in the clay. It will later cause cracking as well. Always using a spray bottle of water at your workstation is highly advised.
Spray bottles are ideally known for their mess-free dispensation and nozzles that spray out just the right spritz of water at a given moment. You can avoid water spilling on your desk and have absolute control over the amount you put in your clay. You can also spray over your hands to keep them damp at all times without adding a lot of water.
3. Sculpt in One Piece:
It is an underrated tip that is often undermined. When possible, use one chunk of clay to make the entire piece.
It eliminates the need for any attachments, layers, and adhesives. It may take more time to work on the project, but it will lead to greater structural strength and durability of the sculpture.
4. Maintain the Thickness of Clay:
While air-drying clay gives the potter the complete freedom to control the required thickness and adjust it at any point during the process, it is essential to maintain a steady thickness of clay. An object with sections of varying thickness will have minimal strength and is likelier to crack and even break when compared to a piece of clay of the same thickness.
While you can determine the thickness as per your craft idea, keeping it around 1/4 of an inch is ideal. It is an excellent benchmark for beginners, allowing their sculptures to be stable throughout. As you progress and gain experience, you can reduce this thickness by up to 1/8 of an inch. The lower you go, the reduced the strength of your clay will be. Any lower than 1/8 of an inch will result in cracks and shattering.
5. Use the Right Amount of Water During Molding:
The correlation between adding too much water and later cracking issues seems strange, but it makes sense when you understand how it happens. While it is known that too little water can later dehydrate the clay in the drying stage, the opposite is also true because too much water can saturate the clay. It slows down the drying process, and a lot of water evaporates from too little space on the surface, which later causes cracking. Therefore, it is recommended that you dab water into the clay with the help of a sponge as opposed to pouring water on it. It helps add the right amount of water instead of reducing or overdoing the moisture content.
If you feel the clay has a lot of water, let it dry out for a few hours before molding begins.
6. Improper Joining of Clay Pieces:
When you combine two pieces, the crafting process can be prone to cracking issues as it dries up. While this will not always be the case for your sculptures, you must remember that the combined pieces should experience drying at the same level and pace. If one piece is dryer than the other, it can cause the connection to crack. Also, it would be best if you store your pieces properly, like a crosshatch pattern, using a toothpick. It helps with better adhesion.
Alternatively, you can use designated tools for scoring purposes, including popular options like the Xiem Retractable Pottery Scoring Tool. This ergonomically designed tool features 6 sharp edges, providing precision and depth for scoring purposes.
7. Use The Same Clay Slip to Join Two Pieces Together:
Slip is created by watering down the clay and then mixed with glue. If you fail to use the same clay as the base sculpture for preparing the slip, it could dry out faster or later and hence induce cracking issues. So, always use the same clay type to prepare a slip as your sculpture.
Also, remember there is a difference between a slip and a slurry. Slips are loaded with water, while the slurry has a thicker consistency. While some joining instances require the use of slurry, others would require the use of a slip. So, keep the following differences in mind to avoid cracking issues.
| Parameters | Slurry | Slip |
| Features | The slurry is a thick liquid made from water, clay, and adhesive such as glue (optional) | Slip is generally a thinner liquid that is created from water and clay and might require the use of adhesives if needed. |
| Usage | The slurry is generally used later in the drying process as it has low moisture content and keeps up with the sculpture’s drying speed to avoid cracking. | Slip is used in the beginning stages of the clay drying process to join two pieces together as it has a higher amount of water than the sculpture you just created |
| Shrinkage | Slurry has low water content, which causes minimal shrinkage | Slip has a higher amount of water that can cause higher shrinkage |
8. Knead Your Clay Properly:
Another way to prevent cracking issues in air-dry clay is by kneading it properly before molding. You should knead the clay for at least 3 to 4 minutes before crafting. If you feel that the clay is too dry for use, try to dab in more water with the help of a sponge dipped in water. It will help prevent any cracking issues as the sculpture dries up. In short, kneading correctly is the key.
9. Fix Tiny Cracks Immediately When Noticed:
While sculpting, it may be possible to see some cracks appear in the clay. In such a case, taking action immediately rather than waiting for the clay to dry is ideal. So, as per the tips in the article, use a slip or clay to fill up the cracks and make one homogenous pottery piece.
10. Store the Parts of the Structure Properly:
If your craft idea requires working in smaller sections and cannot be altered for structural strength, you may work on different pieces at different times. After finishing working on a pottery piece that needs to be stored but not dried immediately, it is essential to check the conditions.
Use a bag that can be sealed to place the piece in. Ensure you press out all the air from the bag before sealing it. If it is going to be stored for more than a day, it is recommended to spritz it with some water to keep it damp and prevent the clay from drying out to allow any alterations if required later.
Ideal Clay Air-Drying Process
The best way to air-dry your clay sculptures is by giving them 24-48 hours, within which most air-dry clays harden. Also, ensure proper ventilation to prevent excessive heating that can speed up the process and cause cracks.
Instead of placing your pottery piece on its designated bottom, like the bottom of a vase, plate, etc., place it on an elevated surface with slits. A typical household tool example of an excellent drying stand is a cookie rack or grilling grate. These tools allow air to flow upwards and facilitate the sculpture’s drying from all sides.
If you do not have such tools, place your sculpture in an airy room close to a window and turn it every few hours. This way, all sides will be equally exposed to the direction of the wind and dry equally.
Tips to Avoid Air-Dry Clay Cracking During the Drying Process
It may have taken plenty of effort and resources to realize your vision. However, impatience during drying can result in cracks that may be superficial or deeper ones that affect the sculpture’s strength and stability. While superficial cracks can be covered, increasing deep cracks’ strength is impossible using clay.
So, here are some factors that can help minimize the possibility of cracking while drying the pot.
1. Choose Appropriate Materials That Suit Your Craft Idea:
The first step after getting an idea is finding suitable materials to bring your vision to life. For example, air-drying clay is excellent for all uses but is not meant for sculptures placed outdoors or those with rounded edges, delicate sections, or multiple layers.
For such pottery ideas, especially those with many parts that add to the weight of the sculpture, it is recommended to avoid air-drying clay.
2. Ensure Even Drying:
After you have crafted your clay sculpture, ensure the project is evenly dried from all sides. For this, you need to keep rotating your piece now and then. If you fail to do this, certain clay sides might dry late, leading to cracking issues.
3. Avoid Using Heat on the Air-Dry Clay:
Leaving it alone after sculpting is essential for your clay to dry without cracks. It means you should not interfere with the hardening process by using external heat sources to rush it.
Since the heat from an oven or hair dryer will dry the outermost layer of clay first, it will shrink more than the clay underneath. This mismatch in drying and shrinking speeds is bound to cause cracks in clay. Therefore, allowing your clay to dry at room temperature in a well-ventilated room is best.
4. Use Armature Sparingly:
Keeping a sculpture with different parts together becomes only possible with a skeletal structure that holds the entire piece together. An armature makes this possible. However, using armature leaves little space for the clay to shrink.
Therefore, the lack of space for clay to shrink will result in cracks. If you need supporting material, use materials like aluminum foil. It provides more space for shrinking than wire, polyester, etc.
Conclusion
The tips mentioned above are a great way to prevent your sculpture from incessantly cracking or even breaking. Air-dry is a much-preferred medium for artists and sculptors to give their pottery a new spin. Cracking clay is a process we sometimes cannot eliminate, but certainly, these effects can be minimized by taking proper precautions. With no prospect of kiln firing, you have all the time to give it any shape you want.
When the air-dry clay dries up correctly, you can add colors, embellishments, and other adornments to make your piece even more compelling. You shall allow your sculpture to dry completely before applying a new layer of anything new, whether clay or adornments.


