Did you just discover how great air-dry clay is? Well, this versatile clay is so amazing that you can literally craft your pieces and make them permanent without the use of a kiln. Best of all, it is inexpensive and can be an ideal start for beginners. But as you start your very first air-dry clay project, make sure you follow each & every guideline to a T.
On your new journey towards air-dry crafting, you need to be very careful, all the while enjoying your experience as a whole. So, here is a guide to help you craft in a glitch-free manner for your first air-dry clay project.
What Can You Make Using Air-Dry Clay?
As mentioned earlier, air-dry clay works as an efficient and versatile medium for crafting purposes. It can help you craft anything under the sky. Starting from clay tiles and slab pots to badges or fridge magnets, your air-dry clay could help you achieve that perfect start for your favorite item. You can also craft some amazing Christmas decorations with no need for any specialist pottery wheel or kiln.
Crafters can also make use of air-dry clay to fix the damaged items or even fill in the cracks. However, you need to keep in mind that air-dry clay might not be waterproof or food safe. So, if you plan on using it to hold your food or anything that involves water, the project might not be sturdy or durable enough.
However, applying varnish could help prevent any cracking in the finished item if you plan on placing it outside.
Does Air-Dry Clay Dry Out Very Fast?
The answer to this varies depending on the brand of air-dry clay you select. The process of hardening for air-dry clay starts as it comes in contact with air. It is easy to use and stays moist for quite some time. So, you don’t necessarily have to rush into the crafting process. However, you need to make sure that any remaining clay piece must be wrapped & stored within a container that is air-tight. This will help preserve the moisture and make it eligible for use in your next crafting project. Air-dry clay cannot be brought back to a moldable state once it has lost all its moisture and hardened completely.
In order to be dried out completely, the clay must be left out for a minimum of 24 to 72 hours. It must also be dried completely in order to be painted on. Make sure you refrain from speeding up the process of drying via an artificial heating process. Doing this can create cracks on your air-dry clay project.
How Should You Use the Air-Dry Clay?
The right way to use air-dry clay is to knead the clay well before initiating the modeling process. This makes the clay more pliable while making it easy to shape. Make use of the right amount of clay and water in order to create a slip that helps join the pieces together.
In case your work table is a particularly porous surface, such as wooden tables, ensure that it is protected with the help of a cloth or any placemat made up of plastic. This makes cleaning up the surface faster and glitch-free.
Also, selecting the right kind of air-dry clay is very important. Depending on your project, you can try out these clay variants listed out in the table below:
Air-Dry Clay Types |
Material |
Properties |
| Epoxy-Based | Hardener and Resin | Water-resistant |
| Paper-Based | Processed Paper or Cellulose Fiber; Terracotta or Earthenware Clay | Reduced weight, Enhanced Firmness |
| PVA Glue-Based | PVA Glue & Corn Starch | Dries hard, Durable |
| Baking-Soda Based | Corn Starch, Baking-Soda, Water | Bit Brittle in Nature |
Do You Need Tools to Craft with Air-Dry Clay?
Regardless of the clay variant you use, there is for sure a requirement for tools to achieve precision. You can use almost anything to create designs and patterns on the surface of your air-dry clay piece. The best thing about air-dry clay is the fact that it can pick up textures with ease and imprints from objects with ease. You can use woven fabrics or leaves such as hessian work or lace to create some amazing patterns and designs.
You can also make use of cookie cutters from your kitchen to craft out some amazing designs. However, you need to make sure that the cutters are old and aren’t used for cooking activities in the kitchen. Other items such as rolling pins used to flatten the air-dry clay must also be kept separate from your kitchen’s rolling pin.
Can Air-Dry Clay Play a Role in Model Making?
Yes, air-dry clay can be used for the preparation of small figurines, models, and antlers. You can also use wires for the creation of something that is termed as ‘armature.’ This helps hold the clay right in place. This clay can easily be shaped like something you please & would require side cutters or wires to maintain the shape. Keep in mind that your wire doesn’t necessarily need to be ideal in shape and size. However, it must be strong and with a thick gauge. It must not have the liberty to flex or move after you have started the application of clay on this base.
The use of rolling pins can help flatten out the clay while making it perfectly easy to cut out shapes & embellish it with the help of a crafting knife. Apart from this, you can make use of smoothing tools to smooth out the edges and rough bumps. Further, the clay shaping tools can help you add minor details. It also helps you create some craters and small patterns with the help of a chisel tool. Finally, the V-Tool and Needle cuts & sculpts the clay into various shapes & manageable sizes.
How Can You Decorate Your Air-Dry Clay Project?
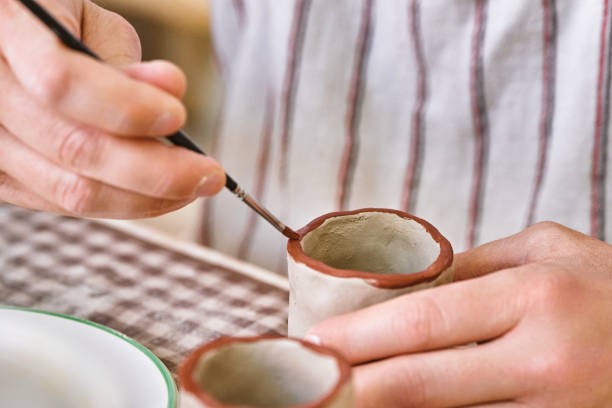
You can add beautiful details to your clay by rolling it out onto a textured surface. Adding colors can be a great experiment when you aren’t simply satisfied with the patterns added by you. One can use acrylic paint directly on the clay surface. If the clay has dried out completely, you can paint the surface with ease.
Acrylic paint works fairly well on air-dry clay. However, make sure you don’t apply a lot of color in a single run. After you apply the color, it would require additional time to dry out completely. So, make sure you apply the second coat only after the first coat has dried out. You can also use Mod Podge or Decoupage Papers to embellish & varnish the project. Sequins and buttons look amazing when pushed directly onto the surface of the clay before hardening. After the clay project has completely dried out, you can make use of hot glue to add some embellishments onto the varnished or painted surface.
Tips to Help You Get Started with Your First Air-Dry Clay Project
1. Prepare the Work Surface:
As you work on your air-dry clay project, you would observe that things start sticking on the clay’s surface. This includes things such as lint, dog hair, or dust bunnies. To help yourself craft with ease, you can start by cleaning the surface completely.
It is also recommended that you make use of a silicone-based craft mat or something made out of plastic to keep the surface away from any unwanted dust. Alternatively, you can also use wax paper and tea towels to keep the surface ready for use.
2. Tackle the Stickiness with Ease:
One thing about air-dry clay that puts off crafters is the fact that it can be particularly sticky. It can stick to the hands, work surface, & tools as well. However, not all brands of air-dry clay are created equal. One such clay that comes with regulated stickiness and can be molded easily is the Crayola Air-Dry Clay that comes in a re-sealable bucket to help preserve the clay with ease.
Also, several potters use this trick of applying a bit of hand lotion to ensure the clay doesn’t stick to the hands. You can also use some baby powder to minimize the stickiness and dust it on your hands.
3. Cover the Project:
When molding the air-dry clay for your project, you should have a damp towel beside you. As you work piece by piece with the air-dry clay, you need to ensure that the rest of the mold is intact. You can also wrap the clay with a cling wrap to ensure it doesn’t dry out with time.
You can easily resume when required as the wrap help keep the moisture content intact within the air-dry clay.
4. Ensure that the Pieces aren’t Too Thin:
Rolling out the clay too thin can be the worst mistake you make. Doing this would lead to cracks in the air-dry clay. So, always remember to roll the clay to a minimum of ¼ of an inch to ensure that project comes out in its best form.
5. Smooth out the Project:
When sculpting the air-dry clay, you will surely see the presence of imperfections after the project dries out. You can smooth out the imperfections while molding the project with a bit of water. You can use a sponge or even dab in water with the help of your fingers to smooth out the piece.
Make sure you don’t use a lot of water on the project as it would increase the overall drying time or even make the clay difficult to mold. Don’t worry. Even if the piece has some uneven surfaces, you can scrape off the unwanted area with the help of fine sandpaper.
6. Joining or Adding the Clay:
Sculpting isn’t something that you can perfect in one go. It is a process that involves a lot of making and breaking. In the process of crafting your piece with air-dry clay, you might have to add or remove a lot of clay.
Now, removing the clay might not be a big deal. However, adding more clay to your piece requires you to use “slip” or “score.” In order to join two pieces or add more clay to the project, you need to follow a process. Scrape the surfaces that you need to join together using a toothpick/sculpting tool. Doing this helps the clay piece to stick on to. Use a bit of slip (clay that is watered down to a paste-like consistency) to cover both these scored surfaces. Now, join these two parts together with the use of fingers or a sculpting tool.
A slip helps join these parts together and ensures a durable bond that isn’t likely to break or crack.
7. Drying the Air-Dry Clay:
The best way to dry out the air-dry clay is by keeping it in an airy room. In case you are using some kind of mold to craft your piece, allow the clay to achieve maximum possible dryness to hold on to the shape. Next, remove the clay piece from its mold, and this will aid in the speeding of the entire drying process.
It is also recommended that you flip the project as often as possible. Now, doing this will ensure that the project dries out evenly from all sides. Most air-dry clay projects take about 24 to 72 hours for complete drying out. It cures completely after 72 hours.
8. Coloring the Air-Dry Clay:
You can craft with colorful air-dry clay by adding some color during the crafting process. This will introduce a beautiful tint that isn’t too bright but more like a pastel look. However, you can darken this color by adding more to the mix. Keep adding and molding up until you attain the desired color. Kneading is the key to achieve color consistency in the dough.
You can also paint the piece post drying out. The best and highest quality acrylic color must be used to achieve bright and beautiful output. Ensure that you allow a thorough drying process between two different paint layers.
Conclusion
When you follow these tips bit by bit, your very first air-dry clay project can save you any abrupt errors or mistakes. Most of all, you will add a lot of skills to your crafting portfolio. Remember not to panic when you make a mistake, as it is a part of the learning process, and creative art takes up a lot of time and patience to turn out perfect. So, keep practicing, and your next project would surely turn out amazing!


