When throwing pottery at the wheel, a lot can go wrong. There are a few key problems though that can happen, and here, we’ll talk about the 5 ways to ruin your pottery at the wheel.
The pottery wheel is a great resource since it allows you to create and craft some wonderful items. But, did you know that it’s super easy to ruin your pottery right at the wheel?
It is way more common than you think, and here, we’ll dive into how it can happen, and how you can prevent it.

Not using Water or Wet Clay
This is one of the biggest mistakes you can make, and it’s so easy to fix as well. Clay that is too dry just won’t work, and it will bring about issues.
The problem with dry clay, or not using enough water, is the following:
- It creates wobble
- It won’t stay centered on the wheel
- It won’t be easy to shape
- It tends to break apart when you try to center the clay on the wheel
- It can be awkward to work with and tends to have issues with smoothness
We’ve all been there before where we tried desperately to get the pottery thrown, but we couldn’t because it just wouldn’t stay on the wheel. The problem may not even be the wheel though, but it’s what you’re throwing on the wheel.
The type of clay that you put on the wheel does matter, and it should have the following properties:
- Easy to use
- A little bit wet so you can shape it
- Strong enough to stay centered on the wheel
So if you do notice that your pottery isn’t sticking on the wheel for whatever reason, there are a few things that you can do to fix this, you’re not suffering.
What you can do to rectify this problem is quite simple, and it includes the following:
- Have a splash pan on hand, and wet your hands before you work with the clay
- Make sure that the clay is nice and wet before you put it on the wheel
- If all else fails, get a new piece of clay out and work with this
- Make sure that if you do get a new piece, it is thoroughly wedged out and taken out from the big piece in a manner that it can be worked with
This is probably one of the easiest mistakes that you can make, but you’ll realize that having clay that works with you is much better than trying to work with clay that is just cumbersome, that’s for sure.
Arm placement
This is another very common one that a lot of beginner potters notice that they have issues with. This is commonly done by beginners more than anyone else because they have this false idea that the arm placement is supposed to be this way.
The wrong way to shape pottery is to do the following:
- If you center it with your hands out
- If you put your elbows out wide
- If you use all of your muscles to shape the pottery
Lots of people think that when they center clay, they need to put a whole bunch of elbow grease into it, but that’s not the way to do it. If you do that, you’re going to cause issues with your pottery centering, including the following:
- You may crush the pottery
- You’re going to realize it isn’t comfy to hold your elbows out like that
- You may use enough force to end up crushing the clay, ruining your piece, and taking way more time than you need to put this together
- You’re going to put the force on the forearms instead of your entire arm, and that will also tire it out
Lots of potters think that to throw clay, you need to use a whole bunch of force at the wheel, but that’s a good way to wear yourself out, and it’s a good way to make the job a lot harder. This is also how a lot of potters end up with arthritis over time.
If you’re older, and you’re already at risk for developing this, I highly recommend that you correct your actions before you continue throwing any more pottery, since it will, in turn, create a lot of issues.
But, what is the best way to do it then? Well, read below to understand the hand placement when you’re centering this:
- Pull the elbows toward your body
- Create a triangle with your arms, and your hands
- Keep your body tight, and don’t hunch yourself over
- Very gently throw pressure on this
- Focus on using the skeletal parts of the body, rather than the muscles, to throw pottery
- Keep the pressure light, and focus on maintaining a triangle shape with both the hands and the body when you do this
If you do this, you’ll immediately notice that there is a lot less force exerted on the body, and you’re sitting there for a whole lot longer than you may have in the past.
You also will notice that, if you keep your elbows closer, you’re less likely to feel the strain from this. It will prevent issues with the elbows, so you should try this if you feel like you are having issues with how your arms feel whenever you’re pushing into the clay.
With the right placement of your arms, you’ll be able to do so much more, this is a beginner mistake that should be rectified as soon as you can fix it since it will prevent injuries when forming your pottery as well.
Pushing on the Clay too much
If you’re spending a chunk of your time pushing down on the clay, that’s going to spell trouble for you. There are a few reasons why you shouldn’t be doing that as much, and they include the following:
- You will wear yourself out
- Pushing on that could cause the center of it to collapse
- It can cause the clay to dry out and become harder to move over time
- You’re going to feel your muscles working, instead of just letting it naturally happen
Lots of people think that centering and throwing clay on the heel is a very physical process, but that’s far from the case. It’s a very relaxing process that doesn’t take a long time to do, and you don’t have to use so much force.
If you use so much force on your pottery piece that feels straining, it will cause the following to happen:
- You’re going to push down on the center
- You’re going to make it collapse
- Your pottery wheel will be off-center, affecting its shape of it
- You’re going to make it break, which isn’t good for anyone
With the way things are, chances are you’re going to have issues with your pottery if you continue in this fashion, which is why when you do use your clay you make sure that you’re not forcefully pressing down on it.
It will help with the overall feeling of the clay, and it can prevent your pottery piece from being ruined.
How you prevent this mistake from happening involves a few steps, and they are as follows:
- Wet your hands using the splash pan that you have
- Put your hands directly over the clay
- Press and hold down on the clay for about 1-3 seconds
- Slowly release your hands
- Continue to repeat this process again and again until you keep pushing your bowl into there, and pulling shortly
- Do this in short bursts to prevent your body from wearing itself out at the wheel
Remember that pottery is a process that is relaxing, and something that you shouldn’t be spending too much time worrying about. Remember it isn’t an overly physical process either, but it does involve gently using your hands to shape the clay into the medium you’re trying to make.
The best thing for you to do is take your time, remember that this isn’t a race, and make sure that your hands are wet when you’re doing that because it will prevent the clay from drying out, and it will make it much easier to move about.
Doing this will prevent your hands from tiring out, and it will also help to prevent the clay from suffering while it is at the wheel as well, allowing you to make pieces that are bigger and better than ever. In turn, you’ll be much happier with the results of your efforts too.
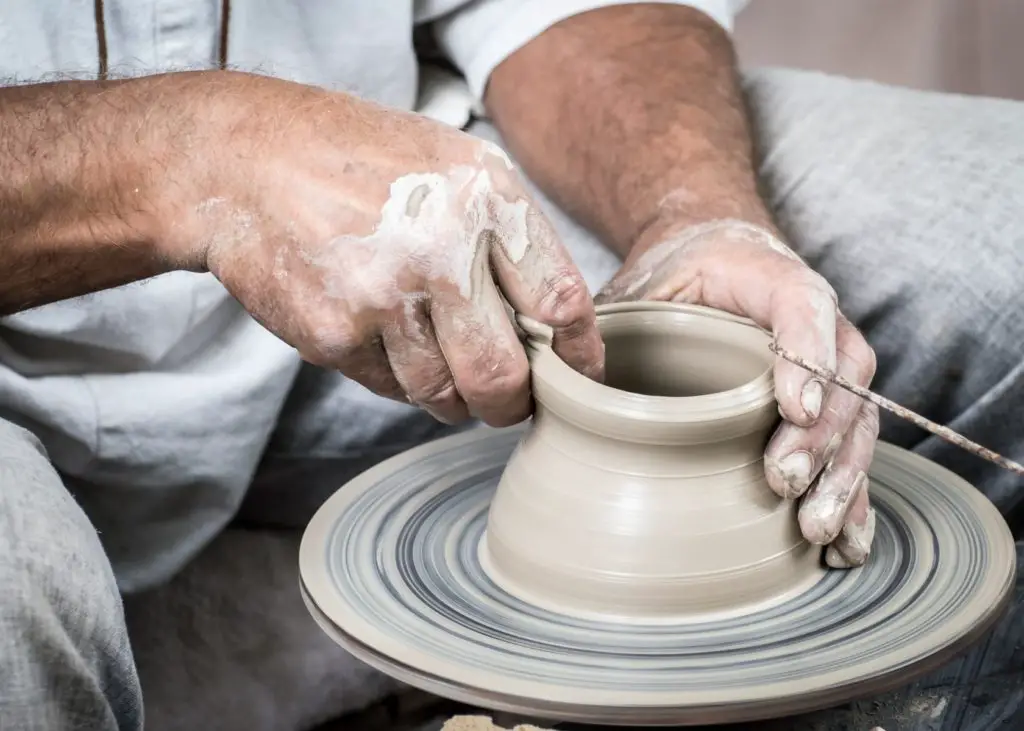
Pushing the Finger into the Center too Quickly
This is a big pottery mistake that a lot of people tend to make, especially if they are new. But, the problem with this mistake is that it’s a one-way ticket to really messing your pottery up.
There is a reason why this messes up the pottery so easily, and it is because of the following:
- It can cause you to make a hole too deep in the bowl
- It can make the bottom of it quite flimsy and unable to be easily pulled off
- It can cause the bottom of your bowl to get stuck on the wheel, thereby ruining the piece
- It also causes issues with the sides of the walls, which in turn will make it a whole lot more annoying when you get to the firing process
So yes, you need to make sure that when you do open it up, you’re not pushing your finger in so fast that it causes a whole wealth of issues with the pottery piece. Instead, you want to make sure that you do this quite slowly.
Slow and steady wins the race for a variety of reasons, and they are the following:
- You can create the perfect size inside
- You can prevent it from being opened too quickly
- You can help make the walls stronger, and not have to worry about them being too thin or too thick
- You can fix your mistakes in a much shorter time if you take your time with this rather than just push down on the piece willy-nilly
You must learn slowness and precision with your pottery wheel training, and make sure you know to slowly push the finger in.
How do you prevent this mistake from happening? Well, we talked a little bit about this, but below we’ll go through the steps of how you easily do this so you’re not screwing up your pottery:
- Wet your finger before you begin
- Gently put your finger on the top of the pottery piece
- Slowly, and with a little bit of effort, push it down
- Start to let your fingers just naturally go downwards
- If you notice that your fingers are drying up, take some time and throw some water on them
- Repeat the process, and once you’re near the bottom stop because you don’t want to poke a hole in the bottom of your piece
- Make sure to gently pull it a little bit more and more
This is a big one that you should make sure that you know because this is a very common potter’s mistake. If you do this wrong, you’re going to have to redo the entire pot again.
Of course, that’s never fun, especially if you just threw it, centered it, and now you’re opening it up.
It does take some practice though, so always make sure that, if you do take the time to actively open up and improve your wares, you work on this slowly but surely, and make it the best that it can be.
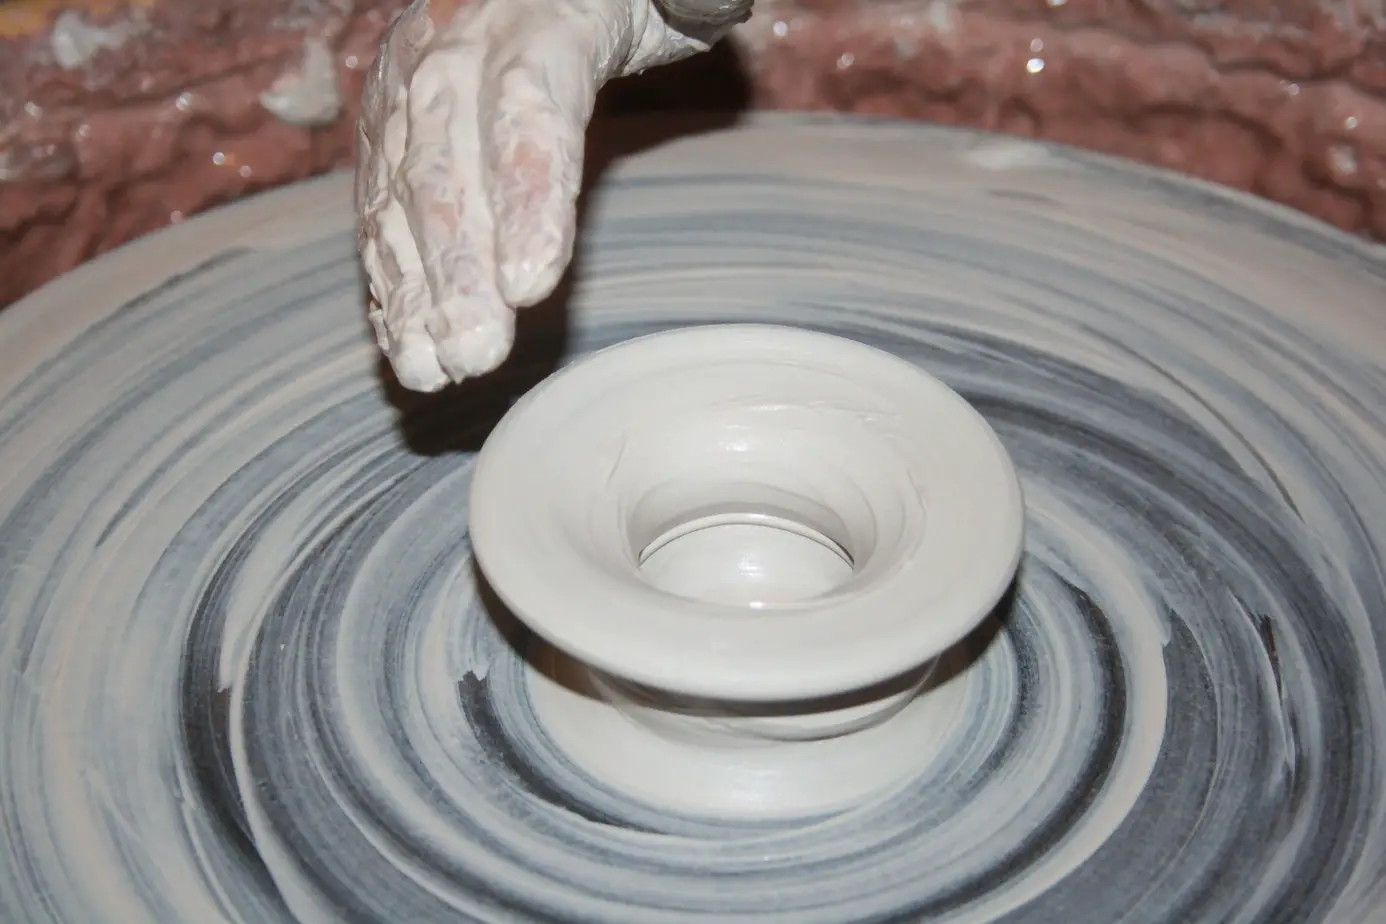
Pinching Problems
Pinching, both the walls and the top, is the final way you can totally cause disasters with your pottery. For most potters, pinching is the way to help open up, and fix the top of your pottery.
But the problem is, that too much pitching is a problem.
We are going to tackle both pinching of the sides, and pinching of the walls in this so that you know how to avoid doing both of these.
For the walls, if you pinch too much, this causes them to thin out, and this can spell disaster for you as a potter.
It’s because it can do the following:
- Make the walls too thin, so it will collapse
- Make the walls too thin, so, during firing, it ends up cracking the sides
- Makes the walls uneven, which can also crack the pottery during the firing stage
This is why when you do this, you should make sure that you engage in the following with it:
- Take the walls and very gently push outwards
- Use your hands slowly but surely, making sure that they lightly move outwards
- Try to keep the walls as even as possible
This, in turn, will help with pinching the walls of the pots, making it easier for you to accomplish all of this, and much more manageable as well.
Now, there is another issue with pinching that is a grave mistake for potters. That is, to pinch the outside walls.
Usually, it occurs in this way:
- They pinch
- They keep pinching hard
- They pull all the way through
- This then will dry your fingers out, and it can tear down the walls
If your hands are dry, they are going to tear down the walls of the pottery, no matter if they are thick, or very thin. The best way to do this involves water.
You can control where the water gets placed in the following ways:
- Wetting your fingers and then re-smoothing the top of it
- Taking your fingers and drizzling the top, working downwards
- Moving a sponge into the bucket of water, wetting it, and then lightly smoothing the walls
- Slowing the wheel down as you do this, to control this
- You can compress the edges to make it a bit sharper with your fingers if you slow the wheel down, and gently push
Some people like to pinch with this, and you probably do use pinching for the top, but remember that you do need to have water, and a lot of control with this if you’re going to use this. Lots of people don’t realize the importance of control, and it’s something that you should learn.
By learning the control, and how to use the wheel, you’ll be so much more successful with your pottery making. So yes, do learn how to control your fingers when you do this because it can make a difference in the way that your pottery works.
Speed and practice are everything!
There are two things which, if nothing else, you should learn. They are speed and practice.
Learning how to practice on the wheel allows you to do the following:
- Understand how much pressure you need
- Understand how to do what you need to do at different wheel settings
- Allows you to practice and master the skills that you need
- Makes you more confident in your ability to move your hands around
The best thing to do to prevent these mistakes is to learn how to control the wheel and practice with it. You’re going to realize that initially, you’re going to have trouble with this, and it’s going to be frustrating, but with the right amount of control, and the right amount of understanding, you’ll be able to apply and without fail, control these various actions.
As for the second part, you need to learn which speed works for you. Some aspects to consider include the following:
- If this is fast, you’re going to have issues with controlling the wheel
- However, a faster wheel will allow for faster pottery-making
- Slower wheels take a bit more time, and some electric wheels don’t go slow
- However, a slower wheel allows for more control and allows you to easily maneuver and understand your ability to control pottery
With the right technique, you’ll be able to create a much better, more rewarding result from your actions. This will, in turn, help you with a better understanding of all of the different aspects of pottery, and help you master the wheel so that you’re not struggling.
You can also adjust the speed of the wheel by doing the following:
- If it’s electric, lower the speed
- If it’s too much for you at the lowest speed, get a new wheel
- If it’s a manual one, try not to kick it as much
By learning how to control this, and by practicing, you’ll be amazed at the difference this will make in your pottery. All of these mistakes can be prevented through the use of both of these aspects, so always make sure that, if you are struggling, consider these so that you can have a better experience.
Prevent these mistakes Fast!
With the right amount of prevention, you can stop all of the different problems from being a thing, and you can prevent your pottery from being ruined. Pottery is an art form, and it does take time to master.
If you’ve already worked with hand building, and you want to move forward into a new realm of pottery, then you’ll want to know how to use the wheel. This post went over the five most common mistakes, and exact measures to take to prevent them.


