What do you do after molding your ceramics? You glaze them! Glazing adds a safe, sealed coating to your bisque-fired wares– thereby making your creations waterproof and food safe. It also brings life to your work and it also brings your work to life with any color you wish to create. Glazing is that finishing touch you add to your piece to make is distinct and unique from all other artists’ wares. The creative possibilities of glazing are infinite and the techniques and patterns you can create with them have no limit. Glazing can take an ordinary ceramic ware and make it an exquisite work of art.
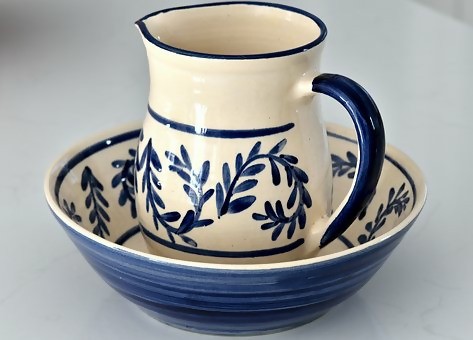
As earlier said, glazing can turn ordinary to an astonishing work of art, but in the same vein, improper glazing techniques can ruin a piece. That is why it is advisable to spend a bit of time planning and picturing the exact look, feel and color of what you want to achieve. Various glazes and clays have different properties, so you should put that into consideration before you begin the glazing process. As you know, glazes are responsible both for decorating the pottery and for crafting an attractive glossy surface that protects the pottery from wear, tear, and water. Glazing is a long and elaborate process, although it is not too hard to learn, and your results will improve with constant practice.
Let us talk about the type of glazes before we move into the mistakes often made in the glazing process.
This is designed to be food and drink safe and there are a large number of colors and special effects to satisfy all tastes. It contains minimal elements of lead, making it very safe to use to eat/drink. Many potters use this type of glaze when crafting dinner-wares.
-
Earthenware Glazes Containing Fritted Lead
This type of glaze contains a significant amount of white and/or red lead. Thereby it will be toxic if used in the making of dinnerware. This type of glaze is mostly used to decorate and coat flower vases. Some companies use a lead bi-silicate frit which is a combination of materials melted together to render them insoluble and resistant to 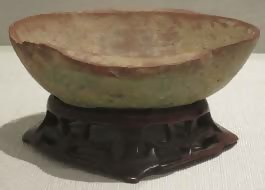 acid attack. Lead bi-silicate frit, therefore, is a means of introducing a material that will render the white/red lead anoxic.
-
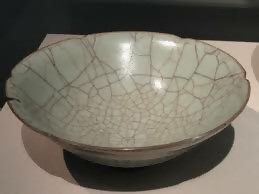
Stoneware & Mid-fire Glazes
All these glazes are very constant under both dissolving and reducing conditions. Very many variations of color and properties can be produced by using different colored and stippled bodies. All of the glazes are inter-mixable, allowing unique double-dipping, mottling, and pouring on or painting on of different glaze colors or type over or under another glaze colors or type.
-
Raku Glazes
Raku glaze is any glaze that is being used in the Raku method. Raku is a type of Japanese pottery traditionally used in Japanese tea ceremonies. Raku glazes are often fired at low temperatures. The fired raku piece is then removed from the kiln and is allowed to cool in the open air.
Enough of beating around the bush, let’s talk about the common glazing problems and the mistakes involved.
-
Crazing: Using a higher expansion glaze than the clay body
 The number one on my list is crazing. This is the most common glaze mistake and also very easy to correct. Glazes that have crazed show a fine pattern of cracks in the surface of the glaze. It is very easy to detect by simply breathing on the piece and fogging the glaze surface. Crazing is a result of a discrepancy between the coefficient of expansion of the glaze and the body of the clay. When the glaze is expanding more than the clay body, there will be crazing. You can easily correct crazing by reducing the difference in the expansion of the glaze or switching to a higher expansion clay body. You can add an expansion material such as silica to the existing glaze to reduce the difference in expansion.
-
Shivering: Using a lower expansion glaze than the clay body
This is the opposite of Crazing. It is a little bit more complex than crazing. This occurs when a glaze shivers; it cracks and pieces of glaze peel right off the piece, often at the edges of a project. Shivering is problematic because slivers of glaze from the edges can drop into your food or drink. It can be toxic if the glaze contains white/red lead. This is another mistake of mismatch in expansion coefficients. The glaze expansion is lower relative to the clay body. A preferable solution is to increase the expansion of the glaze by adding a material such as a high expansion frit or switch to low expansion body clay. Another solution is to reduce the amount of Silica in the glaze or increase Sodium feldspar or nepheline syenite, or other alkaline bearing materials. You should be careful when reducing the amount of silica in the glaze to avoid crazing.
-
Crawling: Use of excessively powdery glaze and allowing the underglaze to dry out before applying the overglaze.
Crawling is a problem prominent to occur in every beginner’s project. Even some experienced potters face this problem while glazing. Crawling occurs when the glaze has built up too heavily in some corners or has not flowed into the corners. It is caused by a high amount of surface pressure in the melting glaze. Most times, crawling is triggered by adhesion problems which are caused by the bad application of glaze. When a glaze is excessively powdery and does not attach itself to the surface of the clay, crawling is unavoidable.
Crawling is common in matt/powdery glazes than in liquid glazes. Crawling can also occur when one glaze is applied on another glaze, especially if the first glaze is allowed to dry out before the application of the second glaze. In other words, if you allow your underglaze to dry out before applying your overglaze.
Note: Do not allow your glaze to dry completely before applying another glaze over it.
-
Blisters: Excessive application of glaze
Blisters are often as a result of excessive application of glaze or incomplete clay 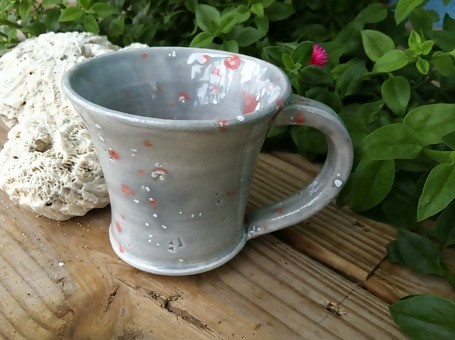 preparation. Blisters look like little craters on the surface of the piece. It is usually lesser than 0.5cm in diameter. A few potters have attested to the fact that insufficient drying of a glazed piece causes a lot of blisters on the pottery piece. If there is any trapped air in your piece, expect blisters after glazing. You should also mind the type of clay you use. Too dense clay will trap air on the piece and thereby causing blisters. he following fluxes might cause this problem: borax, boric acid, potassium carbonate, magnesium sulfate, and sodium carbonate. If these materials are present in a problem glaze, it would be well to replace them with other fluxing agents, or fritted materials.
-
Pin-holing: Use of a bad glaze and a bad firing cycle
 This is the most annoying problem you can ever face after glazing. In some parts of the world, this is called pitting. They are most times caused by a badly controlled firing cycle, the composition of the glaze, or the clay body. Reports have it that highly grogged clay bodies cause pin-holing. Pin-holing appears in the form of tiny holes and dots on the clay body. If you find pinholes on your piece, it is a clear indication that you should elongate your firing cycle or you should apply the glaze less thickly.
-
Settling Out: Use of bacteria-infected glazes/equipment and improper mixing of glaze.
This is the most popular problem potters have for glazes before firing. Settling-out may also result in firing problems. When a glaze settles out, the heavier components of the glaze settle to the bottom of the container. I am very sure you have seen this problem on mugs and jugs. If you try to use a glaze without thoroughly remixing, you will be applying a glaze with some key ingredients missing. A glaze stays in check due to the presence of various clays, such as bentonite, and/or gums, such as CMC. Another common cause of settling out in pottery is adding too much water to the glaze. Adding too much water to a glaze will dilute the effect of the suspending agents (Bentonite and CMC) and allows some of the glaze components to settle out. Another probable cause of settling-out is the growth of bacteria on the piece which in its natural state will consume an organic gum, such as CMC, and will lead to loss of suspension. To prevent bacteria growth on your project, do no return a used glaze, which has been poured out of the original container, back into the original container. You should get a new container. Also do no introduce contaminated objects, like stencils, pins, brushes, into the original container.
PROBLEMS |
MISTAKES |
| Crazing | Making use of a higher expansion glaze than the clay body |
| Shivering | Making use of a lower expansion glaze than the clay body |
| Crawling | Allowing the underglaze to dry out before applying the overglaze. Using excessive powder glaze |
| Blisters | Excessive application of glaze or incomplete clay preparation. |
| Pin-holing | Using a badly mixed glaze and a badly controlled firing cycle. |
| Settling-out | Improper mixing of the glaze and use of bacteria-infected glazes and equipment. |
Below are some useful tips that will guide you in glazing:
-
Chose the right pottery and the right glaze
The selection of glaze is one of the most important steps to creating a masterpiece. Before you select a glaze, you have to make sure your piece has gone through thorough firing (bisque firing). If you have a clay object you made yourself, fire it in the kiln to make it hard but still absorbent before you glaze. The temperature of the fire is determined by the type of clay you use.
Most times, I advise beginners to purchase a premixed glaze or they should get their glazes mixed by a professional due to the chemical compositions involved. The firing temperature and the components of the glaze should also be considered when choosing a glaze. Don’t use two glazes that require different firing temperatures.
-
Prepare the project and the glaze.
Use sandpaper to rub the surface of your piece properly. If you see bumps on the object that aren’t meant to be there, you should sand them off using 100 grit sandpaper until you have a smooth surface all over your piece. Clean the piece after sanding off the bumps. Then get your project a little bit wet and clean by using a damp sponge to wipe the surface of your piece. Also, apply wax wherever two removable parts meet, for example, a mug and it’s handle. The wax should be applied with a separate brush. As earlier stated a pre-mixed glaze is highly recommended for your first few projects due to the safety hazard and difficulties that will be involved when mixing your glaze. If you decide to mix a dry glaze powder with water, be sure to follow the manufacturer’s instructions carefully, or else your glaze may not be according to your desire. Remember to always wear a mask when working with glazes.
-
Apply the Glaze on your project:
Before you apply tour glaze, it is advisable to stir it well even if you are using a premixed glaze. After you are done mixing the glaze, keep each glaze separately with its brush. Separate brushes for each glaze make sure glazes don’t mix. Decorate your project with brushes dipped in underglaze. You can get creative with it by flicking the brush or making twirls and twists. It depends on you. After a while, you can apply your overglaze by brushing the glaze onto the project or dipping the piece in an overglaze for about 1-3 seconds. Be careful with your glazes, too many glazes can ruin a masterpiece.
To make your glaze stick to your project for life, you will need to fire your glaze. Make sure you fire the glaze according to the recommended temperature. Glazes are either low temperature or high temperature, and firing them at the wrong setting may cause your project to break.
In this article, I have talked about what glaze is, the types, and I have discussed the problems you can encounter while glazing and the mistakes causing such problems. Also, I have provided you with helpful tips (process) on how to achieve a perfect glaze. Adhering to the processes above brings you a step closer to becoming a legend in pottery.


