Today we are going to be talking about pottery stamps. Before we move into the discussion of the day, you can check out some other pottery-related articles on this blog. Trust me, it will improve your skills as a potter (even if you are a newbie) and it will be worth your while. Enough of that let’s dive into the affairs of the day– Pottery Stamps. I am going to be talking about How to make your Pottery Stamps that look amazing
First and foremost, what is the pottery stamp?
It is usual to think of postage stamps as complements to clay projects, but in reality, it is nothing like that! A pottery stamp is no less than the identity of a potter, along with their various projects. More frankly, pottery stamps act as the brands and IDs for your pottery creations. They help you distinguish one from the other and identify a certain one at any time. Pottery stamps are exceptionally functional in determining commercial pottery wares. It implies that pottery stamps are specifically for pieces created for commercial purposes, not personal ones.
History of Pottery Stamp
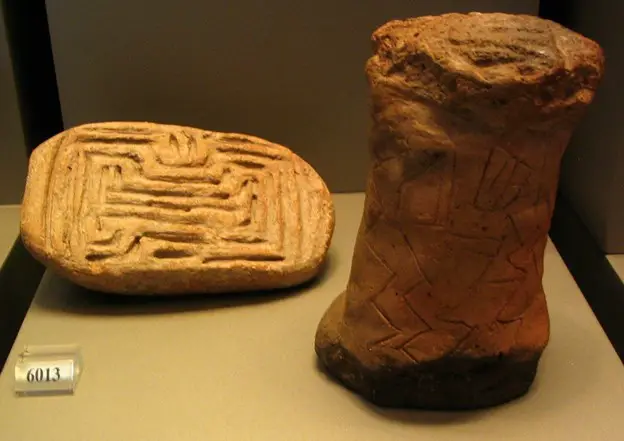
Pottery Stamp, otherwise known as the potter’s mark, dates back to the 18th century when sculptures and plates were made out of terracotta. Although a useful process, stonewares (ceramics) before the 20th century were often not marked. Potters’ stamps are frequently seen on some earthenware, but signatures are rare. A stamp that dates back to ancient Greece reads: “Exekias made and painted me.” The red pottery of the Roman era was quite famous for stamps. Before the 19th century, potter’s stamps were most commonly found on porcelain. Chinese porcelain marks usually record the dynasty and the name of the emperor. However, they are unreliable because the Chinese often used the mark of an earlier dynasty as a sign of reverence for the products of antiquity and, in recent times, for commercial gain.
European pottery factories embraced pottery stamps, the earliest example of which is the stamp of a cathedral and an F on some Florentine ceramics from 1573–1587; they were regarded as a guarantee of authenticity. Not only were fake pottery stamps added to contemporary forgeries, but the smaller 18th-century factories often copied the registered marks of their competitors.
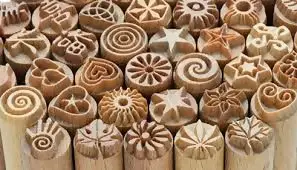
As a potter, you should familiarize yourself with many pottery stamp designs. You can discover new pottery stamp designs by turning a piece of pottery over and inspecting the base. If you are new to pottery, any marks you find may seem cryptic and ambiguous. Some common stamps include the studio where the piece was made, the potter’s initials, and the signature of the artist who decorated it.
Importance of Pottery Stamps
Pottery stamps have been around for centuries, as it is clear now. But what has made these simple additions a dealmaker for pottery pieces worldwide? Maybe the quick identification or the commercial value that comes with it. Let us discuss this in greater detail:
- Identification:
Pottery stamps are primarily a way for potters to mark their wares as their original work. It is an apparent reason for using these stamps. The most crucial reason pottery stamps are essential in the pottery business is the prospect of a potter/sculptor getting recognition and becoming known to buyers for their art.
- It Increases the Value of the Potter’s Wares:
A pottery stamp is important when you are trying to generate future revenue, and a fantastic pottery stamp can increase your business’s value by giving it greater leverage in the commercial pottery industry.
- Creates Trust Within the Marketplace:
Why do you buy shoes/clothes that have three stripes? It is simply because Adidas has built its products’ trust in you. Therefore, whenever you shop and see any shoe with three black/white stripes, you pick it up without second thought. The same applies to good pottery. Your pottery stamp is like Adidas Stripes, representing you wherever your wares are sold. A professional form and well-designed potter’s mark will help your business build trust with consumers, potential clients, and customers. People are more likely to patronize you if you have a polished and professional portrayal.
How to Choose the Perfect Pottery Stamp?
Certain factors fuel a perfect pottery stamping. Consider a few important things before you go for just any pottery stamp to put on your wares. Your art shall represent you and bear your originality in the form of a properly chosen stamp. Here is how you can do it:
- Stick to Professionalism:
The stamp is the most crucial element of pottery, especially where this factor is concerned, as it is essentially the face of the potter. This is why a professional logo in the form of a pottery stamp should be robust and easily memorable, making an impression on a person at first glance.
- Envision Original Designs:
Your pottery work is a collection of unique pieces that show your caliber in this field. Envision some original designs that will go with the aesthetic of your pottery wares, assemble elements like your name, and bear micro art designs that can add a commercial appeal to your signature work.
- Experiment Before Finalizing:
Experiment a little before you move any further and get a stamp made. Doodle around unique designs or use advanced graphic design to put together compelling logos. Make use of prototypes to come to a concluding design you will be happy to put on your wares.
Methods of Pottery Stamp
Creating a pottery stamp is an act of discipline, just as it is with making pottery itself. There are specific expert ways to carve your logo, design, or initial as a stamp onto the wares. Here are some common ways:
1. Incised:
The incised stamp is done by carving out the form of the stamp by hand after making the fundamental design. The clay is still soft, making it very easy to engrave the design.
2. Pleased:
Pleased pottery stamps follow the very same process as the incised stamp. However, the mark will be marked into the clay. This method is sometimes used to determine the piece’s undecorated white porcelain or white blanks. Various renowned potters prefer this method, which is still in use today.
3. Painted:
The painted pottery stamp is further demarcated into two categories: The underglaze and overglaze markings. The Underglaze stamp/mark is hand-painted upon the ware after the bisque firing but before the glaze is put on. Overglaze mark involves hand-painting the mark after the glazing has been done.
4. Printed:
As explained earlier, the stamp is printed onto the piece and can be underglaze or overglaze.
| Methods | Process |
| Incised | Involves carving out initials or design by hand after making the fundamental design |
| Pleased | Involved carving out initials or designs by hand after making the fundamental design after it has been marked into the clay |
| Painted | Involves Painting the piece. It can be divided into Underglaze and Overglaze. |
| Printed | Involves Printing on the piece. It can be divided into Underglaze and Overglaze. |
What is the Process of Making Stamps?
There are various ways of making pottery stamps for your wares. This post, however, discusses the top 3 techniques you can try. Get your jotters and fasten your learning belt; it is time to learn.
1. Bisque Stamps – Tessellations:
Everyone who knows pottery must know what a Tessellation means. While this has been defined in previous posts, let us discuss it again. Tessellation is the repetition of shapes without overlapping or any gaps. Many wares and ceramics have tessellations in the form of bisque stamps. It is prominent in making unique and beautiful marks. Here is how you can make a bisque stamp:
Step 1: Roll Out a 1-inch-thick Slab of Clay:
Make a slab of clay that is about 1 inch thick and let it stiffen up a bit, but not too leather-hard. If it gets too hard, there is a chance of the slab breaking.
Step 2: Cut Out a Paper Template:
Put on paper the template of your determined design and cut it out.
Step 3: Place the Pre-Cut Paper Template on the Clay Slab and then Trace Around it:
You must cut through the clay around the paper template using a sharp yet thin knife. Use various loop or carving utensils, and develop or alter the surface to finish the tessellation bisque stamp.
Step 4: Smoothen All Edges:
Once the bisque stamp is stiff and rigid, smooth all the edges around the stamp, adding finishing touches to the stamp. Do it carefully so you do not hurt yourself with the edges.
You can use recycled clay to make new pottery stamps, so do not waste new clay.
2. Logo Pottery Stamp:
Logos are a common sighting on pottery wares. Virtually every ceramic nowadays carries a logo or a brand stamp. It is quite a delight for everyone that there is a way to create your very own logo stamp from the comfort of your home. Here is how you do it:
Step 1: Print/Draw Your Logo:
The very first step is to print or draw your logo or design on a piece of paper. It is advised that you make a simpler logo. The simpler it is, the easier it is to trace.
Step 2: Trace Your Logo onto a Plaster:
Tape your logo on plaster or a slab of clay and then trace it out. You can use a dull needle tool or a stylus to trace the logo. Be careful not to rip the paper while you do so.
Step 3: Carve the Logo into the Plaster:
After you have traced the logo, remove the taped paper. Now, you shall carve the logo deeply into the plaster using sharp needles and a stylus. As you carve, make sure you are sweeping the dust off the surface of the plaster with a brush. If dust rises too much, wear a face mask to ensure safety at all costs since that always comes first.
Step 4: Prepare Your Putty:
You must get your putty ready once you finish the carving process. You can order and get your putty delivered by clicking here. Once your putty is prepared, place your carved-out design on the putty and let it dry for about an hour or two. You can smoothen and carve your putty into any shape you want.
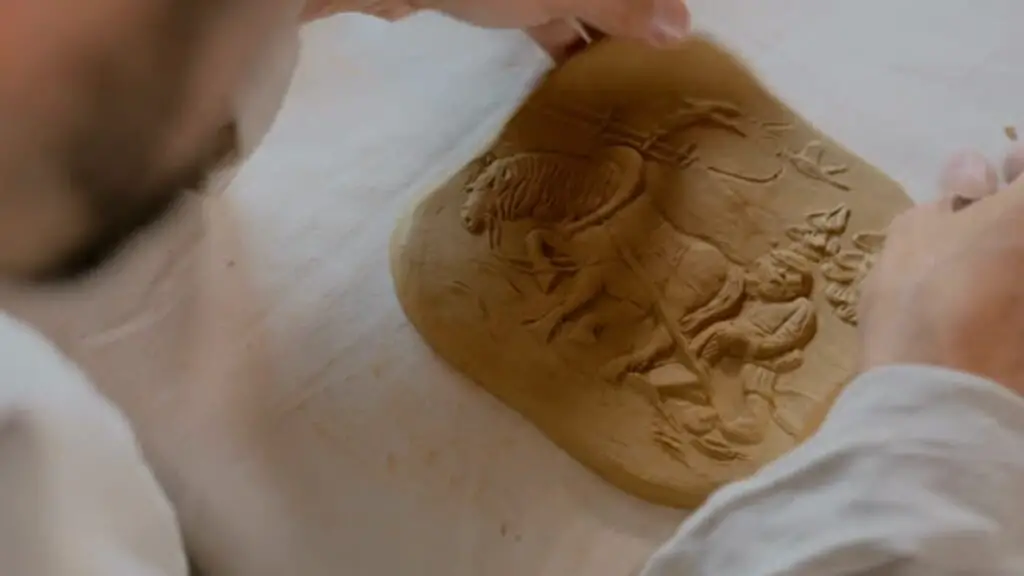
Step 5: Press Putty into Your Project:
Once the putty is appropriately mixed and a bit dry, take it and gently press it into your clay projects. Pressing it when the piece is still damp will be the most proper way. You should be careful while pressing the putty onto your piece; too much pressure might break or rip your project.
3. Seal Pottery Stamp:
Seal pottery stamps are so easy to make. The easiest method is described below:
Step 1: Roll Your Clay into a Ball:
Take a portion of standard clay and roll it into a ball.
Step 2: Make One Side of the Clay Ball Flat:
Flatten one side of the ball to give yourself a ‘stamp’ area.
Step 3: Use Logo Imprinting Elements onto the Clay:
Use sticks, metal tools, needles, or any utensil to impress your logo designs into the clay. It is best done while the clay is on its way to becoming leather-hard, but it can also be done to soft clay if you want to make confident and long-lasting marks.
On the other hand, you can make a cylindrical shape by carving out your logo/design right around the cylinder (but not the ends). This type of pottery stamp is called “roulette.” Indeed, you have seen many wares/art pieces with this type of stamp on them. They work when you hold and roll them like a wheel into soft clay to create a continuous pattern (Tessellations).
These two types of seal pottery stamps must be left to dry out thoroughly before you fire them in the kiln. It will make them hard enough to use again and again. As long as you look after them, they will last years (and make sure you don’t drop them!). We have seal stamps dating back to the 1900s; this is due to the care and proper maintenance of the stamps.
Conclusion
Pottery stamps have been the signature of potters around the world for centuries. It gives them a unique identity which keeps them recognizable through their art for years. As a modern-day potter, you have all the amenities required to create that perfect stamp, as long as you pay attention to proper techniques and styles.


