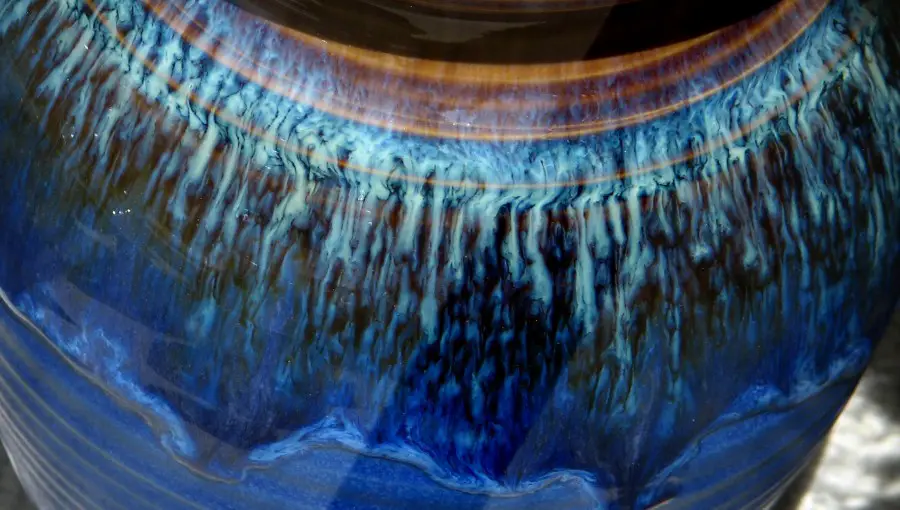
WHAT IS REGLAZING?
I understand that your first glazed pottery might have some problems. But I want to tell you not to worry. Help is here. There is nothing wrong with making mistakes while glazing your piece. I can remember the weeks it took me to perfect my glazing skills. You might need to try glazing a few pottery items over and over again. But what do you do to your previously glazed ceramics with defects? Do you just throw them away? There is something you can do. It is called Reglazing. Re-glazing, as the name implies means glazing your previously glazed ceramics. Reglazing is usually done to pottery pieces that have some glazing defects or problems.
IS REGLAZING POSSIBLE AFTER FIRING?
Reglazing is muchly done after the bisque firing or the final firing. It is easily possible to reglaze a ceramic that has been fired before. Some potters tend to paint the new glaze on the finished pottery and then fire in the kiln at high temperatures. Some say this is known as Overglaze on Overglaze. Lol.
IS IT POSSIBLE TO REMOVE A GLAZE AND THEN REGLAZE IT?
Ceramic products are glazed by baking chemicals onto the pottery piece at very high temperatures. Removing the glaze can be done by sanding the surface of the piece. Sanding is usually done to prepare a glazed tile surface before it is painted all over again. Clay surfaces that are frequently exposed to water should not be painted as the paint can be easily removed when this occurs. Make sure you wear safety glasses, protective clothing, and a respirator to protect yourself from debris and dust generated while sanding the glaze from the ceramic.
After sanding the ceramic, make sure you dust the ceramic and clean up the room. You can apply a fresh new glaze on the piece and the fire.
HOW TO REGLAZE A PIECE?
Reglazing can be a bit of tasking but there are quite a few steps to it. Below are the steps you should take if you ever want to reglaze your artwork.
1. Brush a thin layer of glaze on the piece
If you are going to reglaze a pottery piece, it is vital to brush up a thin layer of glaze first. Why? This is to make sure that the clay body has a uniform look and also the expansion ratio is adequate for a new underglaze or overglaze. This step is important if you have removed the previous glaze on the pottery. The thin layer of glaze should not be excessive so it won’t form part of the underglaze and it should not be too thin that it’s not visible from a meter away.
2. Let it Dry
After you have applied the thin layer of glaze, the next thing to do is to air-dry. You should leave the piece to dry for about an hour. Make sure you are not drying it in extreme heat temperatures. For example, if it’s a sunny day, it is advisable not to dry it under the sun because all the moisture in the clay might evaporate.
3. Spay the Piece with Spray Starch
The importance of spray starch in the process of reglazing cannot be overemphasized. The starch acts as a temporary glue that will tighten the clay body for the new glaze to be applied. Later in this article, I am going to talk about the negative impacts a loose or lower clay body has on the ware after glazing.
4. Apply your underglaze
Before you apply your glaze, it is advisable to stir it well even if you are using a premixed glaze (if not, there will be a defect on your wares). After you are done mixing the glaze, keep each glaze separately with its brush. Separate brushes for each glaze make sure glazes don’t mix. Decorate your project with the brushes dipped in underglaze. You can get creative with it by flicking the brush or making twirls and twists. It depends on your taste and preferences.
5. Spray the piece with sticky hair spray
Sticky hair spray is a solution for underglazes. It is believed that hair spray prevents crazing and blisters. You don’t want to make the same mistake again. Apply the air spray moderately. Don’t overspray the item, it might lead to crawling. After spraying, allow it to dry for about two hours before moving to the next step.
6. Heat the piece
To make sure your underglaze stays attached to your pottery, the best thing to do is to heat your artwork. After you have applied the sticky hair spray, your piece will be moist and it to seal the underglaze, you will need to heat it. I will personally advise you to use a heat gun to heat the body of the piece. If you don’t have a heat gun, you can place it in an oven for 10 minutes (anything more than 10 minutes will cause crawling on your piece). Make sure you feel the ceramic with your fingers and ensure it is not moist/cold. Brush white (Elmer’s) glue on.
7. Apply your Overglaze
Once your piece is dry, the next thing to do is to apply your overglaze. You can apply your overglaze by brushing the glaze onto the project or dipping the piece in an overglaze for about 1-3 seconds. Be careful with your glazes, too many glazes can ruin a masterpiece.
8. Fire your project
To make your new glaze stick to your project for life, you will need to fire your project. Make sure you fire the piece according to the recommended temperature. Glazes are either low temperature or high temperature, and firing them at the wrong setting may cause your project to break.
If you are new to glazing, it is advisable to always get a premixed glaze. You can always order your premixed glaze by clicking here.

COMMON GLAZING DEFECTS AND CAUSES
Below are the common mistakes and defects that might warrant you to reglaze your pottery piece.
PROBLEMS |
MISTAKES |
Crazing |
Making use of a higher expansion glaze than the clay body |
Shivering |
Making use of a lower expansion glaze than the clay body |
Crawling |
Allowing the underglaze to dry out before applying the overglaze. Using excessive powder glaze |
Blisters |
Excessive application of glaze or incomplete clay preparation. |
Pin-holing |
Using a badly mixed glaze and a badly controlled firing cycle. |
Settling-out |
Improper mixing of the glaze and use of bacteria-infected glazes and equipment. |
1. Crazing: Using a higher expansion glaze than the clay body
The number one on my list is crazing. This is the most common glaze mistake and is also very easy to correct. Glazes that have crazed show a fine pattern of cracks on the surface of the glaze. It is very easy to detect by simply breathing on the piece and fogging the glaze surface. Crazing is a result of a discrepancy between the coefficient of expansion of the glaze and the body of the clay. When the glaze is expanding more than the clay body, there will be crazing. You can easily correct crazing by reducing the difference in the expansion of the glaze or switching to a higher expansion clay body. You can add an expansion material such as silica to the existing glaze to reduce the difference in expansion.
2. Shivering: Using a lower expansion glaze than the clay body
This is the opposite of Crazing. It is a little bit more complex than crazing. This occurs when a glaze shivers; it cracks and pieces of glaze peel right off the piece, often at the edges of a project. Shivering is problematic because slivers of glaze from the edges can drop into your food or drink. It can be toxic if the glaze contains white/red lead. This is another mistake of mismatch in expansion coefficients. The glaze expansion is lower relative to the clay body. A preferable solution is to increase the expansion of the glaze by adding a material such as a high expansion frit or switching to low expansion body clay. Another solution is to reduce the amount of Silica in the glaze or increase Sodium feldspar or nepheline syenite, or other alkaline-bearing materials. You should be careful when reducing the amount of silica in the glaze to avoid crazing.
3. Crawling: Use excessively powdery glaze and allow the underglaze to dry out before applying the overglaze.
Crawling is a problem prominent occurs in every beginner’s project. Even some experienced potters face this problem while glazing. Crawling occurs when the glaze has built up too heavily in some corners or has not flowed into the corners. It is caused by a high amount of surface pressure in the melting glaze. Most times, crawling is triggered by adhesion problems which are caused by the bad application of glaze. When a glaze is excessively powdery and does not attach itself to the surface of the clay, crawling is unavoidable.
Crawling is more common in matt/powdery glazes than in liquid glazes. Crawling can also occur when one glaze is applied to another glaze, especially if the first glaze is allowed to dry out before the application of the second glaze. In other words, if you allow your underglaze to dry out before applying your overglaze.
Note: Do not allow your glaze to dry completely before applying another glaze over it.
4. Blisters: Excessive application of glaze
Blisters are often a result of excessive application of glaze or incomplete clay preparation. Blisters look like little craters on the surface of the piece. It is usually lesser than 0.5cm in diameter. A few potters have attested to the fact that insufficient drying of a glazed piece causes a lot of blisters on the pottery piece. If there is any trapped air in your piece, expect blisters after glazing. You should also mind the type of clay you use. Too dense clay will trap air on the piece and thereby causing blisters. The following fluxes might cause this problem: borax, boric acid, potassium carbonate, magnesium sulfate, and sodium carbonate. If these materials are present in a problem glaze, it would be well to replace them with other fluxing agents, or fritted materials.
5. Pin-holing: Use of a bad glaze and a bad firing cycle
This is the most annoying problem you can ever face after glazing. In some parts of the world, this is called pitting. They are most times caused by a badly controlled firing cycle, the composition of the glaze, or the clay body. Reports have it that highly grogged clay bodies cause pin-holing. Pin-holing appears in the form of tiny holes and dots on the clay body. If you find pinholes on your piece, it is a clear indication that you should elongate your firing cycle or you should apply the glaze less thickly.
6. Settling Out: Use of bacteria-infected glazes/equipment and improper mixing of glaze.
This is the most popular problem potters have for glazes before firing. Settling out may also result in firing problems. When a glaze settles out, the heavier components of the glaze settle to the bottom of the container. I am very sure you have seen this problem with mugs and jugs. If you try to use a glaze without thoroughly remixing, you will be applying a glaze with some key ingredients missing. A glaze stays in check due to the presence of various clays, such as bentonite, and/or gums, such as CMC. Another common cause of settling out in pottery is adding too much water to the glaze. Adding too much water to a glaze will dilute the effect of the suspending agents (Bentonite and CMC) and allows some of the glaze components to settle out. Another probable cause of settling-out is the growth of bacteria on the piece which in its natural state will consume an organic gum, such as CMC, and will lead to loss of suspension. To prevent bacteria growth on your project, do not return a used glaze, which has been poured out of the original container, back into the original container. You should get a new container. Also do not introduce contaminated objects, like stencils, pins, or brushes, into the original container.
Whether you are a beginner or an expert, no one is above mistakes. In this article, I have talked about how to remove a glaze from your pottery, how to reglaze your pottery, and the common problems and mistakes that might make you need to reglaze your pottery.


