After being used by the Egyptians for the first time during the 1st century BC, glazing became one of the most popular forms of pottery decorations. Gradually, it earned popularity in China and the Middle East countries, and later on, the whole world started acquiring the pottery glazing technique. It is not unknown to all pottery lovers how glazing turns an ordinary pottery piece into an extraordinary and unique one. Glazing is nothing but the burning proof of an artist’s creative mind and his/her ability to create wonders with one magical touch.
Glazing seems like bringing life to an ordinary piece of clay. Without glazing, it is hard to give the pottery piece a complete and finished look. Moreover, glazing in disguise ensures the long life of ceramic pottery. Glazing works like a coating on the surface of a pottery piece that seals all the pores of the hardened clay pot and adds waterproofing quality to the piece. The clay pot becomes food-safe, less fragile, and durable enough after it goes through the entire process of glazing.
What’s the purpose of glazing?
Glazing makes a pottery work look complete and gives it a final touch to make it look like a fantastic piece of art. Following are the purposes of turning ordinary ceramic pottery into an extraordinary piece, using the glazing process:
Decorating the pottery:
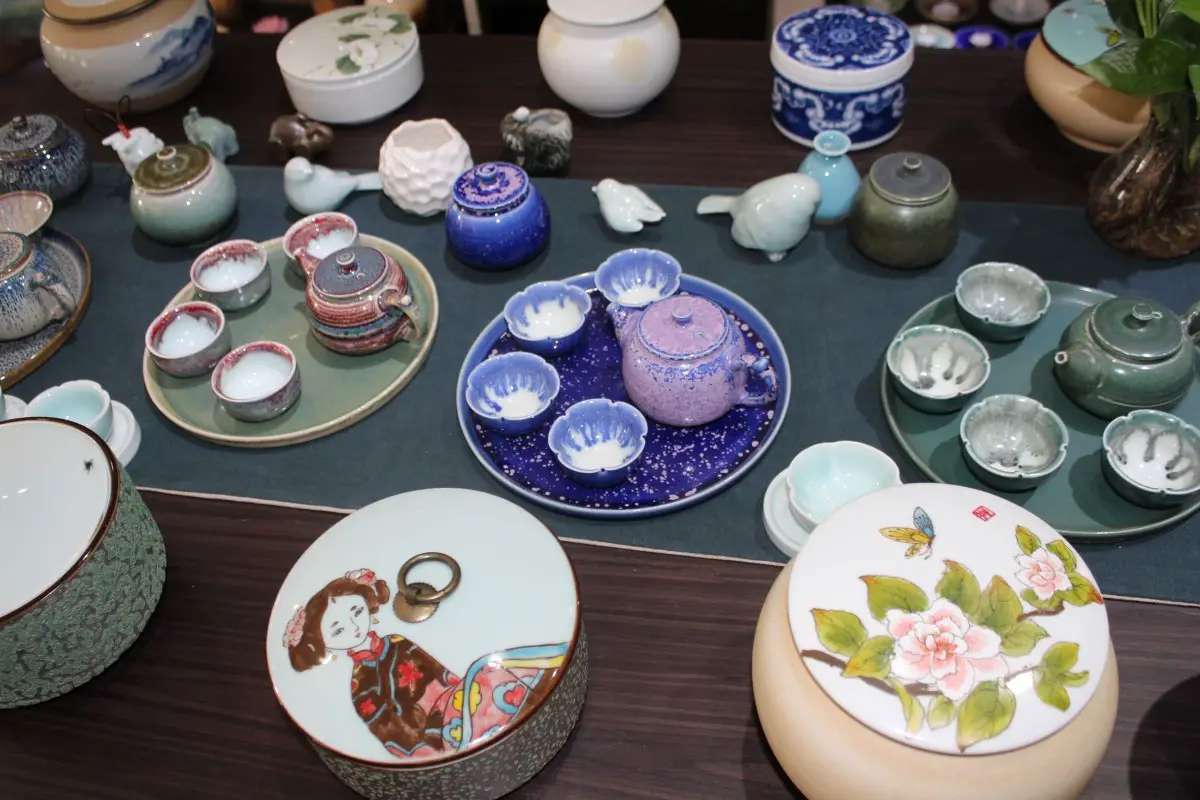
In the initial days of pottery, Greeks were used to keeping their pots unglazed as they mostly used pots for cooking and daily use purposes. Later on, the Egyptians developed the technique of glazing to decorate those pottery pieces and make them durable as well as look tremendously beautiful. The first-ever blue-green glossy glaze is famous to date. Eventually, lots of experiments have been done with the glazing technique, and it has evolved into modern-day glazing. The primary purpose of glazing is to add coloration and designs on the surface of the pottery with the help of chemicals, and by firing it, the glaze is made to stick to the surface permanently.
Making the pottery waterproof:
Days before glazing was invented, pottery pieces remained to be porous, which means it was unable to hold water inside them. Glazing worked as a blessing to the world of pottery by ensuring the pots became waterproof. Glazing compounds are made to adhere to the surface of pottery to cover the pores present in it and fired to ensure the permanent waterproofing nature of the pottery pieces. Even uniform melting of the glaze as it comes in contact with high temperature forms a coating on the pot surface.
Increasing the durability of the pottery:
Glazing is applied as a coating onto the surface of a pot that adds an extra layer on the top of the pottery, making it thick enough to prevent it from becoming fragile and breaking apart. Also, the waterproofing property of glazing doesn’t allow the clay to melt down as it comes in contact with water. In this way, glazing increases the overall durability and longevity of the pottery piece.
Makes the pottery food safe:
Simple earthenware is not capable of holding moist things in it, as it may melt. After the application of glazing, treat the pottery piece at a high temperature such that the clay and glaze onto it hardens up. In the meantime, the process also fuses the chemicals present in the glazing mixture and makes the pottery food safe.
Smoothens the clay surface:
The coating of the glaze smoothly spreads out on the pottery body and gives it a beautiful texture that feels nice to touch. The roughness of the earthenware vanishes with the application of glaze coating on it.
Now, glazing is an intricate process that one must do by adopting proper techniques and tricks. One has to master the skill properly to get control over the glazing process like a professional potter. Even a tiny mistake can ruin the entire process. Experimenting with different types of glazing is something that you should try every time to create new and unique pottery pieces, it is essential to learn the glazing process first.
Let us have a look at the most critical facts about pottery glazing that you need to consider before opting for the process:
Get some training classes on how to glaze. Learn the process slowly and concentrate on each step.
Get your supplies ready and keep them near your reach before starting the process of glazing.
Collect all the pieces of equipment or tools at your studio that are needed for working with glaze.
Follow each step, and don’t skip any, or else it can ruin your entire effort.
Wear some old clothes while glazing so that you don’t have to worry about stains.
Handle with care while working with glazing compounds that contain hazardous chemicals.
Follow all the proper instructions and tips about the glazing technique to prevent the occurrence of any risks that may lead to failure.
Wear masks and gloves to protect yourself from hazards related to chemicals and specks of dust.
Take proper safety measures while firing the pottery glaze.
Most importantly, keep patience. Crafting pottery out of unwanted hurriedness can ruin the entire work.
Once you are ready with all the arrangements, only then proceed to the glazing technique. Now, let us learn how to glaze a pottery piece step by step.
How to glaze a pottery step by step?
Glazing might seem difficult enough for novice potters at the beginning of the work. But if you follow all the steps sincerely, you will achieve success in mastering the glazing technique. So, let us move on to the steps that you need to follow one after another to create a beautiful glazed pottery piece.
Take the unglazed earthenware first:
Whether you want to glaze onto the pottery bought from your nearest ceramic shop or you have made your pot, take it out and start working on it. There are two types of potteries, one is greenware, and another one is bisque fired. Greenwares are considered to be those types of potteries that are not fired and hardened with the help of air. On the other hand, bisque-fired potteries are those that are fired at least once to make the surface hard. A bisque-fired pottery has an absorbent and porous surface that absorbs the glaze properly and turns it into a nice texture when fired. Though it is totally up to you, it is always better to work with bisque-fired pottery, as it gives an outstanding result once the glazing is done.
Prepare the glazing mixture:
The most crucial part of glazing is mixing the glazing compounds in adequate proportions. You need to take a container and mix all the ingredients properly. Mix and stir the glaze continuously until it turns into a nice creamy consistency. There are two ways that you can use to prepare the glazing mixture. One easy way is to purchase readymade glazes such as Duncan INKIT-1 Envision Glaze Kit for Ceramics and add the proper amount of water to make it ready to use. On the other hand, you can buy all the ingredients and mix them on your own, maintaining the proper measurement and ratio.
Here, we provide a guide to the components required to make a 1 kg glazing mixture.
Ingredients | Amounts in (g) |
| Soda feldspar | 350 |
| Wollastonite | 200 |
| China clay | 200 |
| Quartz | 150 |
| Calcium borate frit | 100 |
Make sure the glazing mixture is smooth:
Once you are done with mixing the glazing compounds, you need to strain the mixture through a sieve to remove any existing lumps or bubbles in the glaze. Also, glazing compounds tend to become crystallized. So, straining it properly, ensures that there are no such solid elements present in the mixture. After you have mixed and strained the glazing mixture, you need to let it sit for 24 hours to achieve better consistency. After 24 hours, before working with the glaze, stir it again with a stick or any tool similar to it, and make the mixture pass through the sieve one more time. This action will make you double-sure about the smoothness of the glazing compound’s texture.
Make the pottery surface smooth:
Before applying the glaze on the outside of your pottery, you need to make sure that the pot surface is smooth enough. There must not be any dots present on the exterior side of the pot. Take sandpaper and rub the surface evenly to get rid of any irregularities and make it smooth first. While rubbing the pottery with sandpaper, make sure you are wearing masks to protect your face from dust that your pot may release while getting scraped off.
Wipe the surface of the pot:
After scraping off the bumps and lumps present on the surface of the pottery to make it smooth enough, you need to rub it with a wet sponge to get rid of all the tough dirt and clouds of dust. Before applying the glazing mixture, make sure the ceramic pottery is clean, and there is no as such dust or grime present on it. Squeeze the sponge properly after soaking it in the water, and then clean the pot evenly with it. The water-doused sponge allows the pottery to remove the presence of excessive dirt or oiliness on it.
Add wax to the surfacing:
Glazing mixture sometimes sticks onto the ceramic body so badly that it becomes hard to remove it in case of any mistake. Also, the joint places present between two parts of a ceramic piece may get stuck because of the adhering of the glazing compound. So, it is good to apply a thin layer of wax onto the base and joints of the pot before applying the glaze to avoid this problem. You can either use paraffin wax with the help of a brush or rub some crayons onto the surface.
Apply the glaze onto the pottery surface:
Now comes the trickiest part of the glazing process. Applying the glazing is not that hard, but you need to be much more careful while applying it as the success of the entire process depends on this step. Take the pot and start applying the glazing with the help of a brush, or start pouring the mixture gradually onto the pot while spinning it slowly. Make sure that the entire pot is covered with the glaze evenly. While working with the glazing procedure, it is better to use the brushing technique as it’s easy and effective to apply this way. While applying the glaze, make sure you’re starting with the inside part of the pot first, as you would not want to deal with a mess while working.
Another thing you need to focus on is how to apply the coloration. Some of the potters directly apply a coat of colored glaze, while some choose to apply the color first as an underglaze, and then add a transparent coating of overglaze onto it. You can also purchase more than one underglaze to decorate the pot, the way you want. The coloration of glazing goes through a drastic change when the pot is put inside a kiln for firing. However, underglazes don’t change as much as overglazes do. So, select the type of glazing based on your requirements and choice.
Let the glaze become dry:
After applying the glazing, you need to let the glaze sit for some time. Wait until the glaze becomes dry as it gradually comes in contact with the normal air. Never put wet glazed pottery inside a kiln, as fire does not behave in a much more friendly way when it comes in contact with moisture. An explosion or bursting of the pot may happen if you don’t consider drying the pottery before placing it inside the kiln. Check after some time if the pottery is dry or not. Touch the pot to check its temperature. If it does feel cold, you need to let it rest for some more time. If you are working with multiple layers of glazing, then you need to dry each layer properly before applying the next layer.
Remove the unwanted glaze:
It’s always recommended to be extra cautious while glazing the pottery pieces. Sometimes an uneven or non-uniform way of glazing may result in an improper application of the glaze. This unevenness sometimes causes a difference in the thickness of the glaze at different parts of the pot, which does not look good. You can scrape off the extra unwanted glazing with the help of a scraper or a knife or any sharp object similar to these tools. You can also use sandpaper to rub off the extra glaze and turn it into dust to get rid of it. After you have scraped off the unwanted glazing, wipe the place with a wet sponge carefully, and dry that place once again.
Fire the glazed pottery inside a kiln:
Get access to a kiln that is easier for you to work. Learn all the basic techniques about firing first, and then follow all the firing and safety-related instructions before opting for the said process. It is to be noted that before firing, you need to have proper knowledge about the firing temperature for the type of glazing you are using. Set your kiln to that firing temperature and put the pottery inside it carefully enough.
Before placing the pot inside the kiln, make sure that the equipment is functioning properly to avoid any unwanted dangers. Check thoroughly, if you have set the temperature of the kiln to the required cone, or else it may lead to disaster. Schedule the firing of your pottery until it becomes ready. Don’t leave the side of the kiln when your piece is undergoing the process of firing. Once you are done with firing your pot, wait for the temperature of the kiln to become completely the same as the room temperature. Don’t open the lid of the kiln when it is hot. A sudden change in temperature may be the cause of thermal shock, and it can cause the breaking of the pot. So, be extra careful while firing and bringing the pottery out of the kiln.
Mistakes that you need to avoid while glazing:
Glazing is not as smooth as it looks when it is done. Some common glazing mistakes are often made by beginners that cause defects in their pottery pieces. So, you need to avoid such mistakes if you want to reach the desired result.
Here are the glazing mistakes that can happen if you don’t pay proper attention to certain factors.
Glazing Mistakes | Reasons/ Factors | How to avoid it? |
| Blisters | Excessive application of glaze might lead to the formation of blisters on the surface of your pottery. Not drying the pottery after applying the glaze and before placing it inside the kiln or improper way of clay preparation also can be the reason for this kind of small crater-like defect on the surface of your pottery. | Don’t apply too much glaze; always try to work with thin layers of glazing. And if you are working with multiple layers of glazing, make sure you are drying every layer properly before applying the next one. Also, make it certain that there is no air trapped inside the pottery. |
Crazing of the glaze | The expansion limit of your clay body and glazing should match. If it doesn’t match, and the expansion of the glazing becomes higher than the clay body, then it results in the crazing of the glaze. It leads to the appearance of cracking patterns on the surface of your pottery. | To avoid this defect, make sure there is a lesser amount of difference between the expansion coefficient of the clay body and the glaze. Use a lump of clay with a higher expansion property for a glaze that has a higher expansion limit. |
Settling out of the glaze | If you don’t stir the glazing mixture continuously, the heavier elements present in the mix tend to settle down at the bottom of the container which causes a difference in thickness in the glaze. At this point, if you apply your glaze onto the pot, some essential compounds won’t be present at that part of the mixture, which will later cause problems during the process of firing. | Mix the glazing mixture properly before applying it to the pot. Also, you must cover the container properly to avoid bacteria formation in the mixture. |
Crawling of the glaze | It happens when you apply the overglaze after the underglaze has dried out totally. Again, too much usage of powdered glaze and allowing it to become thick near the corners make the glaze crawl down through the pottery body. | Don’t let the underglaze dry out totally before applying the overglaze. Try to use liquid glazes instead of using too much powdery glazing. |
Pin holing | Again, the improper mixing of glazing is the reason for such kind of defects. Also, if the firing cycle is not controlled correctly, it leads to the formation of such type of small holes and dots on the pottery surface. | Always mix the glazing by whisking it continuously. The more you whisk it, the more it gives the desired result that you want for your pottery glazing project. Also, have some proper knowledge about the firing cycle. Fire your pottery for two or more sessions at the optimum temperature for the required time. |
| Shivering | When the expansion limit of the glaze becomes lower than the clay body, it causes shivering of the pot that further leads to the cracking of the pottery piece. | Choose a glaze having a lower expansion coefficient for a clay body possessing a lower expansion limit. Try to match the expansion properties as much as you can. |
Tips and tricks for glazing to achieve the best results:
Not only you must learn the entire process of doing proper glazing on your pottery piece, but there are also some small tricks that you need to apply to master the glazing technique like a pro. While glazing, every step counts. So, if you skip or commit even a small mistake, it will lead to the ruining of your whole effort. Also, some defects will appear eventually, if you don’t pay proper attention to these tricks. Here are some of the essential tips that you need to follow while working on the process of glazing:
Choose a glaze that matches your clay:
Make sure that you are choosing a type of glazing that goes compatible with your clay. The firing temperature of both your clay body and glaze should match to avoid problems like cracking and breaking of the pot. Also, there should not be much difference between the expansion coefficient of your glaze and the clay body. Else it will cause problems like crazing, shivering, and cracking of the pottery base.
Never forget to mix the glaze properly:
We have already discussed this before, and again stressing the fact to give you a constant reminder about the utmost importance of mixing the glazing compounds properly. Keep on whisking and stirring the mixture until it reaches a creamy milk-like consistency. Whisk the mixture again and again before you apply it to the ceramic piece.
Strain the glaze after mixing:
Once you are done with mixing and whisking the mixture, make sure you are straining it using a sieve. There should not be any lump, solid particles, or crystals present in the glazing mixture. Otherwise, the application of the glaze should not be taking place smoothly.
Never skip smoothening of your clay body:
The ceramic body that you are going to use for your glazing operation should have a smooth enough surface. There should not be any bumps, dots, or roughness on its base. Take sandpaper and rub it onto the surface evenly to get rid of the roughness, this should be followed by wiping off the clay body using a damp sponge to eliminate the extra dirt and oil present in it.
Change the direction of the application of the glazing:
It is important to change the direction of the glazing application to avoid the uneven thickness of the coating. Change the brush strokes each time when you opt for coating the pottery with the mixture. Make sure that the thickness of the glaze spreads equally everywhere on the pot.
Be careful about the thickness of the glazing mixture:
The glazing mixture you are using for your work should not be too thick, as it can be difficult to apply and would create unwanted thick layers. Also, the mixture must not be too thin, as it will drip continuously while applying and will create a total mess while working. So, make sure the glaze has the right kind of consistency, neither much thick, nor too thin. Instead, it must be of a creamy and smooth texture.
Work with one type of glaze at a time:
There is no issue with working on multiple types of glazing at the same time if you know how to handle it properly. But working with only a single type of glaze at one time helps you to get your job done in the most fuss-free way.
Completely dry out the glaze before putting the pot inside the kiln:
After applying the glaze, wait for it to become completely dry. Even a little amount of moisture present in the pottery will lead to the failure of the entire process when it comes in contact with such high temperatures inside the kiln. Always be double-sure about the drying of your pottery glazing before throwing it for firing.
Choose the right thickness of the brush:
If you are planning to apply the glazing with the help of brushes, then you should choose the right measurement for your brush. Depending on how much area you need to cover with one stroke, choose the right brush, and apply it evenly on the pottery surface. You can choose a glazing brush like Creative Hobbies 1 7/8“ Hake Blender Brush For Ceramic and Pottery Painting to get your job done with nice enough finishing.
Always scrape off the excessive glazing:
If you pour excess glaze that causes uneven spreading of the glaze on the ceramic surface, it should be scraped off with the help of any sharp object. Otherwise, the glazing won’t be drying properly and will take time to dry up completely. Also, the final texture of the pottery piece won’t be nice and smooth.
Always choose the right temperature for glaze firing based on the type of clay body:
Select the right temperature of glaze firing depending on the type of clay body you have used to form your pottery piece.
Here is a guide related to the glazing temperature and cone range that you should follow.
Kiln | Clay | Cone | Temperature |
| Low fire | Earthenware | 04 -06 | 1745F – 2012F |
| High fire | Porcelain | 10 – 12 | 2381F – 2455F |
| High fire | High range stoneware | 8 – 10 | 2305F – 2336F |
| Mid-range | Mid-range stoneware | 4 -8 | 2124F – 2264F |
Always choose the right tools for your glazing work:
Always use the proper tools to achieve perfection in your glazing work. Without appropriate equipment, it is difficult to give a perfect look to your pottery. Whether it is mixing the glazing, applying it to the ceramic piece, or doing decorations on the surface of your pot, you need the right kind of tools in each step. Tools like a sieve for straining the glaze, jiffy mixtures to mix the glaze, metal scrapers to scrape off the extra glazing, tongs to control the glaze dipping, and brushes to apply the glaze – all are important for getting your job done correctly.
Wrapping up:
This ancient form of artwork has now become a daily need for almost everyone. If you are passionate enough to work on pottery glazing for your everyday use or to cherish your hobby, this article will give you the basic guidelines about what to do and what not to do while glazing. Just follow all the instructions and steps carefully, and go on creating as many marvelous pottery works as you can.
Happy sculpting!


