
When it comes to throwing pottery, there are a few things that you should know. Throwing can be quite hard, to begin with, but here are a few tips that will make the process easier. You’ll learn here in this post how to throw better with some great hints and tricks that will assist you.
Throwing pottery might seem easy, to begin with, but there are a few hints that will help you get the most out of it, and you’ll realize that when you do, you’ll be able to get the results that you want with this. It’s amazing just what it can do, and the changes that you’ll get from it.
Arm bracing
When it comes to throwing, you want to brace your arm and have it near the body. Why do you do this? Well, there are a few reasons, and if you’re struggling with throwing, you should consider this. They are the following:
- You keep the elbow stuck to the hip
- Your body will lean with the arm itself
- You’ll be able to cup and center the clay easier
If you throw correctly, you’ll be able to center it better, which in turn will give you better stabilization. At the end of the day, it might be a moot point, but it’s super important, and it will keep it centered so that you don’t have anything lopsided.
Don’t move arms Away
If you’re looking to do well with your pottery, then you’ll want to make sure that you don’t move your arms away from where your body is centered. You should keep these as close as possible, and that’s because of the following:
- It’ll prevent your arms from being knocked
- It’ll keep everything from being shaky
If you keep them close, you’ll have better control, and one of the most common things that often happens in the beginning is you forget to do this. But, keeping your arms nice and tight will prevent you from going shaky, which in turn will prevent your body from destabilizing as well.
Hand placement
When you’re choosing how you want to throw, you should make sure that your hands are supported as well. when you do place your hands on the clay, as a rule of thumb, they should be touching each other, and working together.
Lots of times, this can be hard, but it plays a huge role in it being centered. This is important especially when you’re doing the pull-up of the clay to form a wall.
What happens if they aren’t touching? Well, the following will occur:
- The outside hand will move with the clay rotation
- It can throw your clay off-center
- It creates a clay fold
In essence, you want to make sure that your hands are working together and touching, and having everything nearby will create better stability.
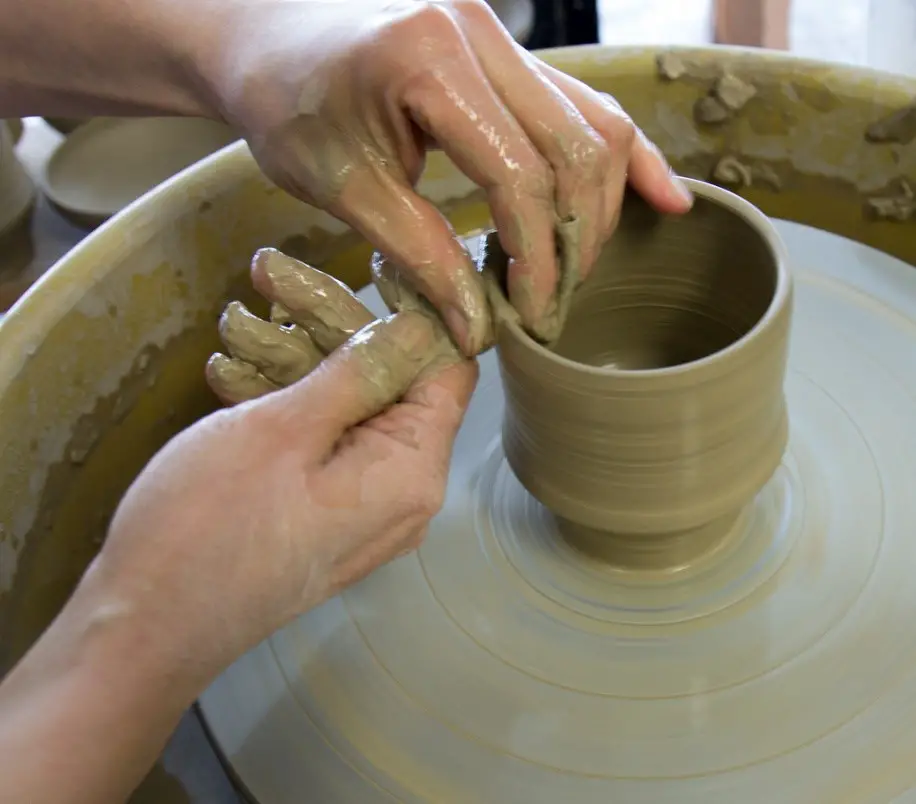
Keep fingers strong
When it comes to throwing, you want to keep your fingers strong. This does all build on the placement of your hands near the body, and in truth, you want the hands to be touching as well. If you do this, you will keep your fingers together, and it will then give you more support.
Having strong fingers is a big thing, and that’s because of the following:
- It helps with pinching
- The weaker hand can support the dominant hand
- You’ll be able to have better control of your fingers when doing this
You essentially want to have the fingers work to help themselves out, and you want to keep the hands touching, and the fingers touching. Combining this with the body being stable will lead to amazing stability, and it will make a huge difference in controlling the pottery. This makes a huge difference when you’re working with throwing pottery. A good, stable hand will make a world of a difference in the future of your throwing, and you can make better pottery if you watch the placement of all of these.
Porcelain Slurry
One thing that you can think about getting if you’re going to be working with porcelain, is a porcelain slurry. If you use water when throwing porcelain, it can cause issues.
A porcelain slurry does the following:
- Gives it better lubrication
- Make sure that you keep the shape
- Allows for better kneading
- Can help prevent it from flopping
If you’re going to be using porcelain, sometimes it’s better to work with it again if things get a little bit messed up. If you throw porcelain with water, for example, it will tend to get worked too much, and then it flops. If that happens, usually it’s best to begin once again, but cutting the clay on the wheel head typically isn’t enough for this. You do need to put it back, and sometimes, using a porcelain slurry to help get this off will make it easier, and it’s usually the way to go.
Helping with floppiness
If you realize that you’re working with a piece that begins to look a bit floppy, and you don’t want to start all over, you can salvage it. Typically, the best way to salvage it is to get something that is hot and can put out warm air, or even just a gas burner, a paint stripper, or something along those lines. You put it right near the surface area, and from there, it will dry out your clay so that you can try again.
When you do this, make sure that you keep the wheel turning. It might seem strange to turn the wheel head, but if you want to have the heat evenly distributed, then you’ll want to do this.
Now, it’s easier to throw something that’s got thick walls rather than those with thin walls, but you can get the right thickness over time. You can even get thin walls if you do try this. You should also look at the scale of what you’re working with.
Remember two things:
- With a big piece, you’ll want to have thicker walls because you need to support the weight
- If you want to go small with a piece, you can always go thinner. This is optional though
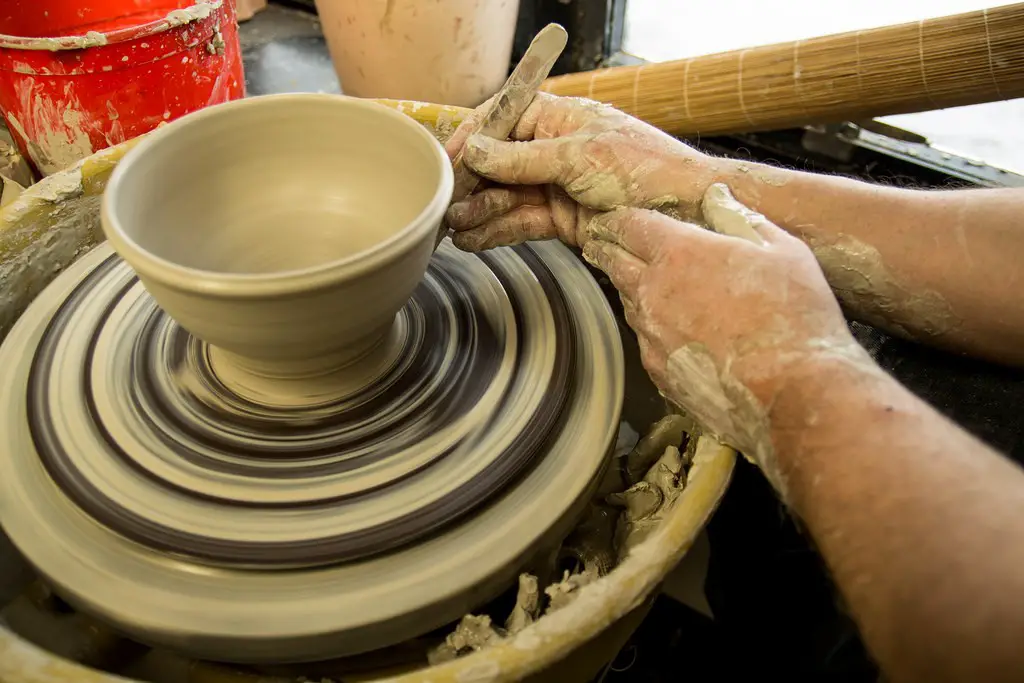
How to form thin walls
When it comes to throwing, lots of people think that thin walls are done solely by throwing. However, it’s more than that. It’s actually turning, which is the following:
- Cutting off the layers of the clay with turning tools
- Watching the walls so that they don’t get too thin
When you’re making thin walls, you want to make sure it’s even, because if they’re not, it will cause issues with trying to put the piece in the kiln to fire. Not only that, but thinner walls actually do crack as well, and that can also occur when you’re firing, so keep that in mind. Watch out for this, since it’s a common problem for many people, and if you’re struggling with pottery that continues to crack, you want to make sure that you start with a wider piece, and from there, you can work with thinner.
Watch your water
With throwing, you should never let the water start to get to the base of what you’re making, which is where it sticks to the wheel. You should always make sure that you do sponge out the water from the bottom, and you can get it out of the base of your pots.
Why is that? Well, it does the following:
- Can pool up and create uneven surfaces
- Can cause issues in clay compression
- This can cause the clay to be off-center
- Can subject the pottery to cracking
You should definitely be watching your pottery. Now, the nice thing is, if you are using earthenware, or even raku, you can get away with having a bit of water in there. However, if you’re working with porcelain, that can cause an uneven compression of the base, due to the water accumulating, so you should make sure that no excess water is formed, because porcelain tends to be more liable to crack, and it’s best if you’re trying to create an even base to get into the habit of creating that with your pottery. Be smart with this, and make sure that you take your time and do what’s necessary in order to achieve the right sort of texture for the porcelain that you can.
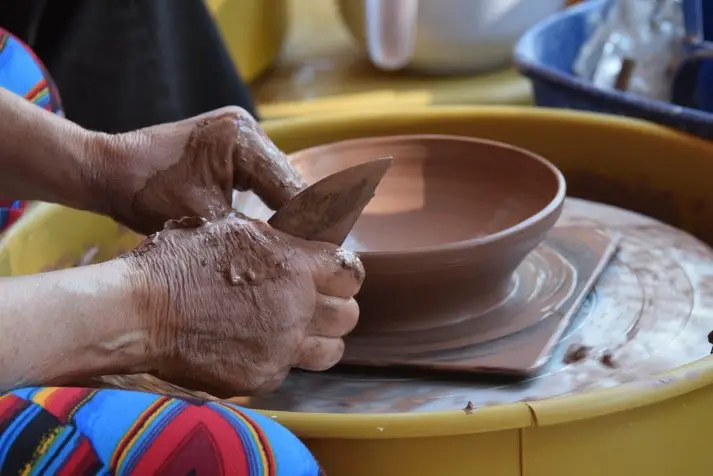
Best Centering Technique
When you’re getting the pottery onto the wheel head, it’s important that you make sure that the clay is compressed enough, both near the bottom, and at the top. If you’re having issues with this, we’ll dive into this section to ensure that you know exactly how to center the potter before you do this.
- First, you put the porcelain on the wheel head by cutting it off with a cutting wire
- Turn it around
- Bash it onto the wheel in an upside-down fashion
- Recenter it
This is the best one in particular for porcelain, but if you’re worried about clay compression, this is actually the best way to make sure you’ve got even compression at the bottom, and then at the top as well.
You also might notice that when you’re throwing, it might be doing great, but it might start to collapse when you take it off the wheel. You will start to notice this happening initially, but don’t despair. The best thing to do is you should try once again, work to recenter it, and then try to get it off. We’ll discuss, however, the best way to get your pottery piece off the wheel so that you do end up getting it together.
Getting pottery off the wheel
This is often the hardest step, especially for newbies, or those who don’t typically work with porcelain and the like. But, you can actually get it off pretty easily by doing the following:
- Keep the wheel going
- Get a small burner a portable gas bottle, or even a hairdryer
- Remove it from the wheel
This is something that can really help. sometimes, the reason why forms collapse isn’t because you did something wrong, but because of the wet texture of your pottery. This is a really annoying thing, but if you start to work with this, you can just get the area, and from there, you can remove it from the wheel easily. A little bit of drying does make a world of a difference. Actually, understanding how to throw, it and getting it off the wheel, can make a huge difference in your pottery, and for many, it’s the difference between a pottery piece that works and one that ends up creating a ton of issues. You can always practice this, and from there, get the perfect piece that you know and love.
Judging thickness Tips
One thing that can immensely help you is that you can really help get yourself out of pickles if you know how to judge the thickness of pottery that you’re about to throw. If you’re able to determine this, you’ll be able to form the walls way easier, and there are lots of benefits to this, including the following:
- Makes for better stabilization
- Helps prevent walls from being too thin
- Can prevent the cracking of pottery
There are some great ways to help you judge the thickness of the pottery, and this section will go over it.
The first thing that you will do, if you want to wedge some throwing clay, such as what you’re going to have for the clay body, and then a smaller piece for the pot bottom. You should get a quarter, and then a needle tool. Here is how you do it.
- Center the clay on the wheel and flatten it to the thickness you want
- Take the quarter and put it on the center disc of the wheel
- Now put the larger clay that you have right over the disc of the quarter, acting as if the disc isn’t there period
- Open up the center and then put the sides up like how you should normally do. You should then see the quarter at a certain point. When you do, don’t go deeper but instead pull up and shape the walls
- From there, you remove the quarter, and there you have it, you’ll be able to have the perfect pot thickness if that’s what you’re going for, and that can make a world of difference
- You should clean up the excess water with a sponge and also use that to smooth out the indentation made by the quarter if you don’t want that being seen on the pottery
Now, if you’re comfortable with this, you’ll start to learn over time with your hands how to do this, and that muscle memory will help you learn a bit better over time and you’ll soon automatically understand how to judge the thickness of walls.
For the second technique, you should throw a pot, and act like you do have a quarter there, but don’t actually do it. when you’ve hit the depth, you want to then get your needle tool and from there, push through the center of the bottom, and you’ll see the thickness therefrom that measurement
If it’s not enough, then you’ll definitely want to learn to do this, and you can use the quarter technique to master this. You should definitely make sure that if you do use the needle tool that’s got clay on it, it’ll be wet where the clay is touched. You should also try checking by pushing the needle tool into where the base is and then put your finger there. This can be quite hard, but it definitely is another way.
From here, you’ll be able to master the art of determining thickness, and you’ll be amazed at the difference that this makes when you’re throwing pottery.
No Magic Bullet
With this, you do need to realize there is no magic touch, no magic bullet that will make you good at this. when it comes to the potter’s wheel, the best thing to do is to learn how to sit down and test it out.
You’ll probably start out with clay molds which might seem easy, but you struggle with opening it up once you begin to try this. It’s a frustrating thing, but there isn’t one magic technique that changes the way that you put it together.
With this, you want to sit down and adjust your arm position so that you’re comfy. Keep everything close, and everything together, and you’ll realize that you can make the most out of the changes that you want to make with this. There is nothing that can automatically give you the correct sort of technique, but if you do work with this, if you try to master this immediately, you’ll be able to get a better result from this.
Remember, just like with anything in pottery, there isn’t one technique that will work all the time, no magic bullet that’ll make your life easier, just hard work, dedication, and practice, and you’ll be able to master this in no time.
Sit at the Wheel and play with Speeds
One thing that can help you figure out just what the best speed for throwing is, is to try throwing at different speeds.
Some people like to have the wheel slower, and that’s because of the following:
- Easier to control
- Easier to move hands
- Better for coordination
But, some others like the wheel faster, and that’s because of:
- It gets the forms done faster
- Allows for speedy motions
- Can work well with the opening
But, when you’re beginning, the last thing that you want to do is start off too fast. That will just end up getting you in trouble. The best thing for you to do is to sit down at the wheel and try out different speeds.
Work with each of them and find the one that best fits you. Try it for yourself and see from here just what type of speed you need for this. what is the best speed for you to work with? What will get the job done? all of this is really just on your own accord, and it’s what will get the results super-fast.
Practice Makes Perfect
Finally, you’re going to probably end up getting frustrated with this at some point. Wheel throwing isn’t something that you normally can master on the first try. Forms get wobbly, they might fall apart, you might end up needing to rework the clay after a bit, or maybe something is off-center. Maybe the first time you do this the pottery cracks. It’s quite frustrating for many people who do this, but the best thing to do is to sit there and practice.
Do the following:
- Take time and learn to throw
- Work with different techniques to see what works for you
- If you fire and it cracks, don’t get upset
- If you do something right, write it down
- Do take wins
- Don’t mourn your losses. It happens. It’s pottery
- If you need help, you can always ask
And that’s it! you just need to work on practicing this. Throwing takes some time to master, and if you’re worried about doing it right the first time, well chances are you probably will struggle for a bit. But if you take the time and learn, it can make everything easier.
With throwing, work on trying to master it with these hints and tips, and you’ll see from here just what kind of a difference it makes, and what it can do for you. You can learn to throw perfectly, and this article will help you learn to master throwing, and tips that will make throwing not only possible but something that you’ll be able to master in no time. With this, you can learn to throw, and you can learn to create pottery that you can fast, and with some great results too.
If You Enjoyed This Article Please Share and Pin. It is Greatly Appreciated. 🙂


