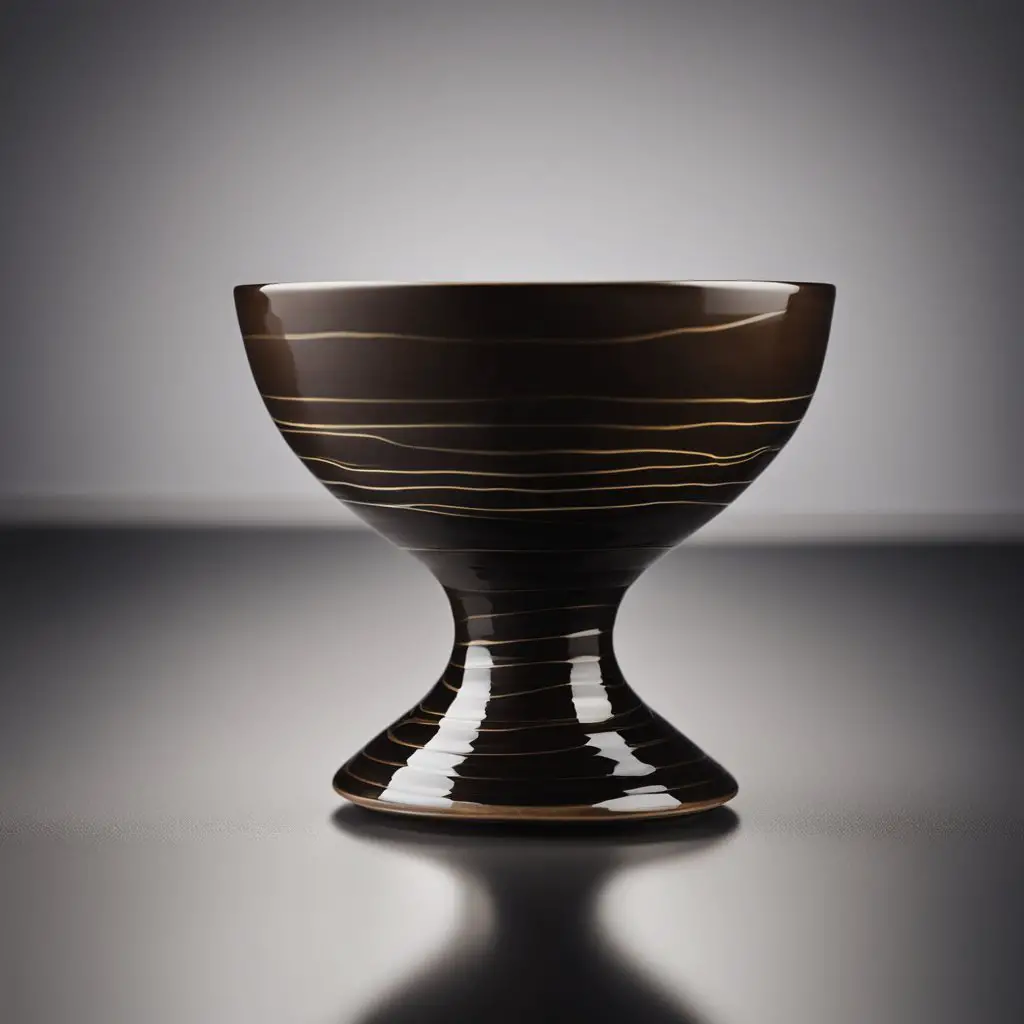
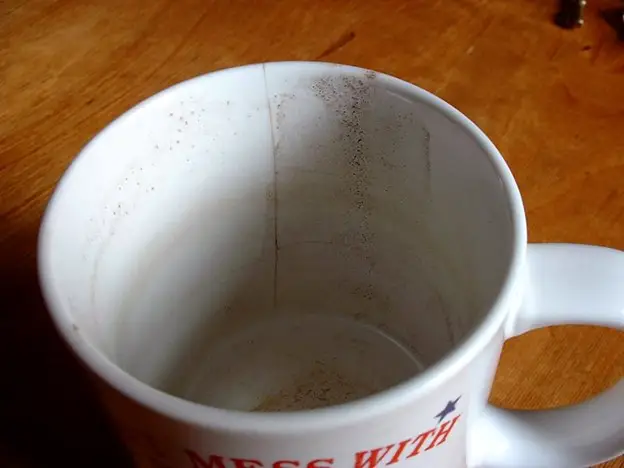
A ceramic gift, such as a mug or a pottery bowl, is unique. However, it is a big bummer if you see one of those little hairline cracks on it. You never know how it got there, and it does let you down, especially if it was your favorite piece! But it is relieving since you can repair your ceramic pot quickly at home with some easy steps. Giving your cracked pottery a brand-new upgrade and fixing it is a joyous process. Worry not; your favorite piece will be bright and beautiful again!
Ceramic pottery is always more prone than anything to getting damaged. Saving your pottery from such cracking defects may sometimes be all in vain since you never know when a new crack may appear and how. All you can do is handle them carefully at all times. It is difficult always to stay attentive, and accidents can happen. If the piece breaks into little pieces, restoring it to its previous state is almost impossible. But a few hairline cracks are more easily fixed if you follow some tricks.
This article will drive you through some great tricks you can adopt to make your favorite piece of pottery come to life again, free of hairline cracks. All you need to do is follow these steps carefully.
How Do Hairline Cracks Appear on Pottery?
Hairline cracks in pottery or ceramic ware can happen through various stages of the ceramic-making process or even after the piece has been all fired up. Understanding the multiple factors contributing to the creation of hairline cracks is essential for you to produce high-quality, durable pieces and restore them. Here are some key reasons why hairline cracks may be there:
- Clay Preparation:
- Improper wedging of the clay can leave air pockets within the material. During the firing in the kiln, these air pockets may expand and contract continuously, which leads to hairline cracks.
- If the moisture content in the clay is uneven, it can cause varying drying rates and lead to cracks. It is specifically common in the thicker sections of the clay.
- Forming and Drying:
- Uneven distribution of clay thickness in different parts of the piece can result in uneven shrinkage during drying and firing, which also causes cracks.
- Quick or unnatural clay drying can cause the outer layers to dry faster than the inner ones, creating tension and potential cracks.
- Bisque Firing:
- If the bisque firing is not done correctly, any remaining water molecules within the clay can turn into steam during the subsequent glaze firing, causing pressured cracks.
- Glazing:
- Some glazes may not be compatible with specific clay bodies or firing temperatures. The thermal expansion mismatch between the clay and glaze can result in cracks.
- If the glaze is applied too unevenly, it can lead to an unnatural shrinkage during firing, causing cracks.
- Firing:
- Fast temperature changes during the firing or cooling of the piece can cause thermal shock, a significant reason for hairline cracks.
- Exceeding the recommended firing temperature can lead to excessive shrinkage and stresses that cause cracking.
- Post-Firing Stress:
- Handling the piece roughly or exposing it to sudden impacts after firing can cause hairline cracks.
- Changes in humidity and temperature in the surroundings right after firing can cause clay and glaze to expand and contract, another cause for cracks.
- Clay Composition:
- Inconsistent or impure clay may contain particles that behave differently during firing, contributing to cracking. Always use pure clay during your artistic activities.
Methods of Repairing Hairline Cracks in Pottery
There are several ways to repair a hairline crack in pottery. And here we are going to discuss some of them. So, let’s get started with the methods that you can apply to give your cracked potteries a new life:
1. Fixing Pottery Cracks at the Greenware Stage:
If you find a pottery crack at the greenware stage, many scopes exist to repair it. Finding hairline cracks is quite challenging since they are too minute or fine. But they have quite the potential to break your pottery ware eventually. You should monitor your wares with a magnifying glass to identify any fissure and repair it immediately before it can expand or cause any damage.
- Cracks tend to appear at structurally weak points of a clay pot, where the coils get attached or where two walls of the pottery meet. Added stress or carelessness while building your pottery may be the reason for the formation of such cracks. So, take a minute to check those places to find a hairline crack.
- Once you find one, try fixing it when the clay is at the leather-hard stage. Start fixing the crack by covering many more areas near the exact cracking place. Take soft clays and fill them into those places by compressing the clay.
- To normalize the addition of wet clay with the previous clay body and let it dry, you can wrap it with a plastic wrapper. It will make the repairing clay stick onto the pottery body permanently. It is better not to use water during this time as excessive moisture may exaggerate the crack. Once the clay pot is dry, you can see you have successfully repaired the fractures.
2. Repairing at the Bone-Dry Stage:
During its bone-dry stage, pottery needs care when it comes to reparation. You have a limited choice in what you should do at this point. It is not straightforward since you cannot just put wet clay on the cracks and then bisque fire it. However, it is more likely to increase the number of fissures. So, at this stage, avoid adding soft clay. The process below is ideal for helping you repair a hairline crack spotted at the bone-dry stage.
- You can try paper clays to repair such points. Get some toilet paper to make paper pulp out of it. Then, mix it with the clay you used to make your pot. Make sure that you are not adding too much water to it. Let the mixture dry slightly to have a consistency similar to putty.
- Score the cracked area properly and apply a small amount of water to avoid roughness. After this, you have to fill up the scored place with the paper clay mixture and let it dry before bisque firing it. Ensure no cracks are left on the pottery body before opting for bisque firing.
3. Pegging Method to Repair Hairline Cracks:
Pegging is an efficient process for repairing pottery cracks with more mechanical integrity and strength. Before using this technique, ensure the piece is at the ideal thickness so you can proceed. Below, we have provided detailed steps of the said technique in the form of a chart for your easy understanding.
| Steps | Processes | How to Execute? |
| Step 1 | Find the crack and grind the peg insertion | Find out the crack first. Then, you have to grind channels on the side of the fissures to allow the epoxy to become apparent so that the peg can penetrate through the pot’s walls. |
| Step 2 | Prepare the copper peg for insertion | Cut a required amount of copper wire based on the measurement of the crack. Use a razor blade to insert through the cracks and widen the gap enough to plot the copper wire. |
| Step 3 | Start cementing the wire | Start cementing to stick the copper wire properly onto the crack. Heat the pot and associated epoxy at 120-140°F temperature to make the epoxy melt a bit and penetrate through the cracked wall. Then, microwave the pottery for 2-5 minutes. Check if the epoxy has reached the other side of the crack. Remove the razor blade and insert the clamp before the epoxy hardens. Then, again, heat your pottery inside the oven to achieve optimum strength. |
| Step 4 | Fill in and cover the repaired place | Take some filler epoxy and sand it with some rotary power tool to fill the lines of repair. |
| Step 5 | Finish off with coloring and glazing | Once you are done with filling, hide that place by adding some colors and glaze, and give it a beautiful finish. |
4. Repairing Your Cracked Pot with Milk:
This method is one of the most straightforward processes for fixing pottery cracks. This technique costs you nothing and is too simple to do at any time. Casein is an organic and natural glue found in milk. When heated, milk sticks and separates from it and sticks to a hard material to settle down on it. When this glue is in contact with a fissure, it shall settle between the rough edges and repair it.
It is the most effective purpose if the piece that has the crack is used for cooking and food storage. This process proves to be the most non-toxic one as well and is sure to work for you. But sometimes, it may last for years as well. Also, it is a much quicker way to fix your ceramic cracks. So, here is how you can execute this process.
- Take the cracked pot and place it in a bowl or saucepan. Fill the pan with milk and ensure the cracked pottery gets drowned in the milk.
- Simmer the pan to bring the milk slowly to the boiling point. Don’t boil it vigorously, as it may cause more cracking. Once the milk reaches the boiling point, let it boil and simmer it again for an hour.
- After that, place the milk aloof to become cold. After completely cooling down, remove your pot from the milk and let it sit for 1-2 days before using it. Thus, you get cleanly repaired pottery.
5. Repairing Using a Cyanoacrylate Glue:
Cyanoacrylate glue can be used as a quick fix to repair hairline cracks in your pottery. This super glue quickly sticks onto the fissures and creates a strong adhesion bond using only a small amount. This liquid glue is resistant to water and heat and adheres finely to the pot’s body.
Though the glue works magically in sticking cracks, it is toxic. So, one should refrain from applying it to such ceramics used for food. If you want to fix the potteries used for decoration or other purposes, you can quickly fix them using this super glue. So, let us have a glance at the steps of this repairing technique:
Find the cracked places on the pot first. Then, wipe the area with a tissue to ensure no dirt or oil is left on the surface.
- Apply the glue evenly to that place, and make sure that you are not using your fingers to apply this glue. Use a stick or something similar to it to apply the adhesive. You can use cyanoacrylate glues like the Gorilla 7700104 Super Glue Gel for a lovely finish and superb adhering.
- Make sure you have applied enough amount of glue to allow it to soak properly.
- After 4-5 seconds, while the glue is still wet, wipe off the excess adhesive with a tissue.
- Let the pot sit for some time to dry, and you will see that the cracks have disappeared.
6. Fixing with a 2-Part Epoxy:
Cracks also can be fixed using epoxy glue. Epoxy is a two-part adhesive that consists of a resin and a hardening agent. It creates a firm bond that works quite well in sticking the cracks. So, fill in the fractured areas on the surface of the pottery by using the 2-part epoxy glue. Now, let’s proceed with the process step by step.
| Steps | Processes |
| Step 1 | Fill a bucket with sand that will serve as the potholder. It will help you in holding the pot in an angled way. |
| Step 2 | Take the cracked pot and smoothen its rough edges. Use sandpaper on the sides of the crack and rub it onto the place evenly to get rid of raggedness on the pot’s surface. |
| Step 3 | Mix the 2-part epoxy glue properly by keeping it on a plastic surface. Whisk the mix quickly, or else it can get dried. Once blended well, fill it into the chipped section of the pot evenly with the help of a stick. Never use your fingers to apply the glue, as its powerful adhesive nature may coalesce your fingers. |
| Step 4 | Finish it off by applying paint to the cracked area of the pot. You can also use transparent acrylic gloss on the color for better finishing. |
| Step 5 | Let the adhesive set for some more time to dry properly, and after 15-20 minutes, once it is completely dry, scrape off the dried adhesive using a razor or knife. After that, use sandpaper over the place to smooth out the surface properly. |
| Step 6 | Finish it off by applying paint to the cracked area of the pot. You can also use transparent acrylic gloss on the color for better finishing. |
Wrapping Up
Do not throw away your favorite pottery piece! There is always scope for fixing it with simple efforts. Just follow the abovementioned methods to breathe new life into your pottery wares. Always follow precautionary methods while dealing with fragile items, and wear protective gear like gloves, glasses, and masks.
Always ensure your pottery pieces are not on the edge of a table, rack, sofa, etc. It is advised that you do not put hot water or any liquid directly into ceramic pottery. These situations can lead to a hairline crack and the breaking of the piece into tiny pieces.
If your pieces get a hairline crack, the hacks in this article will help you just fine. We hope you can apply these techniques to fix your pottery collection!


