One thing that a lot of potters like to use is paper clay. Some think it’s a bit easier to work with, and you can utilize it in many different types of clay styles. If you’re someone that wants to try out a different type of clay, paper clay is the way to go. But how do you use it? What’s so great about it? And furthermore, what in the world is paper clay? If you’re someone who has been curious about this for a while, read on to find out.
What is paper clay?
Paper clay is a bit different from traditional clay. Typically, traditional clay has silica and other parts within it, but this one actually contains the following:
-
Shredded paper
-
Paper fibers
-
Paper Pulp
This might seem a bit strange to have in pottery. After all, why would you incorporate paper into something like this? Well, it’s actually got two very great properties to it, and they are as follows:
-
This clay is strong
-
This clay is very light
-
This clay is super versatile
-
This clay works with ceramics of any size and scope
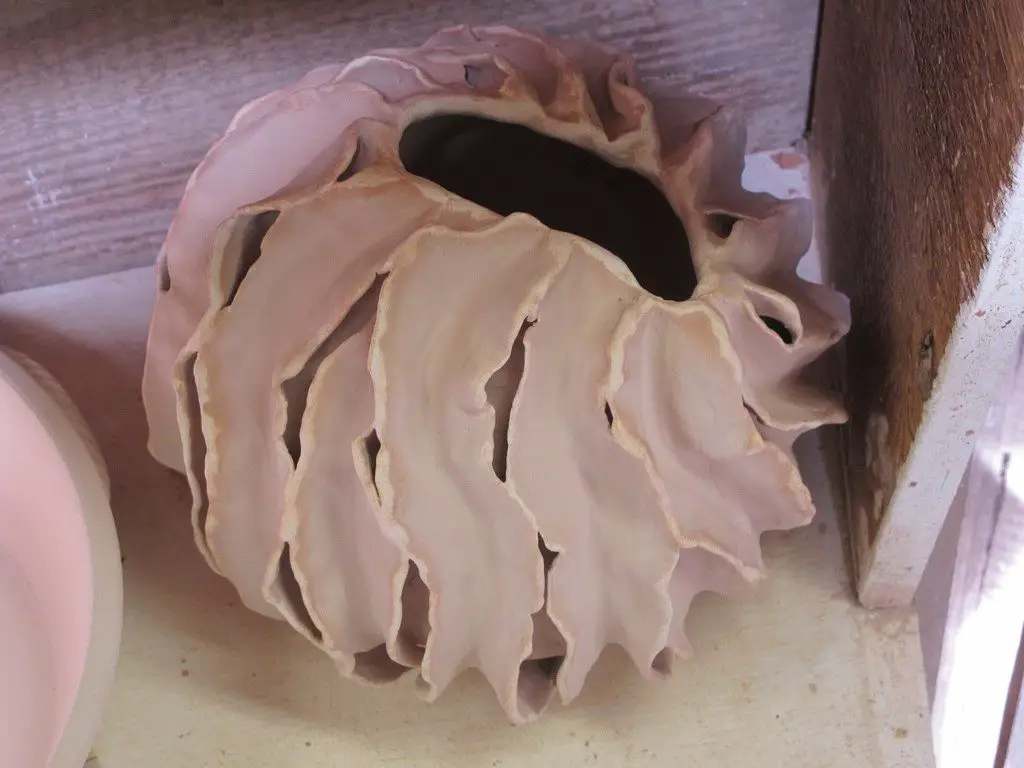
This is a type of clay that’s actually quite popular for those making larger pieces of ceramics. That’s because of how lightweight it is, and you’re not lugging a huge piece that weighs a ton whenever you’re using it.
This clay is made in the following manner:
-
You mix the clay with paper pulp
-
You put this in there together, and the fibers within this create a structure
-
You then can mix it further, and you can create a simple, yet versatile clay.
So why use this? Well, paper clay contains paper fibers. These are actually very strong, and putting this within the clay makes a sort of capillary system that’s integrated into there, and you’ll notice that the moisture has a much easier time transferring about, and it creates a more balanced piece. It will help with retaining moisture and also creating clay that’s much easier to work with since it has a much more integrated system.
If you don’t find this at the store, you can make your own, especially if you’ve got regular clay. You use this with a fiber made of cellulose, and it does create the same effect, however, if you’re trying to get something super easy to work with, you want to use paper for this. If you buy it at a ceramics store, it’s already put together, which might be easier if you’re just starting out with this.
If you’re wondering whether or not it looks like the same type of clay you’ve used before the answer is yes. It does look the same, which is a huge benefit, and you can substitute this out in order to get a great result and to make something easy for you to work with.
What’s so good About It?
So, what’s so great about it? Well, here is the thing, this is one of the most versatile elements of pottery. You can use this with so many different clays, including the following:
-
Porcelain
-
Terracotta
-
Stoneware
-
Earthenware
That means you don’t have to go out and get a special type of clay, you can, in essence, make your own.
If you are choosing to make your own, you can work out what types of fibers you want to add and create as well, and if you’re looking to figure out what you want to achieve in this as well, you and even control the different elements that you want to enable on this. Some of the different things that you can control are the following:
-
The papers and fibers you want to add
-
The strength you’re looking to achieve
-
How you can easily make the clay so that it’s able to be folded and bent
-
To make the clay easy to work with, so you can make shapes that are super simple to mold, and very easy to work with
It’s a super versatile means to making different clay elements and if you’re someone that is struggling, you should definitely try to make the shapes that you enjoy
If you’re also working with larger pieces, such as different structures that you may wonder if you’ll be able to keep up, you actually will want to use paper clay. That’s because the clay is very strong, and its internal strength of it gives you a way for it to support in it itself. This will allow for the following to happen with it:
-
It’ll stay strong regardless of firing
-
It is much lighter, so you don’t have to struggle to carry it
-
The light nature makes it much easier to transport this
-
You can actually make very delicate and thin shapes, and you don’t have to worry about it being too heavy since it’ll support the weight
The internal strength of this gives you the ability to really make it so that you’re able to build the perfect sort of piece of pottery that you will want to enjoy, and if you’re looking to try out making huge and sprawling pieces, this is for you.
This is also a repair tool in many cases. You may be someone who has started a piece, and halfway through, you notice that there is a crack. You may think there is nothing that you can do, but paper clay is actually really good. It can do the following:
-
Join the pieces that are not together together
-
Fix cracks and make them look better
-
Can mend any sort of flaws
-
Work well with a regular clay body
-
Can help to fix any breaks that happen in both pottery made with or without paper clay
-
You can use this to fix anything that has any problems with it, provided that the clay is a wet paper clay
It also dries extremely quickly. You’ll notice that you don’t have to wait as long for something to get either leather hard or bone dry, reducing the time on each piece of pottery. That’s because of the fibers, and the moisture tends to go away much faster.
In some cases, though, you may need to make sure that the piece is wet enough when working so that you don’t end up messing up the piece, so be careful about this element.
Now, sometimes if you’re really pressed for time, you can “force dry” the paper clay. It actually is something that can be used, and it does help with the following:
-
You can work much faster.
-
You don’t have to worry about it cracking as much
-
It often means that it will reduce the time in the kiln, and therefore energy and money
The nice thing about paper clay is if you’re wondering whether you need to fire it in different ways, it actually doesn’t need to be, and the glazing process is the same as regular clay. However, some potters do like to fire the clay at a higher temperature. You won’t need to change up the routine, however, you should make sure that you realize that these extra fibers make the piece strong, and I mean really strong, and when fired, it might mean that the work is more porous. Essentially, that means that it can be more fragile, so take care whenever you’re moving this about, and don’t think that it’s just as strong in some cases as regular clay.
Best uses for this
So, what is the best use of paper clay? Well, there are a few things that you can do with it.
-
Throwing
-
Slabs
-
Hand building
However, these often do have a couple of drawbacks to it.
With throwing in terms of paper clay, you’ll notice it’s much harder to stretch, and it doesn’t do so as easily when you compare this to regular clay. However, if you want to test it out, throw a piece of regular clay, and from there, you can then take your clay scraps that are left over. You can then make your own paper clay if that’s what you want to do, and typically, these are best used within about two weeks of doing this, because over time the fibers to break down, and it can completely change the clay properties, and if you’re not careful, it might end up risking the entire integrity and structure of the clay itself.
Now that you know how you can utilize paper clay, let’s talk a little bit about the best ways to make your own.
Making your own
So, can you make your own? The answer is yes. It is encouraged to learn how to make your own paper clay, and generally, if you’re going lighter, you will want to add less paper, but if you want heavier, you want more paper, which might seem a bit backward, but that’s the way to do it.
Below are the steps to make this type of clay.
-
First, you need the clay slip and a paper pulp
-
You should make sure that you have about 10 to 15 pounds of clay set aside.
-
If you’re wondering how much clay slip you need, do divvy out about two gallons of this
-
If you’re wondering what types of paper fibers you need, use either paper fibers from newspaper, or printer paper, but if you’re not able to get those, regular paper works
-
You should mix in the paper, the clay slip, and the clay itself together to help create a decent mixture
-
After that, add in a tablespoon of bleach, letting it sit for about a minute before you mix this again. This is actually a very important thing, since the mold tends to develop on this due to the mixture of these elements, and you can prevent this from developing
-
You should make sure that it goes clay, clay slip with bleach, and then three handfuls of the fiber itself, and from there, add it and mix it around
-
You’ll need to do this for about 20 minutes, and then, make sure that the consistency is totally smooth
-
From there, you can store it as needed in the locations that you have, and make sure that you use this within two or so weeks because it can go bad after that
-
If you don’t want to use a ton of clay that you have, start to take the craps from the pieces that you’ve already made, put them together, and from there, create a paper clay
-
If you notice that you’re using it to fill in an area, what you do is take it apart, put it in the space that needs to be filled in, and from there, you can smooth this out. Remember, this can be applied as late as the bisque firing, but not any later.
And there you have it, it’s all that you need. But, now we’re going to talk about the best ways to use it.
Extra tools you need
So, you’ve made your clay, but there are two things that you absolutely need when you’re working with paper clay that air dries, and they are:
-
A bowl of water
-
A lint-free rag
The clays are usually water-based in nature, and you’ll need to give it water, so it doesn’t crack and dry out. The bowl is used to keep your hands wet as well and used to wet the tools. You should make sure the bowl is big enough for the fingers, and one that isn’t one that’ll tip over quickly. The cloth does keep the clay pieces from drying out too, and you can use it to help unclog the clay from your hands.
If you have these two things you’ll be ready to begin using this, and it’ll make using paper clay all the easier.
Using paper clay
So how do you use it? Here is a simple procedure to help you learn how to use paper clay.
-
First, wash your hands, and make sure that the surface is clean.
-
You should get the clay rolled out to about a quarter of the thickness or as much as you desire. You should make sure that you have the tools to shape the surface as well.
-
Once you have the base built, you can then work up the sides, keeping the bowl and the cloth on hand. You can from there, get some shaping tools to help with this. You can use a regular shaping set, and before you use it, make sure that they’re moist before you use them so that they don’t stick to the clay.
-
Most of the time though, people like to use their fingers to shape this, since it’s much easier.
-
If you’re working to create details that are finer, you can use a metal or wooden ceramic, or pottery tool to help you do this.
-
If you need help with smoothing out small and tight areas, get a small brush. They make detail work easy, and you can use them to smooth out your clay and get into areas that are tight. Just make sure to moisten it so that you can shape it.
-
When doing this, make sure that you don’t overwet the clay. That will make it lose its shape. The tools and hands should be moist, but not wet, and you can clean this off with a moist cloth.
-
Once finished, you can then let it sit to dry.
-
Now, if you see areas that need to be carved out, as in the case of reducing the presence of clay in an area and working to reshape it, this is how.
-
This is also a good area to look at when you’re repairing an area, and you will be able to smooth this out.
-
You can also create textures and effects, but, it has to be very dry to prevent tearing.
-
You can use an X-Acto knife, and be careful when you’re carving this out. It’s similar to soft wood, so you may cut yourself if you’re not careful. You will want the blade to be sharpened as well.
-
From here, you will want to smooth out the clay when it’s air-dried. You can use your fingers lightly against there, but don’t use a ton of water, since it may end up cracking in that case. You will not get a totally smooth surface due to fingerprint details, but if you’re looking to create that cool, personalized touch you can.
-
You can also use the back of a spoon to push down the clay and give it a blurring texture. You can do this with wet and dry clay, and if you do this when you have clay that’s dried, you can create a shininess to the clay as well.
-
If you also want to create a unique touch to paper clay is to take it, mix it with water to make a paste, and then brush it on. However, this takes a long time, and it isn’t consistent as well.
-
If you want to use a dry technique, you can use sanding. You should use a grit starting at 60 and move up to 400 to create a soft and velvety surface. The sanding can make textures that look cool depending on the grit. However, this is very messy and should be done outside, since there is a lot of silica that comes off with this, and it can get into your lungs, and you’ll breathe it in. You should do this with a mask on for better results and safety.
-
From here, you can fire the piece as needed, and you can then adjust your piece in the way that you want it to, and whenever you feel it’s right. You can apply glazes and stains at this point too, making it easier for you to make the piece personalized.
Now that you know how to do this, there are a few tips that you should keep in mind when working with this:
-
This clay can typically be cut when it’s wet, but it can be when it’s dried.
-
You can smooth out the edges of this with a wet fingertip.
-
With sanding, you want to make sure that it’s fine, even to the point of an emery board, and it’s best to do this when you have it dried.
-
You can add embellishments with paper clay as well, using the same tools to create finite details for this.
-
You can store the clay that you aren’t using in a container that’s airtight.
-
You can’t add water to this clay to restore this, so you want to make sure that it’s fully stored in a wet location, and once it’s dried, you can’t use it again.
-
If you don’t feel like buying a bunch of tools to get the intricate little details on this, toothpicks, paper clicks, pencils, and even other small tools can be used to etch the designs onto this, and they are handy, and they work well as well. You’ll be able to put this onto there and make it easier for you as well.
If you’re looking for an alternative type of clay, then paper clay is the way to go. This is also great because if you do get the store-bought stuff, it’s typically ready for you to use. You can create small pieces with this, or large, intricate pieces with this type of clay. The possibilities of this are endless, and if you’re someone that’s been looking for a reliable means to create the pieces of your dreams, then this is the way to go, for there is a lot that you can do with this, and a lot that you can learn to achieve the perfect types of pieces that you want to with this and to help you get the most out of this type of pottery as well. It’s a valuable tool, and it does involve its own little personal touches to really make it the best that you can get from something like this.


