If you are interested in taking up pottery as a pastime, it might be difficult to figure out how to get started in the field. As is the case with any new venture, it could seem as if there is an overwhelming quantity of information to take in.
Have bravery because all you need to do is take things one step at a time. To assist you in getting started with pottery, I have compiled this handy list of the greatest recommendations available.
How to Begin a Pottery Hobby
The following is a list of the top 12 tips for getting started with ceramics as a hobby:
Tip 1: Pick a Method When Starting a Pottery Hobby
There are three distinct approaches to the creation of pottery. It is advisable to choose one strategy to focus on initially to maximize efficiency. There are three major approaches to making pottery, which are as follows:
A good number of potters work in all three styles simultaneously. However, when you are initially getting started with pottery as a hobby, it is a good idea to focus on the component of the hobby that appeals to you the most.
You always have the option to broaden your horizons and become an expert in more ceramic methods if you put in some additional effort and practice. Choose your path, and get started right now!
The following provides an overview of what each strategy includes.
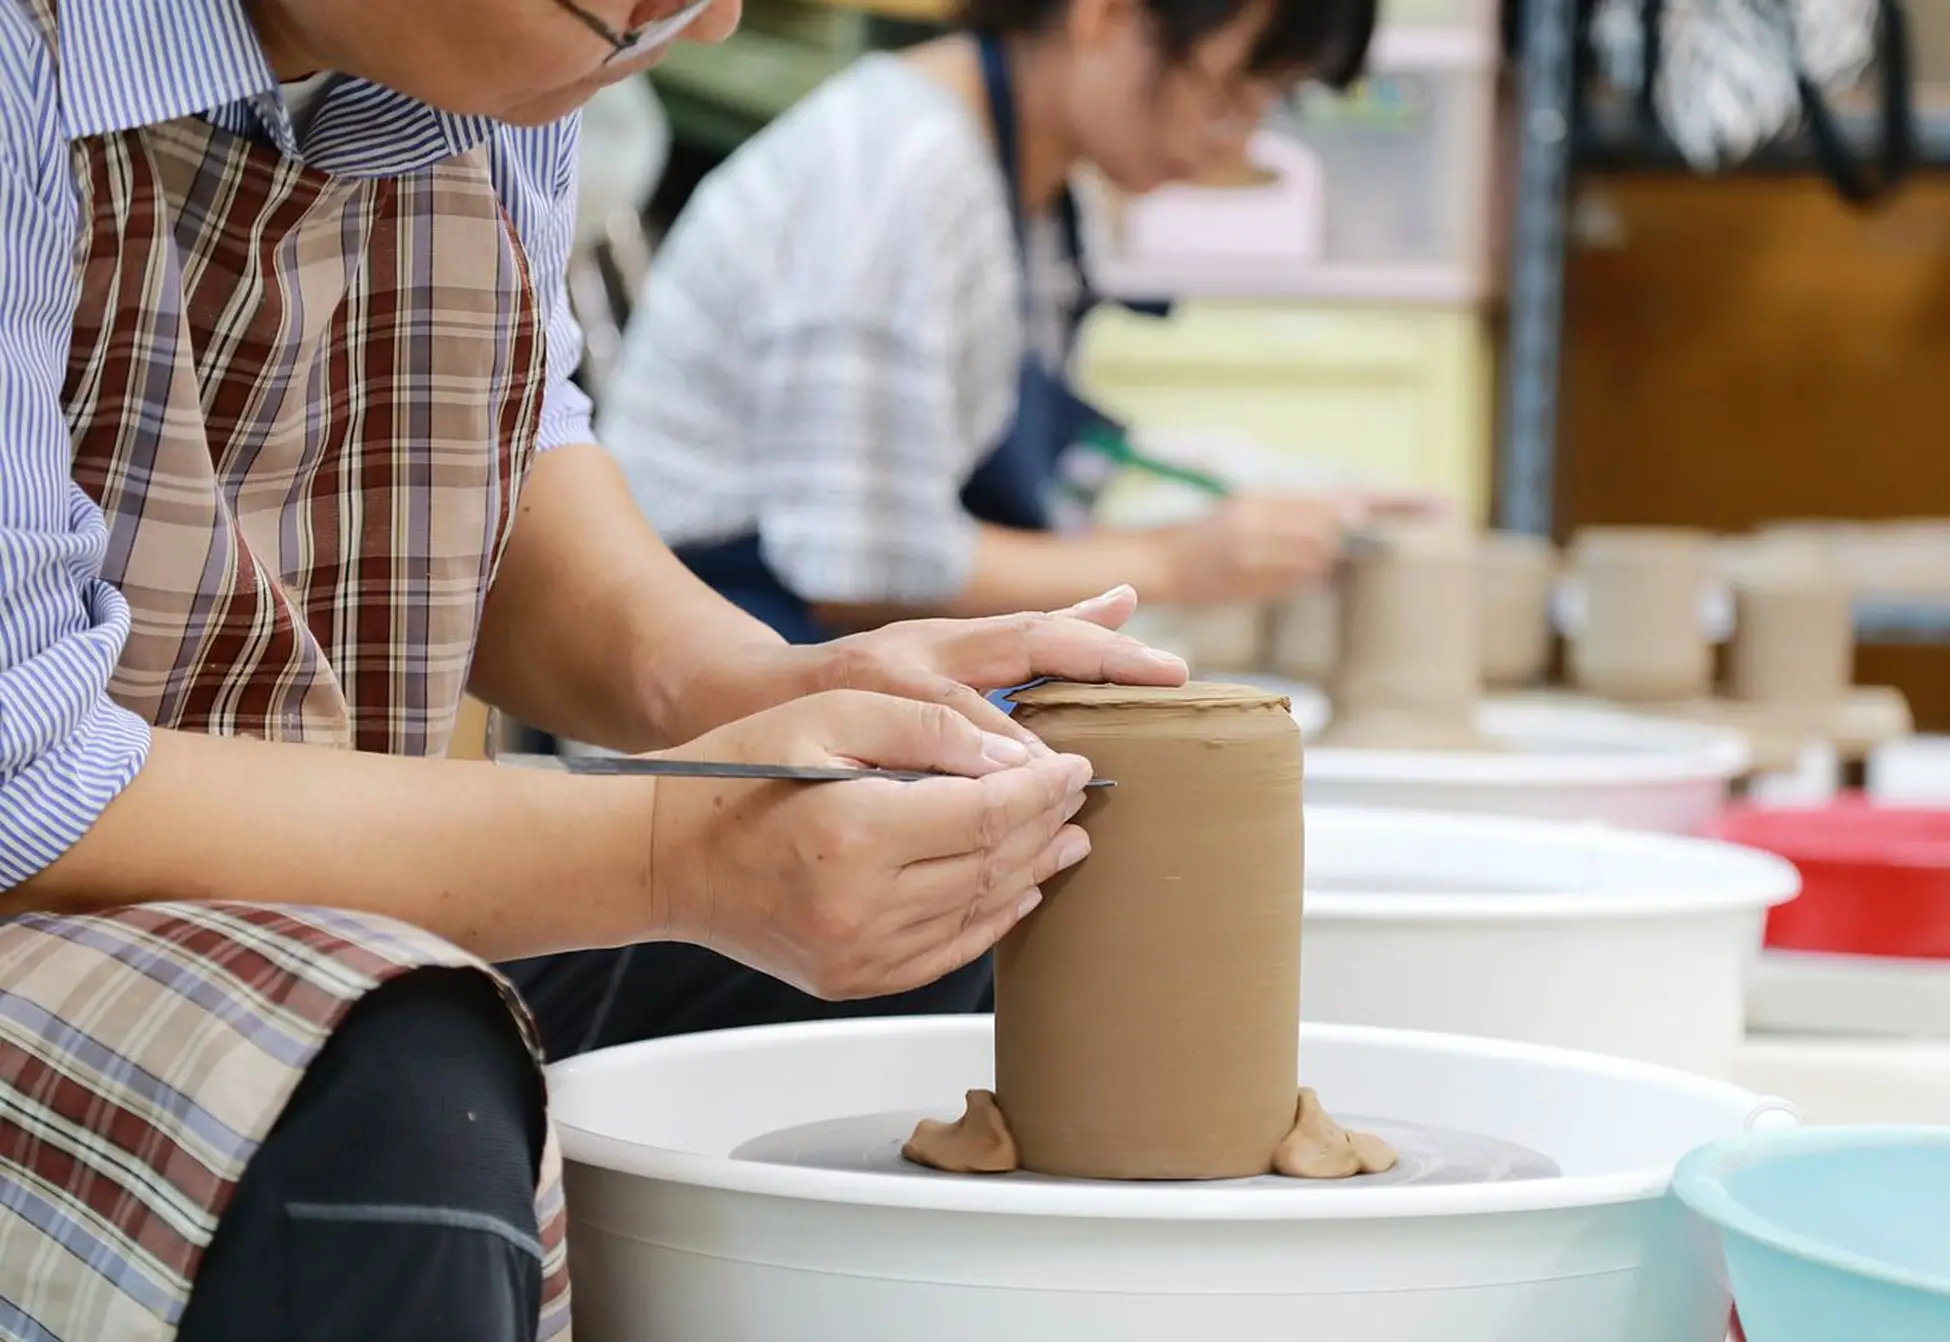
Using a Pottery Wheel
Clay may be spun using a tool called a pottery wheel, which is part of the pottery equipment set. While the wheel is turning, you shape the clay into a vessel such as a bowl, cup, vase, or similar object. The process is referred to as “throwing pottery.””
Some pottery wheels are equipped with a space that may be used for standing. The vast majority of them are conceived to be used in a sitting position. Others are designed to be placed on a tabletop, and you have the option of either standing or sitting while using them.
In the same way that there is a staggering number of manufacturers and kinds of hobby equipment, there is also a baffling diversity of pottery wheels. However, there is no need for concern since you can get started with pottery as a hobby with an inexpensive wheel that is more than enough. In the next section, I shall investigate the possibility of buying a pottery wheel. You might instead read this post on choosing a wheel for pottery instead.
The Pros of Pottery Wheel:
I will be the first to admit that my opinion on this matter is skewed. When working with clay, one of my favorite tools is a pottery wheel. The fact that operating a pottery wheel is so enjoyable serves as the primary rationale for this claim. It is challenging, but it is also fulfilling, enjoyable, and therapeutic all at the same time. Oh, and you can make some very stunning pottery as well. What exactly is it that you do not like?
Hand Building Pottery
The process of creating pottery by hand is precisely the same as it sounds. You are producing pottery even if you do not have a potter’s wheel. Your hands are your main tools, and you use a variety of techniques to build the pots that you sell.
I have a background in sculpting, and one of my favorite things about producing ceramics by hand is how much it reminds me of sculpture.
The following four techniques are the most often used alternatives to the use of a potter’s wheel:
If You don’t have a pottery wheel you can build your pottery by hand.
Benefits of hand-built pottery
Making pottery as a hobby using hand-building techniques may be done with relatively little initial investment in equipment. Clay and some simple tools are the only additional items you will need to complete this project.
Casting in Slip
Clay that has been moistened by water to the point that it may be used as a liquid is referred to as slip. It is possible to find a slip in several different thicknesses. Some of it has a consistency similar to paste and is rather thick. The other slip is perfectly smooth and has a consistency that allows it to be poured.
Slip casting refers to the process of pouring smooth slips into a mold made of plaster. The slip dries out and takes on the shape of the mold while it is in the mold. After the plaster has been set, it may be easily removed from the mold it was made in. After being removed from the mold, the pottery made using the slip-casting technique may be finished in several different ways.
Benefits of slip casting
Utilizing a mold allows you to produce several iterations of a single product. In addition, a slip cast may be used to manufacture pieces that are exceptionally neat and are all of the same sizes.
Tip 2: Choosing The Right Clay Is Important
There is a wide variety of clay available in a variety of forms. You need to make a decision initially on whether you want to use pottery clay or air-dry clay.
Air Dry Clay
As its name suggests, air-dry clay may be dried in the open air rather than being baked in a kiln before use. Several distinct types of clay may dry in the air. A portion of it is a polymer, and the rest of it feels something like plastic. If you wish to make jewelry or toys, this is helpful information to have. If you want to create pottery, you will need clay that is more similar to pottery clay.
You can get air-dry clay that has the feel and look of clay on the market today. In most cases, this is just conventional pottery clay that has been fiber-reinforced for it to be able to dry hard without being subjected to the process of burning.

Clay that has been allowed to air-dry may be used for many of the same functions as pottery clay. For instance, using some types of air-dry clay, the potter’s wheel may be used to create the desired object.
Amaco showed really good judgment by doing this. It has the consistency of ceramic clay but does not need fire in a kiln to harden.

The Cons of Using Air Dry Clay
Some air-dry clay, but not all of it, is designed to be fired in a kiln after it has been dried using the air-drying method. The usage of pottery that has been air-dried is subject to certain constraints. It is not food-safe and does not have a waterproof coating. This is because, despite its tougher nature, it is still porous. It is possible to create water-resistant clay by sealing it after it has been exposed to air and allowed to dry. However, making it entirely non-porous is a challenge in and of itself.
Additionally, air-dry clay is far more robust in comparison to ceramic clay. Clay may be transformed into ceramic and improved in strength after being subjected to heat treatment in the form of firing. As a consequence of this, it is more resilient and has a greater inclination to survive for a longer time.
Ceramic or pottery clay
In contrast to clay that is dried via exposure to air, ceramic clay is dried with the use of a kiln. When it is heated in a kiln, it transforms into a ceramic form. As a direct consequence of this, it will no longer dissolve in water.
If you have never manufactured pottery before, the wide range of clays available may seem a bit overwhelming to you.
When you first start getting into ceramics as a hobby, it can be best to avoid working with porcelain since it will help you concentrate more. Several skilled potters practice their craft by working with beautiful porcelain. However, working with this clay is not the easiest thing in the world.
If you are someone who enjoys a challenge, porcelain may be the right material for you to work with. But if you want your life to be a bit less complicated, you could switch to using stoneware or earthenware instead.
After the fire, pottery made from stoneware is harder and more impermeable than that made from earthenware. To begin with, if you are interested in making pottery as a pastime, you may choose to work with either stoneware or earthenware.
Nice To Know…
Smooth clay bodies are great for use when throwing ceramics on a wheel because of their reduced friction. A portion of the clay has been improved by the addition of grit, sand, or grog. Because of this, the clay becomes more robust and is far less difficult to make and shape.
Tossing on the wheel, on the other hand, puts a strain on your hands and makes it tough to do so. The clay will move easily under your fingers and may have a gritty and scratchy texture. Therefore, choose a more refined clay.
On the other hand, if you want to make anything by hand, utilizing clay that has some grog mixed into it would be a good idea. The addition of grog or sand to clay gives it the ability to withstand mechanical stress, which enables it to keep its shape while being molded. The following is a selection that might be prudent:
Tip 3: Tools You Need to Start a Pottery Hobby
You will need a variety of equipment to get started with pottery, and these tools will vary according to the sort of product you want to make.
The following is a list of some of the major pieces of equipment that you will need to begin your interest in ceramics:
There is a wide range of pottery wheels, each varying in terms of size, cost, and complexity. They range in price from $150 to $2,000 per unit.
When you first begin, however, it is not necessary to get a wheel that is at the top of its class. When you are first getting started, I believe it is best, to begin with, something that is not too expensive. After that, you are free to try out a new endeavor and choose whether or not you like it.
You could try wheel throwing and find that you like it so much that you decide to give up your day job to become a potter full-time. If that is the case, then terrific! The time may have come to spend hundreds of dollars on a new wheel. On the other hand, an initial spending plan of $150 to $250 is okay. You may be able to find a pottery wheel in that price range that is more than enough for your needs.
When you go to buy your first pottery wheel, there are a few things you should keep an eye out for.

A tabletop mounting technique is available for some types of pottery wheels. The remaining ones include legs and are designed to be placed on the ground.
The vast majority of pottery wheels are equipped with foot pedals, which enable the user to control the speed of the wheel head by using their feet. On the other hand, some of them come equipped with hand levers integrated right in. Which one you choose to go with comes down to your particular tastes and preferences. On the other side, I would argue that throwing causes your hands to get covered with clay. Because of this, employing a foot pedal control is something that I like doing.
The hobby of ceramics may be started on the right foot with one of the many different wheels that are on the market today.
When I first started producing ceramics, I worked with this model for a very long time before moving on to another one. I was able to pick up a lot of useful information from it.
You will be able to improve once both your skills and your confidence have increased, but making this choice right now is fairly smart. You do not have to spend one million dollars to get a piece of equipment that will be of some service to you.
Tools for Making Pottery by Hand
The wonderful thing about hand-building is that, as was just said, you can get started with it without really having to buy any tools. Clay is going to be a need, but other than that, your costs are going to be surprisingly inexpensive.
All you need is clay to construct coil pots or pinch pots.
To create your ceramics using a slab basis, you will need to make clay slabs. To do this, you may use either a slab roller or a rolling pin. Despite this, beginning with that is not necessary for any way. A beautiful and even slab of clay may be formed even without the use of a rolling pin.
Equipment for Slip Casting
If you believe that slip casting is the most appropriate method, you will require some plaster molds. You will also need a casting slip to fill your molds.
Casting Slip
When making their casting slips, some potters repurpose the scraps of clay that were cut off from earlier efforts.
It is simple to put together. Mixing scraps of clay with water will result in the formation of a paste.
If you are just getting started, doing this will save you money, but you will not have any scraps left over once it is all said and done. As a result, you will need the purchase a casting slip.
Plaster Molds
You have the option of either making or purchasing your plaster molds. Plaster molds could seem to be financially out of reach for a very tiny amount of plaster due to their high price. However, you should bear in mind that they might be used more than once. Plaster castings are often used by potters as a means of producing several things from a single casting.
If, on the other hand, you want to try your hand at some do-it-yourself manufacturing, plaster molds are among the easiest tools to work with. In addition to this, one of the numerous advantages it offers is the possibility of customizing your mold.
Tip 4: Pottery Tools
As you acquire more expertise in producing pottery, you will surely begin to build a collection of the various tools and supplies you like to use. If you decide that pottery is your new love, though, there are a few things that you will need to get started.
You may get started with pottery by purchasing a starter kit. In this location, you can discover everything that you need to get things going. When compared to the expense of buying each component separately, the initial investment in a starter kit is often more cost-effective. In addition, you are conscious of the fact that nothing has been overlooked.
The Mudtools brand is one of the best on the market. Mudtools makes the bulk of my favorite tools. In my view, this is an excellent kit for someone just starting.
On the other hand, you can decide to piece together your collection of tools by purchasing each one separately over time. These are some of the tools that I just cannot function well without and make frequent use of. After some time has passed, you will realize that you have added to these. To engage in the hobby of ceramics, however, you will need this.
-
Wire clay cutter
-
Rib tools
-
Wooden tools
-
Sponges
-
Chamois leather
-
Shredder
-
Trimming tool(s)
Tip 5: Making Ready Your Clay
Therefore, the time is now here. You are already in possession of the clay and the materials need to get started. After that, what? The next step is to prepare your clay so that it may be used to make pottery.
Before making anything else out of clay, the process of wedging has to be completed first.
Why would someone wedge? To turn clay into anything that can be used, there are a few steps that need to be taken, and they are as follows:
-
Get to remove any air bubbles that could be in the clay.
-
Raise the level of the clay.
-
Put the pieces of clay in their proper places.
When placed in the kiln, pottery that contains air bubbles runs the risk of bursting or breaking apart. This is because moisture present in the clay turns into steam at 212 degrees Fahrenheit when the kiln is heated. As it transforms into steam, it expands into the air gaps that are present in the clay. The pressure causes the air pockets to burst and release their contents.
If you do not want your pottery to explode when it is being fired in the kiln, you will need to remove any air bubbles from the clay. In addition, before you fire your object, it has to be dry.
By wedging the clay, you may remove any air bubbles that may have formed in it. Because the two techniques involve very similar motions, some potters liken wedging to the act of kneading bread dough. On the other hand, when you knead the dough, the air is introduced into the mixture in a controlled manner. The process of wedging entails compacting the clay to remove any air pockets that may be present.
The air bubbles are removed, and the clay is awoken and made more workable as a result of the wedging process. Because the clay particles are lined up, it is much easier to throw and mold than regular clay.
Wedging may be accomplished in several different ways. Watch this informative video to get an insight into the several tactics that may be taken.
Tip 6: If you want to start a hobby in pottery, enroll in some classes.
A class in pottery may be taken at your local community college or a pottery studio, and this is an excellent alternative. Attending courses comes with several advantages, including the following:
-
Your coach will not only provide you with instructions, but they will also be accessible to answer any technical issues that may arise.
-
The availability of various tools, such as kilns and pottery wheels.
-
listening to the recommendations of the other students.
-
A source of motivation and encouragement.
-
avoiding the acquisition of undesired behavioral patterns. It could be difficult to break certain bad behaviors.
Tip 7: Learn From Us
This is a short one, follow us and enjoy all our useful content and easily level up your current pottery skills or start from ground zero,
Tip 8: Decorate Your Pottery
What comes next after the creation of your pottery, whether it was done so by hand, on a pottery wheel, or via the process of slip casting? What is going to happen next?
Kiln firing is a process that pottery typically undergoes twice. The raw clay transforms a ceramic material during the first fire, which is referred to as the bisque fire. During the second fire, often known as the glaze fire, the surface is given a glazed finish in preparation for the third and final firing.
The first step in creating your pottery is making it, and the second is decorating it. A few distinct kinds of ceramic decorations are often added to greenware just before the bisque firing. Additional decorations are added after the bisque fire but before the glaze is applied.
How you choose to design your ceramics will be determined by the image that you desire to convey. There are many different methods to embellish a piece of pottery. This is a really fun part of the process, and as your expertise grows, you will have the opportunity to experiment with a variety of various approaches.
Here are a few ideas for embellishing your pottery:
-
employing underglaze. It is possible to get this look on your ceramics by painting, spraying, stenciling, sponging, or silk-screening. It is rather flexible in a lot of ways.
-
sculpting and carving on your ceramics. The techniques of sgraffito and Mishima, both of which include carving (or incising), are two examples.
-
Make your pottery more decorative by using a slip. One example of this is the practice of slip trailing.
-
putting a glaze on your pottery.
Tip 9: Fire your pottery
As was indicated before, pottery is often subjected to a second firing. The first firing, known as the bisque fire, is followed by a second burning known as the glaze fire.
It is that the idea of firing ceramics in kilns has never occurred to you. The first fire is used to remove moisture as well as organic waste and compounds of carbon from the clay.
When these components are removed from the clay and clay particles, the clay can shrink and become more rigid. This process is referred to as sintering. This process changes the clay into ceramic, which prevents it from dissolving in water. Ceramics cannot be dissolved in water. To put it another way, during the bisque fire, the clay is transformed into a strong ceramic material.
After the clay has been bisque-baked, the glaze may be poured into liquid form to give it a finished look. It dries out on the surface of the ceramic. After that, the glazed pottery is baked in the oven.
During the glaze firing process, the glaze will first melt, then it will solidify into a glassy coating that is impenetrable and cover the pottery. As a consequence of this, the pottery may become watertight, making it appropriate for use not just as dinnerware but also as a container for water. However, the glaze has the potential to further beautify your pottery.
How is Pottery Fired?
There are two options available. You have the option of buying a kiln for your pottery or taking it to a local company that offers kiln firing services. The kiln firing service will be responsible for firing your ceramics on your behalf.
If you are just getting started with your ceramics hobby, you may want to hold off on purchasing a kiln for a while. Kilns are owned by a lot of beginning potters. There is a diverse selection of kilns that have been developed specifically for amateur potters.
Kilns, on the other hand, are costly, take up a lot of space, need ventilation, and might have very specific power requirements.
When it comes to buying a kiln for use in your home, there are a lot of different factors to take into consideration.
Kiln’s use also necessitates a different learning curve because of the nature of the tool. When you begin a hobby with ceramics, you will find that you already know quite a bit. I would suggest that you hone your pottery skills first before you look into buying a kiln since this will better prepare you for the endeavor.
How can I find someone else who has a kiln and will fire my work for me, and what is the best method to go about doing this? It is a wonderful question, and thankfully, I have already published something that specifically addresses it! Many people would gladly let you use their kilns to heat your creations.
If you are extremely lucky, you could come across a particularly kind potter who will fire your work without charging you any fees. However, in virtually every case, you will be required to pay a fee to have your work rejected. However, in many cases, this charge is not much more expensive than owning and maintaining your kiln.
Check out my article for some excellent pointers on how to find a ceramic burning company in your area, and I hope you like it! You will not need very much longer than that before you start to fire your pottery.
Tip 10: Safely travel with your pottery
After you have found a local firm that fires pottery, the next step is to get your wares to the kiln in a safe manner.
It can seem to be easy at first. How challenging could it possibly be? Clay that has not been burnt, on the other hand, is very fragile when it is in its dry condition.
Before being fired, pottery has almost little structural integrity left on the inside of the object. On the route to the kiln, even the smallest jolts might cause the ceramic to crack or shatter. Particularly susceptible to damage are the handles, lips, and pouring spouts of mugs.
Tip 11: Practice
If you want to become better at your ceramic hobby, practice is really necessary when you first start. Observing a video of an experienced potter at work will make the process seem straightforward to you. It is one of the reasons why looking at pottery may be considered either calming or intriguing, and this is one of those reasons.
However, there should be no doubt that practice is the primary factor accountable for that natural ability. Do not quit if your first attempts do not come out the way you had anticipated for the results to be. To expect to play the piano without having had any prior instruction is analogous to sitting down at the instrument and expecting to perform.
You will progressively develop as you put in more effort and practice. Have fun figuring out your signature style as you are in the process of learning.
Tip 12: Always keep trying and improving
This aphorism is one of my favorites. If you continuously compare yourself to other people, you will lead yourself to believe that there is no chance for you. I think that most people would be able to identify with this. And in my view, it is still the case whether you want to engage in pottery as a hobby.
There are many skilled potters out there who are capable of creating works of art that are breathtaking. Instead of being intimidated by them, consider seeing their experience as a wellspring of ideas and information from which you may learn.
Everyone must start from the very beginning. When we first begin doing anything new, the vast majority of us are bad at it, with a few exceptional exceptions. You just need to maintain your current course of action to achieve your goals.
My interactions with other potters have shown me that the vast majority of them are encouraging and generous with their knowledge. The majority of the time, they do so intending to assist and motivate other potters. Find your ceramic people, and they will help you on your journey if you would just let them.
Conclusion:
Beginning a pastime in ceramics might be seen as a challenge by some. Make use of the guidance that was provided before to get you through the first stages. You will start learning new things, improving your abilities, and making ceramics that are stunning very fast. And who knows, after you have gotten the hang of a few different pottery methods, you could even be interested in making a living as a full-time potter. If you are interested in learning more about how to become a potter, you may learn more by reading the article that I have written on the subject, which can be found here.


