Did you know that you could still glaze clay pots without a kiln?
The process of glazing clay pots without a kiln is a lot more involved, but it’s possible, and here, we’ll tell you how you can do it, and the exact steps, and considerations that you should keep in mind when you’re doing this process.

Why Glaze without a Kiln?
Usually, glazing requires you to have a kiln, right? Why in the world would you not want a kiln for this?
Well, some people may choose this route because of the following:
- They don’t have access to a studio, so they will need to figure out an alternative to fire the glaze
- They don’t want to spend the money on a kiln just yet
- They don’t know where to put it in their home
- They aren’t ready to invest in a kiln just yet
These are all valid reasons to not get a kiln just yet. They are expensive, with the best ones being a couple of hundred dollars minimally, sometimes a lot more.
If you’re already spending a lot of money on a pottery wheel, you won’t want to spend more money on a kiln just yet. It’s all valid, but you must realize that when you do spend money on this, it will make your job easier.
But, here, we’ll discuss how you can fire pottery glaze without a kiln.
The Requirements of a Firing Medium
There are a few requirements that a firing medium needs to have especially if you’re looking to start with this, and they are as follows:
- It needs to get hot enough to vitrify the clay
- It needs to get rid of the water
- It needs to turn it from clay to pottery
Every single piece of pottery that’s done with this will need these requirements, and you should make sure that if you’re choosing this type of firing, you know what you’re doing.
The limits of Glaze
If you’re planning to fire the pottery naturally, you can use a decent amount of glazes, but if you’re going to do this without excessive heat, there are a few things that you should keep in mind when doing this, and they include the following:
- You will need to make sure that it’s used for decorative pottery only
- Typically, they aren’t food-safe
- If it doesn’t flux, so there is a chance it can’t be used for foods
- You should make sure that you take the time to read the labels on the glaze before you begin
In many cases, these glazes are usually done with only a bit of heat. You’re not getting it up to a couple of thousand degrees in a few instances, but again, you can fire it outside to much higher temperatures if you think you’re going to use this for items.
Raku Firing
One of the ways to glaze pottery without a kiln is raku firing. This is a bit complicated since you will need to bisque the fire still, and need a location to fire this.
But, there are some benefits of raku firing, and they include the following:
- You can fire this with a glaze on it
- It will be bisque, so it will be able to hold food-safe items
- It typically creates a very unique piece
- It will bring a lot of cool design elements out of this

Now, there are a few limits to raku firing as well, and they are the following:
- You need a giant pit
- You need to be able to have a barrel or area that can hold the fire in
- You should be watching this at all times since it definitely can be a bit of a time-consuming action
- You’re not going to get a consistent design, due to the nature of Raku firing
With raku firing, you can use a lot of really cool additions to it, including the following:
- Sawdust
- Woodchips
- Animal Dung
- Different types of other media that burn up, such as seaweed
Now with raku firing, you can do this with a heat source, and use glazes too, you shave to make sure that the following happens though:
- It gets hot enough
- You can watch it for a while
- You keep other additives out of there and only fire the glazed pottery
We’ll discuss how to utilize raku firing in the next section so that you can try this.
How to do Raku firing
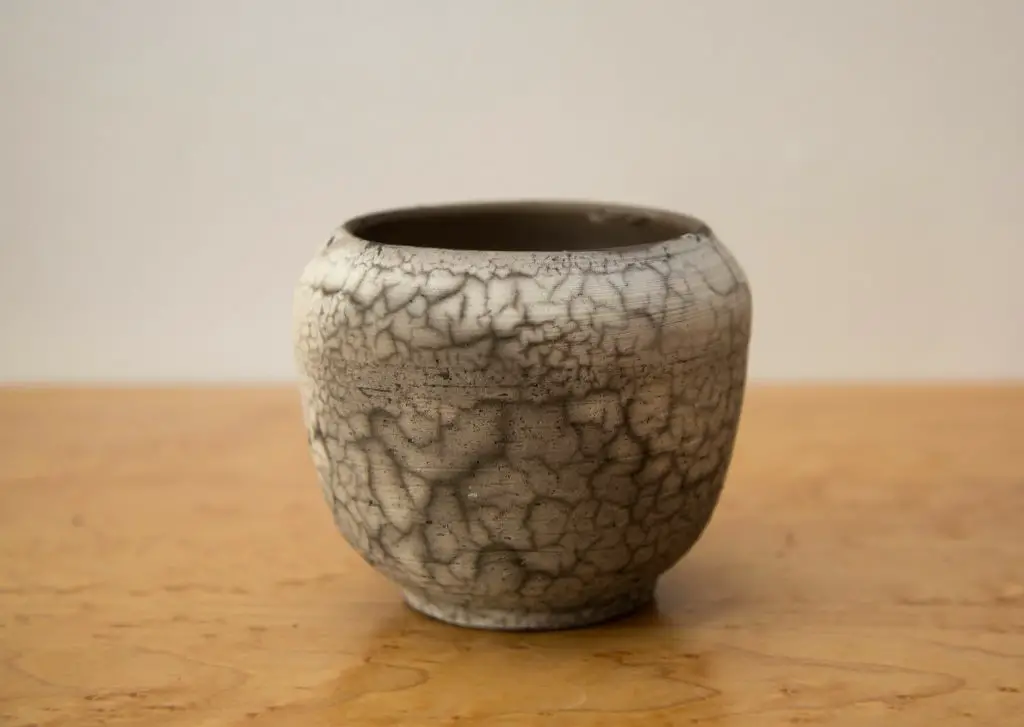
Raku firing is often considered one of the ways to glaze without a kiln, especially if you’re considering a metallic or copper look, and it works well with most slips and glazes. It is low-firing too, so it won’t be durable and food-safe, but generally, it makes it look pretty.
The process of this is the following:
- First, you should bisque fire it in the pit, making sure that your clay will be designed for raku firing in an open environment that can withstand thermal shock
- You then bring it into a bowl or barrel that almost looks like a kiln
- It has some openings, and from there, when you put it in the hot medium, you can let it sit and fire
- There’s an overhead lift mechanism that you can always pull off to get to access, or in the case of using a barrel, you just take the top off
- At this point, you let it fire for a long period
- When they’re done, you remove them with tongs
- You then put it in a reduced environment, with a reduced amount of oxygen, such as a metal garbage can with materials inside
- When the heat from the pot burns up the items that are supposed to burn, the oxygen inside, and from there, you’ll see a unique piece of art when you’re done
- You always apply the ship before you put it in the kiln
- You should be able to bring the pottery up to where it needs to melt the glaze or get it to vitrify, anywhere from 1400-1832 degrees Fahrenheit
- When finished, if you want to, you can use a cleanser to get the carbon off the glaze and make it “shine”
Now, it does use a specific type of “kiln” in a sense, but this is a different type of kiln than what you’re used to since it is essentially a vessel for the pottery to sit around and dry and let the glaze stick to the pot.
The Kitchen Oven?
Some think that firing in the kitchen oven is a good alternative, but the truth is, it actually won’t do much for you.
There are a few benefits to doing this such as the following:
- They are easier to dry out
- They can look good as decorative pieces
- They’re good for learning clay
However, the main downsides to this include the following:
- The temperature fired on this is still too low to fully “hold” the glaze on it, so it won’t be very strong
- The finished piece tends to be brittle
- Paint usually works better for decoration
This is a good way to begin, but for the most part, you probably will want to go with alternatives that work well.
Roadside glaze
If you’re thinking about potentially making your glaze, that you can fire out in a pit, then this is for you. Developing glazes that are made from natural materials allows you to fire them uniquely, and it’s different from getting them from a plastic container.
The hardest part of this is to get the right materials, and here, we’ll tell you how to get materials and the process of making them. To do it, you do the following:
- Go to an area with rocks, such as roadways with great rock formations, or even go to secondary roads for this
- Collect these, and if needed, you should read about the geology of the area you live in so that you know what clay exists here, and what you’re getting from this
- Crush this down with a sledgehammer until it’s small enough to use with a mill or grinder
- From here, throw it through a grinder, getting it into tiny amounts
- When it starts to crumble, add water, mixing this
- You can from there mix it until everything is nicely formed
- At this point, put it on top of your pottery piece, and then fire it in pit firing to whatever temperature is needed, ideally somewhere between 1600-2000 degrees, since you’ll want this to vitrify
Yes, roadside clay is pretty awesome, and you will want to make sure that you follow the laws that are there on roadside clay since it is important to know a little bit about it before you begin this process.
Impure clay is your best bet for this, and that’s because the impurity does the following for it:
- Adds some character to it
- Can add natural blemishes
- Give it different warmer or cooler feelings
So if you don’t feel like spending money on this, you should consider this option, since it is natural, and you can do it.
Pit Firing
If you’re going to glaze your pottery, but don’t want a kiln, you need to have a pit. Pit firing does get it to the temperatures needed, and to do it, you simply do the following:
- Have an open area, not near combustibles
- Dig a nice, big hole for your pottery, deep enough so that if the wind blows, it doesn’t catch
- Work on your pottery, first shaping it
- If needed, you bisque fire it, but sometimes you can just glaze it and put it in the pit
- Make sure the pit stays nice and hot, and measure the temperature
- Get it from 1800-2000 degrees, and make sure that you let the clay stay in this for 12-24 hours
- When done, carefully remove this with tongs, setting it aside to dry, or you can let the fire burn out
Now pit firing is a great idea especially if you want to just fire a bunch of pottery naturally. However, it isn’t as strong as typical pottery firing, and there isn’t consistency when you’re working with this, so make sure that you know that before you begin.

Alternatives to This
As you can see here, firing a glazed potter without a kiln is quite hard to do, and it takes a lot of work. There are a few ways to get past this though, and if you want to use a kiln, you can try the following:
- Meet fellow potters, and if they have a kiln, you can ask to borrow it
- Alternatively, if you have a pottery group, maybe chip in to get a kiln
- You also can fire it in a rented space, and if you do it with multiple people, it can be cheaper
While firing your clay without a kiln might seem like fun, it can take a ton of time, and if you’re not careful, you’re going to get sucked into it. If you’re someone who doesn’t like to get that involved in their pottery, you should consider one of these alternatives.
Glazing your pottery is a good way to make it stronger, and to make it better to use. You need to have this or else you’re going to end up with pottery that you can’t use and is just decorative ware at best.
But, if you know how to glaze properly, even without a kiln, you’ll be able to access a wealth of more options that will make you happy and give you pottery you’ll love.


