When it comes to bringing pottery together, two things are often mentioned. If you’re thinking about joining different pieces of pottery together to give it a better decoration, then you need to learn about slipping and scoring. But lots of us don’t know about it, or even how to do this. Let’s say that you know quite a bit about how to put together pottery, but you want to do something a bit more. Well, let’s discuss slipping and scoring, what they are, and why they matter when it comes to joining pottery pieces.
What is Slipping and Scoring Pottery
Now, slipping and scoring in its entirety is essentially this.
- Slipping is the process of joining these parts together
- Scoring is essentially hatch marks put on the pottery
You may be familiar with the action of scoring when used in other ways. They’re those little scratching marks that you might see along the side. Well, when combined with slipping, they’re joining pieces together. This is accomplished before you brush on the slurry, and when you join pieces together.
It’s essentially called score and slip because you do the scoring first, and then, you slip it afterward.
Now that you know what it is, let’s discuss further how you can accomplish both of these actions.
Ways You Use It
So how do you use it? Well, the typical means to utilize this type of action is by joining two parts together, and both slipping and scoring do have a part in this.
Currently, we will discuss scoring, but we will bring up slipping later on.
When you use this, you apply it to the following:
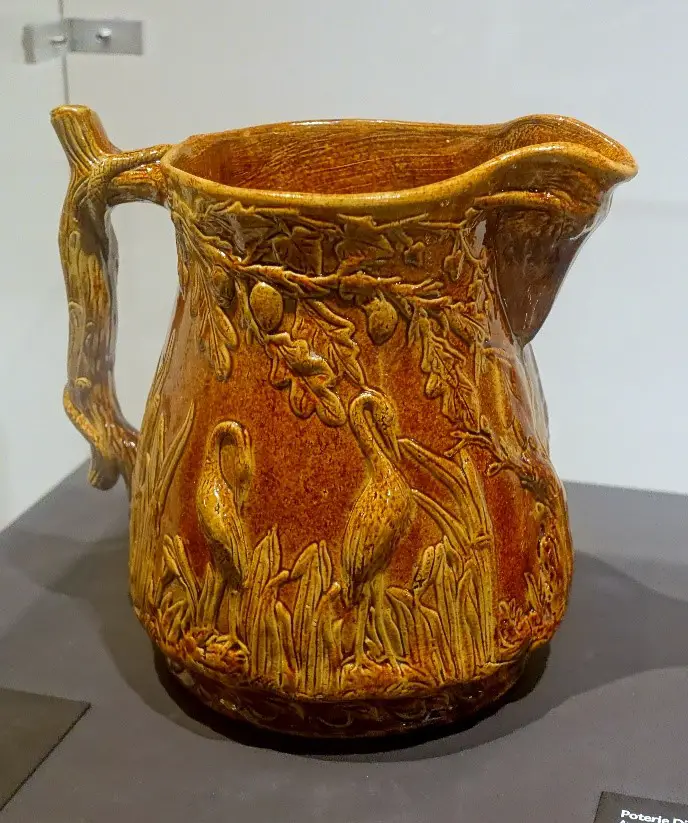
- Attaching handles
- Attaching other decorative pieces to a piece of pottery such as an emblem or a decoration
- Mating various coils together
These are important to learn because when it comes to attachment, it’s a little bit different. This is usually where you put the pieces together, and we will discuss the attachment process in the next section.
All About Attachment
Now, marrying them together by putting them together can be done when you have clay that is soft and wet, but the problem is, when you fire this, it causes the attachment to reduce, and it dries itself out. This will cause the pieces to fall apart when they are fired within the kiln.
Lots of times, when beginning potters try to put handles on mugs and cups and the like, the following happens:
- They do it when wet
- They fire it
- They realize they can’t put it together
- They try to put it again on there, causing it to deform
The deforming of this is one of the major issues, not necessarily the marrying of these together. If you do this, the handles can warp, and the decoration can have issues, so it won’t look as good, and this does become a bit of a problem.
Essentially, scoring and slipping are done when they are in shape, but wet enough to be scored on. You want to make sure that the pottery is still wet when you do this because you want to be able to leave the hatch marks on there. We’ll discuss slipping as well in a future section, but you need to make sure that you have the score marks there because it’s an integral part of making sure that the pieces stick together.
From there, once you have the scoring and slipping done, you want to let it dry, especially if it isn’t fully dry yet. You then fire it, and that’s how you attach it.
There are a few mistakes that people tend to make when they’re trying to score and slip, and we shall discuss those in a future section on why they happen, and how to prevent them.
Tools to Score
When it comes to scoring, you can get special tools if you want to. However, if you’re a beginner like many who read this blog, or if you’re someone who doesn’t want to spend a copious amount of money, any sharp object is used to score, and that’s quite important.
For example, if you’re going to score, and you don’t want to go out and buy stuff, you can get the following and from there, you’ll be able to score everything quite fast:
- A needle
- A pencil or pen
- A pin
- A form or knife
- A chopstick
- An Exacto knife if you have one on hand
- Virtually anything that gives you a sharp surface
- Toothbrushes, to get really small pieces, scored
The truth is, there is a lot that you can use, and you can try virtually anything. When it comes to the scratching, you don’t have to do it super deep, but you want to make sure that it can do the following before you fire it:
- Can take the slip
- Can unite the pieces firmly once they’re dried and fired
When it comes to scoring, it’s not that hard, and there are a lot of pieces that you can use to create this. use the tools that you have on hand, and you’ll be able to create some amazing pieces together, and you’ll be able to have a beautiful piece that does have a bit of that extra touch to it.
How to Score
Now that you know what scoring is, and how to do it, let’s discuss how you can score objects. It’s important that you have everything nearby before you begin with this, and that you can have a good and solid plan to figure all of this out.
To do this, you have to do the following:
- You need the object itself
- You need to know where to attach
- You should know exactly where you’re going to join
- You should have it measured out so that you know the location
- You should make sure everything is even and balanced when it comes to the location of scoring
- You should make sure nothing is lopsided
That’s what you need to do before you get into the process of scoring. You should from here grab the tool that you use to score. Again, remember that you can use whatever you want, so long as you make sure that you’re able to make the lines deep enough for you to see. If you are in doubt and wondering what to use for your very first scoring escapade, you can use the Xiem Retractable Pottery Scoring Tool. This ergonomic solution for scoring provides depth & precision for beginner clay artists.
From there, you want to create marks that are crisscrossed in design, and you want to do it on every single object that you have. You should make sure that when you do this, you have the measurements completely figured out, because if you don’t, you’ll end up with score marks being seen, and that will become visible once you dry this, and you fire this. however, there may be ways to paint over this if you can figure it out. But, that’s where the measurements come in. They’re used to help figure out exactly what size you need for this, and you should follow what they say to score pottery accurately.
Now, you take your time and score the objects. From there, you do the following:
- Add the slip
- Press it together
- Let it dry
- Fire away
These are the steps that are used to score. We will go into detail about slipping, what it is, and some of its constituents it in the next section because it’s quite important. But, scoring is quite simple, and really, your biggest worry should be the measurements of everything, since that is in essence what you may get wrong whenever you’re not doing this correctly. But, scoring is quite easy, and you should be able to accomplish this in due time, and with your mindset to figure all of this out.
Slipping by definition
Now let’s discuss slipping. Slipping has been mentioned a lot so far, but let’s talk in detail about what it is.
In essence, slipping is the suspension of clay within the water. You may have heard a bit about a slip, and a slurry, and let’s talk about the differences:
- Slipping usually has a much thicker texture
- It’s got more clay particles in it
- It’s got the consistency of heavy cream
Slipping and slurry are two actions that are typically used when you’re making pottery, and we will talk about a slurry sometime in the future. However, slipping is used in different ways, and typically, it involves the following:
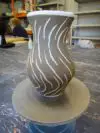
- Decoration
- As a glue
- As a way to help keep everything suspended
Slipping does have the natural color of what the clay body is made out of, so it will create a piece that is uniform in color. But, if you want to color this with glazes and oxides, you totally can.
You typically apply the slip to any sort of greenware, whether it be wet or soft, and if you don’t have that already, you do need to make a piece out of greenware.
But, there are times when potters get confused between slips and slurries. Let us check out the differences between the two in this table:
| Slip | Slurry |
| Slip is usually a thinner suspension liquid created out of clay and water (Can involve other liquid adhesives as well) | The slurry is a comparatively thicker liquid created out of clay, water, and any adhesive (if required) |
| It is mostly used for joining two pieces together or being used to add color, shine, or smoothness to the pottery piece | It is generally used to patch in any cracks or dents in the pottery piece |
| Has a high amount of water and could shrink more | Has a low amount of water and doesn’t shrink as much |
Slipping with Scoring
We mentioned slipping and scoring before. Well, slipping is the glue that puts the pieces together. It can hold the pieces together, and it will then make the pieces stick together before firing. You can make slips using the clay that you already have, and we shall discuss how-to below:
- First, you take the scraps from your clay body
- Soak them until they’re softened to the point of a slurry
- Stir and push it through a mesh to get lumps out of there
- Put it to the surfaces that you want to join it all together
- Let it dry, and then fire it!
Typically, this is how you use a slip when you’re trying to put pieces together. It does take a bit of time, but once you have a good feel for it, it can help bring your pieces to life.
This is probably the easiest way to use a slip, and if you have issues with this, you’ll be able to learn from it and create some great pieces.
Slipping to create decorative pieces
Now, you also can use these to decorate. This is one of the more common uses if you’re looking to truly better yourself. Now, a slip, in this case, can be put on in a couple of different ways:
- They’re brushed on
- Sprayed on
- They can be dipped into a container of this
- You can even use a condiment bottle or other means to apply this if you want to
If you do it this way, you can create different patterns and textures, and you can even layer these if you want to. You can create super intricate designs.
When you’re using it for a handle, you probably are using it in the most basic of forms, which isn’t necessarily a bad thing but do remember that you can do so much with your slips that there is a lot that’s here to be offered
You can typically use different colors as well if you want to get creative with slips, and you can do so by doing the following:
- Using clay of different colors, but still greenware
- Using colorants to help add to the slip
You can use different chemicals as well, and you can create slip bases that involve kaolin, silica, and even nepheline syenite along with other ingredients that give you a lot of different colors
You may see some dry slips that you can get commercially, and you can use those too. Commercial slips are a bit different because you will want to research to make sure that it will work with the clay that you have going on, but it’s often a good type of method to use if you’re someone who doesn’t have the handiness to make your own or just wants something easy.
Some great examples include the following:
- Ravenscrag
- Blackbird
- Alberta
These varieties of slips are great to try, especially if you’re looking for something unique and different
If you want to get supernatural or give yourself something quite different from the rest of them, you can even mine your local clay. That’s right, you can go out and mine the different clay that you want to use for this, and you can add it to the clay body in the form of a slip. It does take a bit more time, and there is a bit more work to put into it, but if you want to create a natural touch for your slips, this is certainly the way to go.
You can do slip painting as well, which is a great way to match the shrinkage of the clay better. That’s because you’re putting some thicker paint onto this before you fire. This, in turn, will help with matching the clay a little bit better.
You can also do this in other different ways, such as the following:
- Adding the slip paint before you fire
- Adding it when you bisque fire
- Adding other underglazes and engobes that will help with decorating the pottery
If you’re looking to get super creative with the different ways to make pottery, you should start to learn how to use slips. Slips are essentially the way to go if you’re someone who wants to decorate, and you’ll be able to create beautiful, intricate pieces of art if you so desire with this, and in turn, you’ll be able to create the art that you want, and the beautiful pieces that you so desire.
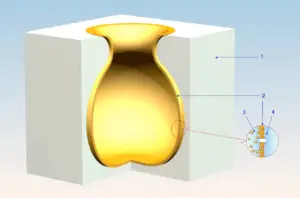
Slip Casting and What It is
Finally, let’s discuss slip casting. This is another way to create slips if you want to, and it’s important to try them out, especially if you want to engage with a unique plaster mold. In essence, you do the following:
- First, you have the slip gets poured into the mold
- You let the water absorb it and see a layer of clay deposited on there
- When it’s opened, you remove the clay, and you might realize that it’s a solid cast, or it’s filled in with the new object, or it might be a hollow cast
- From there, you can then add various deflocculates that will help what slips when you’re doing this
- You can then fire this to help create more solids
This is a popular technique that’s used in plaster casting because it gives you an interesting and different sort of shape to it. You can either get it hollow, with the object creating a hollow center area, and the rest of the slip can be used once again, or it can create a solid cast, and you’ll be able to see that the form does have a new object thrown into there. This is a different and fun way to help create different pieces of pottery, and if you’re someone that does like to try new things, and you have absorbent plaster mold there, and the mold itself as well, this is an intricate and different way to utilize this to create something new, and something that can inevitably be quite fun for you to try out for yourself.
Common Mistakes for Those Who Slip and Score Make
There are a few common mistakes that can happen when you’re slipping and scoring, and we shall get into the details of what they can be, and how you can utilize this to fix them.
- First, the most common mistake is not having your score marks deep enough. If they’re not deep enough, you won’t be able to see the design, and you won’t be able to get the slip onto there. Make sure that they’re deep, and that you can see them successfully create some great pieces
- You should also make sure that your slip isn’t a slurry. It’s different, and that can ruin the actual adhesive to the piece
- If you’re creating a slip for the decoration, a common mistake many make is they don’t realize that some types work better than others, so make sure that it works with the clay itself before you use it
- You should make sure that everything is dried out before you fire this
- You want to make sure that everything is bone dry, and I mean bone dry before you do fire it. This is super important, because often if it’s not fully dried out, it will make it harder for it to stick together
- If your slip doesn’t have enough suspended particles, it can ultimately create a lot of problems, and sticking issues. Make sure you mix all of this before you apply
- Finally, make sure that when you do slip and score, if you’re having trouble making your own, you take the time to find a commercial one to work with. There is nothing wrong with commercial slips at all they can be quite helpful if you’re not good at making these, and ultimately, they can provide a good base for you to begin with
- Also, make sure that you don’t get into intricate decorating initially. Many like to bite off more than they can chew, and that ultimately can create issues with the overall state of the pottery that you’re making, and you don’t want to set yourself up for losses when it comes to this
And that’s it! if you’ve been wondering about what slipping and scoring are, how they can help you with your pottery, and why they keep showing up each time you look up pottery stuff online, then look no further, and you’ll be able to have a fun time with this, and if you’re ready to truly give your pottery that new life that it so deserves, then you’ll be able to do so with this method, for it will make a difference in your life, and in turn, it will give you the ability to create amazing pieces that you will enjoy.


