The subtlety and challenges that come with slips are always challenging for an artist. While a slip might seem nothing big of a sort for beginners, but with the right technique in place, the versatility of this concoction is endless. Potters that fire with soda, salt, or wooden kilns tend to use the slipping technique on the outer surface to achieve proofed skin-like surface with beautiful patterns
.
However, even as a pro-crafter, you might go wrong in the process of slipping. The key is to follow a guideline and learn from the mistakes of others. On the other hand, if you are a beginner, you can easily avoid the common mistakes made by most crafters when they slip their pottery work.
But, what exactly is a slip?
Slip: Decoding a Pottery Essential
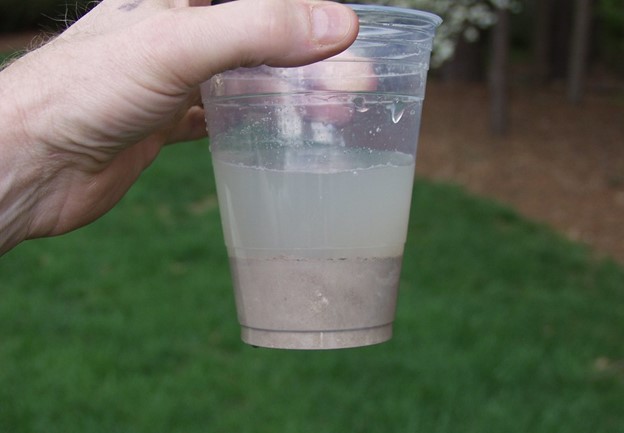
Slip is a mixture made of water and clay particles. The consistency of the same can vary depending on where and why you plan on using it. It can range from buttermilk to thick cream-like consistency. You can use slips to bond different types of pottery pieces together. However, there are several other uses of slip that include decoration, pouring into molds, & use in casting objects.
Now that you know all about pottery slipping let us check out some of the recurrent mistakes made by most pottery artists.
1. Not Differentiating Between Slip and Slurry:
For one, as a pottery artist, you must know the difference between slip & slurry. This can help determine the way they should be used in pottery crafting. While most potters tend to use slurry and slip interchangeably, it surely isn’t one and the same, especially not in terms of consistency. Technically speaking, slip is actually a watered-down version of slurry. So while the slip is watery and thin, the slurry is actually gloopy and thick.
Most potters tend to use slurry for joining two pottery pieces together. Using the right consistency of slurry is important to ensure that the pieces join together perfectly. With slip, you plant on a lot of water to the mix, which takes up longer to dry and might also lead to cracking issues. The key is to opt for slurry, which has a thicker consistency to ensure faster drying and zero or minimal cracking.
2. Uneven Consistency When Joining Parts:
Another mistake potters might commit in their journey to understanding slip is to apply a mixture with uneven consistency. First things first, as the clay dries up, it tends to shrink in size. Then, if you happen to speed up the drying process, it could also lead to unfortunate cracking issues. Well, the thought here is that joining two parts should involve a mixture with the same consistency.
Apply the very same mixture on the base model as you do in the piece you plan on attaching to it. First off, create the mixture in one bowl instead of creating it in two different bowls. This will help ensure that the consistency is even. Now keep mixing the clay in water till you achieve the desired consistency. Apply this mixture onto both parts and gently press on the joint to keep it in a sealed position. This will ensure that the pieces form a strong bond. If you fail to apply a paste with even consistency, the part with thicker slip could dry out faster, and the one with thinner slip won’t dry out at the same rate. Now, remember that clay tends to shrink as it dries out. The parts would shrink at different rates, which would weaken the bond between the two pieces. This could induce cracks in the parts being joined or even make the joint fall off.
There isn’t any hard & fast rule for the consistency of the clay to join different parts. The liquid content in your slip can vary depending on the wetness of your clay piece. If your cat mold is relatively wet, the slip doesn’t have to be of a slurry-like consistency. On the other hand, if your clay piece is almost dried out, you need to prepare a thicker slip to ensure the pieces stick together.
3. Preparing Slip from Different Clay Bodies:
There are different types of clay bodies available for potters to craft with. The types generally used include:
-
Ball Clay
-
Stoneware Clay
-
Earthenware Clay
-
Porcelain
All these clay bodies come with a range of colors, textures, & flexibilities.
Clay Type |
Color |
Features |
Earthenware Clay |
Wet Clay: Red, Orange, Brown, or GreyPost-Firing: Orange, Brown, Grey, Red, or White |
Soft & Can Easily be Scratched Using Sharp Objects |
Ball Clay |
Wet Clay: GreyPost-Firing: White |
Tad slippery for use;Primarily used for slip casting but can also be used in wheel throwing |
Stoneware Clay |
Wet Clay: Grey, White, BrownPost-Firing: Varies depending on the firing temperature |
Used primarily for wheel throwing and hand-building |
Porcelain Clay |
Wet Clay: GreyPost-Firing: White or Off-White |
Used primarily for cast slipping and wheel throwing |
Among these clay variants, the best option to use for slip is ball clay and porcelain clay. However, keep in mind that you must use the exact clay that you are using to mold your pottery piece. For example, if you are using earthenware clay, make sure you prepare the slip using the very same clay.
If you prepare the slip with any other clay, the drying rate could vary. Plus, different clay variants come with varying properties. So, the joints where your slip has been added might be softer or harder than the rest of the piece. It could also be brittle and break off easily.
4. Not Scoring the Piece Properly:
Scoring is a technique of etching the location at which you plan on adding a piece. For example, if you plan on adding hands to the base doll body, you need to create etching marks on the place where the hands go. However, this doesn’t mean that you have to do it only on the base body. You also need to create these hash marks on the parts to be added.
With the help of some sharp tools, create these hash marks that are deep enough to allow the slip to stay right in its place. This doesn’t mean you can simply dig in or rough up the area. Instead, you need to create proper crisscross designs that help lock in the two pieces in place. This helps create a strong bond between the two parts as they dry out and interlock with each other with the help of the slip.
5. Not Using the Right Tool for Slipping:
You simply cannot pour the slip onto your pottery piece for slipping purposes as it can spread out and about all around. So, how exactly can you do this? How can you slip your pottery piece the right way? Depending on why you are using the slipping technique, you can either use a brush or sponge to dab on the required amount of slip on the pottery piece. One great slipping tool you can use is the Mudtools MudSponge Shaping and Cleanup Pottery Tool. This set of 3 sponges is designed in a kidney shape to ensure you can hold it with ease while cleaning up the extra slip.
You can also use glazing brushes to create beautiful designs on the surface of the pottery piece. Decorating the pottery with a brush can involve lines being designed with fine, fluid slip particles. You can also apply a heavy slip layer all across the pottery piece with the use of wide brushes.
6. Failing to Slip-casting with Deflocculates:
If you are tackling issues such as cracking or heavy shrinkage, the best way to use slip is to use it with an additive that has deflocculant properties. This includes chemical compounds like sodium silicate, which can be mixed with the slip in order to disperse any raw material present in the mixture. This helps with better use of the higher solid content. It helps potters create a slip with proper fluidity minus the heavy amount of water.
With less water involved, the shrinkage on drying would be minimized. This can help make the bond between the two parts stronger and wouldn’t create a lot of cracks, as seen with regular slips that have a huge amount of water when compared with the base body’s moisture content.
7. Using Slip-on Bone-Dry Clay:
When clay dries up completely and achieves the bone-dry state, it tends to lose its flexibility. It is no more malleable like leather-hard clay or wet clay. To ensure that your slipping technique works in a perfect way, it is better to work with leather-hard clay or wet clay.
When the clay is wet or leather-hard, it still has a good amount of moisture within it. This helps with an easy application of the slip. Once the slip is placed on the joints, the entire piece dries out at the same rate as opposed to a bone-dry piece. If your project is bone-dry, it will have zero moisture, and hence the joints won’t be as strong. One hack you can use when slipping bone-dry clay is to use slurry as opposed to a slip. As explained above, the slurry has less amount of moisture when compared to slip. So, no doubt your project wouldn’t shrink a lot and hence avoid any cracks or joints coming off loose.
8. Don’t Create Clay Dust for Slipping:
While most potters would suggest that you should opt to break down the clay particles into their powdered state for preparing a slip, you must not actually do that. This sure is a faster way to create slip, but it is a labor-intensive way of preparing the same. In addition, when you prepare clay dust for slipping, you end up creating a lot of dust in the process that can create a mess in your workspace.
Further, it can also enter through your nasal passage creating allergic symptoms and, unfortunately, could be a health hazard. Plus, breaking down the bone-dry clay into a powdery mass could be very tough, and you might end up with pain in your hand.
So, the key is to simply break down the clay structure into small pieces. Try to break the pieces down into one or half-inch diameters. Next, place these pieces in a container in which you plan on preparing the slip mixture. Now, slowly pour some water on this clay until it is completely submerged. Make sure you don’t actually drown the pieces, or the mixture might become very watery. Instead, allow the pieces to absorb the water, which will make the clay revert to its original state.
Now, this process could be a bit time-consuming. However, it is actually safer and doesn’t require you to have herculean powers in your hand to crush down the clay. Remember, the same might not be possible with plastic clay. As the clay starts absorbing water, it will keep on dissolving in the water. This particular process is termed as slaking down.
Normally, you would be required to leave these clay pieces inside the container for a minimum of 24 hours. This will make the clay dissolve completely. You can also slightly press on the clay to let it mix well. If you have thinner clay pieces, they could dissolve even in mere hours.
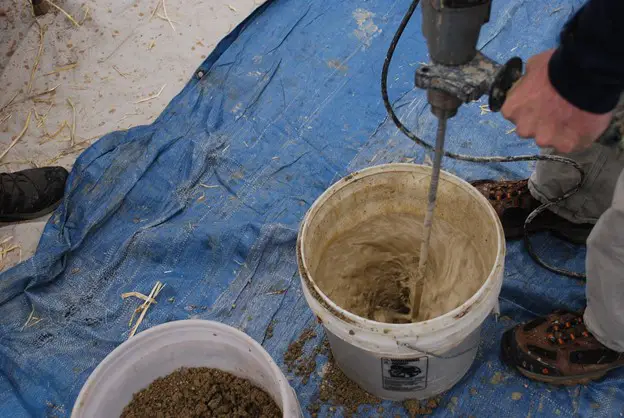
After the clay particles have slaked down, you can simply use your hand blender to ensure that the slip is mixed thoroughly. If you do not want to use your kitchen appliances for this messy job, you can simply place a lid atop the container and shake it until the ingredients mix completely. Alternatively, you can mix the concoction with the help of a fork or spoon to achieve a thorough consistency.
You can always add some water in case you feel the slip you prepared is too thick. But always start with less amount of water.
Conclusion
With the right slip consistency, you can create some of the best masterpieces. In addition, you can store the prepared slip in a properly sealed container to come in handy for use in the future. The ideal way is to place the slip in a zip-lock bag and then inside an air-tight container to ensure there isn’t much moisture loss.


