
Maybe you’ve been doing some pottery for a bit, and you want to improve it vastly. When it comes to making your pottery better, there are always things that you can do to better this. Here are some tips that can help you improve your pottery markedly, and how you can get the most out of your pottery-making abilities.
Write Stuff Down
This is probably one of the biggest things that people don’t do when they’re learning pottery. People don’t write stuff down. Writing stuff down, however, can help you in different ways, such as:
- Testing and experimenting
- See what you need to change to improve
- Keeping important tips and information on hand to see what you did
- Remember tips to avoid when you’re making pottery
All too often pottery will do something super freaking cool, and then they’ll not remember it the next day. It happens, and it stinks. But, did you know that you could prevent this by simply writing it down? By writing it down, you’ll have all of these notes on hand, and you can make different changes to your pottery as much as you can.
Maybe you want to test to see if something will go differently if you do it in another direction. Maybe you’re just wanting to experiment with different ways to help make your pottery shine. Whatever it might be, you should write it down, especially if you’re working with stains, glazes, or different throws. It can make a difference in your work, and actually, give you a whole new set of tools to work with and a whole new playing field that can change your life for good.
Tights to line Molds
Lots of times when you have a mold, you want to make sure that the clay doesn’t stick to it. When it sticks, it can be quite annoying to deal with. But, when you want to line it, you have to figure out what to use.
Lots of people will tell you that you should use the following:
- Saran wrap
- Any sort of plastic wrap
But the problem is, these can leave marks on clay that you’ve already smoothed out. If this happens, it can create marks that you don’t want on your pottery. What’s a solution then?
Well, why not an old pair of tights?
It might seem strange, but tights are one of the best materials to use on a mold because of the following:
- They don’t leave marks due to the even texture
- They’re durable, and while they might cause runs when you wear them when it comes to clay they hold up well
- They come off super cleanly so it’s less work for you
It’s a strange hack, but it’s a hack that can work wonders to change the way your pottery goes, and it creates a much better, more efficient means to create pottery.
Keep lots of Sponges on Hand
Do you want to have pottery that looks awesome, and looks even? One of the key things that you need to have on hand is sponges. And not just one sponge. You need quite a few.
Sponges are something that many potters tend to not have enough of, but if you skimp on this, it can cause some issues. Sponges are used to clean up your pottery so that it looks great.
There are a few things that sponges can do to help with your pottery, and they are as follows:
- Clean up excess water at the bottom of your pot
- Get rid of any excess dust particles from the clay
- Create an even texture on the surface
- Give your pot the cleanest look that it can have
If you want to make your pot look amazing, you should get the sponge, dampen it, and from there, start to cleanly fix the sides of it up, you’ll be amazed at the difference that this will make in time. If you want to make your pots pretty, and you want to do what will work for you, add this, and you’ll see a difference in time.
Vaseline and Pot Rims
One of the biggest problems with pots is that they tend to get sticky with the lids. This, in particular, will happen with the jars that you glaze.
You should do this before you fire it since it will help with the firing, and prevent them from getting sticky.
Now, you don’t have to use Vaseline, but you can use other types of materials as well. for example, you can use the following:
- Glue
- Petroleum jelly
Lay the lid and the vase so that the bottoms of it are facing up. From there, you want to coat the lid around the rim, and the inside with this product. You can do this before you fire so that it doesn’t get sticky once you finish it. Glazes should also be looked into, for if your jar doesn’t work well with the Vaseline, you should use another product because some of the products might have some issues with glazes.
But, if it tends to be an issue, you’ll want to make sure that you use the right materials because this can help you with your pottery, and make it better than before.
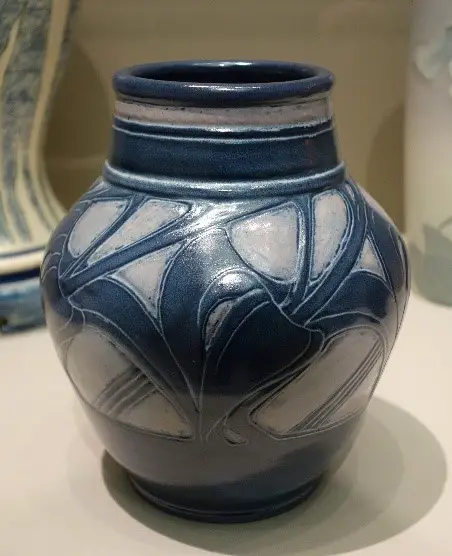
Experiment with glazes and Try to Marble
If you want to make your work shine, you should try to experiment with ceramic glazes. With glazes, a lot of times different ones give different effects, which is what makes it so much more fun than other types of projects. You should try out different types of glazes, and different types of firing, and make sure that you write this down each time.
Glazing is great, but remember that different ones can do the following:
- Give an effect
- Make it shiny
- Make it brighter
- Make it darker
There are lots of different types of glazes, and sometimes, you just need to try out different ones to find the one that best works for you.
One of the big things that you should try is marble glazing. This might seem a bit complicated, but a marble pattern is a great way to give your pieces the kind of decorating that you want to have.
What you’ll need is shaving cream and the glaze colors that you want to put on there, along with the pottery that you’re going to use.
To begin with, create a circular base that’s slightly bigger than the bowl or plate that you’re going to use with shaving cream. From there put in the glaze colors that you choose to use, and from there, you mix the colors with the shaving cream to mix it well. You should then put the pottery in there upside down, and then let it sit in there. You should then lightly rinse off the foam, and don’t give the bowl too much water. You’ll then get a cool marble pattern, and it works for a lot of different glazes that you want to try.
Glazing is an art within itself, and if you’re looking to better your art, you should consider adding this to the repertoire, because this can take your pottery building to the next level.
Balloon Glazing
Then there is balloon glazing, which allows you to glaze your jars in a different color that’s different from what you have outside. Perhaps you want to create a super unique look on the inside but have a plain outside, or maybe you just want to mix colors inside but keep it uniform outside? Balloon glazing is something that allows you to do this, and you will be able to ensure that you don’t mix either of these.
What you’ll need is the following:
- A balloon
- Glazes you’re going to use
- Something to pop the balloon
The balloon can be just any old balloon that fits on the inside of the vase. You want to make sure it fills up the piece entirely. From there, you take the outside of the balloon, dip it in the glaze, and then fill it into the inside. You can then carefully do the outside to glaze, and then, you can pop the balloon that you have so it’s removed.
Another way is to get it to the shape that you want, and then put the clay around it to create an interesting shape. If you want to play around with shapes, you can do this. It will hold the form until you pop it, and it will allow for unique shapes to form, it does give it a bit more support than other types of means to glaze the balloons.
You can do this for both the outside and the inside glazing, whichever one you want, but it can help you make the best and prettiest posts that you can imagine and ones that work for you.
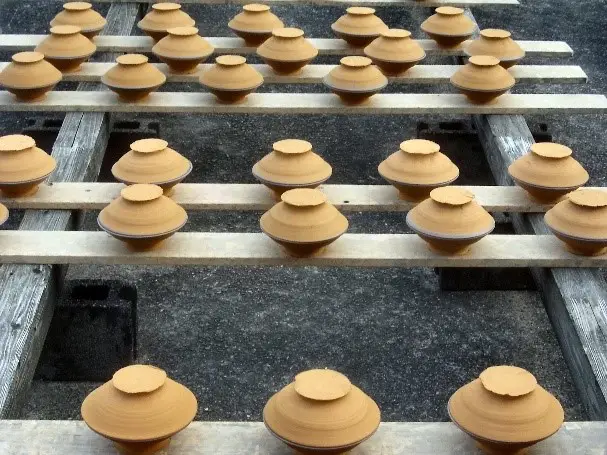
Drying pottery Tips
If you’re drying pottery and it’s creating some issues, there are a few things that you can do, and it’s important to know how to dry stuff before you put it in the kiln.
When you’re drying pottery, make sure that the following happens:
Now, when it comes to drying, you don’t want to forcefully dry this, such as using hair dryers and hot air blowers. This actually can risk the breakage of these especially if the clay is already starting to dry out. The best types of pottery drying are really to just slowly and evenly dry each of these.
If you notice that a piece of pottery is drying super fast, you want to cover it. You can use plastic, newspaper, and then plastic, or whatever, depending on the space. The more humid the place is, the more newspaper you’ll need because that will take all of the condensations that were in there and soak it up.
You should make sure that you don’t dry an object past the point of being leather-hard without taking out the armature. The armatures tend to compress and crack when they are dried, so keep that in mind when you’re drying this type of pottery.
For slabs and tiles, you should just simply put them on a wire rack once it’s formed. You can then leave it rolled out, it will decrease the chances of it being folded and bent, and it can prevent warping.
Consider using natural Clay
Natural clay is something that many people think about using if they want to experiment and work with different bodies. Local clay can create some unique pieces, and it can make a world of difference in your pottery.
You can get some local clay from the following places:
- The banks of a river
- Road cuts
- Construction places
- Stream beds
- Canyons and gullies
If you do this, make sure that you have permission before you dig in the area, especially if it’s a construction site, and you want to stay away from dangerous places, or machinery. You should make sure that it’s never a natural habitat since you could end up disturbing it and then that causes consequences that you probably don’t want to have to face.
If you do this, you will dig up the clay, and then you’ll need to process it to remove the following;
- Rocks
- Twigs
- Roots
- Any other debris
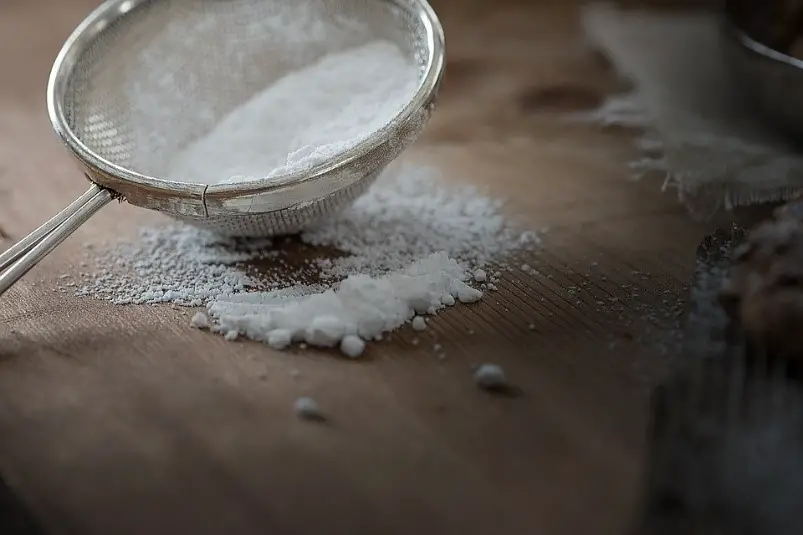
You can remove this in two different ways, and they are:
- Pulverizing the clay when it’s dried and then proceed to sieve this
- Dry it, slack it down into the water, and then sieve it
You will want to use a mesh that is around 30-80, since the finer the mesh, the fewer inclusions that will be there, but over 80 will affect how much you can use the clay.
You can then create some test pieces to see how it works, such as small bowls. You should keep notes on this, and make sure that you have designators on there, such as what types of stains or oxides are used on this. You should use the clay body that you’re currently using, and then a clay body, and you’ll be able to see what the maturation temperature with this is, definitely test to see what glazes and slips work well with this.
Now, before you fire this, you should test the workability with this, such as:
- The maturation temperature
- What cone does it need to be at
- The shrinkage and absorption rate
You should take into consideration that most of the clays that you will use are probably earthenware, and they’re typically mined. You can reasonably say that the firing temperature is somewhere between the 02 and the 06 cones. You can test-fire all of these and see which ones work for you.
With local clay, it’s important that you take your time, and you should look into trying out new things. local clay gives an amazing texture, and it can make your pottery shine. Try this, and work with what you have, because it can take your pottery to the next level.
These tips will change how your pottery is, and how it works for you. test out what you think is best, and work on the different types of pottery, from there, you’ll be able to see the difference and make the necessary changes that you feel need to be done.
If You Enjoyed This Article Please Share and Pin. It is Greatly Appreciated. 🙂


