As a beginner clay crafter, you might or might not have access to a kiln. Even if you have access to a kiln, you shouldn’t start using it right away when you are just learning the art. In fact, one can add permanency to your pottery work without the use of a kiln. So, let us understand the best ways to fire clay without a kiln.
But, before we do that, let us understand why you should replace kiln firing with other alternatives.
Why Fire Your Pottery Work Without the Kiln?
You might have been wondering whether firing without a kiln is the right thing to do. However, it surely is, and we need to discuss the reasons to do so.
Here is why pottery firing without kiln is important and beneficial:
- Pottery firing kilns are very expensive
- Kilns take up too much space in your work area
- They aren’t feasible for daily use and are very heavy to move from one place to another
- If pottery work is just a hobby for you and it isn’t going to stay with you for a long time, it might not be worth the heavy investment
When talking about the outdoor firing, you have to take up the temperature to a minimum of 1000oF. This cannot be done inside. This is a reason why different types of clays are fired at different levels. Usually, with low-firing clays, you can fire it without the help of a kiln. If you plan on working with clay that isn’t of the high-fire type, you don’t necessarily need a kiln for the same. Most commonly used clay that is meant for beginners does not need to be fired beyond 1900oF.
Firing without the use of a kiln has been a tradition among ancient potters, and they do that for a reason:
- The clay can be contained at a high heat level
- One can create a setting similar to a bonfire to get the wood kindling and help it burn
- It is comparatively easier to contain
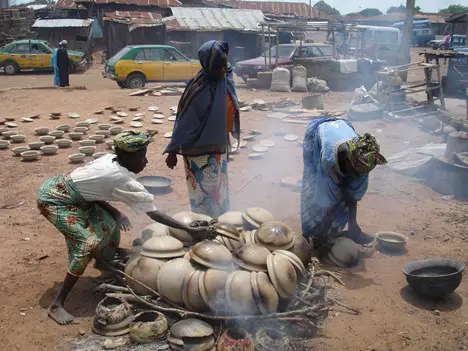
This variant of pottery pit firing tends to be popular among beginner crafters. It is fairly simple to put in place and even contain.
Can You Fire Clay in an Oven?
Simply put, you cannot fire your clay pottery in a regular oven. Of course, one can bake the clay in an oven but firing in the oven is impossible. Here are some reasons that firing clay in the oven doesn’t work:
- Ovens cannot get hot enough even at their extreme temperature to initiate the firing process
- If you push the ovens beyond their temperature limit, there is a possibility that they might explode or combust
- If the crafters aren’t careful, it might melt or crack the clay
You can bake your clay within the oven. This is when you can make use of the kid-friendly clay variants that can be easy to bake in a regular oven. However, keep in mind that it is baking and not actually firing. So, the oven is out of the question if you plan on firing your pottery work without a kiln.
Of course, you can allow the clay to air-dry. However, if you do this, you cannot actually use it for regular everyday options and rather only for decorative purposes. If you need permanency, firing is compulsory, and here are some alternatives that you can try out.
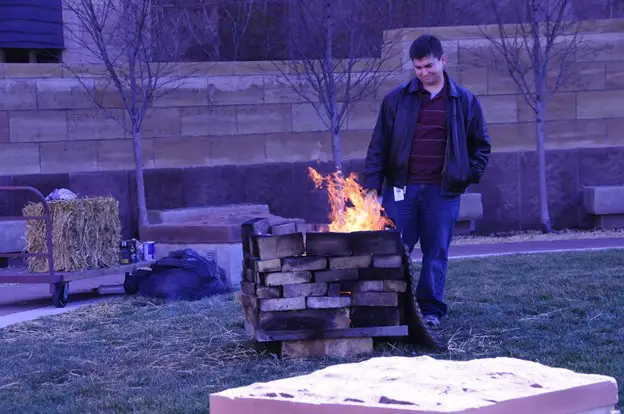
Pit Firing Setup:
If investing in a kiln is something you don’t want to do, you can set up your very own pit for firing purposes. Here is how you can do it:
- Setting up the open firing pit could be a bit challenging for beginners. So, let us talk about firing the clay model outside.
- First, dig a hole in the soil and pile the kindling wood inside. The pit can be created with the use of stones, steel, or brick to create a strong wall-like structure. Ensure that the location is completely clean and the pit fire doesn’t spread.
- Now, put your pottery piece atop the wood that is kindli9ng. Make sure you stack the wood so that it doesn’t burn down completely and make the pottery piece tumble or turn into ash. You can place bricks, stones, or other things that don’t burn easily to ensure that the piece is stable and kindles properly.
- Next, place a tin or roofing scrap inside the pit with an opening for the exhaust. This will allow the air to go around with ease.
- Now cover this using a thick grass layer or with animal dung. This will help the heat retain inside. Plus, the moisture present within the dung shall ensure that it doesn’t burn off. Further, it would also insulate the same to be burned later on if you fire another piece.
- Some potters prefer to smear the dung to create a thin yet durable shell-like structure. After this, you can layer it with the help of a straw and grass mixture.
- You must ensure that the setup must come with a big hole to serve as an exhaust on the top of the roof. Also, ensure that there are several vent openings to allow air to get in and burn the clay to a point where it becomes red hot. The setup would vary depending on the size of the firing piece. The openings present in the bottom would give in enough space to help ignite & allow the rapid combustion. The top section must be large to ensure a rapid flow of air to reach the bottom and heat the pottery piece kept inside.
Now, you are ready with your firing pit that can be used to make the piece permanent. Next, you need to keep in mind that there isn’t anything flammable in the area. Always wear the best-quality protective gear while you work with the firing pit.
How Can Your Fire Your Pottery in the Pit?
In order to start the pit firing process, you simply need to start the fire & watch it as it goes. It is important that one shouldn’t leave it unattended. Here is the best way to fire your pottery in the firing pit.
Start By Lighting the Kindle with Paper Wads
If you feel that the fire might break out, you can start by covering the vent of the pit partially by using the tin or the pottery shards. This can help restrict the burns & heat things slow in the beginning. Ensure that airflow is proper in the pit as it will help fire the pottery better.
Next, you need to start moving more fuel to the firing pit. Next, continue and burn everything & increase it until it is red hot. Now, you need to check if there is enough kindling in the firing pit. Let your pottery piece sit inside the pit for 12 hours or so, depending on the size and thickness of the same.
After the firing is done, let the piece cool down slowly. Next, cover the project with a proper layer of wood ash or dirt. This lets the air choke off in case you need your piece to be darker and smokier. It is an amazing way to create black pottery pieces.
Next, let the pottery piece cool down until it reaches 500 degrees or lower. Do not touch the piece until it gets to room temperature. However, you can surely start rolling it out via moving and prodding, which is great for your pottery piece.
Remember that you might have mistakes when trying to fire in a pit for the very first time. Learn from the mistakes and be careful the next time.
Safety Tips for Clay Firing without Kiln
Safety, no doubt, is a major part of the firing process for your pottery piece. Always ensure that you adhere to the guidelines. There is a list of things that one needs to keep in mind when firing your pottery in a pit. So, here you go:
- Always ensure that you keep in mind the space you are creating your firing pit at and the way you are doing it
- Adhere to the local fire and safety codes when indulging in outdoor pottery firing
- Do not practice pit firing in case you feel the probability of fire spreading out in the area
- Ensure that there is plenty of water supply close to the area
- Keep in mind the current wind pattern when firing your pottery work. If the wind direction could lead to a spread of fire, avoid or postpone the firing for another day
- Never leave your firing pit unattended when in use
- Ensure that you don’t have pets or children close to the firing pit
- Warn everyone in the area not to touch or mess with the firing pit
- Use durable and heat-resistant tongs in order to keep the hands safe and secure from any fire or heat injury
- Apart from this, you also need to use fireproof gloves, safety goggles, & a hair net to keep them away from flames or any abrupt accidents. You can make use of Rapicca Mitts for handling the firing process. The extra-long sleeves will help protect your hands well enough.
By following these basic safety rules for firing, one can experience a rather pleasant firing process and prevent any type of accident from happening.
Pit Firing Problems & Solutions
Although pit firing is an amazing alternative for kiln, it sure has its own set of problems. So, now let us discuss the issues potters might face when a piece is fired in the pit and the ways you can easily solve them.
PROBLEMS |
SOLUTIONS |
| Pots Might Turn Black | This generally occurs when you cover the fire with the help of sand. It could result in a major reduction of the fire and hence turns the pots black. Ensure that the reduction is limited to allow better firing of the pottery pieces. |
| Cracking of the Pots | Use clay variants that respond better to the heat shock. Organize the firing process when the weather is cold. This will allow the piece to cool down gradually and slowly. You can also use polyurethane varnish in order to strengthen the cracked pots. The inside of the pottery piece can be varnished with the help of the pouring technique. Paint the pottery piece from the outside using varnish normally. |
| Development of Ugly Scars | At times potters might throw in beer bottles and sticks into the firing pit. Refrain from doing so as these bottles might burst, hit, & smash the clay pot. Plus, the glass might also melt & stick onto the pottery piece. This phenomenon can leave a scar on the piece. |
Use a Metallic Dustbin for Clay Firing
If you don’t plan on going large scale, metallic dustbins work as an amazing option. It also brings in additional benefits when compared to pit firing, along with better safety.
- Given its smaller size, it is easy to contain
- It can be placed anywhere given its size
- You might not need as many protective gears in comparison
- When done in the right way, you can easily create some amazing pottery pieces
- No need to worry about the safety of the children or pets
However, the downside associated with this pottery firing process is the fact that there is a higher chance of making mistakes, especially related to the pottery pieces burning down. When using the metal trashcan, ensure that you gauge the amount of air that gets in. Also, make sure you include a large number of leaves, sawdust, & small twigs.
Ensure the clay is dried out properly before being fired. You should also layout the sawdust and pottery pieces to ensure that it isn’t all in a single side of the trashcan. Post-firing, make sure you allow the piece to be cooled down before handling.
Conclusion
You can also make use of BBQ pots to fire the pottery pieces. This will help you avoid investing in any pricey electric kiln. Use the right set of tools to ensure that everything is done in a safe way. Although the non-traditional ways might not fare well and won’t be as fast as kiln firing, they are ideal for beginner crafters who don’t plan on investing a lot.


