Pottery may be a relaxing pastime that does not demand much of your time or money, or it can become an obsession that consumes your whole life. If you are just starting, it is highly recommended that you participate in a class geared toward beginners or give pottery a go. If you are starting on your own, here are some recommendations for where you should get started.
1. Why Work With Clay?
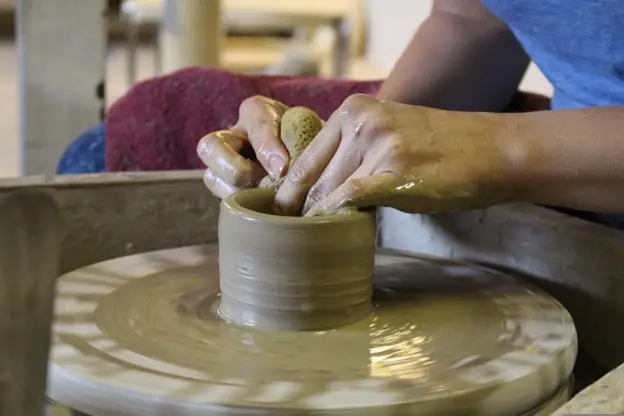
Clay is fun to work with and can accommodate skill levels ranging from beginner to advanced. The majority of the time, even very young children can grasp pinch pots without any difficulty. You may be able to rapidly learn how to construct a pinch pot in less than an hour.
Clay offers a never-ending supply of opportunities for discoveries, experiments, and creations. Given that clay is both as deep and as vast as the earth it comes from, venturing into the realm of pottery will undoubtedly be an incredible adventure.
2. What is the ideal workplace?
It is recommended that the clay be stored in a different room or a separate outbuilding. Home vacuum sweepers will not be able to gather or retain clay dust due to the very fine particle size of this material. The following components should be present at the perfect location:
- Flooring is made of water-resistant materials like concrete or linoleum that are easy to clean and maintain
- Availability of water (but clay should not be allowed to go down any drains!).
- A sturdy table, such as one used in the kitchen.
- A surface for working with clay that does not enable the clay to adhere to it (see below)
- Strong shelves are necessary for drying out pots.
- A container for storing glaze or another safe spot where animals and children are unable to get it
You also have the option of delaying the process of choosing a home of your own while you play about with clay. The quickest and easiest way to do this is to enroll in a beginner’s pottery class.
3. What to Know Before You Buy Clay and Glazes
Clays and glazes come in a wide variety of textures, colors, and flavors. The most important aspect to consider is the temperature at which the clay achieves its full maturity. Glazes have to be chosen specifically for the material they will be applied to, taking into account the temperature at which the clay will mature.
Several different clays and glazes are analyzed by “cone” to determine the amount of heat effort that will be needed (similar to temperature). Zeros are key!
Find a local potter who will allow you to use their kiln and ask them for permission. Find out at what temperature (or temperatures) and in what kind of atmosphere (oxidation, neutral, or reduction) they normally ignite. Buy clay and glazes that perform very well in that setting and can mature within the appropriate temperature range for firing.
4. Find Clay and Supplies
Clay and glazes that are already mixed and ready to use are fairly typical materials. There is a wide variety of hues and temperatures available for purchase here. Inquire with a local retailer about the availability of pottery or ceramics supplies, art materials, or artist supplies. You have the option of searching for a solution to your problem on the internet or visiting a physical location in your area.
As you use more clay, glazes, and other materials, you could find it more cost-effective to buy them in larger quantities. When there is not a ceramic supply shop in the immediate area, it is possible to reduce the total cost of shipping by buying a higher quantity of the item(s).
5. Tools for Pottery You Might Need
Even though pottery may be created with nothing more than your hands, there are several tools that you will find to be extremely useful during the process. There are starter kits available, often consisting of a few essential implements, one of which is the appropriate sponge. These tools come highly recommended:
- Towels, and maybe an apron as well
- A compact bucket that may be used to store liquids or muck while working.
- Two or three really large buckets of water for cleaning
- A sponge, or many sponges, to wash the clay and provide water to it
- A large and mild-mannered brush (Sumi or bamboo are good)
- A tool made of wood that is used for carving or trimming.
- A needle for potters
- A frayed or damaged wire
- A container for stowing away your various tools.
6. Work Surfaces
Clay tends to adhere to or leave huge stains on most surfaces. When clay is worked very recently, the finished product sometimes cannot be differentiated from the surface it was manufactured on. For this reason, it is advised that you work on a piece of robust canvas, such as a cotton duck with a weight ranging from medium to heavy. In addition to protecting your table, you can easily pull the canvas away from the pot so that it can air dry without cracking. This will also save the pot from being damaged.
When working with clay that is too wet to manipulate easily, plaster bats may be a very beneficial tool. As you wedge the clay onto the bat, the plaster will take in any more water that is there. To make one, you will need to get a container that is quite shallow, such as a clean pizza box, and then pour plaster into it once it has been mixed as specified in the instructions. After the plaster bat has cured and become more solid, it is ready to be used.
7. Where To Fire Your Pottery: Kiln
After the greenware has been dried and allowed to fully dry, it is then ready to be burned (no longer cool to the touch). To do this, you will need a kiln. The price of a kiln may be beyond reach for a novice craftsperson who is just starting.
Inquire with local potters to see if any of them provide kiln space for rent. Remember that kids are following their schedules and working on their pottery at the same time. It is possible that you will not be able to have your pots fired until they have a full kiln and space for them.
If you have any interest in helping in the firing process, you should not be hesitant to inquire about the possibility of doing so. When it comes to mastering the art of lighting a kiln, there is no substitute for hands-on training. The potter could be grateful for help in loading or unloading kilns and keeping an eye on them while they are burning.
8. Pottery Shrinkage
After being dried, some varieties of clay contract more than others do. In addition, when a pot is burned, its volume decreases, especially after it has been heated to its mature temperature. In both cases, the shrinkage is caused by the clay’s fibers being more compacted as a result of the drying process. In the first step of this process, the molecules of water are removed from the equation. When it comes to the second case, the tightness is caused by the melting that occurs on a molecular level.
If you require a pot to be a certain size after it is dry, you may find it helpful to use a shrinkage ruler to calculate the size of the pot while it is still wet.


