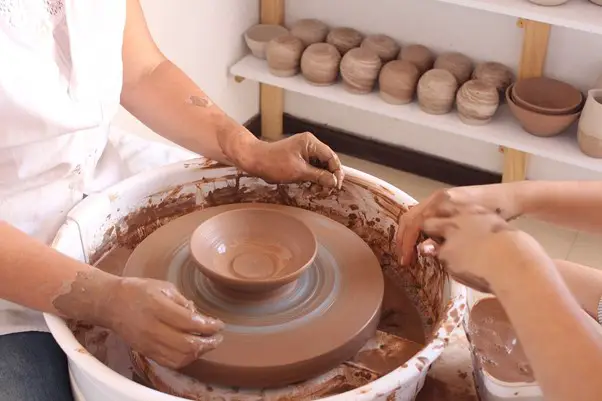
After making the pottery, the first thing that can hit your mind is how to wire your pottery off? Whether you build your pottery on a bat or use a wheel, removing your pottery from the wire is always challenging. In most cases, potters end up crashing the pottery’s bottom since they don’t know how to do it rightly.
At the same time, a beginner tends to break off the pottery, as the pot strives to stick on the bat or wheel and creates an utter failure when lifted. It is why you need to ensure that you are applying the right technique while wiring your pottery off. This article is going to talk about the correct technique that you can use for your pottery wiring. Read on to know more.
Why is it even a problem to wire your pottery off the bat?
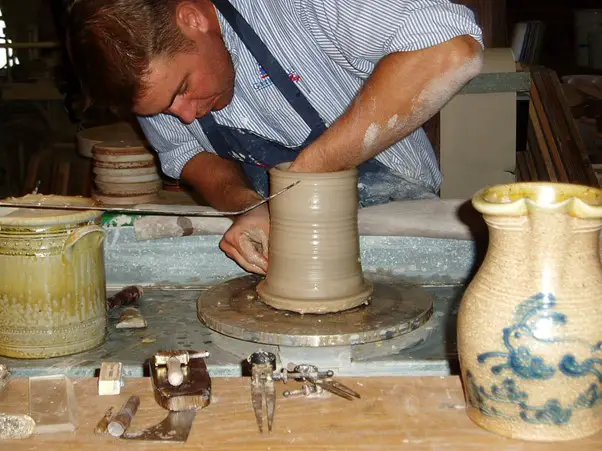
The clay you have thrown to make your first pot on the wheel looks excellent when you shape it rightly. But the actual problem appears when you need to get it off without squashing the walls.
You can experience difficulties in most cases, as pots tend to stick on the wheel or the surface you have used to make your pottery. It is more likely to happen because the clay is softer, and it gains more moisture, which makes it stick on the surface.
The problem gets severe when you are finished with throwing your pottery. As you have freshly thrown the pot, the clay is very soft. At the same time, it stays firmly stuck on the wheel head. The best time to move your pottery off the wheel is when it is leather hard on the wheel head. But that takes more than 2-3 days for a pot to become completely dry. But it is not a practical idea to leave your wheel unused for such a long time.
But you should not admit the fact and sit back. Trying out the right process is the only way out. But how do you do it? Well, here is where you need to focus:
So how do you do it?
Though it might sound like struggling, you can easily do it by following a few simple techniques. To try out less failure, remove the pot from the wheel and tidy up the bottom from the pottery using a wooden tool. Then you can merely remove the slip from the surface areas of the pot. Then you need to splash some moisture off the wheel and go for sliding the wire under the pot. Now you can lift your pottery piece and put it on a bat.
Sounds easy, right? However, the technique may not feel smooth at the beginning. The practice is needed. Having a look at how you do it step by step can help you a lot. Have a look:
First of all, have a quick look at which tools you are going to need.
Which tool do you need? |
For what do you need the tool? |
Wooden tool |
To press your pot against the bottom. |
Sponge |
To clean the slip from your pot. |
Rib |
To ensure the proper coming off. |
Clean off the base first:
As you are finished throwing your pottery on the wheel, the first thing you have to do is keep it covered in a slip. Slip refers to liquid clay, which helps in strengthening the bond of the clay. The slip is going to be inside areas of the pot. Also, you can apply it to the side and the base area. However, it would help if you cleaned the slip off the pottery piece.
Start with cleaning the base area of the pot at the beginning. It is easy to do if you go slowly by spinning the wheel’s head gently. You can also use a wooden tool to press the pot against the bottom edge.
Soak the slip inside
The next step is quite a bit trickier. Here you need to take a wet pottery sponge. Dip it in water and then squeeze the excess water properly. If there is excessive water, it can break the pot with over-moisturizing. You need to use this sponge to soak up the slip, sitting in the pot’s inside area. It is vital to ensure that you are doing this step, or else it can make it difficult for you to lift the pot. If a lot of slip is sitting inside your pottery, the base will dry very slowly. On the contrary, when one part of the pottery dries on a quicker note, it can allow the pottery to crack fast when it is dry.
Now you can soak up the slip from the inside area while holding the sponge very carefully with your fingers. Now you can lower your hands in the pot and carefully dab the slip using the sponge. You can also go in an alternative way by sticking the sponge on the head of a stick to do it more safely without crashing your fingers. In case the pot is having a narrow neck or a larger one, the stick method will be beneficial and more comfortable.
Clean the outside of the pot:
Now you need to gently clean the slip from the outside area of the pot. But you should do it? It gives your pottery a lovely finished texture and lets you do less trimming along with your pot. Also, it is beneficial as removing the slip makes the pot surface drier, which makes it easier to tackle. You can lift your pottery piece with your hands out of feeling stickier.
Just clean the slip off the side of the pottery using a pottery rib. You can select any shape or size of the pottery rib based on your pottery type. While cleaning the slip off the side of the pottery, you can find a rubber rib much helpful. Hold the rib gently against the pottery side and start rotating it slowly the wheel head using the foot pedal. The slip is going to get collected on the rib. Then you can merely scrape it off the pot easier. You might need to run the rib up and down near the side of the pottery to clean it properly.
Moisturize your pot:
You might feel the need to moisturize your pot a little bit to ensure the procedure’s proper accomplishment. Use a sponge to splash a few drops of water on the wheel head to make the pottery come off. A few drops of water at the edge of the pot’s base area is enough to do it smoothly.
Now you need to hold your clay cutting wire firmly with both hands. Now carefully draw the wire underneath the pot and drag it towards you.
Make sure you are holding the wire very tightly. Also, you need to be very careful while you come to an end to draw the wire under the pot. Don’t let the tension in the wire go, or it can dig the underside of the pottery. The clay cutting weirs come with the springy trait, which means you have to be very attentive while doing the process to ensure that you are not gouging your pottery.
While dragging the wire underneath your pot, you are going to extract some moisture that you have splashed initially into your piece. It helps you to have a more comfortable stance to remove your pot. Drag the wire under the pottery two or three times. As you are done doing it use your fingers to clean the clay slip from the wire.
You need to splash some water on the wheel head from the base of the pot. Then simply drag your wire underneath the pot once again. During this second phase, you can feel that the pot has started moving smoothly. As soon as you feel the movement, it is the time when you can remove your pot off the wheel.
Moving of the pot:
As you are done wiring it off, you need to position the surface area while moving your pot near the splash pan. Now you can lift the pot. Then you need to handle it gently as little as you can. Ensure the drying surface you will use stay nearer to your pot so that you don’t have to lift it too much. A wooden bat is going to be sufficient for moving your pottery to let it dry properly.
While doing this, you need to ensure that your hands are clean and dry enough so that the pot does not slip away from your hands. Wipe your hands properly to ensure that it is dry and clean. It is going to help you with the surface of your pot, which is free of slipping.
Now you need to carefully use the gentle twisting motion for your pot to move it from your wheel head. As you get the pottery piece, along with the edge of the wheel head, you can easily slide off the metal. Support the side area of the base of the pot. Now you need to lift the pot and place it on the bat swiftly. While you lift the pottery, it is slightly going to bend. If it is having an around the lip, it can turn oval. Well, not to worry much. While setting your pot down on the surface for drying, it will come back to its proper shape.
Dry your pot properly:
As you are done with moving your pot properly off the wheel, now you need to dry it while moving it off the bat. Make sure you are not touching your pottery piece too much until it is too dry. Touching it quite often can hamper the proper shape. It is better to wait until your pot is entirely leather hard on the surface of the bat then you go for moving it. If you want to know whether it’s dry leather, wait for 2-3 days. Then touch it. If it feels cold yet hard enough to work anymore, it is entirely leather dry, and it is going to come off the bat at ease.
Also, have a quick look at how you can wire off your pot from the bat while the pot is wet.
Process |
How to do it? |
Cleaning the foot of your pot |
Once you have thrown the pottery, start with cleaning the foot of your pot. You can make a groove to ensure the pot is moving. |
Run a wire |
After that, you need to run a wire under the pottery. Soak a sponge under the water and run the wire under the pot with water. Run the wire until the pot starts moving a bit. |
Remove from the bat |
As the pot moves, remove the bat from the wheel while tilting your bat slightly. Then slide it while removing it from the bat. |
Which wire is going to be the best for you?
In case you are frequently working to make pottery, then ensure a wire that comes with durable build quality. It is recommended for such cases to use Mudwire – Green Handle Standard Cutoff Tool for Pottery Wheel and Clay Artists – Sherrill Mudtools.

From the house of the Sherrill Mudtools Green Standard Mudwire tools, it comes with a very sturdy and ergonomic design, which ensures a very steady grip while you put it underneath the pottery. Also, the ergonomic handle makes it easier to have a firm grip. The polymer-made handle comes with a very comfortable holding that lets you wire off your pottery easily.
On the other hand, the high-grade braided stainless-steel cable of the wire meets the green model’s standard, which comes with more outstanding kinking resistance than any regular cable. The solid wire comes with the nylon finishing of the line. The cut-off wire comes with the standard 13 inches, ensuring a clean cut that makes it easier for your regular use. The total length of the wire is approximately 15 inches which makes it easier for the larger vessels.
Conclusion:
Whether it is making your pottery or wiring it off the wheel, all kinds of processes need an exact technique. However, while making the pottery, make sure that you are not doing it quickly or fast. Be careful while making your pot cut off the wheel.
Also, while doing this, ensure that you are not using too much water, as it can make your pottery supple and soft again, which turns your clay squishy. Hopefully, the technique mentioned above is going to help you in having a smooth pottery process.
Happy sculpting!


