Are you a beginner home potter worried about how to start and improve your pottery-making skills? Well, you are not alone. Pottery can seem like a daunting art form if you are new to it and without any guidance. But, with the right tips and tricks, you can create some beautiful pottery pieces from the comfort of your home. You do not need to have a dedicated studio and costly tools to create artwork that is just as stunning as something created by a professional. So, what should you keep in mind before you embark on this wonderful journey of home pottery? Let us dig deeper into these tips and tricks that will help you ace pottery!
Should You Indulge In Pottery At Home?
Well, the answer is yes. Of course, it can get messy initially, but even if you have a professional studio, things will get messy. Creating pottery at home can be convenient as you don’t have to travel to a dedicated studio. Moreover, you can work on your schedule. Even if you get inspired in the middle of the night, you can start right away.
- Practice Artwork In Budget:
Studio rental fees, pottery classes, and some pottery tools can be expensive. At home, you can find various suitable alternatives to create pottery at home. You can start with a small budget and scale up once you are confident about your skills.
- Unleash Your Creativity:
Creating your pottery pieces at home allows you to experiment with your ideas, materials, and techniques without the restrictions of a structured class in a studio.
- Connect With Peers Around The World:
At a studio, you a limited to the people in your class that you can connect with and learn from. However, when indulging in home pottery, you have access to pottery enthusiasts from different parts of the world. All you need is a device that supports the internet, and you can learn pottery tips and tricks from artists worldwide.
Choose The Right Type Of Clay:
Selecting the right kind of clay is crucial when it comes to creating pottery at home. There are different variants of clay with unique properties. It is important to note that different clays have different levels of shrinkage and porosity. This can affect the final product. So, you need to experiment with what is best suited for your project before you proceed with your main batch.
Here is a detailed comparison of the commonly used clay variants in pottery.
- Earthenware Clay:
Earthenware is low-fired clay that is typically fired at temperatures between 1800 to 2100 degrees Fahrenheit. Given its highly porous texture, this clay variant is easy to work with for beginner artists. Potters usually use earthenware clay for decorative pottery and tableware like bowls and plates. Post-firing, the pottery ware is reddish-brown and can also be glazed to achieve different colors. However, earthenware isn’t as durable as porcelain or stoneware. This makes it unsuitable for items that are subjected to regular wear and tear.
- Stoneware Clay:
Stoneware clay’s firing temperature is higher than that of earthenware and falls between 2200 to 2400 degrees Fahrenheit depending on the artwork’s size. Moreover, it is less porous and denser than earthenware, making it durable and highly functional for pottery pieces like vases and mugs. It is also less likely to crack or chip. When fired, it has a natural beige and gray color. However, potters can glaze it to achieve different colors. Yet, this clay variant might not be ideal for beginner potters as it requires more skill to work with due to its dense texture.
- Porcelain Clay:
Porcelain clay is a high-fire clay variant that is typically fired between 2192 degrees Fahrenheit to 2552 degrees Fahrenheit. This high temperature is vital to vitrify the clay, which makes it non-porous and hard while providing it the characteristic whiteness and translucency. Unfortunately, porcelain is fired at a higher temperature which makes it the most challenging clay variant to work with. However, it is also perfect for potters who wish to create highly durable pieces.
Among these three clay variants, earthenware is the best choice if you are a beginner home potter. However, this would only work if you have a kiln to fire the clay and a pottery wheel to shape and harden the clay. For beginner home potters who do not have a kiln or wheel, a great alternative is air-dry clay.
Air-Dry Clay For Home Potters
Air-dry clay has become a popular choice for home potters. It doesn’t require a wheel or kiln to help you create pottery pieces. With air-dry clay models, all you need is your hands, some basic shaping tools, and some water to mold your clay into your desired shape. Unlike the clay variants mentioned above, air-dry clay doesn’t require kiln firing. Instead, it dries and hardens on its own when left to air-dry for a period which typically varies between 24 and 48 hours, depending on the clay’s thickness.
Moreover, it is just as safe and non-toxic as earthenware, stoneware, or porcelain clay. Air-dry clay is generally made from natural materials like water, clay, paper, and natural fibers. It is perfect for use if you have pets and children at home. A great option is the Old Potters Premium Air Dry Clay, which is popular for its softness and resistance to cracking.
Hand-Building Tips For Home Potters
Before pottery wheels existed, hand building used to be the oldest form of pottery making. It includes three primary methods: slab building, coiling, and pinching.
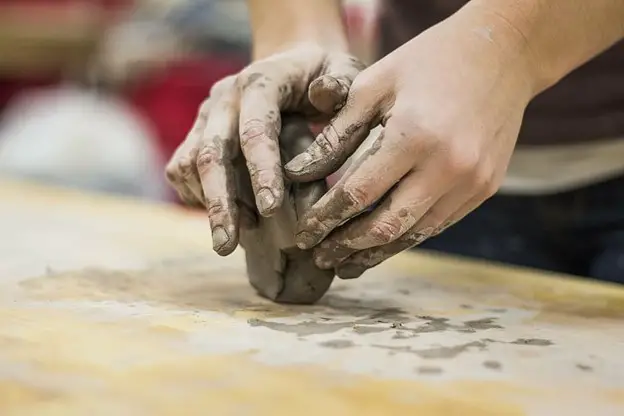
- Pinching is one of the simplest ways to create small bowls or pots using your fingers. In this technique, the ball of clay is placed on your palm, and then you press into the center to create a depression. Next, slowly start rotating the clay in one direction while you simultaneously press the walls out using your thumb. This is a technique that is also seen when making round pizza dough. When pinching, make sure you check whether the sides are equally thick.
- Coiling is another form of hand building where potters roll out long individual clay coils and join them together to create larger pieces. Depending on how you want your pottery piece to look, you can smooth out the walls or leave it as such showcasing visible texture. When joining two pieces together, make sure you check for gaps between two coils and fill them in with additional clay.
- Home potters can also opt for slab building. This process involves joining several pieces of flat slabs together after they are processed via slab rollers or via hand rolling with the use of rolling pins. You can create cylinders, boxes, or plates with this technique.
With hand building, here are some tips that you need to keep in mind.
- Keep Water Usage In Check:
Too much or too little moisture can be a big problem for beginner pottery artists. Make sure you have a sponge that will help add the required amount of moisture to the clay without making it too wet. Additionally, with the help of a sponge, you can also dab out the excess moisture from the clay if you accidentally introduce too much water. If you use less water, the hand molding process can get tedious, and you might be unable to mold it the right way. On the other hand, if you make the mold too watery, the shape won’t stay intact.
- Use Safety Gears:
When you work with clay at your home, you have to keep in mind the safety protocols that need to be followed. In a studio, you will be provided with the essential safety equipment to keep you from harm’s way. However, when crafting on your own at home, this is something you have to take care of. If you tend to use clay powder to form clay, make sure you use a mask and safety goggles to keep the dust from getting into your eyes and nose. Also, you need to use gloves when working with sharp tools to ensure you don’t cut or nick your palm when crafting.
- Keep Your Work Area Clean:
Whether you work in a studio or at home, you must have access to a clean work area. While professional studios have appointed cleaners to clean up after you, the task is designated to you when you craft at home. Make it a practice to wipe off your molding surface every time you craft something new. You can also use your sponge to gently wipe away the surface of any clay remnants.
Wedging Your Clay Is Important
Wedging is an important part of your pottery-making process. This is especially important if you happen to craft with the hand-building process. Whether you are mixing two different colored clay pieces or creating a marble effect, the wedging process is very crucial. This process makes your pottery easy to shape and pliable as well. If your clay becomes too soft, you can keep it in the refrigerator for a few minutes to get rid of the excessive moisture content.
Moreover, when wedged properly, clay doesn’t have any air bubbles, which help shape up the pottery piece and give it a final, stronger shape.
Here are some quick benefits of wedging explained:
| Benefits Of Wedging | Final Output |
| Create A Homogenous Clay Mixture (Consistency) | Proper Wedging Makes Clay Smoother With Fewer Lumps Or Chunkiness |
| Get Rid Of Dry Patches | Clay Stored For Long Term Can Have Uneven Dried Parts. Wedging Helps Mix Up The Hardened Dry Places And Spread Out The Moisture Evenly |
| Avoid Cracks Or Stress To Clay | When Molding With Properly Wedged Clay, The Piece Comes Out Strong And Doesn’t From Cracks |
| Remove Air Bubbles Already Present In Clay | Air Bubbles Can Put Your Crafted Piece Off Balance, Especially When Working With Pottery Wheel. Wedging Helps Get Rid Of Bubbles. |
| Recycle Old Clay | Leftover Clay Portions Can Easily Be Mixed To Create A Smooth Texture And Avoid Any Unwanted Wastage |
Storage Necessities When Making Pottery At Home
When building pottery pieces at home, the task can get tedious at times, and you might end up leaving the work midway to rest. However, if you leave your clay out for too long, it might dry out. This is especially important if you happen to use air-dry clay for your projects. Therefore, placing your clay in air-tight zip-lock bags is ideal for preserving its moisture content and using it for the long term.
An ideal spot is a cool and dark environment away from direct sun. However, you also have to ensure that the clay doesn’t reach freezing temperatures. In certain cases, when not stored well for the long term, the clay might end up forming mold growth. While a small mold growth can be taken care of and the clay can be salvaged, if the mold has taken over the entire clay piece, you might have to throw it away.
If you have the habit of buying clay in bulk, you must divide the larger pieces into smaller portions and store them in separate air-tight bags. The next time you build something, make sure you take out the required amount of clay and leave the rest. This will preserve the clay for a longer time.
Conclusion
When starting, crafting with clay at home can seem tedious, but it doesn’t have to be. Ensure that you work slowly and steadily step-by-step, and remember not to hurry. Even if you do not succeed with your first piece, practice will get you there. Make sure you start slow and purchase smaller kits in the beginning. Even if you feel strongly about your skills, do not invest in one go. This will help prevent any possible losses. While buying in bulk might seem lucrative, do not invest a large sum if you are just starting, and follow our tips to avoid any mistakes when crafting at home.


