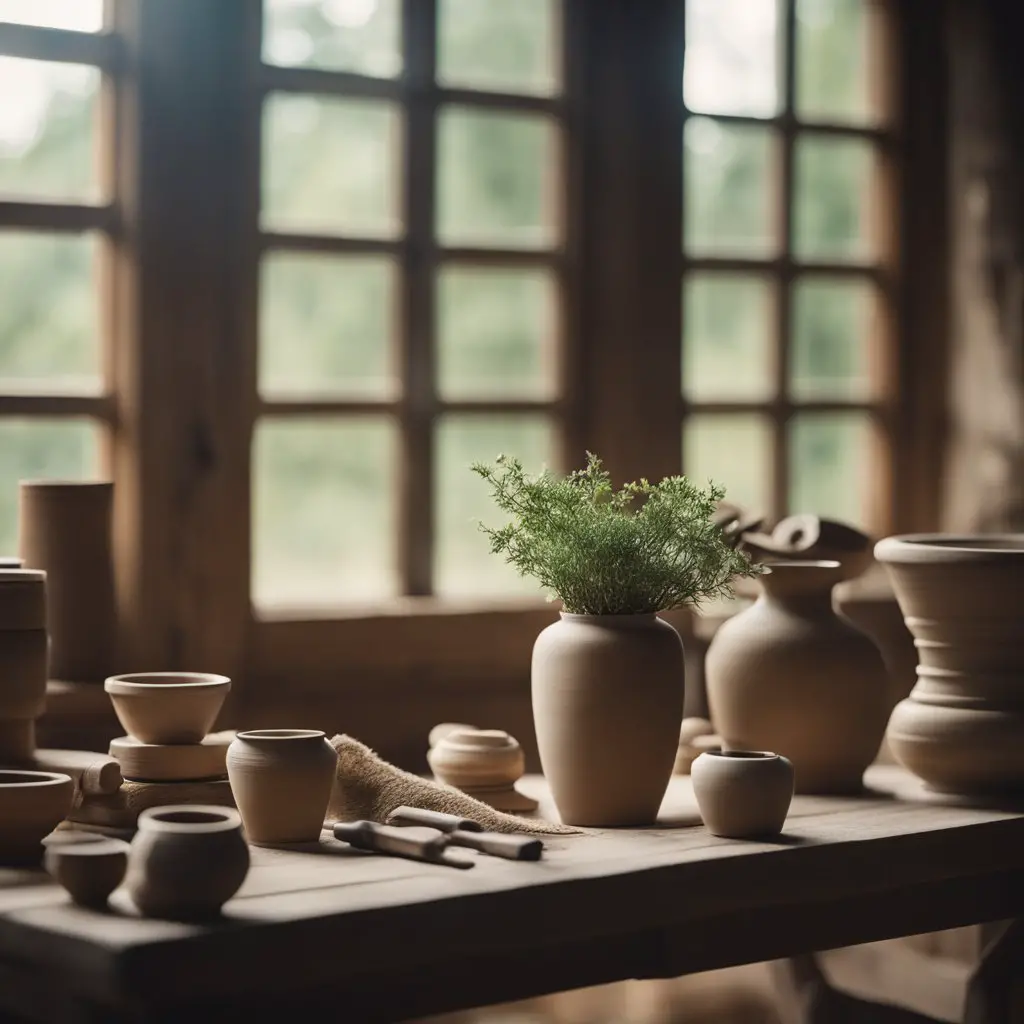
For a pottery enthusiast who is just starting, the world of pottery might seem a tad overwhelming. While you surely need some basic tools to create those masterpieces, some of the costlier ones can be avoided at the beginning of your pottery learning process. You do not have to spend 1000s of dollars to buy a kiln or a pottery wheel to create something beautiful. All you need are some ideas and the will to learn and experiment. Most of all, you need patience! So, if you are wondering whether you can make pottery at home without a kiln or wheel, the answer is yes. So, let us check out how exactly you can achieve this feat!
Best Clay For Pottery Without A Kiln Or Wheel
Most clay variants like porcelain, earthenware clay, ball clay, or stoneware clay require the use of a kiln to achieve permanency. They have a high firing temperature and cannot be fired with the help of a regular oven or microwave. Yes, you can mold and shape them without a pottery wheel and dry them out completely with the use of a microwave. However, you cannot help the pieces achieve strength and permanency without kiln firing.
So, what is the best clay that can be used for beginner pottery artists who do not have access to a wheel or a kiln? The answer is air-dry clay and polymer clay.
Air-Dry Clay:
As is evident from the name, air-dry clay doesn’t require firing as it dries on its own. Therefore, it is the perfect medium ideal for crafters of all ages. In addition, you don’t require high-end tools to use this as compared to traditional clay, which requires glazing and firing.
Moreover, with a few basic tips, you can easily sculpt air-dry clay and save money.
Here is why air-dry clay is perfect for beginner pottery enthusiasts who don’t wish to invest in expensive kilns or pottery wheels.
- Easy Moldability:
Air-dry clay is smooth to knead and isn’t as sticky when compared to traditional clay. As a result, it is easy to sculpt, craft, model, and manipulate. Just remember to keep it lightly moist to increase the molding time, as it tends to dry out super quickly.
- Durability:
While most pottery artists debate the clay’s durability stating that it tends to break easily, that is not the case. It depends on how well it has been crafted. Remember not to roll it out too thin, and it would be just as durable as any other clay art.
- Non-Toxic:
Commonly used, air-dry clay is non-toxic as it is also used by children of all ages. It is made primarily of earth or paper-based. However, some variants, such as epoxy air-dry clay, tend to undergo chemical curing, which might cause skin allergies in some users. However, it is generally considered safe.
The ingredients can vary from brand to brand, so make sure you check them out before making a purchase. A great choice would be the Crayola Air Dry Clay. This air-dry clay comes in a re-sealable bucket that helps preserve moisture for a long time.
- Easy Customization:
You can use air-dry clay for almost every project, given its customization feature. It can be stamped, painted, colored, and a lot more. You can also imprint a stencil on it or even transfer an image. With air-dry clay, customization is very easy.
- Cheaper Alternative:
Air-dry clay is cheaper as compared to normal clay, such as earthenware clay, stoneware, or porcelain clay. So, if you are just starting your pottery journey, air-dry clay is the perfect alternative to other clay variants. It can be a cheap medium to practice molding. Truth be told, when starting out, you are bound to make mistakes as you learn. So, wasting expensive clay isn’t fruitful if you have a small budget.
When learning, air-dry clay is what you should opt for!
Alternatively, you can also work with polymer clay which doesn’t dry on its own during the molding process. If you are a slow crafter, you might have issues crafting with air-dry clay as you would have to get it wet time and again. However, with the help of polymer clay, you can work on your project for as long as you want.
Polymer Clay:
Polymer clay is popular for its pliability, versatility, and simplicity. It can be baked in an oven or a microwave. The clay is comprised of resins, polymers, fillers, and coloring agents. Although it is man-made clay, it is just as versatile as air-dry clay or any other clay used for pottery. Moreover, it doesn’t dry out on its own and needs to be baked to harden.
So this gives you enough time to mold the artwork without having to worry about it drying out too soon.
Here are some features of polymer clay that can help you create some beautiful artwork without a pottery wheel or a kiln.
- Non-Toxic:
Do you wish to decorate your coffee mug with cute little polymer clay sculptures? Well, don’t worry about toxicity. Instead, you can create some beautiful mini sculptures and design amazing pieces to amp up your décor game with polymer clay.
Polymer clay is considered non-toxic and is completely safe for use by children. Even if you have pets at home, it is considered safe. However, you should keep in mind that it shouldn’t be consumed. Given that it is made primarily of plastic, if children use it, they should be accompanied by an adult to prevent swallowing or biting into the clay.
However, if you are a beginner crafter, it is just as safe as any other clay.
- Shorter Preparation Time:
Air-dry clay tends to take a lot of time to dry out. So even if you try to speed it up, you might end up with a project that is cracked. On the other hand, polymer clay can be a great choice if you are looking for a project that doesn’t require a lot of time. While the molding time would entirely depend on your capability, it can be baked within hours to harden it.
For smaller projects, it could also be wrapped up in minutes. You just need to know the right temperature. This can often be found explained in the packaging of the polymer clay.
- Shrinkage Is Less:
While air-dry clay is notoriously popular for its high shrinkage rate post-drying, polymer clay cannot be blamed for the same. Although it does shrink a bit, the shrinkage rate isn’t as high. So you won’t have to worry about upscaling the size of your pottery piece.
- Durable:
Polymer clay is just as durable as air-dry clay, if not more. When baked correctly, it doesn’t shatter or weaken over time. However, keep in mind that cracking may occur if the clay is over-baked or under-baked. Yet, these cracks can easily be repaired. Simply fill these cracks with some plumber’s putty, let it dry, and sand it down. Finally, paint it to match the clay.
While both air-dry clay and polymer clay are perfect for creating artwork without the use of a kiln and pottery wheel, it would depend on the individual potter’s choice.
Here are some differences between these two clay types:
| Features | Air-Clay Dry | Polymer Clay |
| Moldability | Easy To Mold | Easy To Mold |
| Moisture-Retention | Loses Moisture When Molding | Doesn’t Lose Moisture When Molding |
| Firing/Baking Needed | No | Baking Required To Harden |
| Waterproof | No | Yes (After Baking) |
| Durability | Strong After Drying | Stronger Than Air-Dry Clay After Baking |
| Toxic | All-Natural (Brand Specific) | Can Be Toxic When Consumed |
Basic Tools For Pottery Without A Kiln Or Wheel
1. Rolling Pin:
Given that you don’t have access to a pottery wheel, you would have to work around other tools to ensure that your artwork is even. This can be done with the help of rolling pins. So, what are those? Rolling pins are the perfect tools to help you roll out big chunks of clay and achieve even thickness. They are ideal for pottery artists who are into hand-building. Most rolling pins are usually made from solid wood, metal, or acrylic.
Rolling out an even slab is important for pottery artists. So, a rolling pin is no doubt a crucial tool for your pottery-making journey. If you love to see your clay while rolling, you can go for transparent acrylic rolling pins. While metal or wooden rolling pins are just as great, they can be a tad heavy and not ideal if you tend to work for long hours. Moreover, wooden rolling pins would have to be dried out properly to ensure that mold doesn’t form on the surface.
2. Pottery Needle:
Pottery needles are ideal for trimming or cutting clay with precision. If you try to cut the clay with a blunt-edged tool, the clay piece might warp and get disfigured. So, the key is to use a pottery needle that helps trim off excess clay from the pottery’s edges. It is a versatile tool that can also be used to score clay. Scoring involves creating a rough surface on the clay while you join two pieces together. The needle aids in making shallow cuts/scratches on the surfaces.
You can also use pottery needles to carve beautiful designs on the clay surface. Moreover, it is the perfect tool to poke air bubbles that might form while kneading clay. The needle will help release the air trapped inside the clay.
3. Sponge:
A sponge is used primarily to keep the clay moist during the pottery crafting process. Pottery takes up a good chunk of your daily time, and some pieces even require multiple sittings for completion. With a sponge, you can maintain the moisture content of your clay to keep it moldable for hours. It can also serve as the perfect tool to smoothen the clay. Potters can gently rub the sponge over the clay surface and remove any imperfections or bumps. While a sponge does help in adding more moisture to the clay, it can also help remove excess water from the same. Simply use a dry sponge to absorb extra moisture from the clay surface. Sponge also serves as the perfect cleaning tool to wipe away any excess residual matter from clay. If you have had trouble blending the seams of your pottery piece, using a sponge can be the perfect solution.
With the help of these tools and either air-dry clay or polymer clay, you can create some stylish and vogue pottery pieces that do not require the use of a kiln or wheel.
Make Coil Pots
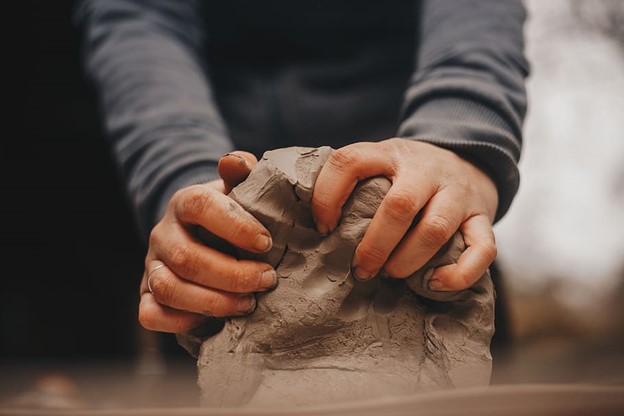
You might think that pots can only be made with the help of a wheel, but that isn’t true. Several DIY techniques can help you craft better. This technique is a fun and simple way to build pots and doesn’t require a lot of expertise. So, it’s perfect for a beginner-level artist.
Start by creating a round base for your pot. Then take a few balls of clay and roll them in your hands to create coils. Now, layer each coil on the round base and form a circle by joining the ends together. Depending on the shape you wish to create, the coils can differ in size. Do not forget to slip and score the ends so that they stick together properly. Once you are done stacking the coils and your shape is ready, smear the inside of the coils going all the way to the base. Ensure that the outside maintains its coil-like shape. Once your project is dry, depending on the clay you used, you can either paint it or pop it into the oven for baking.
Conclusion
Having a kiln and a wheel helps you create some complicated and beautiful pieces, but it doesn’t have to be the case. If you are learning the art, start simple. Learn more about pottery as you upgrade your tools and mediums. The world of pottery is versatile, and all you need is the zeal and a creative outlook to create something magnificent out of a ball of clay.


