Ceramics are a mixture of clay, powders, and water. It takes skill and practice to mold an earthenware, stoneware, or porcelain piece. Artistically, there’s a lot that can be done with ceramics. They are beautiful with a glaze that gives the pottery a polished and glossy look. You can also leave it bare without a glaze for an earthy look.
Decorating is another option to explore when dealing with ceramics. Interesting patterns, colors, and textures can be added to a pot to enhance its beauty. Depending on its desired use, it may not be advisable to use regular art supplies on ceramics. However, you can safely use masking tape in the kiln as it burns during the first firing.
Why Is Tape Used In Pottery?
As a product grows in popularity, consumers become interested in having different colors, textures, patterns, and designs. Ceramics have always been in trend and are no longer only seen as valuable show pieces.
Consumers and pottery enthusiasts are now interested in personalizing their pottery to depict their preferences or find different combinations of patterns, textures, and colors such that it defines their tastes while being visually appealing.
Unlike a few centuries ago, consumers are no longer interested in only classic pottery pieces. With the onset of trends like stripes, blocks, geometric designs, animal prints, etc., clothing and items like mugs, pots, etc., have these designs on them, making them quirky and preferable to modern consumers.
The tape helps in sectioning off areas of the clay body. It allows adding details to specific areas while leaving the covered parts untouched. It helps in creating unique designs.
How Can Tape Be Used To Decorate?
Using tape is not a very new concept. A tape is a tool that can be used in multiple ways to produce varied effects each time based on the clay type it is used on and the process in which it is used.
-
As A Resist
As the name suggests, the tape can be used as a resist for a glaze. However, a clay body must be dunked in completely or sectioned manually if it is glazed without using tape. It means that the ceramist has to glaze the body so that only the part intended to be glazed is covered while keeping the other sections from getting in contact with the glaze.
Instead, the ceramist can use tape before glazing to section off parts of the ceramic. The tape protects the sections or makes designs on which the glaze does not transfer.
-
During Bisque Firing Before The Glaze
Bisque firing is an essential part of making a ceramic. It is the very first stage of firing when the molded pot is placed in a kiln. The temperature of the kiln varies based on the kind of clay. Commonly, kilns are fired at 1830–1940°F or 999-1060°C. It equates to 4-6 Cone.
The exact temperature to fire different clay types is given in the table beneath.
Bisque Firing |
Stoneware |
Earthenware |
Porcelain |
Cone |
Cone 4-7 |
Cone 4-6 |
Cone 8-10 |
In Degree Celsius |
1070-984°C |
1070-1000°C |
955-894°C |
In Degree Fahrenheit |
1930-1770’F |
1930’F-1815’F |
1750-1641°F |
Irrespective of the clay, glazing, and bisque firing temperature, bisque firing is a step that cannot be skipped. It removes any moisture in the clay and makes it dense and porous to allow the clay to become ceramic so that the glaze can settle on top when applied.
You may use tape on your product before putting it in the kiln for a bisque firing. But the clay still contains moisture, which may cause the tape not to stick.
If you can manage to tape your clay, then go ahead and place it in the kiln. If it does not peel off, it will result in a different color for the covered sections compared to the uncovered portions.
-
Over The Glaze
The use of tape does not end after a single coat of glaze. Glazes come in different colors, and if you make appropriate choices, you may be able to glaze your ceramic twice or even more!
After glazing your ceramic once, let it dry completely. It is essential to produce clean results. Use your tape to create the desired pattern. Reglaze the ceramic using a different color to show a contrast in design.
What Kinds Of Tapes Can Be Used?
There are various kinds of tapes available in the market. You can choose one based on its affordability and efficiency. Alternatively, you can use what you have at hand, although its efficiency is not guaranteed.
-
Electrical Tape
Electrical tapes come in varying widths, which can be used for making assorted patterns. They stick better to the surface and are stretchable, making them easy to work with. In addition, they do not burn and melt into the ceramic, unlike paper-based tapes.
-
Automotive Pinstriping Tape
Automotive pinstriping or auto trim tape is used to create designs on the body of vehicles. Its width is relatively less when compared to most tapes. Therefore, it makes it easier to make intricate designs.
Similar in composition to electrical tape, it does not burn in the kiln or smoke. It peels off easily. The only caution you need to exercise before using the tape is to wipe the clay body. If the surface has dust after bisque firing, the tape may not stick.
-
Whiteboard Tape
This tape is thin and can be used to make detailed patterns. While it is not the best option, it is better than masking tape.
-
Scotch Tape
Scotch tape is made of plastic, which is likely to burn and melt into the ceramic while in the kiln. Therefore, it is best to avoid this tape type.
-
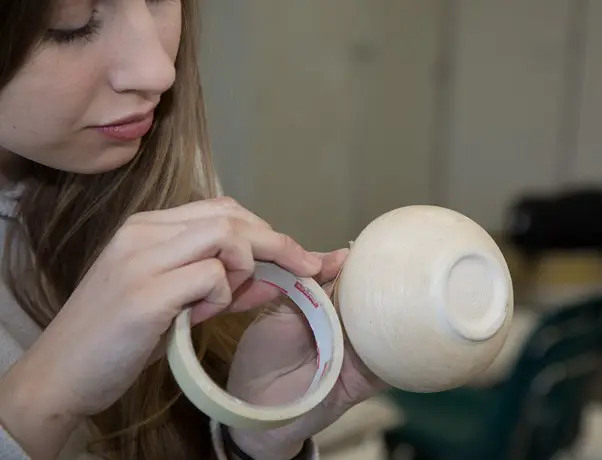
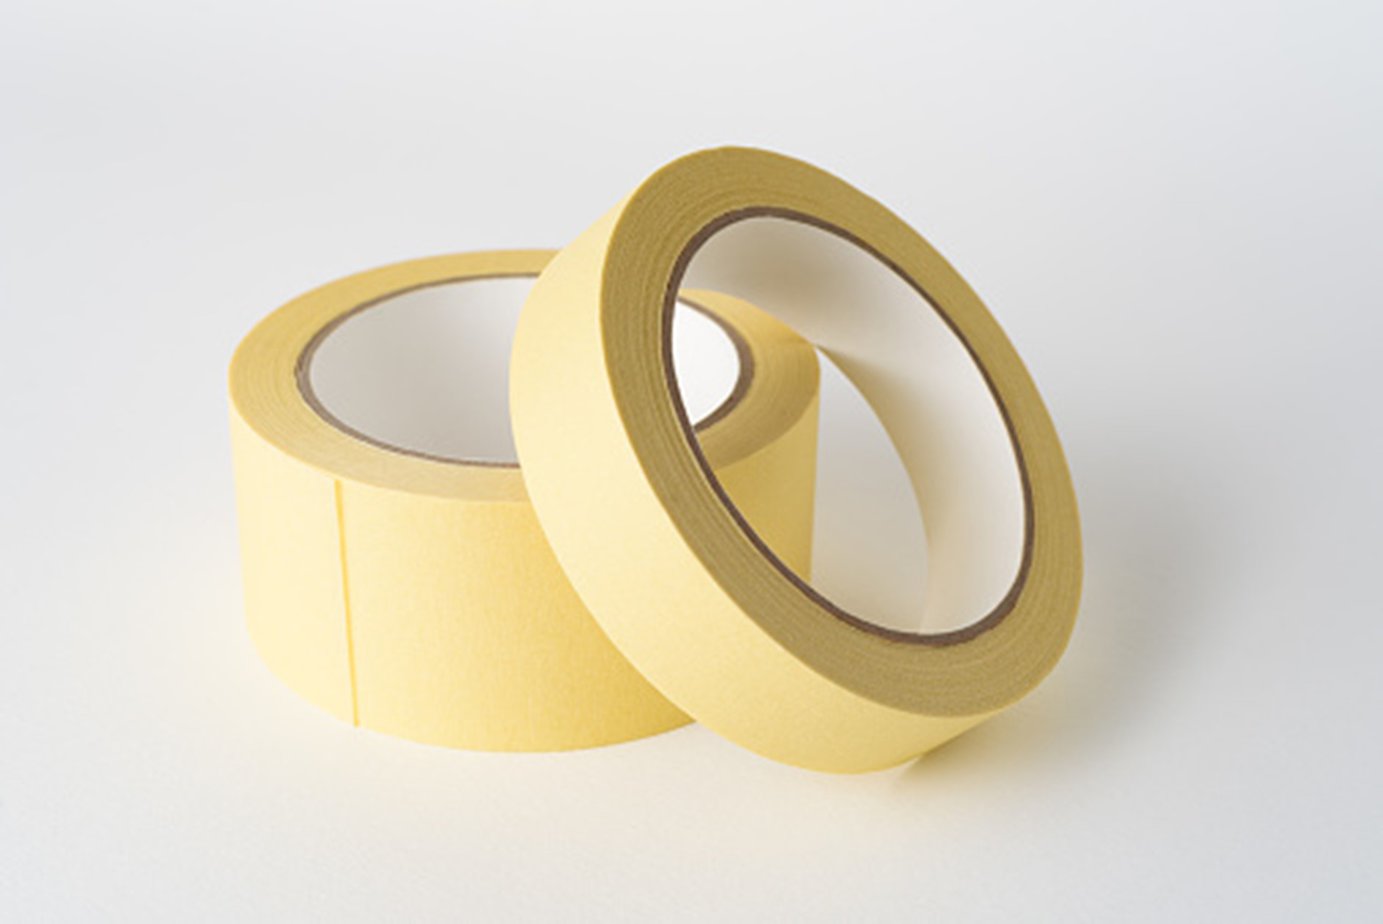
Masking Tape
Masking tape is made of thin paper, a relatively weak adhesive, so it may not be the best choice for use in pottery.
However, if you wish to use masking tape, XFasten Professional Blue Painters Tape is a great option that does not leave any residue in normal usage and provides clean edges.

Will Masking Tape Burn Off In The Kiln?
Masking tape can burn off in the kiln, which may defeat the purpose if used during bisque firing.
The ashes may stick to the ceramic, which requires cleaning before further processing. Ideally, use auto-trim tape or electrical tape for the best results.
Alternatives To Tapes
You do not need to use tapes only for this purpose. If you have any of these household items listed below or similar things, use them to mimic a tape and create designs on your clay.
-
Stickers
A sticker is an excellent way to use what you have and save time and energy. Placing stickers is more straightforward than dealing with individual pieces of tape. If you can find stickers in the shape you wish to use as your design, do not hesitate to use them on your ceramic.
-
Contact Paper
Contact paper can not only be used to cover large surfaces as temporary wallpapers or desks but also to make designs on your ceramics or clay.
Like newspaper and tape, contact paper is a cost-effective solution allowing ceramists to make simple or intricate designs.
-
Sticker Paper
Commonly used by kids and artists, this is another easy way to make complete designs on paper before transferring them onto your ceramic.
How To Use Tape?
Using tape is a straightforward process. Irrespective of your chosen method, placing the tape on the clay or the ceramic is a fixed procedure.
-
Dust The Ceramic
For the tape to stick to the surface, it must not have any traces of dust or moisture. Use a dry cloth to wipe the entire surface of the pottery.
-
Sketch A Rough Design
It is advised to draw a rough guide on your clay or bisque-fired ceramic. It gives a clear idea of the placement of the design and provides a draft of the masked pot. Then, you can use tape to section off the ceramic or make designs.
-
Cut Pieces Of Tape
Place a few strips of tape onto a cutting mat. Using a cutting mat will ensure that the blade does not cause damage to the surface beneath.
Once your tape is placed, alter its length and width as per your requirement. If you wish to, you can make small designs on it. The process remains the same even with alternate adhesives.
-
Follow The Guide
Using the rough draft made on the ceramic, place your tape. Using tape that is small in width and stretchable will provide the best results.
-
Glaze
Glaze the body by dipping the clay body or painting it on or by any other method that you prefer. Let it dry for several hours or as per instructions for the best results. Peel off the tape after the glaze has completely dried. Now you can use a tinted or clear glaze on top to give it a polished look.
Tips While Working With Tape
Working with tape is not as difficult as the rest of the pottery process. However, using the below-stated tips can make the process easier, hassle-free, and produce effective results.
-
Clean The Clay Surface
Before placing the tape, use a dry cloth to wipe the pottery piece. If there are any dust particles, dry powders, etc., on it, they need to be removed so that the tape does not stick to it and instead lies flat on the clay.
-
Use Moisture-Free Clay
The clay body must be free of moisture for the tape to stick. Therefore, before cutting out your tape pieces, make sure that your clay has dried for a few hours, depending on the type, so that the tape can stick on it perfectly and give clean sections.
-
Clean Hands
Tape or adhesive material sticks to any surface it can latch onto. So, keep your material organized and work systematically to prevent the tape from getting stuck onto your hands or places on the pot where you do not intend to use it.
-
Cover The Floor
Irrespective of the type of tape you choose, the glaze that covers it is bound to chip off and fall, making your floors messy. Cover your floor using newspapers or plastic sheets to clean the mess effortlessly.
-
Do Not Stretch The Tape
While using tape, we tend to stretch it out using our hands to cut it when we do not have scissors around. Using your teeth to cut tape is a similar practice that stretches it out and makes the adhesive’s intended sizes and shapes disfigured.
-
Keep A Sharp Tool Near
It is necessary to keep a pair of scissors, a precision knife, or a blade near you to get precise tape pieces. This way, you can prevent stretched-out tape pieces and get the exact shapes and lengths of tape. This tool will also help position the tape on the ceramic, remove any imperfectly placed pieces or any excess, and remove the tape from your pot.
-
Wait For The Glaze To Dry
Impatience can destroy the result of your efforts. Remember to be patient and give your pot adequate time to dry between coats of glaze. Cut and peel off the tape only after allowing the glaze or paint, depending on the technique, enough time to dry. So, you will see clean, perfect shapes each time you peel it off.
Conclusion
Simply making a structure does not make a pottery piece appealing. To attract buyers or to use it as a showpiece or a household item, it is necessary to make it look visually appealing. You can use tape to section off parts of your ceramic and color or glaze the uncovered sections.
Masking tape may not be the best option as it tends to peel off the pot even before it is placed in the kiln due to its lack of adhesive strength. You can, however, use it for simple glazing after the clay has been bisque fired. Using other tapes that are stronger to last in the kiln is better.


