When creating a pottery piece, simply throwing the clay on the wheel won’t magically transform it into something you desire. So, pottery techniques such as pulling & shaping are important to learn when you are working with a clay lump.
What is Clay Pottery Pulling?
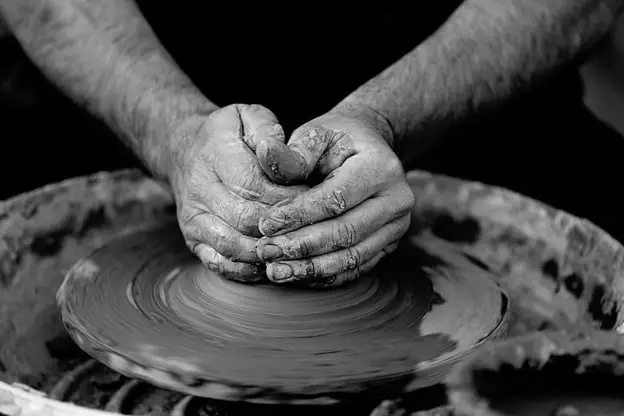
The art of pulling involves the use of hands that starts by pinching on the base clay on the inside & outside and slowly moving the hands in the upward direction to create a wall for the pottery work. The techniques for pulling can differ depending on the shape, size, or style required. However, the key is to keep the pressure as gentle as possible while ensuring that it is firm enough to allow a seamless pull.
Getting Your First Pull Right
Your very first pull decides whether your artwork would turn out a masterpiece or a complete disaster. For your first pull, try to make a shape that is similar to “C” using the left hand. Place your hand in the form of a crab’s claw. In this position, you should be able to place your fingers within the pot while the thumb stays outside.
With a light hand, drizzle a bit of water over the structure’s rim with the help of a sponge. You can use the Mudtools Mudsponge to gently pull the clay. The bean-shaped design of the sponge helps with better hold and easy pulling. Now, start at the clay wall’s bottom portion and gently squeeze the thumb & fingers gently towards one another through your clay mold. This will help bring about a shape in motion.
You will notice a clay bulge forming right above the point you are squeezing. Slowly and with patience, pull your clay in the upward direction. During the pulling process, make sure you keep adding bits of water continuously so that the clay doesn’t stick to your hands. However, try to drizzle as opposed to pouring the water. Adding a lot of water can cause the clay to become watery and difficult to maintain shape.
Keep pulling up and lessen the pressure from your fingers as you move towards the upward direction. When you are about ½ inch away from the pottery’s top portion, gently release the grip. Make sure you leave a bit of extra clay in the rim section. This will avoid any tearing through as you release the pressure.
Thinning the Pulled Up Clay Wall
As you pull your clay piece’s wall in the upward direction, you need to ensure that it is even in thickness throughout. In the thinning technique, you need to use both your hands. This technique helps your hands reach down to the base of the pottery to thin out the walls from one end to another.
Depending on whether you are left-handed or right-handed, you can place your dominant hand on the outside while the second one goes inside. No, continue using the fingers and gently move the pressure in the upward direction to thin out the walls. Now, hold a sponge with the right hand and press the fingertips on the sponge, and dab on the pot’s base.
Using a sponge helps prevent the fingers from sticking to the pot. This helps you throw longer with no need to add more water. Doing this also helps avoid issues such as overwatering that could cause the clay to drop on its sides.
Make sure you let the rims stay thicker to ensure there is enough support for the walls. Apart from this, you also need to ensure that the walls are wet both inside and outside. Repeat the process until all sides of the wall reach a 1cm thickness. Going a bit thicker is fine if you are a beginner in the process. You can work on making them thinner with each practice. This helps you get some creative and lightweight vases, mugs, and bowls. You would notice that the wall’s bottom area is a bit thick, so it would require a bit more pressure applied from the fingers to get it to the right thickness.
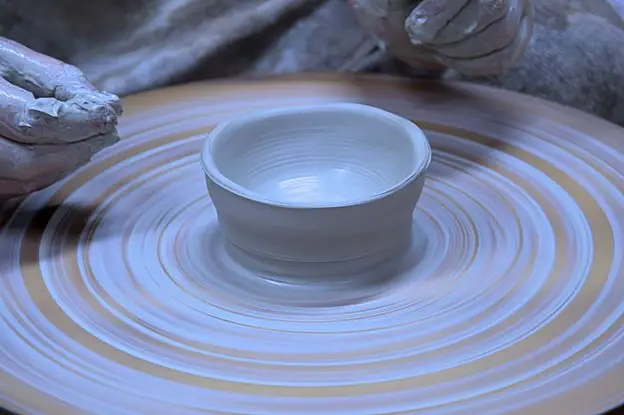
Shaping Up the Walls After Pulling
Depending on the shape you desire, once you have reached the right thickness, you can start shaping up the clay. Use the very same hand positions that you opted for in the thinning process. As opposed to pulling upwards, you now need to pull in a sideward direction to give the bowl or mug its desired shape.
If you plan on pulling a vase, the key is to push out from the bottom towards the top and squeeze in when you reach the neck area. Once you are done, your pot will start taking the shape of your final idea. Do not worry if it doesn’t turn out perfect. The key is to keep practicing and learn from the mistakes.
Tips for Pottery Pulling to Keep in Mind
- In your very first pull, make sure you reduce the wheel’s speed by half at the least. This helps you gain traction and control over the process.
- Try to position your hands in a manner that lays the force more on your body as opposed to the clay. This ensures you can control the amount of pressure applied to the clay during the pulling process.
- Always follow each of your pulls by working your way from the base to the mouth and not the other way round.
- Do not move a lot of material ways too quickly. Take your time and do it at a slower pace. Going too fast can make the walls too thin in certain areas and too thick in others.
Here are some additional tips you can follow along with the reasons that make them ideal during the pulling process.
Tips |
Reasons to Use |
| Use Extra Clay | With extra clay placed on the pottery wheel, you can work around your mistakes during pulling. Moreover, it is easier to cut off anything extra from the top and bottom after the pulling process is done. |
| Use a Stiff Clay Variant | Pulling is easier with soft clay. However, if the clay is way too soft, the piece will become lopsided. So, it is preferable to work with a stiffer clay variant. |
| Use Minimum Water | While water is necessary for seamless throwing process, it might make the clay too watery if you don’t regulate the amount. Use a sponge to ensure easy pulling action. |
| Opt for a Full Pull | During the pulling process, do not ever stop halfway. When you do this, you might see thin wall spots here and there. |
Conclusion
Pottery pulling is an important part of the process for artists that are learning different techniques as a beginner. The initial few pulls will always create a mess. However, it is important not to lose patience and work towards achieving perfection. With each mistake you make, you learn something new. So, keep practicing. Before you start pulling, make sure the clay is truly centered. This will help avoid the clay from getting lopsided.


