Do you wish to embark on a journey that helps you create some remarkable miniature animals with clay? While there are several ways to create one, the easiest and most economical option is no doubt pinch pottery. This hand-building technique is easiest to master when you are learning pottery making and doesn’t require expensive tools to help you achieve perfection. So, how can you create some adorable clay creatures with pinch pottery? Here are some easy techniques to help you craft pinch pot animals!
Easy To Learn Pinch Pottery Techniques To Create Animals
1. Owl:
To create those beady-eyed owls, start by forming a ball shape with your clay. Gently pinch two opposite sides of the clay and form an oval shape that resembles the bird’s body. Now, get a slightly smaller ball of clay that will be attached to the oval body you just formed. While the body is oval, the head should be rounded and then blended into the body seamlessly while maintaining the structure of the two parts.
Now, to create the wings, take two small balls and flatten them out pinching them into a wing-like shape. Attach these wings to each side of the body. Finally, to create the bird’s facial features, gently pinch out a small nose and add two indents on the face using your pinky finger for the eyes. In these indents, add two small balls that would serve as the eyes. You can simply paint it out as you like or use some carving tools to add texture onto the wings and body like feathers.
2. Turtle:
The basic shape to start with to create a turtle is to form a clay disk. Flatten out the clay in a disk-like shape and then start pinching the edges to form a bowl-like design. This curved shape will serve as the shell for the animal. Now, attach a small clay ball to the front side of the clay disc which will be the turtle’s face. Pinch and shape the legs separately with small clay balls and attach them to the disc-shaped body.
Finally, add more details like the eyes, and do not forget the tail. You can either pinch out the disc from the rear end shaping it like a tail or attach one by creating it with another clay ball. Using a scoring tool, you can add texture to the turtle shell. If you are looking for a reliable scoring tool, you can use the Xiem Retractable Pottery Scoring Tool. It comes with 6 tines with a sharp design to ensure precision and depth for proper scoring.
3. Fish:
Fishes are mostly an elongated oval shape unless, of course, you wish to create a puffer fish which is just as easy but with a round shape and a lot of thorny projections. If your goal is to create a simple, regular fish, start with a round and then pinch it out to form an elongated oval shape. Once you have molded the clay into your desired shape, decide which end would be its rear part and which would be its face.
For the rear, simply pinch the piece and mold it into a tail fin. For the dorsal and pelvic fins, you can either create the fins from a different clay ball or simply pinch out the shape from the original body. However, for the eyes, all you need to do is create two tiny clay balls and gently press them onto the face area. Using your fingernails, create an indentation to represent the mouth.
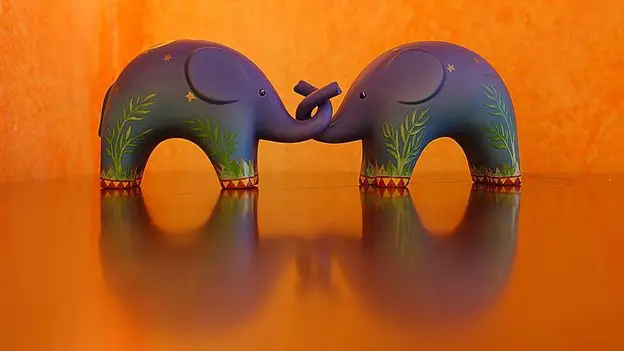
4. Elephant:
If you wish to create a bigger animal, what could be better than an elephant? While it might seem like an animal this big would require much more than the pinch pottery technique, the truth is, that creating an elephant uses basic shapes just like a fish or owl. All you need to do is start with a big clay ball and shape it into a cylinder-like form with the rolling action of your hands.
Make sure it resembles the animal’s body as closely as possible. Now, lightly pinch out a tail-like form from the rear portion of this cylindrical shape. Next, roll out another four cylinders but longer and thinner. These will be the elephant’s legs. Attach it to the body with the help of the scoring technique for a seamless adjustment into the body. However, if you don’t have a scoring tool, you can also use a toothpick.
To make the face, create a round ball, attach it to the body, and blend it smoothly. Finally, pinch out the face to form a trunk and the external teeth. You can also create it separately and attach it to the face along with two round pieces of clay for the eyes.
5. Snail:
Although small, snails can be a bit tricky to perfect. It involves more of the rolling technique as opposed to the pinch pottery technique. To create a snail, start with a clay ball and roll it into a long tapered cylindrical shape. Now, round up this cylindrical shape into a flat spiral to mimic the snail’s shell.
Now, roll another cylinder and flatten one half of the cylinder while keeping the second half as it is. On the flat part, place the shell you formed earlier. On the rounder part of the base cylinder shape, add two clay balls on top that will form the face. Finally, with the help of your fingernails, create a small indentation to create the mouth.
Conclusion
These are some of the basic animals you can create with the pinch pottery technique. However, if you wish to create some complicated shapes with this technique, you might also have to pair it with other hand-building techniques. While you won’t need any tool when working with the pinch pottery technique, it is better to have a scoring tool to join the parts better for added strength. Remember, it might get overwhelming at times when creating some complicated shapes. However, it is important to have fun and let your artistic expression flow. Pinch pottery can be a particularly therapeutic activity that allows you creative freedom. So, if you are bored with regular animals, you can also experiment with imaginary ones!


