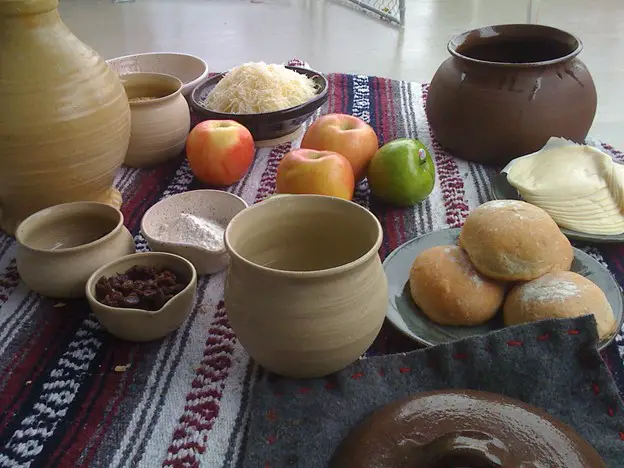
Pottery-making is an enjoyable and therapeutic activity that can be done from the comfort of your own home. Not only is it a fun hobby, but it also allows you to create unique food-safe pottery.
This guide will show you how to make food-safe pottery step by step, from choosing suitable materials to the final firing process. You’ll learn the techniques for shaping, drying, and glazing your pottery to ensure it’s safe for use with food.
So, whether you’re a seasoned potter or just starting out, this guide will provide you with everything you need to know to make beautiful and functional pottery pieces for your kitchen.
How To Make Food-Safe Pottery At Home?
Pottery making is a great hobby that can be done from the comfort of your own home. However, choosing the right materials for your pottery, including clay and glaze, is essential. The preparation methods are crucial in shaping clay into the desired form. Also, letting the pottery dry properly before bisque firing is vital, as it prepares the piece for glazing. The glazing process is crucial as it gives the pottery its final appearance and makes it safe for food use. After the glaze firing, your pottery will be ready to use and enjoy.
1. Choosing The Right Materials
When making food-safe pottery, it’s essential to choose the proper materials. It determines the safety and the procedure you must follow for your crockery. The most crucial factor is selecting a clay that is non-toxic and free of contaminants that could leach into food and harm your health.
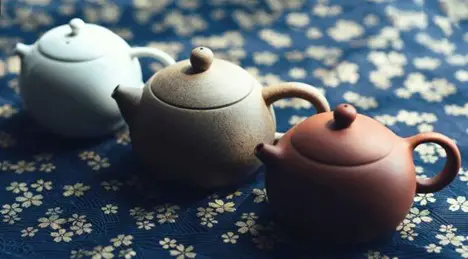
A popular choice for making food-safe pottery is stoneware clay, which is dense and durable, making it ideal for use with food. Stoneware clay is naturally resistant to absorption and can withstand high temperatures. Hence, it’s safe for use in the oven, microwave, and dishwasher, making it a perfect choice for food-safe home pottery. Old Potters Mid-High Fire White Stoneware Clay is an excellent item to opt for creating cookware or decoration pot.

Another material to consider is glaze. Choosing a food-safe glaze that does not contain harmful chemicals is essential. Most commercial glazes are formulated to be food safe, but it’s important to double-check the label. Some glazes may contain lead or cadmium, which can be harmful if ingested. Be sure to select a glaze that is labeled as food safe.
In addition to choosing a suitable clay and glaze, it’s also important to consider other materials, such as underglaze and engobes, that may come into contact with your food.
So, here is a comprehensive list of items you’ll need to make food-safe pottery at home.
| Materials/Tools | How Does It Help? |
| Pottery Clay | Choose a food-safe clay suitable for your project |
| Rolling Pin | Roll out the clay to desired thickness |
| Pottery Wheel | Shape the clay into the preferred form |
| Kiln | Fire the clay and make it strong and durable |
| Pottery Glaze | Make the pottery food-safe and give it a glossy finish |
| Paintbrush | Apply the glaze evenly on the surface |
| Water | Keep the clay moist while shaping |
| Sponge | Clean the pottery before glazing |
The bottom line is to select materials that are non-toxic and food safe. With suitable materials, you can feel confident in the safety and quality of your food-safe pottery.
2. Preparing The Clay
The first step to making food-safe pottery is preparing the clay. You want to ensure that your clay is clean, free of debris, and adequately mixed before you start shaping it into a pottery piece. First, start by sifting the clay to remove any rocks or other debris that might be present. Then, break the clay into small pieces and add water to it. Mix the clay and water until it forms a smooth, homogenous mixture with no lumps.
The consistency of the clay should be similar to that of the cake batter. If it’s too dry, add a bit more water; if it’s too wet, add a little more clay. Once the clay is mixed correctly, you can start shaping it into your desired pottery piece. Keep in mind that the clay will need to dry completely before firing. It’s best to work with small sections at a time to ensure that the clay doesn’t dry out too quickly.
3. Throwing And Shaping The Pottery
Throwing and shaping the pottery is one of the most exciting parts of the pottery-making process. Gather your clay and knead it until it’s pliable and smooth. Then, center the clay on the wheel and use your hands to shape it into a ball. Start the wheel spinning and use your hands to apply pressure to the clay, creating the shape you desire.
It’s essential to keep the clay moist and to add water as needed to prevent cracks. Once you have the basic shape, you can refine it using various tools, such as ribs and paddles. You can also use your hands to add texture and details to the piece.
When happy with the shape, you can use a wire tool to cut the piece from the wheel and set it aside to dry. It’s important to be patient and take your time when throwing and shaping the pottery. If you rush, the result can become uneven or damaged pieces. With practice, you’ll be able to create beautiful and functional pieces for your kitchen in no time.
4. Drying And Bisque Firing
Drying and firing the clay makes the pottery hard and gives a final shape to your pottery. To dry your pottery evenly and prevent cracks, it’s best to place it in a warm, dry room and let it air dry slowly over a few days. You can also use a slow-drying method, such as covering the piece with plastic wrap or a damp cloth, to help prevent cracking.
Once the pottery is completely dry, it’s ready for bisque firing. Bisque firing is crucial because it helps harden the clay and remove moisture. During bisque firing, the clay is heated to a temperature of approximately 1000-1200°C. Bisque firing aims to make the clay body porous and ready to accept glaze.
However, firing your pot at the right temperature is crucial. So, here is a list of materials and their suitable bisque firing and glaze firing temperatures with recommended firing schedules. You must follow this for better results.
| Material | Bisque Firing Temperature | Glaze Firing Temperature | Recommended Firing Schedule |
| Porcelain Clay | 1050°C – 1100°C | 720°C – 780°C | 12 hours at maximum temperature, followed by a slow cooling process |
| Stoneware Clay | 1150°C – 1300°C | 720°C – 780°C | 12 hours at maximum temperature, followed by a slow cooling process |
| Earthenware Clay | 900°C – 1000°C | 720°C – 780°C | 12 hours at maximum temperature, followed by a slow cooling process |
| Lead-Free Glaze | – | 720°C – 780°C | 8 hours at maximum temperature, followed by a slow cooling process |
If you’re making pottery at home, you can create a bisque firing using your oven. Place your dry pottery on the shelf and heat it in the oven for several hours. Make sure to keep the temperature consistent and monitor the pottery regularly to avoid over-firing or cracking.
Another option can be a large electric kiln, which you can purchase or rent. Kilns are the preferred method for bisque firing because they provide a consistent and controlled environment, making it easier to achieve the desired results. However, if you’re starting out, using your oven is a great way to get the hang of bisque firing and see if pottery making is for you.
5. Applying Glaze
Choosing and applying glaze is crucial as it will be directly in contact with your food. Glaze not only enhances the appearance of your pottery but also provides a protective layer that prevents the absorption of liquids and bacteria. Before applying the glaze, ensure your pottery is thoroughly dry and free from dust or debris.
To apply glaze, start by mixing the glaze according to the instructions provided. You can use a brush or a sponge to apply the glaze evenly to the surface of the pottery, being careful not to leave any thick or dripped areas. Some potters prefer to dip their pottery into the glaze, but this method can be more challenging to control.
After applying the glaze, allow it to dry completely before the final firing. When firing glazed pottery, it’s essential to follow the instructions carefully to ensure that the glaze reaches the right temperature and consistency. The glaze will melt and flow, creating a smooth and glossy surface that is beautiful and functional.
It’s essential to choose a food-safe glaze, as some contain chemicals that are not safe for use with food. Do your research and read the label carefully before purchasing your glaze. With suitable materials, techniques, and attention to detail, you can create beautiful and food-safe pottery from the comfort of your own home.
Caring For Food-Safe Pottery
Caring for food-safe pottery is vital to ensure it lasts for a long time and remains safe for use with food. Proper care and maintenance will keep your pottery looking beautiful and functional for years to come. Here are some tips for caring for food-safe pottery.
- Hand washing is recommended for food-safe pottery, as it is gentler and less likely to cause chips or cracks.
- Avoid using abrasive scrubbers or cleaners, as they can scratch your pottery’s surface. Instead, use a soft sponge or cloth and mild soap.
- Avoid exposing your pottery to extreme temperature changes, such as placing hot food directly into a refrigerator. It can cause the pottery to crack or break.
- Avoid using your food-safe pottery in the microwave or dishwasher, as this can also cause damage to the pottery.
- To protect the glaze on your pottery, avoid stacking pieces on top of each other and store them separately to prevent scratches.
By following these tips, you can keep your food-safe pottery looking beautiful and functional for years to come. And by creating your pottery at home, you can enjoy the satisfaction of using pieces you made with your hands and add a personal touch to your kitchen.
Additional Tips For Making Food-Safe Crockery
It is important to note that not all clays are suitable for making food-safe pottery, so it’s crucial to choose high-quality, food-grade clay. Some clays contain harmful chemicals that can leach into food, so always check the label or research the clay before purchasing. In addition, it’s recommended to use a glaze specifically designed for food use, as some glazes contain lead or other toxic elements.
Keep the walls thick enough when shaping your pottery to prevent warping during firing. Thicker walls also provide a more robust structure for your crockery and ensure it will last for years. Avoid using your hands to shape the pottery, as the oils from your skin can prevent the clay from bonding properly with the glaze.
The drying process is crucial for the success of your pottery. Allowing the clay to dry evenly and slowly will prevent cracking and warping. Covering the pottery with a damp cloth or placing it in a plastic bag can help control the drying process.
Finally, it’s essential to fire your pottery at the correct temperature for the glaze you are using. Firing at too high or too low of a temperature can result in a poorly bonded glaze, negatively impacting the pottery’s food safety. Make sure to read the instructions on the glaze carefully and follow the recommended firing temperatures and times.
Practice and patience are key when making food-safe pottery at home. With these tips and techniques in mind, you’ll be able to create beautiful and functional pottery pieces that are safe to use with food.
Conclusion
Pottery making at home is a rewarding and creative hobby that allows you to create functional pieces for daily use, including food-safe pottery. By following the steps outlined in this guide, you can make beautiful and functional pottery that is safe for use with food. With a bit of patience and practice, you’ll be able to create unique and high-quality pieces that you can use and admire for years to come.


