Many people, usually buy clay from the store. But, did you know that you could use natural clay that you find, extract, and process yourself, to create clay to be used for pottery? Yes, it is possible, and we will go over how to make clay from the dirt, and how to process this and use it for yourself. We will go over the different elements associated with this, allowing you to have and obtain the best clay that you can get.
So What is Clay?
First, let’s talk about what clay is. Clay is, at the bottom of it all, a soft rock that has minerals in it. It’s essentially the leftovers from the rocks whenever they decompose. Some, such as feldspar, do stay with the rock originally, and it is called primary clay.
There is secondary clay, which in essence is clay that goes from the original location, picks up other rocks and minerals, including quartz and limestone, and from there, it settles to a location.
When you’re about to extract your clay from dirt, you need to get rid of the limestone, since it does crack the piece when it’s fired.
Now, you have two types of clay that we should discuss here, and they are:
- Stoneware
- Earthenware
Now stoneware differs from earthenware in terms of temperature, so it’s important to understand that each one has a different set of uses. You should consider this before you go out and extract the clay.
Here are a couple of elements that earthenware entails:
- A firing from 1300-2120 degrees F
- It is used primarily for decorative and not food purposes
- It’s good for tiles, planters, steamers, and bricks if you’re making those
- The firing temperature is very hard and tightness
- It’s virtually waterproof
In contrast, here are a couple of things that you should know about.
- It fires from 2100-2372 degrees F, so you can use it for high-fired pieces
- You can use these for containers and vases since they can handle fermentation
- It’s much tougher, so it’s not prone to chipping like earthenware is
- However, it is much harder to find
You should consider both of these factors when you’re looking to choose clay because it’s much easier to figure out what you want, and what properties you desire from this.
Where to Find It
So where to find it? Well, we already said it’s much harder to find stoneware compared to earthenware, but earthenware is much weaker. You usually see earthenware in the form of Terra cotta flowerpots. Earthenware has a lot of locations, and in essence, you want to look at the following:
- Riverbanks
- Ledges that have material exposed
- Any place that has colors that range from red, gray, and white
With this, you need to remember that the clay might not be super obvious till you touch it. When you do so, you’ll notice it’s got a very different slippery feel, and you can feel it in the dirt or even the sand particles.
But, the best thing to do is to look at the color, since when that’s dry, that’s the best indicator. Now, if you want to know how much clay is located in this, you want to do the following:
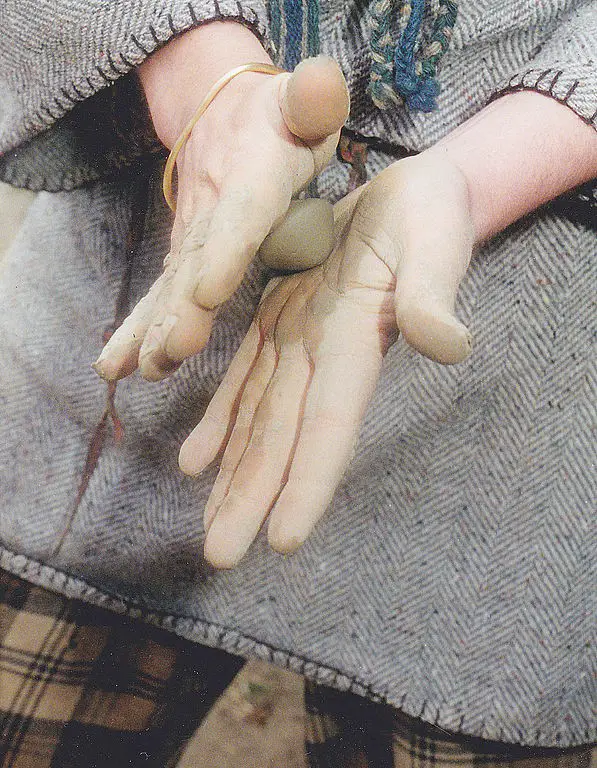
- Add water until it’s at a playdough consistency
- Roll this into a cylinder that’s about half of an inch in diameter
- Wrap this around the finger, and if it does break, toss that since it’s not that good. You’ll be able to find pieces that won’t, and that will affect the firing process of the clay itself.
How to Extract it
For stoneware, there are other extraction sites you can check out, including the following:
- Creek banks
- Seashores, construction sites, and any excavation locations with the topsoil removed
If you have a place with about 8 inches of the earth removed, you’ll be able to find them. You can use a shovel, or even those post-hole diggers, go at least 8 inches into the ground or so, and from there, start to dig through, collect this, and from there, you can process and see what happens.
From here, you want to do something called the smash and soak method, which in essence, you dig it up, smash it, and then soak it until they’re a slurry or liquid clay. Usually, this requires a few steps before you do this, and we will go over them as follows.
You may think just mere soaking would work, but it’s not the case, because it takes a lot more time to take the water in than if they were dried first. This is good however to find out how much plastic is in the clay. Usually, if you have good clay though, you can roll this into a ball shape or something malleable.
Now, to extract the clay, you do the following:
- Collect the clay from this
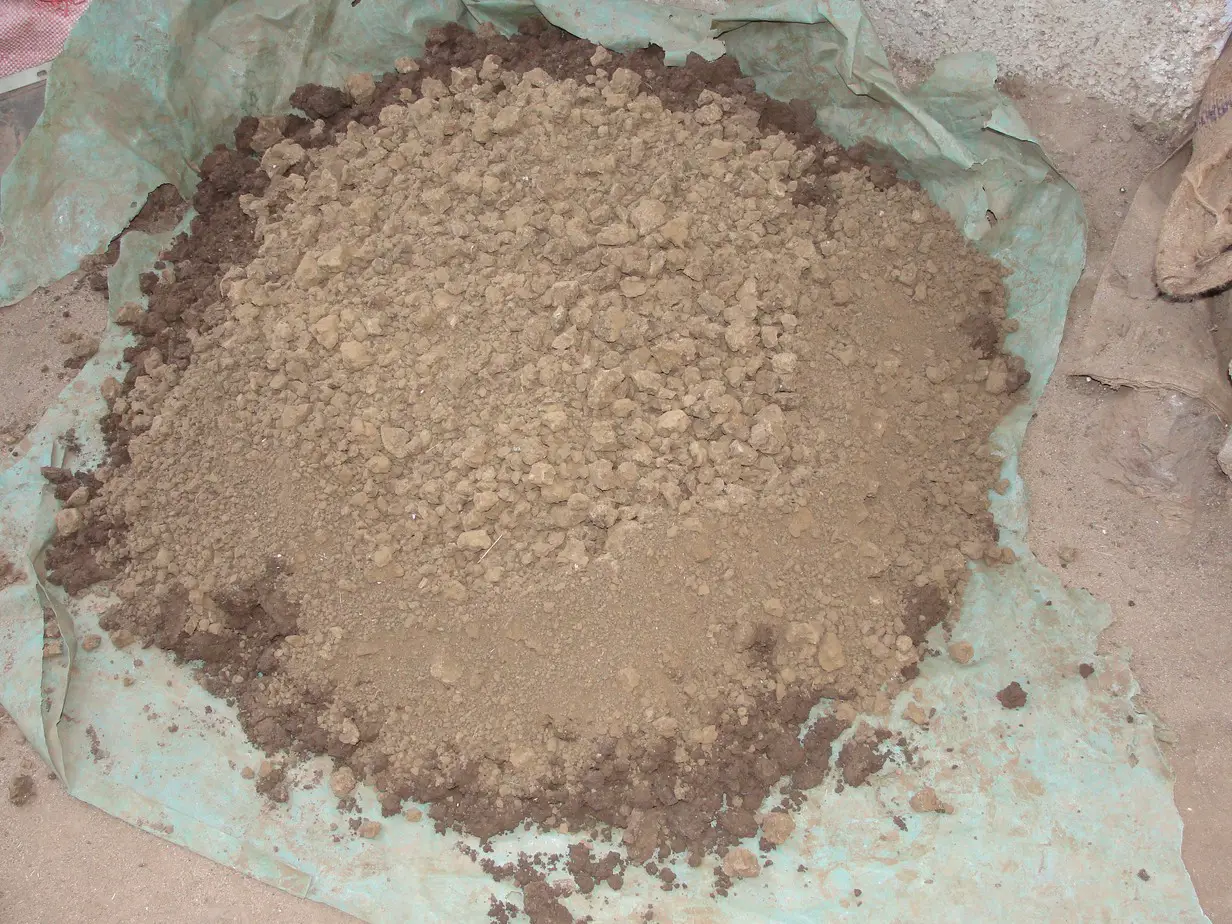
- Put this on a tarp to dry
- Smash it up and get rid of any leaves, pine cones, and the like
- Pound this with either a rock or a hammer, and then take the clay into there. Also, add equal amounts of water to there
- Let this sit at least overnight so that the water can be absorbed
- You can then screen the clay with a screening to get rid of the big debris and hunks. You can do this by pouring the water and the clay into a bucket, and from there smash it once more
- You can then let it sit for a few days, and then pour off the rest of the water
- Continue to repeat this until the product is smooth and mud-covered. Put this in either a cheesecloth, or a pillowcase, and from there hang this up until it drains and you can mold the clay
- You can also put this on a slab of plaster until this dries to a consistent amount. From there, you can fold it while it dries so that it’s even when it comes to dry
- You can then work with it, and then store it with the clay as well
This is the basics upon extraction, and hopefully, you’ll be able to understand it more as we go through the other methods.
How to Water Extract Clay
Water extraction is usually the best way to do this because usually, you can get the most out of this. For example, one amount of clay, about 70 percent of this is used. You can get about 10 pounds of dirt with some clay, and you’ll be able to get at least 3 pounds of high-quality clay, which is a good thing.
Now, most people are a bit scared when it comes to doing this. It’s not that bad, but if you learn how to do this, you’ll be able to create a beautiful set of pottery, without too many issues. It’s usually quite easy to extract, and we will go over this:
- The first thing to do is to take a container and fill about a third of it with soil, and then enough water to fill this. Usually, those 5-gallon buckets and jars work well, and you can adjust this depending on the dirt that you’re using
- Crush the mud to pieces as small as possible, with the clumps broken up
- Once this is lump-free, let it sit in the bucket or container for a few hours
- Stir this and then let it settle. You’ll see that the clay is lighter and will float above. You should look at the mixture, and you’ll even see a color change where the clay and the sediments meet. If you want to keep the “clay water” look to this
- put the clay in a different container. From here you’ll see the sediment gather at the lip of this. If it does, continue to repeat the other steps to get the most clay from this as you can. If you see it, stop, because catching this sooner rather than later is integral
- Take the water and clay mixture that you have and continue the process of mixing, diluting, and settling, from there put the clay water into a third container once this is refined get rid of the last amounts of the sediment that is in there
- Once this is done, let the clay settle for a few hours to a day, allowing it to get to the bottom of the containers Once done, the water should be mostly clear, and there aren’t noticeable changes within the clay as it’s seen. You’ll see the sediment layer below the clay, and continue to repeat this to remove the rest of the impurities within this
- Once the clay is settled and there aren’t any color change lines in the clay as it settles into the water, there will be a small sediment layer that shows itself below the clay, usually a darker and coarser material that’s near the bottom. You should continue steps, 4, 5, and 7 until all of the impurities are gone
- From this point, pour the suspended water into the container lip. If you see the clay pour off within the water, put the container down and let the contents start to settle for a couple of minutes. Begin to continue this until all the water is poured off, and the only clay that’s in there is what’s in the container itself.
- Now, you can take an old bedsheet, or a finely woven fabric, put it over the bucket, and with the cloth secured against the blanket itself, put the wet clay into the center of this. From here, you should take the edges of the fabric and pull them to create a “bag” where you can hold the clay until it’s fully dried. From here, you tie the top area of the bag closed off, and then hold it snugly around the newly formed ball of clay
- From here, you want to use some cordage or rope to put the clay somewhere where it can be undisturbed for a bit. you’ll see water drip out, and it does have either a clear or maybe the color tint of the clay. If you notice any grit or any particles when you feel this, you may not have a fine enough weave to it, so the clay is getting lost. You should get something tighter to re-bag this entire thing
- From here, after a few days, check to see if the clay is soupy, or if it’s gotten firmer. If you’re unsure, put a small amount into your hand, and if you notice that it forms a ball and keeps the shape, then you’re good.
- If it’s not ready, you should re-tie the bag and then let it hang for another day or so before you check again
- Once it’s consistent enough to be used, you can then remove it and put it in a container permanently, and from there, you can temper and mold this for the pottery that you’re about to make.
How to Dry Extract Clay
Dry extraction is the much more popular means to refine the clay, because usually this is much quicker, and often, it’s much faster and has a more hands-on feel to it. If you’re someone who doesn’t mind getting their hands dirty either, this is pretty nice.
However, there are a few downsides to this, and they are as follows:
- It can be harder to get all the foreign materials out without all the right tools
- If you do this, you typically need to have much fancier equipment
But, if you’re looking to have a more classic touch to your clay gathering, then this is the way to go.
To begin, you need to have dry clay. If you need to make the clay dry, you’ll need to let this dry out.
To begin, do the following:
- You need to dry this out completely, either by using some globs near the sun or a fire
- You should make sure the innards are dried out as well before you continue to crush the clay into pieces with any sort of blunt object you’ve got around
- You should make sure that you use blanching force so that you’re not throwing shrapnel around
- When it gets smaller, crush this into bits rather than smash themselves from here, you should have a powdery sort of texture, and you can then run it through a sieve or a screen to get the larger parts out
- You can also use your hands to get the larger parts of this out
- From this point, you want to continue to add water until it’s a plastic sort of texture. From there, you’re good to go
- If you want to continue to make the clay better, you should consider tempering, which we will discuss next
Using a dry means to collect the clay may not be as fun as the wet alternative, but it’s much faster, and it often works very well. Plus, if you’re someone who is down to get their hands dirty, you’ll be able to do that easily with all of this.
Clay Tempering
Now, with clays that are commercial in commercial kilns, you don’t need to temper. Usually, there isn’t a chance that it will explode if you’re just buying clay from the store.
But, if you’re a primitive potter, this may not work, because there are a few things that can potentially happen when you’re using your clay in a kiln.
For example, if you have temperature fluctuations within there, sometimes the particles in the clay itself will cause it to crack, and you could end up destroying a whole bunch of your pottery in just one go. Sometimes, over half of it could be destroyed, and that’s if you have a good kiln and if you’ve built it right.
If you notice that the clay isn’t ideal, or maybe you’re not that experienced, the best way to increase the chances of your survival when it comes to your pieces is to temper.
A temper is when you take larger particles and add them to the clay body. There are a few reasons why this works, and that is the following:
- It lowers the rate of the temperature
- It can lower the expansion rates as well-balanced It will keep it composed together, and it will help keep the clay in the best shape that it cannonballs
Think mostly of tempering as a means for the clay to have something that will cling, such as gravel with cement that is mixed, to make concrete. Many different materials can be implemented here, from sand to even shells and rocks that are crushed, to even organic matter in decent qualities. But, if you do have experience with the clay well, failing, tempering might be the best option to go.
So how do you temper? Well, you, in essence, want to do the following:
- Take the particles and crush them up until they’re a fine powder and granule
- Add in other elements to help it with the actual temperature and state of the pottery
- From there, you can now form the clay body to be successful with this.
Essentially, you’re taking the powdered clay, adding the temper to this, and you can even do this with just the plastic clay itself.
You should take the clay and put this into a disk shape, and from there temper the top of this and then knead it. The only thing that should be of great concern is making sure that you have the temper easily distributed. The amount that you have is case-sensitive. Typically, you’ll need maybe 10% of this by volume, but if you need to add more or less, you certainly can by testing out the situation with each. You can use varying numbers or none at all, and usually, you can figure out what you need to get a decent result from this.
Now that you’ve done this, you can now fire and form the clay. You can use either a commercial kiln or a primitive kiln, but usually, for space, you need a commercial one. If you want to do a primitive kiln, you can use a wood fire that’s simple for this. It’s quite nice, and that’s all that there is to it.
You should take the same precautions that you do with a wood kiln as you do with a normal ceramic kiln. With all of this, you’ll be able to have a simple and easy kiln created, and you’ll be able to use natural clay to create the best results from this.
And there you have it! Everything that you need to know to create your clay from the ground. Some people love to do this because it creates a more natural feeling, and if you’re a fan of trying out primitive actions to create the best clay bodies that you can, this is the way to go. But yes, if you’ve ever wanted to do it, and you know that you live by some clay bodies that are relatively accessible, this is ultimately the way to go, and you can from here, get the clay that you want to have, and you’ll be able to create the pieces that you want without too much trouble. It’s fun to do, and ultimately very rewarding if you’re looking to create bodies of clay that you feel are perfect for you.


