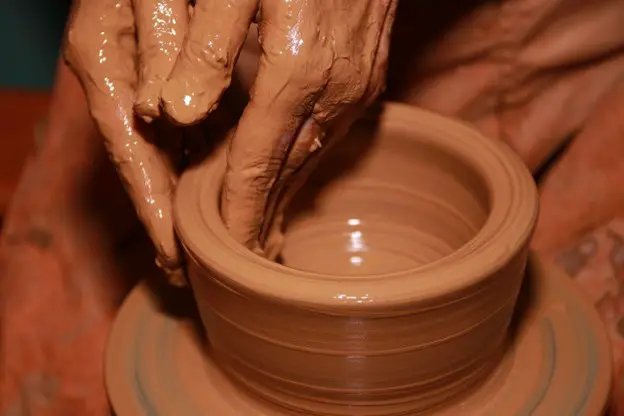
Ever wondered if you could replace your kiln and use a home oven instead for the firing process? This is a question asked by several beginner pottery artists. From years of practice, it is evident that pottery clay cannot be fired unless you have access to a proper kiln. However, there is a way you can create an amazing sculpture or pottery ware without the need to invest in an expensive kiln.
The key is to invest in low-fire clay that can easily be fired in your home oven.
Why Invest In Low Fire Clay?
The best thing about low-fire clay is the fact that it is easy to use and features a minimal shrinkage rate. Plus, they are perfect for slab structures, hand building, or wheel throwing. Most low fire clay variants mature at cone 09 to cone 02, depending on the brand.
When you use low-fire clay, you get access to better workability minus excessive warping or sagging that happens with high-fire clay. Given that low-fire clay doesn’t have to tackle temperature extremities, they don’t shrink a lot. This can be beneficial for beginners who have started dabbling in the art fairly recently.
A great choice for beginners is the Amaco Earthenware Low-Fire Terracotta Clay. It fires at cone 06 to cone 05 and resists cracking, warping, or shrinkage, making it ideal for crafters that are new to this artistic domain.

Let us check out some quick benefits of using low-fire clay:
Color Hue |
Brighter Than High-Fire Clay |
Thermal Expansion |
Low Thermal Expansion Ensures Minimal Cracking |
Porosity |
Porous When Not Glazed |
Warping/Bending |
Less Likely |
Energy Usage |
Requires Less Energy Due To Low Firing Temperature |
How To Use Low-Fire Clay In A Home Oven?
Now that you know about the benefits of using low-fire clay in a home oven let us get to the part where you learn about the best ways to use it.
The first thing you need to keep in mind is that your home oven isn’t designed to achieve high temperatures. This is true for low-fire clay as well. The lowest maturity temperature for low-fire clay is higher than the maximum temperature your home oven can achieve. So, you might need to fire it in a proper kiln to make it permanent.
So, what will your home oven help with?
A home oven can accelerate the drying process and make it usable for decorative purposes. The clay will eventually lose its malleability, but it will still be porous. So, it cannot be used as dinnerware or for any other purpose that requires the use of moisture.
Although it won’t revert to its original form, which is clay, it can become less durable and prone to breaking due to the absorption of moisture.
In order to fire low-fire clay in your home oven, here are the steps you need to follow:
- Start by setting your home oven at a minimum of 250oF and let the oven warm up for a few minutes until it is evenly heated.
- Next, layout baking paper on the baking tray and top it up with parchment paper. This will help prevent the clay from sticking to the tray during the oven firing process.
- For starters, make sure you have a spare piece to test out the oven firing process when using low-fire clay. This will allow you a chance to understand your mistakes and correct them with the main batch.
- Make sure you let your clay air-dry for a minimum of 24 hours, depending on the thickness of the sculpture, to ensure there isn’t any error in the firing process.
- Once the clay feels light in your hands, you can confirm that it is in the bone-dry stage, which is ideal for the firing process.
- In your preheated oven, gently place the tray with the sculptures and let it bake for 30 minutes to one hour, depending on how thick your pieces are.
- Once you have baked your clay pieces, do not immediately remove them from the oven. If you do this, your sculptures might end up with cracks due to this sudden temperature change. So, be careful about it. Allow the sculptures to cool down inside the oven itself. To help the process, you can open the oven’s door and let it cool down gently.
- Once the sculptures have cooled down appropriately, lay it down with the tray itself on a flat surface that is far from your children’s or pet’s touch. The sculptures might still be hot, and they might end up burning themselves. So, select a spot only you can access.
After the sculptures have cooled off completely, you can paint or decorate them as you like. However, keep in mind that they cannot be used as dinnerware due to their porous nature.
Are Oven-Fired Low-Fire Clay Pieces Durable?
If you can just rely on your home oven for clay firing purposes, don’t worry. It isn’t the end of the world. You can create some amazing pottery pieces minus the kiln. There is no doubt that kilns can help you create some perfect clay pieces. However, they aren’t your only option. With proper care and strict adherence to the steps mentioned above, you can create some strong pottery pieces that will stay with you for years.
Maintaining Your Low-Fire Clay Pieces Fired In A Home Oven
There are certain rules you need to follow when taking care of your low-fire clay pieces, especially when they have been fired in your home oven. Let us take a look at these maintenance tips:
- Handwash your pottery instead of using a dishwasher for cleaning purposes
- Don’t drop them or bump them excessively as it could cause chipping or breakage
- Make use of soft detergents and, if possible, avoid them
- Don’t use oven-fired pottery pieces in your microwave
Conclusion
Alternatively, if you need a more permanent solution, you can try and create a kiln on your own. For those adventurous folks, there are several DIY kiln options to try out and experiment with. Regardless, make sure you practice all the safety protocols to the T. After all, safety is a must to help you enjoy your creation to the fullest.


