Hey there, Clay, wheels, slab, rollers, glazes, extruder, kilns. Aren’t you fascinated by the pottery process? Have you ever watched someone work on a potter’s wheel, and found yourself captivated by the smooth vessel and objects pulled up from a mound of clay? It strikes me as both fun and rewarding to turn a piece of clay into art. Are you curious about what it would be like to make your wheel-thrown pottery? If you like working with clay, you may enjoy giving wheel-thrown pottery a try.
Before we dive into the discussion of the day, let’s talk about the advantages of pottery. Most people are blinded to the fact that pottery is more than a means of income. Below are some of the other benefits of pottery:
Pottery is Therapeutic
“We all live busy lives, but when you work with clay, you’re focused on the present moment. You can spend three hours not worrying about anything else”- Louisa Leibman. Research has shown that the creative process of throwing at the wheel lowers the stress hormone in the human body (cortisol). Scientists also discovered pottery reduces heart rate and blood pressure levels and increases positive emotions (no wonder potters are always happy). Sculpting, hand-building, and throwing at the wheel are very therapeutic- good for our physical, emotional, and mental health.
Improves Focus
Pottery allows you to escape the worries and concerns of life and shift your focus toward what you’re sculpting on your wheel. Throughout this process, external influences don’t affect your work so you dedicate your time to what you are creating. Being able to fully focus on something helps the mind relax and expand, which will help you focus on other tasks in your daily life as well.
Pottery allows you to express yourself
Art is a form of expressing one’s emotions and feelings and pottery is no different. Pottery allows you to create things from a lump of clay and as you progress and learn more, you will try out new techniques and stretch your imagination as you become more creative with your work. A lot of potters tend to express their joy, grief, anger, and sadness through clay. It shows how creative you can be when you are feeling happy, angry, or sad. Not only is creativity in the molding of the clay but also once the item has been fired. You can then use more of your imagination to create something stunning and exceptional that can even be valuable to you or a loved one.
Enough of that, let’s move into the discussion of the day which is “Beginner Pottery Projects”. Have you ever wondered or thought of the projects you can do as a beginner? Worry no more, Help is here. Lol. I will be talking about simple projects that require a simple process and won’t take more than an hour to make.
Ceramic Bowls
The easiest project to make when learning how to throw at the wheel is ceramic bowls. They are very easy and simple to make because naturally, the spinning wheel wants to pull the clay out and open into a bowl shape. Not only are bowls simple to make, but they are also useful in our day-to-day lives. Imagine trying to get pasta without a bowl or picture yourself trying to have soup without a bowl.How to make a ceramic bowl?
From small bowls to elaborate bowls, and to most pots, they all start with the same three steps.
Step 1: Center the Clay

A lump of clay must be placed appropriately in the center of the pottery wheel and then forced by hand into an asymmetrical form. The underside of the lump of clay should be perfectly bowed to prevent air from being trapped as it is being placed on the wheel.
Step 2: Open a hole in the centered Clay
Once the clay is properly centered on the pottery wheel, the next thing to do is to carefully pen up a hole in the center of the clay. How you open a hole in the clay on the potter’s wheel will affect the rest of the molding process. It shouldn’t be rushed or done with poor hand placement, or else the bowl may be doomed to be off-center. Kindly note that the wheel should be rotating at either full or three-quarter speed.
Step 3: Pull up the walls
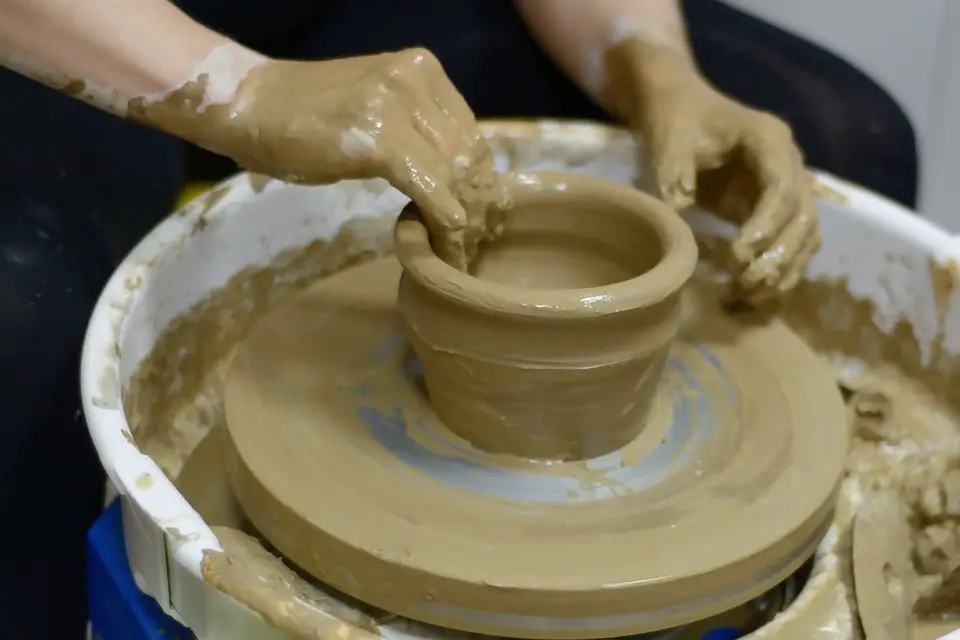
This is the art one has to be careful, you can ruin everything if not properly done. Your hands should be in the center of the clay while gently pulling up clay with your dominant hand. Your other hand should not be left idle as it will be guarding the walls you are pulling up. The walls should be about half an inch thick. It should be smooth and round out the rim. The walls for most bowls are not high/tall when compared to vases and vessels. Also, make sure the walls are strong enough so they don’t collapse.
If you collapse your bowl, don’t give up, keep trying. You need to make about 7-10 bowls to perfect your hands.
Vases
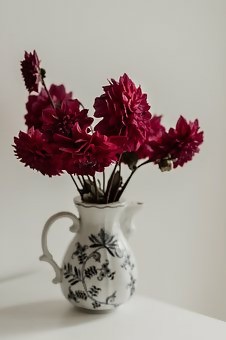
Ceramic vases are beautiful and are very useful to hold your flowers. It can also be used as an aesthetic in offices, homes, hospitals etc. The good thing about vases is that they are easy to make and it consumes less time; some potters prefer making vases to bowls and mugs due to the simple process involved. Also, you don’t have to be a master in pottery or own a pottery wheel to craft your unique ceramic vase. You can make use of a kiln or you can heat it in your home oven. Below are the few steps to making your vase.
Step 1: Choose a flat, smooth surface that can be cleaned easily.
This will be the center of command or “army base” where everything will be made.
Step 2: Knead a large handful of clay for a few moments until it is soft and pliable.
As a beginner, you might not be used to a kiln, so I will advise you to use standard clay for now since you will be using a home oven.
Step 3: Form the clay into a ball, and flatten slightly.
Step 4: Use the rolling pin to roll the clay.
You should be careful when rolling the clay out. Don’t let it get too thin else your vase will collapse when pulled up. I will recommend you roll the clay to about 1/4 inch thick.
Step 5: Cut a large rectangle or cylinder out of the clay.
I prefer making a rectangle because it is much easier when pulling up. Some potters prefer making a cylindrical surface at first. It depends on whatever suits you.
Step 6: Mold the rectangle into a cylinder, pinching and smoothing the edges together.
Be careful when molding at this stage because it is hard to reverse any mistake being made.
Step 7: Gently one hand inside the cylinder, and with the other hand, hold the plastic scraper gently on the outside of the cylinder. Use your hands and the scraper to work the clay into your desired shape.
Step 8: Knead the leftover bits of clay into a ball, and flatten it slightly. Roll the flattened ball to about 1/2 inch thick. This will be used as the base of the vase (that rhymed. Lol)
Step 9: Gently set the vase onto the rolled-out piece of clay, and cut around the bottom of the vase.
Step 10: Dip your finger in some water, and run it along the bottom edge of the vase. Join the clay piece that you have just cut to the bottom of the vase by gently pinching and smoothing the clay together at the joint. This will form the base of your vase. This step may take some time.
Step 11: Place the vase into a kiln or home oven to harden. When finished, you can glaze, paint, or decorate your vase as desired.
The process can be split into 4 interesting parts they are
- The body
- The handle
- Attach the handle
- Finishing
The Body:
To make the mug’s body (that doesn’t sound right), you will first have to throw a cylinder about 5-6 inches tall and 3 inches wide. It depends on what you want to make. You can have a taller or wider mug depending on your preference. But for this project, let us stick to 5 inches tall and 3 inches wide.
Pull up the walls and then curve the walls a bit for an interesting shape. I talked about pulling up walls above. Once the desired shape of the mug has been formed, gently remove it from the wheel and let it dry for a few hours. After it is dry, you can turn it upside down and smooth the bottom. Then let it dry.
The Handle:
Most amateur potters are always skeptical about making handles because they feel it is hard. Meanwhile, it is very easy. All you have to do is take a small size ball of clay then form it into a coil by rolling it on the table till it forms a long rope. The coil should be about half an inch thick.
Next, you will need to bend the coiled clay into a “C” shape. Let it dry for about an hour and a half.
Attaching the handle:
You will need a clay needle or a normal toothbrush for this process. Use the clay needle/brush to roughen the spots where the handle will be placed on the mug. Roughen the ends of the handle too.
Add clay mud to the two spots on the mug. The clay mud will act like glue (slip) to hold the handle in place. Then press the handle onto the mug’s body. Your other hand should be inside the mug supporting the wall so it won’t collapse.
Finishing
After attaching the handle, leave it to dry then smooth the edges where the handle was attached with a wet sponge. Dry for a few hours then you are finished. You can decide to glaze or paint the mug to make it look attractive.
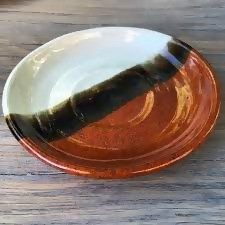
This is one beginner pottery project that I love doing every time. I am sure this will be your favorite project so far because you can make it without a pottery wheel. I can’t overemphasize the need for plates/dishes in our daily lives. Without wasting time, let us talk about the steps involved in making dishes.
Step 1: Chose the type of clay
For a handbuilt dish, it is best to use the standard clay that can be fired in a home oven or a kiln. Select a natural color for your project.
Step 2: Take a small piece of clay to work with
For a small dish, you have to roll the clay into a walnut-sized ball. For bigger dinner plates, you have to roll the clay into a baseball-sized ball. Note that it is easier to remove excess clay than adding after you have shaped your dish.
Step 3: Knead the clay until it’s soft and roll it out to a quarter inch thick.
You should not make the kneaded clay too thick or too thin because it will affect the overall success of the project.
Step 4: Cut from the clay and shape with your hands to achieve the type of dish you want.
You can cut the sheet of clay with your hands or a pointed knife preferably, then you shape it into any form you want. It can be rectangular, square or circular depending on your choice.
Step 5: Remove Air bubbles and Fire
There may be air trapped in your project, all you need is a needle to poke the air bubbles and let the air out. After that is done, you can fire/dry your dish by placing it in a kiln or a home oven.
Remember, in pottery, you don’t have to be perfect. As a beginner, you don’t have to know how to do every project.
Select the projects that you enjoy doing and try to recreate them over and over until you are amazed by the results. Then, when you’re ready to try a new project, go for it!


