Are you an aspiring artist looking forward to mastering the art of coil pottery? Undoubtedly, it is one of the most beautiful techniques of pottery that results in incredibly astonishing and fascinating creations. Coil pottery is one of the most renowned forms that originated about 4000 years ago. Artisans carefully crafted each coil to create the most unique yet mesmerizing creations. Although the extensive detailing may suggest that it is increasingly difficult to master the art of coil pottery, getting hold of the right guide can help you learn the technique quickly! This blog will give you the most straightforward, comprehensive guide on coil pottery.
How to Make Coil Pottery: Beginner’s Guide
Here’s the tutorial for making coil pottery:
Step 1: Prepare the Clay
First, you will need to make the clay workable. For this, knead the clay adequately using accurate quantities of water. Make sure not to add too much or too little water. Otherwise, it might result in making the clay unfit for modeling. Besides, ensure the use of high-quality pottery clay like the BMix Mid Fire Rocky Mountain Clay for the best results.
Step 2: Flatten the Clay
The next step is to flatten the base of the pot. Take a good portion of the kneaded clay and flatten it well using a clay roller or slab.
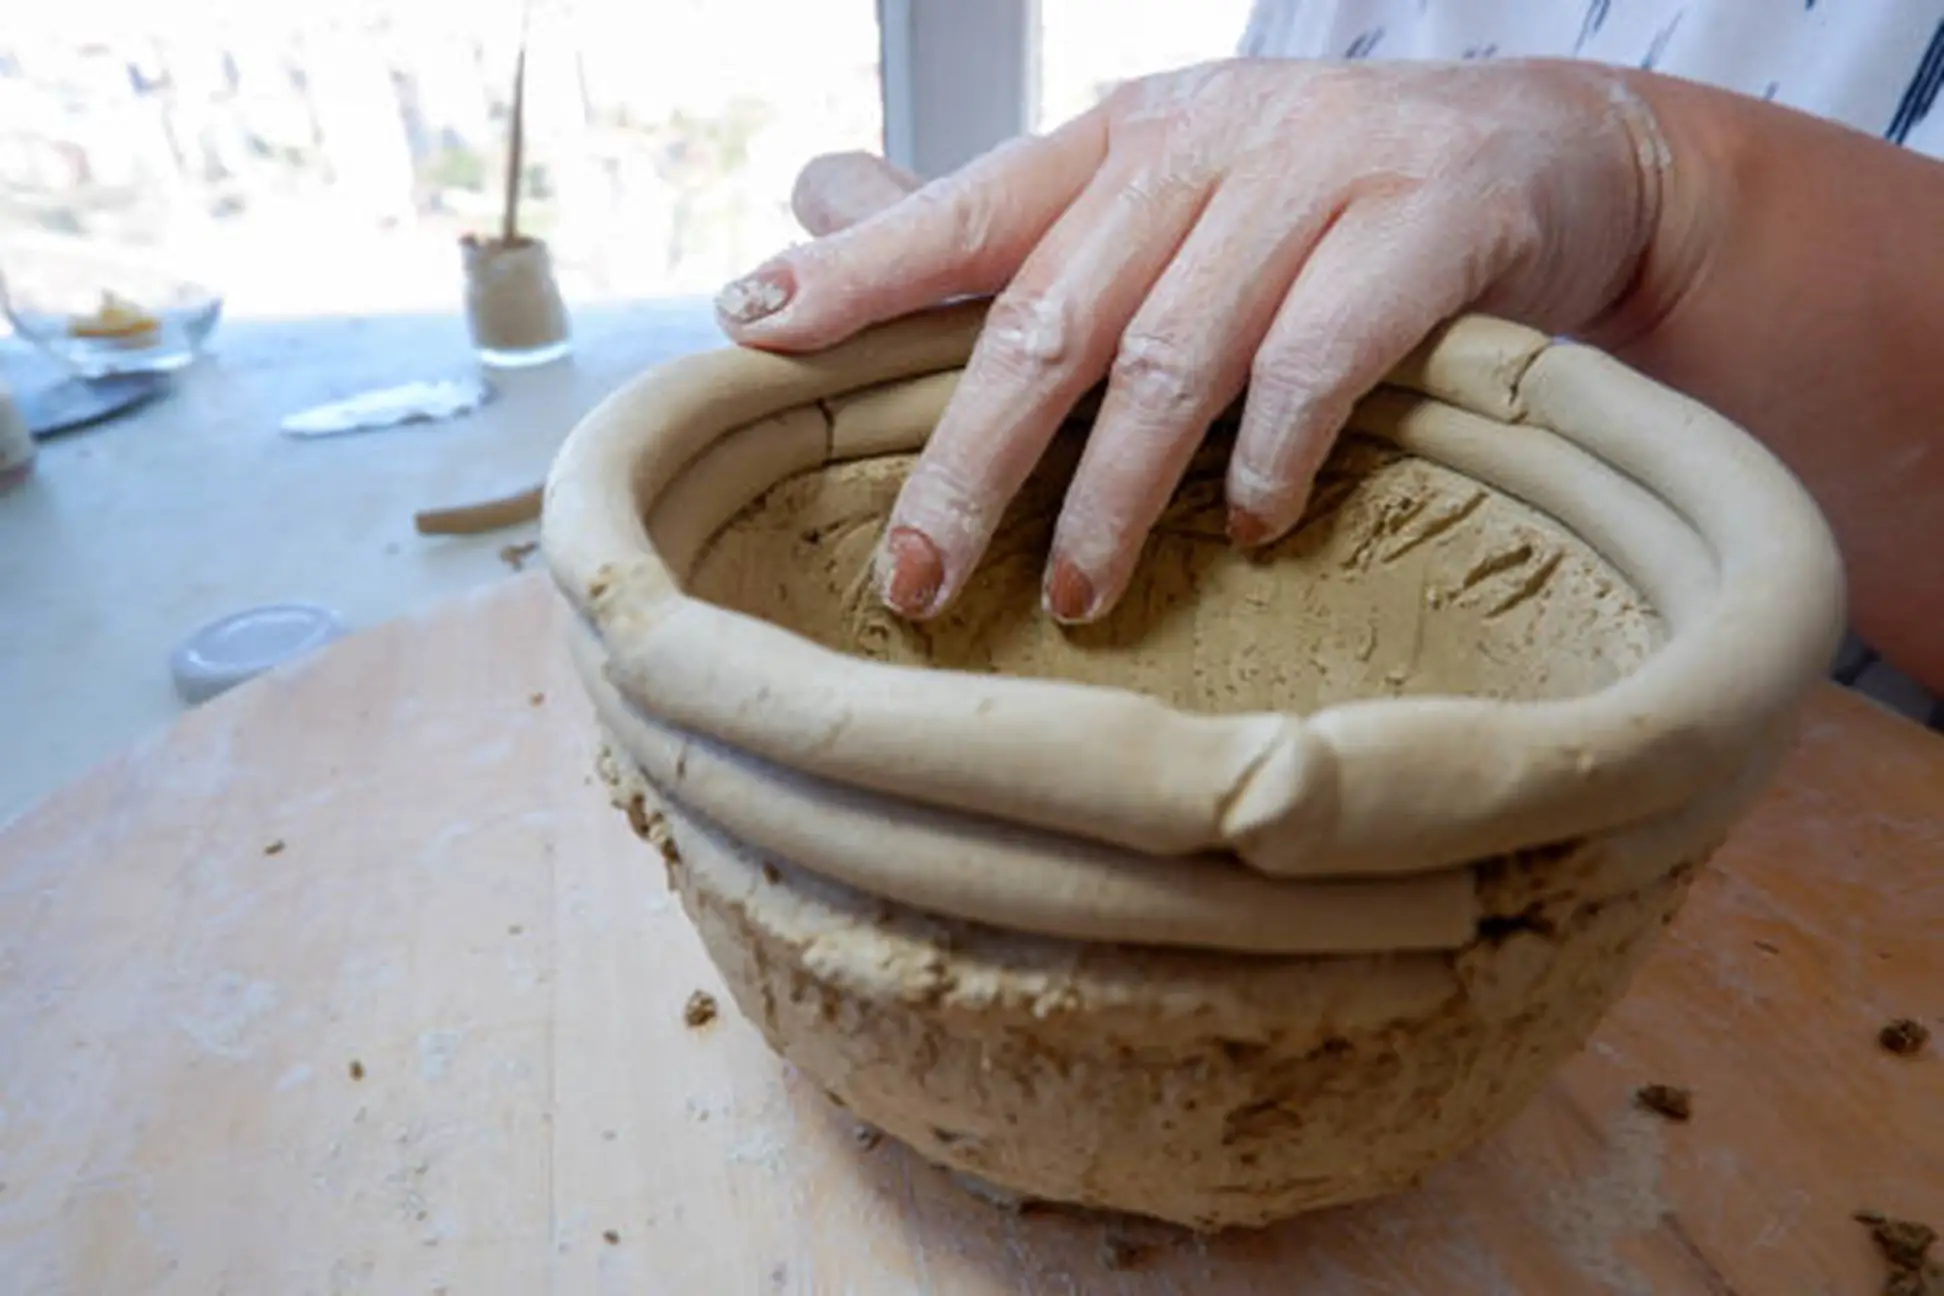
Step 3: Prepare the Clay Coils
After your base is ready, it is time to prepare the clay coils. The coils are the main attraction of this pottery technique. Hence, they should be well-defined and neat. Roll a smaller portion of the kneaded clay into strips to make the coil.
Step 4: Place the Coils
Now, start placing the coils accurately using the slip and score method. Once you have a complete round, cut off the first coil and blend it well. Here, you can mix it gently using your thumb. Once the coil is perfectly placed, continue the same procedure for the next coil. Keep repeating the procedure until you have reached your desired height.
Step 5: Smoothen the Outer Surface
After placing the coils one above the other, it is time to smoothen the outer surfaces. Although optional, it is an important step and must be done carefully. Add layers to the clay pot and blend it evenly using a rib. You can also perform this step using your fingers. However, for a more defined look, use professional pottery tools.
Step 6: Dry Your Coil Pot
After completing all the necessary steps, check out for flaws. Let the clay model dry up slowly if you don’t find any. Do not leave it directly under the sun, which might lead to cracks and joints. Instead, keep it in an undisturbed place away from external disturbances.
Step 7: Fire Your Coil Pot
The last step is to fire the clay pot. Fire your newly made clay in a fire kiln for the final result.
Step 8: Add Finishing Touches
After firing the coil pot, adding varnish can make it look even more appealing. Adding varnish makes the pot look shiny; hence, you can apply as many layers as you want. You can also add colors to the clay pot to make it look vibrant.
3 Best Tips to Enhance Your Coil Pottery
Here’s a list of the best tips that can help artists to create coil pottery:
1. Cover the Work Surface
Coil pottery can get incredibly messy; hence, as a beginner, you should cover the work surface using plastic wraps. It will prevent staining and make it much easier for you to clean up afterward.
2. Use Adequate Quantities of Water
The key to perfect pottery is using an adequate quantity of water. When forming the coils, you will need to measure the amount of water carefully, as adding too much water can make the clay slurry, or else it might get too hard.
3. Keep Practicing
Practice makes perfect! Coil pottery is a technique that requires perfection; hence, you will need to practice this method repeatedly. Use small batches of clay while practicing to avoid clay wastage.
Conclusion
If you are a beginner, refer to the above tutorial and tips to get the best knowledge about coil pottery. However, apart from following the accurate tutorial and tips, the pottery tools play a significant part in the entire procedure, making your coil pottery look incredibly stunning!


