One technique that many can try with their pottery is marbling. You may have seen this in the past and wondered just how you can emulate this style. Well, you’re in luck, because we’re going to talk about how you do marbling. It’s mostly with slips and other decorative techniques, but we’ll go over what it is, how it works, and different ways to do this.
So what is marbling?
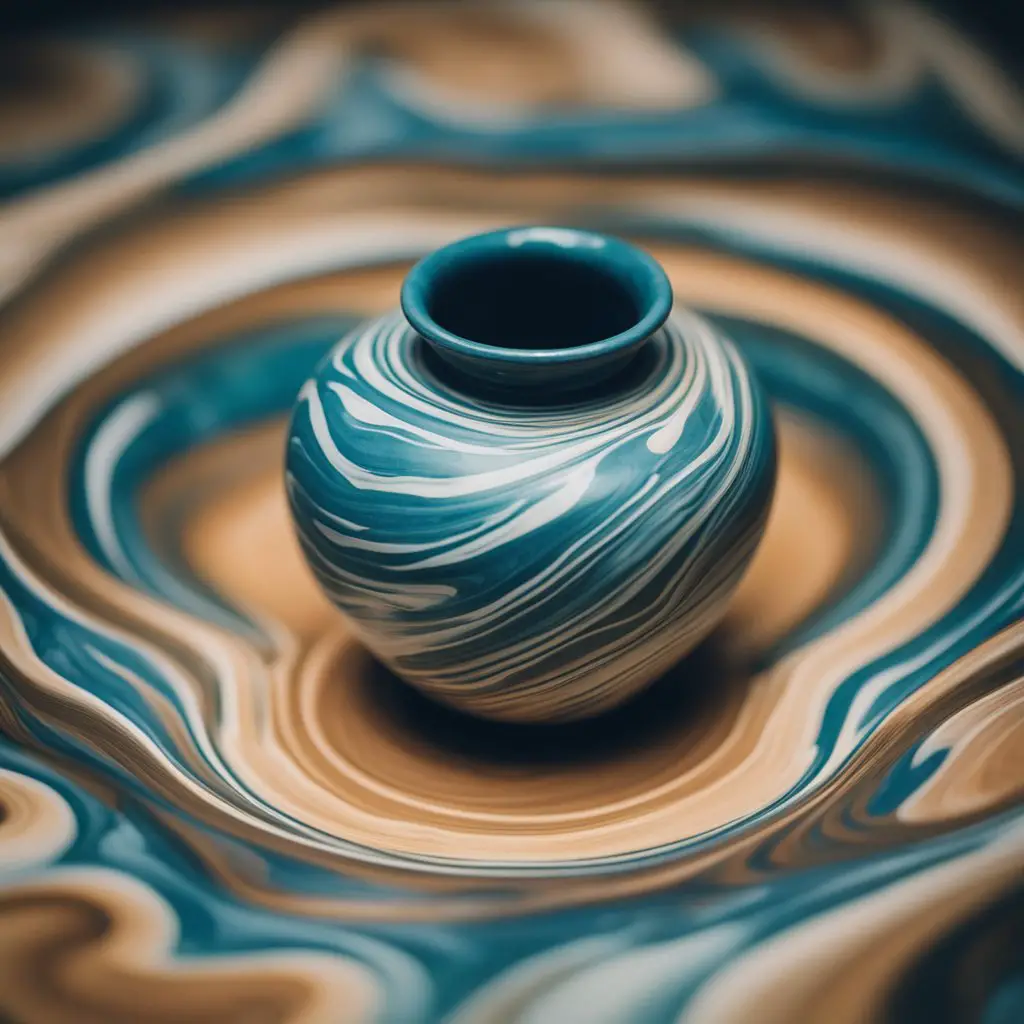
You’ve probably seen that strange embellished art in the past, kind of swirly in a sense, but has a unique sort of texture. That is marbling. Marbling is an interesting way to create this, and it involves the following:
- Using slips to create decorative elements
- Bisque fire before you do this
- Create unique designs with this
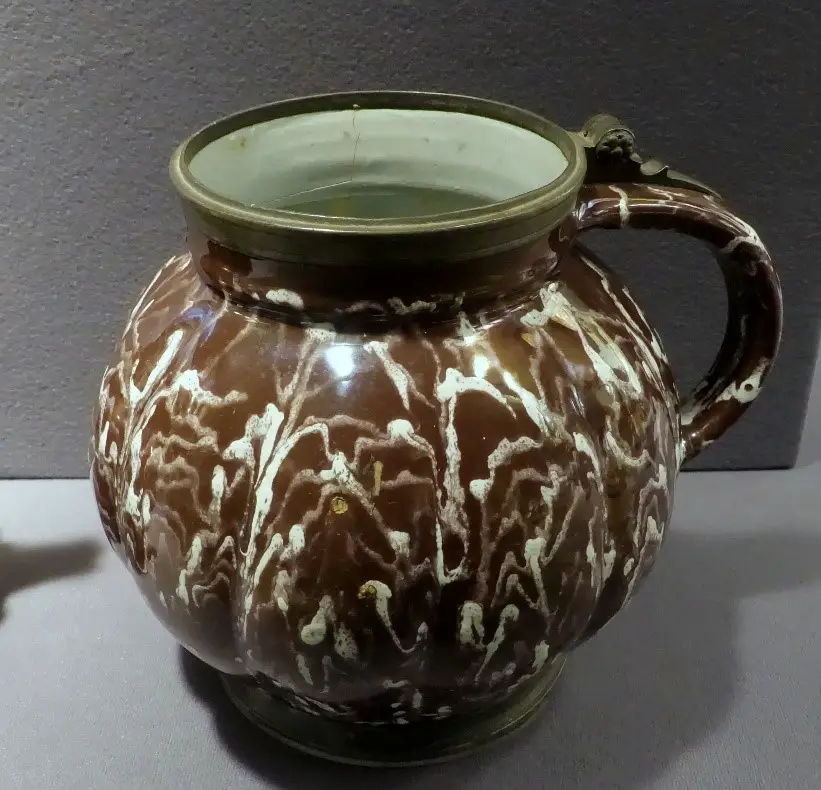
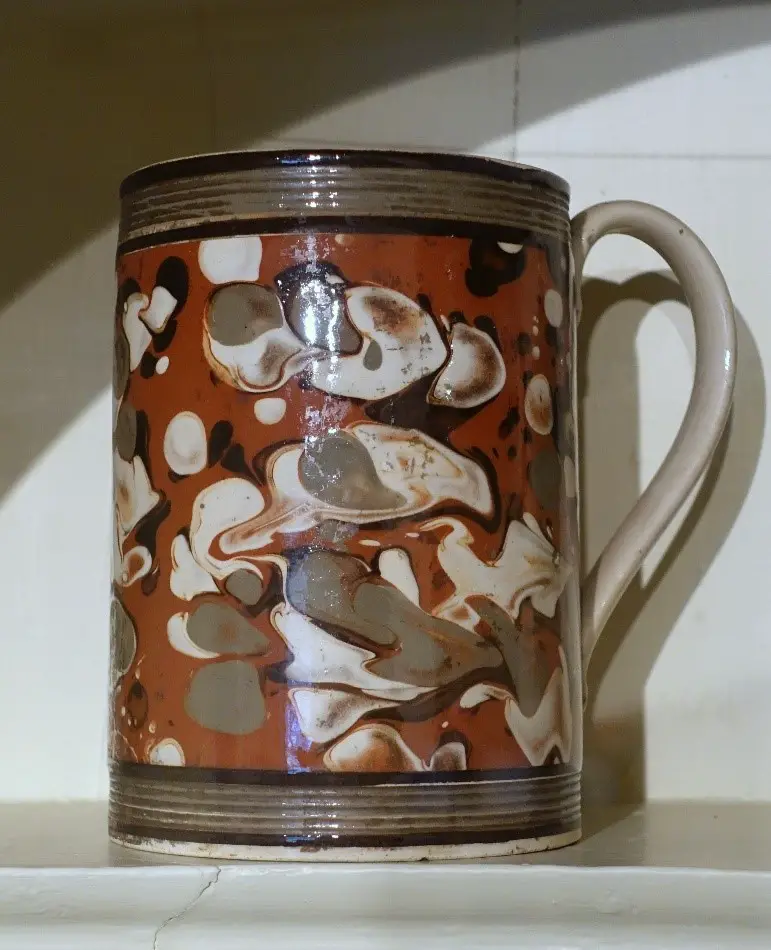
Now, the cool thing about marbling is that it’s super creative, in that you’re going to end up creating works of art that may look different from anything else. The history dates to about the 17th century, and it is a defining characteristic of the Staffordshire pottery that’s in England. With marbling, it’s much more creative, because of the following:
- It’s different every time, no two pieces will be the same
- You can do this before or after you bisque fire, but preferably after for great results
- It’s fun and allows you to test the limits of your slips
- It’s a great way to test out the texture of a slip to see just what in the world it’ll look like when you do this.
It’s cool to try, and if you’re someone who’s considered taking this up, why not try it? There are many creative things that you can do with this, and we’ll go over just how to incorporate this into your life and your pottery.
How does it work?
Well, it’s got a pretty interesting means of working. The two elements that are in play here are the following:
- Centrifugal force
- Gravity
These are two defining elements that will introduce how the flow of the slips will work when it’s marbling, along with the movement. It’s often called joggling in a sense since it’s the act of movement control, and often, this is almost specific in a sense, but it looks awkward. These are some of the different ways that you do this. You may notice when you’re marbling that you kind of look a little silly. But, that’s the beauty of this. In essence, you’re the one creating the flow of the pottery and making it stand out and work wonders. If you want to be successful, you’ve got to learn to control this, and the degree of success in an aesthetic sense isn’t directly linked to anything else but the following:
- Your pottery skill
- Controlling the flow of it
This is even more important with slip pottery than clay marbling. If you’re using slips, it’s almost like art in a sense. If you feel a bit down about your first time doing this, don’t fret, for it takes a bit of time, and some effort, to understand how to marble. You should work on practicing this since it can make a world of a difference in the overall future of your pottery, and the way that it looks.
Clay Marbling
If you’re already a bit nervous about how this might look, start with clay marbling. Marbling, when you do this right, can look very cool, and it’s super easy to get into. That’s because of the following:
- It’s different every single time
- It allows you to touch upon your creative side
- You can experiment with this
Now, when you marble, you have two different ways to do it. when you marble with clay, this is before you bisque fire, so you essentially are working with unfired pottery. Now, this has a few advantages and disadvantages to it, and we’ll go over those as well.
The advantages are:
- If you mess up, you can fix it
- You have more freedom with the design in a sense
- You will have it more infused into the pottery
However, there are a few disadvantages, and they are:
- There is less control here over how the clay tends to be absorbed
- You’re limited with the coloring, especially compared to slips
- You need to be very careful about air bubbles
- Your clay has to be a bit wet for this to work
Now, to begin, you essentially will want to take two different bodies of clay. You can use stoneware and terracotta if that works for you, or essentially any sort of different clay body that does the job well. You want to first prep the clay by putting it together and making sure there aren’t any air bubbles. From there, you do the following:
- Cut this into different slabs, playing around with how big or how small they tend to be. You essentially control this factor on your own, since this is what you should achieve
- Take the clay and stack them upon one another, alternating the stoneware and terracotta piece
- You should make sure with every single one of these, there are no air bubbles therein between the layers
- Roll out the clay in a very careful manner, and you’ll see almost a mixture of what they will do, and in a sense, it almost looks like clay wood if that’s what you’re going for.
- You want to make sure that when you do this, you have two like sorts of clays being put together. Don’t use, unlike clays, because this could affect the overall composition and the state that you’re trying to achieve with the clay itself.
- From here, you essentially create the bowl or the pottery that you so desire to want to create. This is all up to you virtually, and you’ll be able to, from here create the beautiful works of art that you want to, and the different types of clay that you want.
This is a much easier form compared to actual marbling with slips, since it involves essentially well, clay. However, there are a few things that you need to remember, especially when choosing the clay. They are:
- Always always always make sure that you have two clays that work well together. If you take two different types of pottery clays and put them together, the result could be something bad
- Make sure that these two clays that you use fire at similar cone levels. If you have one that fires low, but the other one fires extremely high, you could risk an explosion of the pottery piece
- Make sure that the clay is hardened before you fire it in the kiln
- Take care and look to see if the glazes that you put on top of this work for the piece that you’ve made. Where one glaze may work well for one sort of pottery, it may work badly for another type of pottery. You should experiment with this but also keep in mind anything that will make your clay not work nearly as well.
With this, you should try to make it so that you have it at the consistency that you want, and then fire as needed. You’ll be able to create some gorgeous textures and such with this, and it’ll make everything much better for you.
Marbling with your slips
With slip marbling, you can do this before or after the bisque fire. We’re going to go over both of these and how to do it.
The first thing that you want to do, is roll out the clay. Make sure that it’s flat as can be, and from there, also make sure that the thickness is consistent. You should keep the clay on the board or bat to hold the clay that’s still wet and plastic.
From there, you do the following:
- Take one coat, usually what the entire piece should be, and put a layer of this on top of the slab, from there, you let the excess begin to drain
- Immediately after you should trail different lines in different slip colors across the surface. You can keep the tube right above the surface so that it doesn’t touch the slip below this, or if you want to, let this slip dry for a second before you put this on top
- From there, you want to make sure that the distance from the tip of the tube of the slip to the surface of the ground is of equal width and has consistent lines. The further away you get from the surface itself, the wider the line will be
- Continue to trail these lines each once at a time until you get through the confines of the disc of the slab itself. You should also double back if you want a thicker line
- Once this is applied, the slab, which is still supported with the bat on it, is then tipped, and then, the slip will start to flow. You’ll probably see a bunch of swirls
- If you have a watery slip, the lines will begin to blur
- Don’t let this fully dry either, because if it does, you’ll then have a piece that will not create the flow that you want
- Once you’ve finished that, you need to from there put the slab to the side and then dry it further
- Before you create the vessel for which it’ll form, you must allow the slips to be set up so that they’re not marred on the surface, yet the surface is still pliable. You should make sure that you don’t have these too wet since the slab will stick to the mold surface, and that in turn will ruin it
- Once they’re no longer too tacky, or wet, take the entire slab off of there, and then put it onto a mold surface in the shape of a hump, and then put this into the shape that you want.
- Typically, if you’re going to use the mold, you want it to be made of clay that’s been fired, but plaster is often a good alternative
- From there, you want the piece to become leather-hard
- If you have irregular edges, trim these with the knife until they’re a completely circular texture, and the rim is crimped and pressed
- You can then use a coggle wheel to make a pattern for this
- After this, you’ll then fire this, and you’ll want to glaze it after a bisque so that the surface is smooth. If you mold before you do this, you’ll keep the surface and the slips flattened, and then when you glaze it, it’ll have a smooth texture and make it look even better
There are two things that you should think about when you get to the process of moving the piece around to mix the glazes. They are the following:
- How much time can you use before the slip stops to flow
- How to judge when you stop before the lines stop separating and become muddy
These are two factors that you have to keep in mind when you’re working with this. If you’re not careful of these two things it could cause the slip to harden up, and you should make sure that if that’s the case, you keep this in mind. If you’re wondering what a good judge is for how long you should keep this going, have it about 30 to 45 seconds, and from there, you’ll be able to create the piece that you want. You should experiment though. Maybe only moving it for about 10 seconds is the way to go, or perhaps moving it for about 45 is the ideal time. With this, it’s a lot of experimentation, and you’ll be able to, with this itself, create the ideal piece for you to try out, and one that works best for you if you’re wondering about this.
For a bisque fired Piece
You can do this with a bisque-fired piece as well. It’s often much easier, because it involves fewer factors, especially if you’re worried about the piece becoming too dry, or if you don’t have a plastic mold. Plus, you can work with a vaster number of different slips and such, and more flexibility when you’re choosing your colors, especially in comparison to actually doing this before you fire the clay.
Now, to do this, you need to do the following:
- First, you must bisque fire the piece so that you have the first part of this completed
- Get the piece and the slips ready. You’ll need color to base this and another in a bottle for the marble
- You can use any shape you like, but ideally, to begin, you should use something flat such as a dish that would work for this
- First, do the full layer and swirl it around. It will then evenly move everything and cover the dish.
- Put the rest of the slip onto the pot, and just gently move it about
- Next, you’ll need to get the squeeze bottle of the slip and then make lines onto the dish. You can do parallel, or whatever you feel like you want to do. You can then make a continuous set of patterns
- From there, you do the joggling technique once more, and then you swirl each of these colors together and make sure that you gently move this
- You can also get a tool if you like, and from there move it across the parallel lines in an opposite fashion, and that’s one way to marble this
- You can’t have to lay it down or let it dry, instead, you can get the kiln ready once more, and then fire the piece as needed to make it work
- You can then take it out, and see the different and intricate little designs that you want
Now, with marbling in this fashion, it tends to work pretty well, and it may be easier than doing it in the other types of ways. However, you have to remember the following so that you get the most out of this:
- Always make sure to work fast, so that the slips don’t end up drying
- Use slips that work well together, and fire at similar levels, especially in terms of cones so that you’re not getting anything messed up while it’s in the kiln
- Make sure that you do effectively learn how to fire this, and that you take your time to create the best results that you want from this
- Practice with these, and see which slips work well, and which ones will create the best firing that you can get
- Experiment and try again, especially if you feel discouraged by this. practice does make perfect
This is an alternative means to the other techniques, but ultimately, it can be easier than these other ones since it often is quite simple to get this put together, and if you’re looking to truly get the most out of your slips, and you want to make the best and prettiest images that you can, you’ll be able to do so with this fun technique.
Alternative Techniques?
Yes, there is an alternative to marbling, and this is actually something that you can do easily, and right away. You can do this regardless of skill level, and it’s a very fun way to create the pieces that you want.
All you need are the following items:
- Shaving cream
- A large square of cardboard
To do this, you should get either a wooden rib, or a rubber, and from there, take the shaving foam that you have, smoothing this out.
From there, you will want to choose a means to underglaze your pot, and then, take the shaving create and then put dots on said underglazes that you’re going to use in this case
From there, you should get a paintbrush or another sort of tool and mix these two things. Mix the shaving cream and the underglaze, and it will, in essence, create a marbled effect in the material. You should be able to see it once you finish this
You should then take your dish, put it into the foam, and leave it for a bit to soak in there. You can leave it for longer, but it doesn’t need to be too long, a little bit is enough.
Take off the rest of the shaving cream, and then gently rinse this underwater. The glaze will stay on there, and you’ll see that it has a marbled effect on this. from there, you’ll want to fire your pottery.
If you do this type of marbling, you must make sure that you don’t take too much time holding it in there. a little bit goes a long way. Also, make sure that you bisque fire this first, since often, if it’s unfired pottery, it won’t stick to it, and it could end up wearing off when you fire, so doing a bisquing beforehand will make a huge difference on the state of the pottery that you’re creating.
With marbling, you can use this to create some intricate and cool designs, and there are so many different ways to use this. If you’ve ever liked the look of marbled pottery, or if you want to try it to see if it works, then work on these techniques, and see for yourself just what this has to offer. You’ll be able to create a great piece, and you’ll be able to do a whole lot with this, and from there, you can make the pottery that you want to make, and be able to create some intricate, and very amazing designs. Work to experiment and see for yourself just what you can create with this type of pottery.


