Yes, we know kilns can be an expensive affair. Not every pottery enthusiast can afford to spend on a modern-day kiln, especially if you are a beginner. An ideal solution to this would be renting from your local pottery barn. However, it isn’t always possible to find a kiln that isn’t being used by the owners. So, you might have to end up delaying your firing needs. But, if you do have the right space and the will for it, you can create a make-do kiln at home to tend to your pottery firing needs.
Although you need to ensure that you have an experienced pottery artist with you to ensure that you are doing things the right way, a little error and you might end up with injuries or even start a fire in the house. So, before you try these kiln-making tips, ensure that you have all the necessary safety gears to help you create a good-quality pottery kiln without having to invest a lot.
If you are a beginner, you might want to know why a kiln is so important in the pottery process. So, let us learn more about its importance.
Why Is A Kiln Important In Pottery?
While you can craft your pieces using other clay forms that don’t require firing, the ones that do require won’t achieve permanency if you skip the firing process. This statement stands true for ceramics. These pottery wares require a high temperature to be fired. Doing this introduces physical and chemical reactions that permanently alter the clay’s chemistry.
Kilns are predominantly used to dry and harden clay pieces. Moreover, a kiln helps maintain the desired temperature to let the clay mature to a hardened state which makes it water-proof or water-resistant depending on how it is fired. Moreover, a fired pottery piece is way stronger and more durable as compared to one that hasn’t been fired.
If you wish to add colors to the pottery piece via glazing, you would need to fire your pottery piece. Glazing only works if the piece is fired to the desired temperature. If not, the glaze would never achieve its true colors and come off with a simple swipe.
Keep in mind that different clay variants mature at varying temperatures. So, you might have to adjust your firing temperature accordingly. An electric kiln allows you to do that with ease. However, this might not be possible with a homemade kiln that can only achieve a certain temperature. So, when using your homemade kiln, you might have to stick to one or two variants of clay as opposed to experimenting with other forms that cannot be fired at the temperature achieved by a homemade kiln.
Things To Keep In Mind When Making A Kiln At Home
Before you go ahead and start creating your kiln, you need to keep several things in mind to ensure that you and your surroundings are completely safe. So, let us check out some of the precautionary measures to be followed during the kiln-making process.
Select a well ventilated & secluded area:
The first and foremost thing to keep in mind is to decide on a location that is well-ventilated and secluded. This is because the kiln can become very hot when being used. Moreover, the place needs to be dry enough to prevent corrosion to the kiln.
You wouldn’t want your pets or children to be near a kiln. So, make sure you teach them not to go near it out of curiosity or face any injury. A visible warning sign can also help any guests or visitors from prancing around the kiln. If your kiln doesn’t have a venting system, the key is to ensure that the space it is kept in is well-ventilated. The fumes that come from firing pottery might be harmful when not ventilated regularly. Most organic materials and compounds tend to burn off anywhere between 500oF to 1000oF temperature.
A basement or garage can be an ideal choice. If you have a studio with some windows, it will work as well. Your backyard might also work, but you need to be careful while ensuring that your family & friends are safe.
Wear protective gears when making your kiln:
The pottery kiln gets hot. And, by hot, we mean more than your average oven. So, it is recommended that you wear protective gear such as gloves and a mask to ensure that the hot fumes and surface don’t cause you any harm. You can use the RAPICCA Leather Forge 16-Inches Handling Glove. This genuine leather glove is packed with insulated cotton along with air-isolated foil to ensure your hands don’t burn when removing the hot clay pieces.

Let the kiln and the pottery piece cool down enough before you start removing them. This will help prevent cracks and lower the kiln temperature to a favorable one.
On this note, let us learn about the best ways to build a DIY kiln at home for free.
First Method: Pit Firing
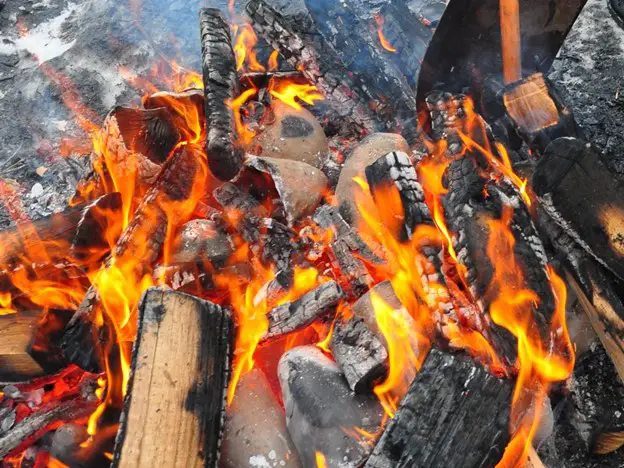
Before electric kilns became popular, pit firing was the go-to option for potters. It is among the oldest known methods. So, if you wish to create a kiln at your home, pit firing in the backyard can be your go-to move. It is among the simplest and most economical methods used for pottery-firing escapades. To create this kiln, you don’t need any elaborate equipment. All you need is a shovel & certain combustible materials.
The process of pit firing is best for greenware pottery & bisque ware as well.
To create your very own firing pit, you need to start by digging a hole in a suitable area in the backyard. Depending on the number of clay pieces you wish to fire, you can create a big or small pit. For a small collection of 5 to 6 pots, a pit that is 1 foot deep would be adequate. Your firing pit must be at the right depth to ensure that the wind doesn’t blow away the fire. However, it should also not be too deep to restrict the oxygen from entering the firing pit. If the firing pit doesn’t get sufficient airflow, it won’t reach the required temperature.
Pit fires have the capacity to reach as high as 1100oC temperature. So, it is best for low-fire clay such as earthenware. Pre-heating is recommended when opting for the pit firing method. The heat helps prevent any cracking by getting rid of any remaining moisture post the drying stage.
With the pit firing process, you will have to continuously feed combustible materials to the fire with wood or something similar. Once you have established the fire, you can also use any metal flue to contain the fire and heat for better firing.
Second Method: Brick Kilns
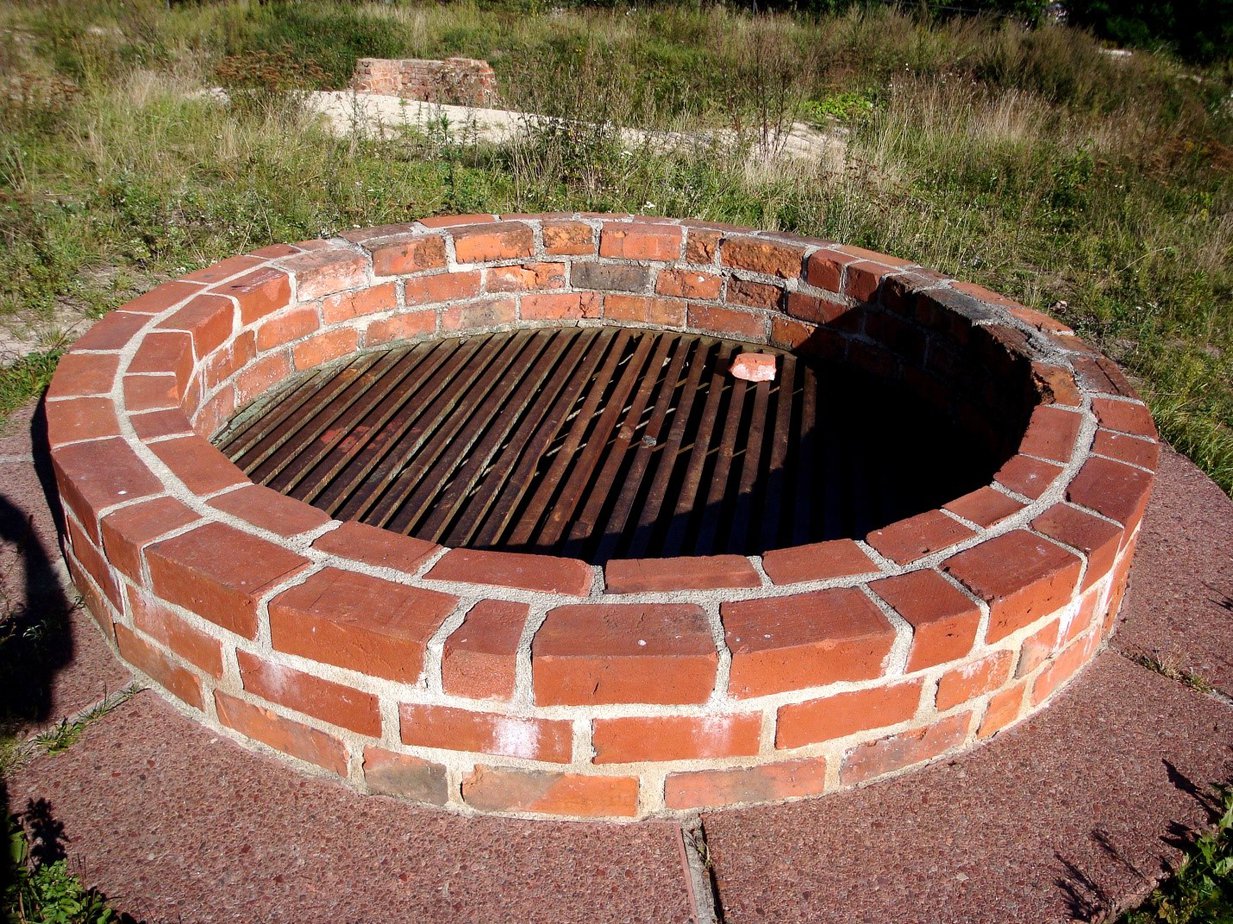
If you are looking for free alternatives to a kiln, another great method is to create a brick kiln. There are several different methods to create a brick kiln. But, what works for you would be your decision. For example, you can create a brick kiln by digging a pit inside the ground & then lining it up with bricks. So, if you have some bricks lying around unused, this could be your go-to choice for pottery firing.
If you don’t wish to dig a hole in the ground, you can simply construct a pit above the ground. Although the bricks are on the upside, this firing method tends to be just as effective as pit firing. With bricks fashioned into your desired shape (round or square), you actually create a pit that can be used to fire pottery with the help of combustible material.
Square bricks tend to be easy to build as compared to cylindrical ones. If you have just started learning pottery firing, it is better to go with a square shape rather than complicating things by trying to create a round one. Some experienced potters suggest the use of fire bricks that can help with better firing. They can easily cope with higher firing temperatures. On the other hand, regular bricks have a tendency to crack due to heat.
Here are some commonly known fire brick types:
Types Of Fire Bricks |
Properties |
Acidic Fire |
These fire bricks are formulated to resist the acidic actions of chemicals or even weather. So, they are highly resistant to acid-based corrosion. |
Neutral Fire |
These fire bricks can handle corrosion from both basic and acidic fumes that come off during the firing process. |
Basic Fire |
These fire bricks are formulated to resist any corrosion or chemical erosion. They consist of high magnesia percentage & lime as the binding agent. |
Regardless, you can use a regular brick and keep replacing the ones that crack after a few uses. In order to create a simple kiln out of brick, all you need to do is decide the size of it. For a small pot collection, a kiln of 3 feet would be enough. Start by creating the base with the help of these bricks and build your walls to the desired height.
You can also create shelves by placing metal grids inside the kiln. The number of grids can vary depending on the size of the kiln. Ensure that the kiln’s top layer features some gaps for ventilation. This allows the fumes and smoke to escape. Moreover, this gap will ensure that enough oxygen gets inside the kiln. You can also create some ventilation by removing a couple of bricks from the setup.
-
Once the base & walls are built, start loading the kiln.
-
You can start by layering some sawdust in the base. It can also be mixed with some wood chips and wood pellets.
-
Now, gently place the pots on top of this mix & then cover them all with more wood chips or sawdust.
-
Repeat the process until all your pots are inside.
-
Once your kiln is loaded, you can top it off with some dried leaves and paper as kindling atop the pile.
-
Ignite the fire, and as it burns, you can keep adding larger pieces than you do with normal fireplaces. Once this fire has been established, you can go ahead and cover its top section using a corrugated iron sheet.
-
You can keep weight on this iron sheet to ensure that it doesn’t slip or fall. Add some bricks on top for the same.
Third Method: Primitive Clay/Mud Kilns
As a potter, you would surely have a lot of clay or mud lying around. You can make the best kiln out of this clay without having to invest a dime. You can also dig up some clay from the backyard. Different potters tend to use different kiln-making materials. You make use of puddled adobe or some mud to create your kiln. You can also use simple clay or mix it with some straw which makes it very strong to help you fire well.
Simply put, a standard clay kiln requires you to create a mud cylinder that is similar to a barrel with thick walls. A simplistic design features a bottom opening via which the wood for the fire is fed. A complicated design would involve creating clay tunnels that run out from this opening. Creating this tunnel-like shape helps protect the kiln from heavy wind that might put off the fire. Plus, it is also a great way to add more fuel to the kiln fire.
The clay shelf contains holes that allow fire, heat, & air to pass through your kiln. You can also create a shelf with the help of a metallic grid.
Conclusion
Other amazing methods for creating homemade kilns include barrel kilns, raku kilns, wired-mesh kilns, etc. The type of kiln you create can be your personal choice. While some of these designs might seem complicated, others are fairly simple with a minimalistic design. Keep in mind that each of these methods tends to produce different results depending on the temperature attained by the kiln. Regardless, it is quite possible to create a kiln at your home without having to invest in an expensive electric kiln.


