Pinch pot, as is obvious by the name, works with the use of pinching action with your fingers that ultimately results in a functional or decorative pottery piece. For this hand-building technique, your fingers are of course the most important tool but what else would you need to create the perfect pinch pot? What are those essential gears for crafting some eye-catching pinch pots? In this blog, we will learn everything there is to learn about the essential pinch pot tools and all the tricks that will help you craft something extraordinary.
So, without further ado, let us get started!
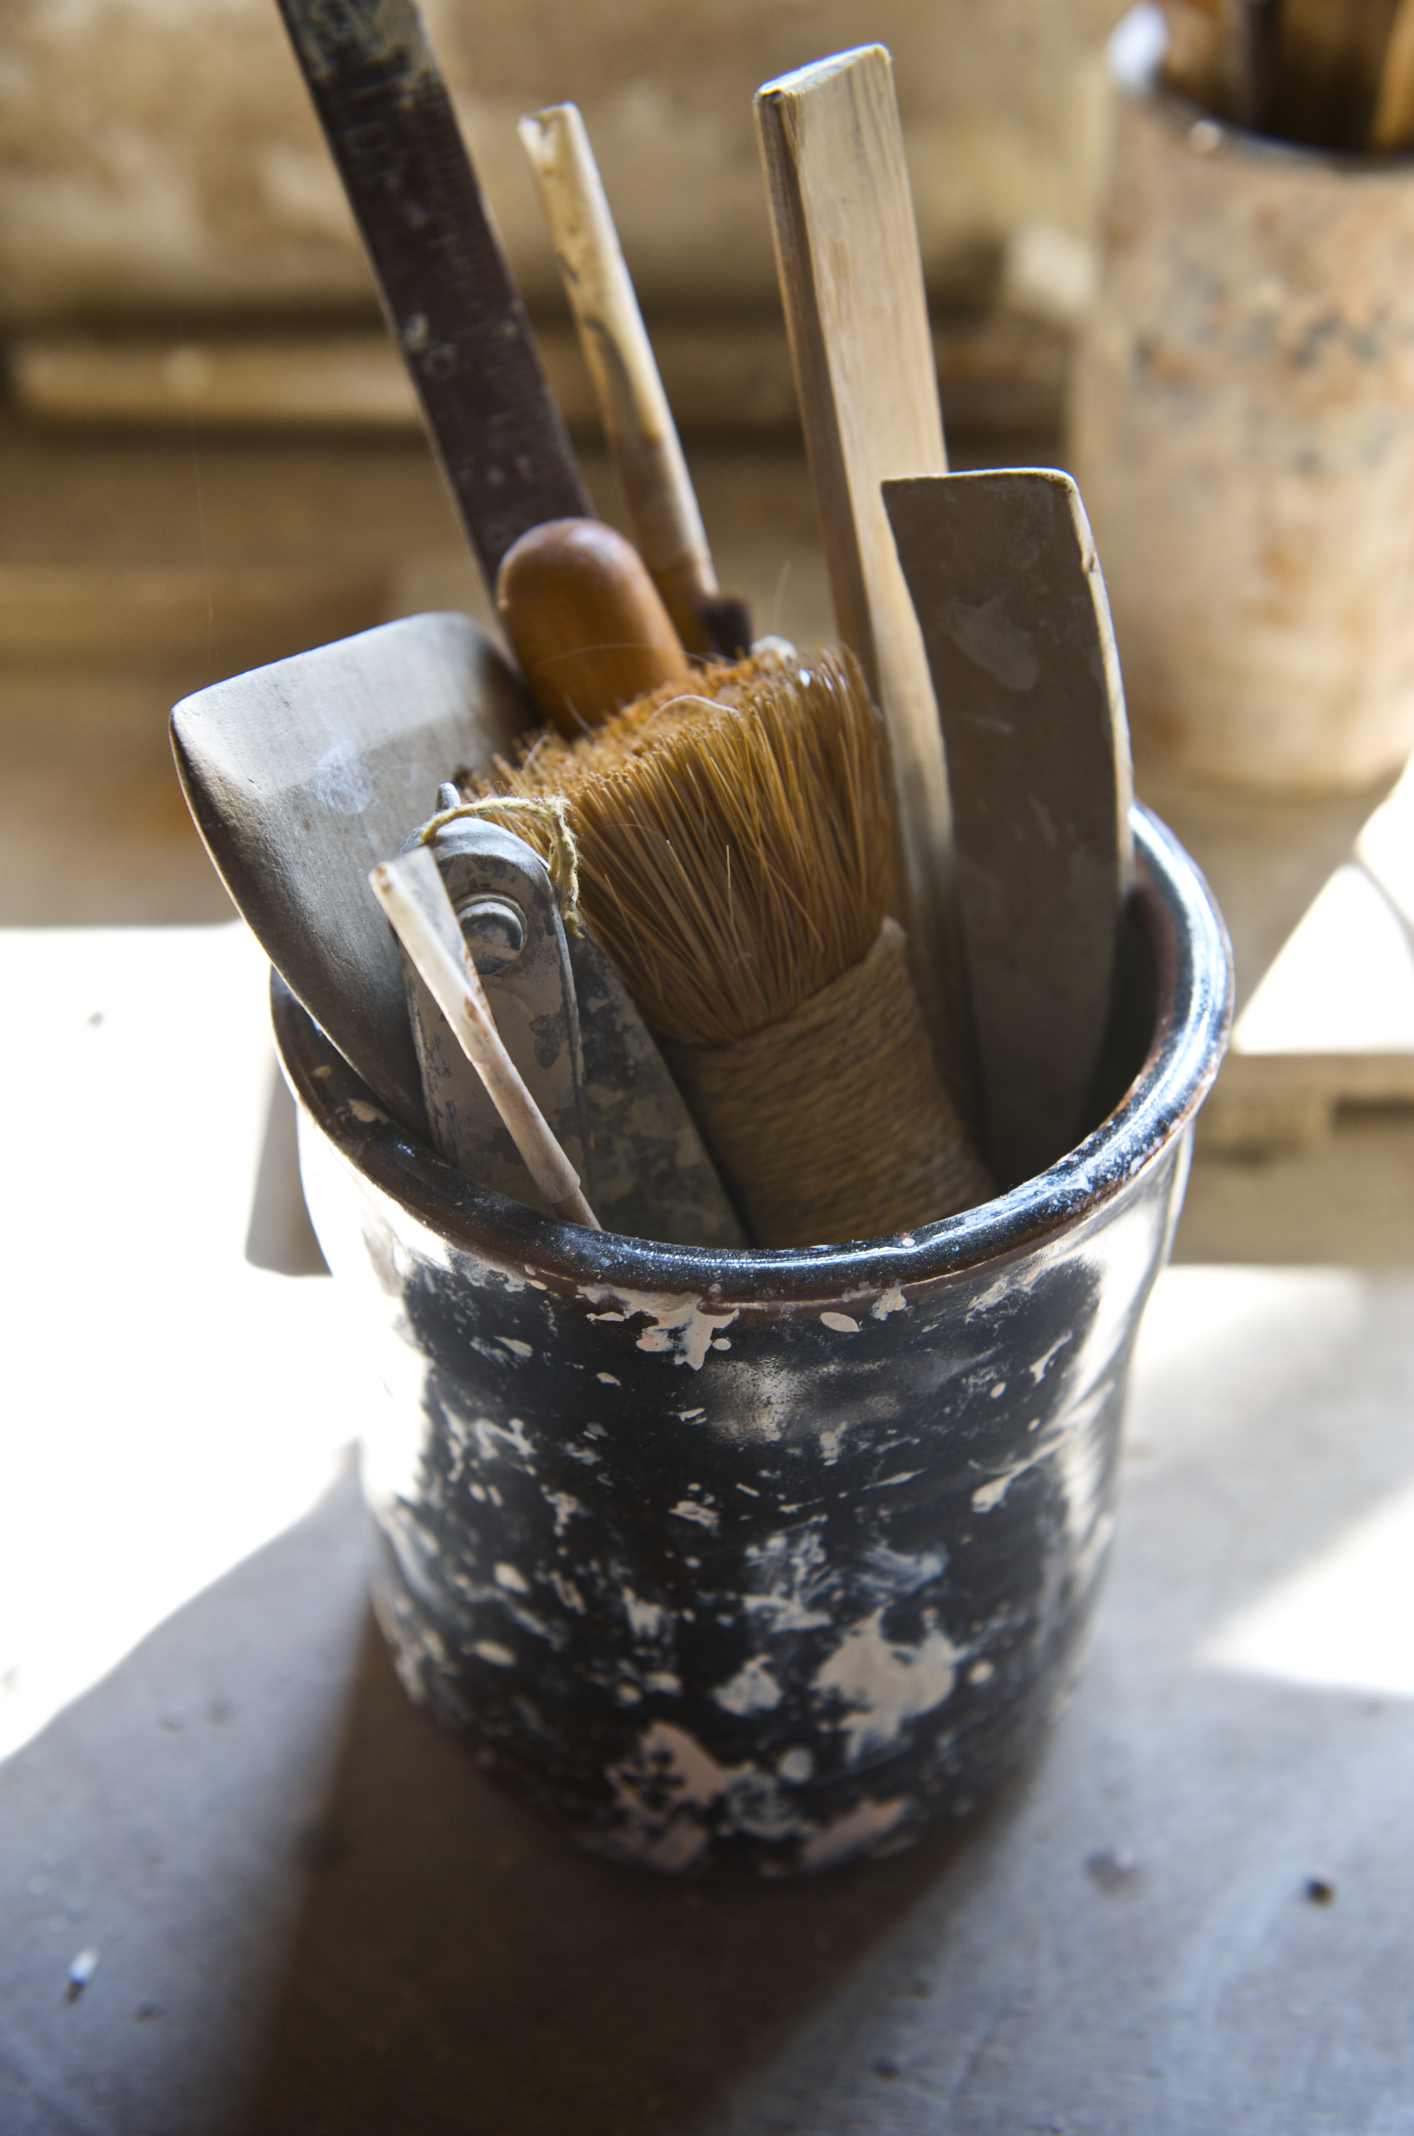
Essential Pinch Pot Tools
To craft some amazing pinch pot pieces, you would of course need to pick a clay variant that is well-suited for the process. And, we have talked about that in one of our blogs. So, do check it out before you discover more about the crucial tools.
Once you have selected the perfect clay for pinching, here are the tools you must have with you:
1. Wire Cutter/Clay Knife:
When crafting something with the pinch pot technique, you can surely pinch off the extra clay. However, if you need a clean cut without unintentionally manipulating the form of the clay, you would need a good-quality clay knife or wire cutter. This tool will also help you cut out the required clay from the bulk if you are working on a big project.
2. Sponge:
Almost every clay variant, including air-dry clay, tends to dry out if the crafting process takes long. Even if you are building a simple bowl, as a beginner, you might have to understand clay and its workability. This can take time and while you do so, the clay might start to dry out and harden which affects its moldability. So, the key is to keep the clay wet while you are working on it. Doing this with a hand or a cloth might not be a great idea as you might end up adding more than the required water into the clay. Keep in mind we have to gently wet the clay and now create something mushy in texture.
This is why most artists rely on sponges to dab in the right amount of water. A sponge has a dual purpose. It can be used to smooth the clay while adding just the right amount of water into the clay making it moldable for as long as you want.
3. Needle/Scoring Tool:
If you are crafting a pinch pot with multiple parts, joining them isn’t as easy as you would think. When you simply join a piece of clay to another, the joint isn’t as strong and will be prone to cracking as it dries. In the worst-case scenario, it might even break off completely after drying or firing. You surely wouldn’t want that to happen to your hard work. To resolve this, the best solution is scoring and how would you do that? This is achievable with a scoring tool or simply something with a sharp end you have at home like a needle or even a strong toothpick. Scoring allows for a stronger bond between two clay bodies that lasts even after it has dried off or has been fired in a kiln. A reliable scoring tool trusted by professional crafters is the Xiem Retractable Pottery Scoring Tool. Its tines retreat to the plastic sheath to ensure safety when not being used.
4. Brushes:
Unless you are using polymer clay or air-dry clay for creating your pinch pot, you would need brushes to apply a slip mixture or glaze for the firing process. You can surely use the dip technique to apply the glaze but it won’t be useful if you wish to create specific patterns. To create intricate designs on your pinch pot, you would need brushes to apply the paint or glaze in a specific pattern.
5. Plastic Wrap/Plastic Bags:
A plastic bag or wrap will be highly helpful when making your pinch pot. But, why would you need it? When you are crafting each part of your pinch pot, the clay that you aren’t using at the moment will also start drying up. To prevent this, you can keep the clay inside a plastic bag or cover it with a plastic wrap. Additionally, once you are done crafting the pinch pot, your clay shouldn’t dry out too fast. It could end up cracking or breaking even before it has been fired. This is especially true if the air around you is too dry and you live in an area with high-temperature fluctuations. To prevent this rapid drying, you can place the pinch pot inside the plastic bag to slow down the drying process. Once the clay becomes leather hard, you can remove it from the bag to let it dry naturally.
Tricks To Achieve Perfection With Pinch Pot Technique
Now that you know the essential tools used for pinch pot technique, here are some tricks to keep in mind to achieve perfection.
1. Use A Template:
Until and unless you have perfected the pinch pottery technique, a little additional help comes in very handy to fast-track the process. A template serves as a guide or pattern to help you pinch and shape your clay better. These templates can be made from different materials such as wood, plastic, or cardboard.
2. Practice Achieving Consistency:
The pinch pot is unique given the fact that no two pieces are the same as they are hand-built. Even if you have been practicing pinch pottery for a long time, achieving perfection is almost impossible. However, you can surely achieve consistency, especially in wall thickness and uniform shaping to ensure durability and strength for your piece.
3. Always Maintain A Record:
If you have just started your journey as a pinch pot artist, it is important to maintain a record of your projects and everything you have learned from it. Whether it is a mistake with glazing or a pinching technique you learned while trying something new, keeping a record will allow you to track your progress and even replicate the results to create similar pieces.
Conclusion
Whether you are an experienced potter or a novice artist exploring pinch pottery, these tools and tips will help you in your pottery-making journey. Remember, things like consistency, attention to detail, and proper clay preparation are essential to help you craft something extraordinary. With enough practice and consistency with your crafting schedule, you can surely master pinch pottery.


